+1, Though if you are shooting more clear, #600 will not cause any issues, #800, or #1000 will be fine too. Generally I use the coarsest sandpaper practical for the task at hand because 1) the coarser the grit, the easier it is to control the shape of the surface and 2) I hate sanding, and coarser grits are faster. Anything coarser than #600 for a clear re-coat gets to where the sandpaper scratches become a bit challenging for the clear to fill in without afflicting the resulting surface. If you have excellent equipment and know how to use it, you can achieve very smooth glassy results, and the surface texture you are coating has more of an impact. For me with my gear and skills, I am fine with the #600, but if I got slicker results, I probably would find I wanted a smoother starting surface and shift to finer paper. I expect your spray cans do not offer the best control, so the surface roughness you are spraying on is a bit less critical. In any event, when in doubt, go fine!
As far as the polishing goes, for me I like to use coarser paper to help keep the body contours as perfect as possible. It is a fact that you can use #600 before polishing, but it is vastly more work to do the polishing because you have a much rougher surface to mow down and it takes longer! By the same token, you can use #2500 (or finer) paper and polishing is that much easier, but it is also easier to deform the surface contours. Mind you, these are pretty fine points and largely just a matter of preference. Great results can be had with variations of the path outlined here, I just list what I do for reference.
There is no need to step through various grits. For your next clear coat, just sand the big areas flat directly with #600 ( or #800-#1000), scotchbrite the rest and clean and paint. Same for the sanding before polishing - you are removing only very tiny amounts of paint - in fact as little as possible, and #1500 will cut very fast. Remember, it only takes me about an hour+ to sand and polish a tank, so it is pretty easy. If you sand with a block (heavily recommended), sand a little and then dry completely. The surface has to be bone-dry to see the difference between the sanded and unsanded areas. You will see that the surface is very dull where sanded, but anywhere that has not been touched which will be shiny. Typically this can look like uniformly arranged tiny shiny dots which shows you have only cut down the high parts of the peel, and as you sand more, the dots will get smaller until they disappear. When they do, you are done. It only takes a very little bit of sanding unless the peel is really heavy. Obviously the parts that already look slick and glassy will need less sanding than the more orangepeely parts. Just in case this was not clear, you are only sanding to straighten the surface. You are sanding flat the tiny ripples of the orange peel, and you will be leaving all the tricky areas in corners and edges alone - no scotchbrite - leave hard to get to areas alone and shiny, mostly the orange peel in these areas is not worth fussing with. Remember, everything you sand will require buffing out to be made shiny. So if you cant easily and safely run the buffer in there you are usually better off leaving it than trying to perfect it. It is very easy to damage adjacent areas when focusing on improving a hard to access area. You get the spot you are working on beautiful, only to realize you burned through a nearby corner with the other side of the buffing wheel you weren't paying attention to!
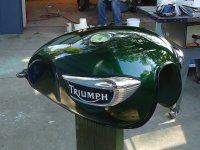
Obviously you have to be very careful around any edges or corners like the step at the edge of the decals. It is possible to "bury" decals in clear so that you can sand out the step, but depending on the thickness of the decal, it can take a lot of clear. Keep this in mind when you sand and also when you shoot more clear. In the pics, it looks like you have a good bit on the top of the tank for instance, but less on the sides. So maybe try to get extra on the sides where the decal step is to help protect it and minimize its appearance for polishing.
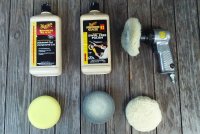
Wax is just car wax, - nothing to do with all this painting and polishing. Just car wax/polish you buy at the auto parts store to protect the paint on your car. I don't wax anything for about a month, but I see some guys wax right after polishing. In any event, keep wax of any kind far, far away until all of your painting is completely finished!! Very often after a month goes by I will find a little spot or two that I want to polish up a bit more and I put on a couple of coats of wax then.

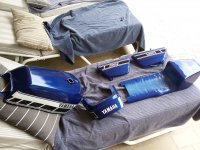
 uploadfromtaptalk1431617144591.jpg772.4 KB · Views: 218
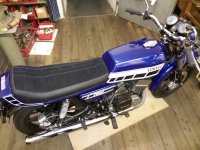
 uploadfromtaptalk1431617228278.jpg1.2 MB · Views: 224
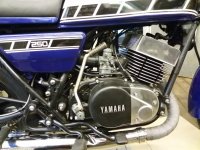
 uploadfromtaptalk1431617253307.jpg834.2 KB · Views: 217
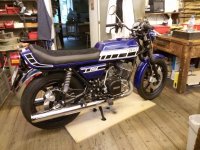
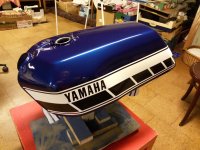 uploadfromtaptalk1431617273577.jpg2.5 MB · Views: 215
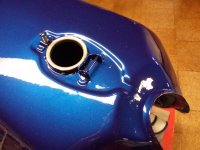 uploadfromtaptalk1431617300452.jpg2.1 MB · Views: 210
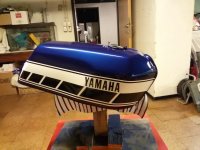 uploadfromtaptalk1431617330163.jpg2.1 MB · Views: 212
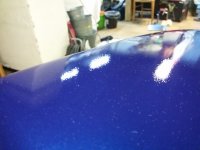 uploadfromtaptalk1431617350738.jpg2 MB · Views: 217
") is there a good tutorial on buffing and waxing?
is there a good tutorial on buffing and waxing?