Follow along with the video below to see how to install our site as a web app on your home screen.
Note: This feature currently requires accessing the site using the built-in Safari browser.
We noticed you are blocking ads. DO THE TON only works with community supporters. Most are active members of the site with small businesses. Please consider disabling your ad blocking tool and checking out the businesses that help keep our site up and free.
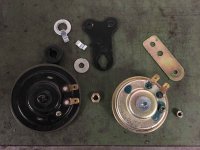
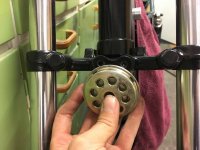
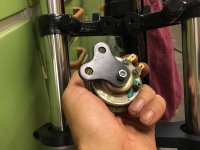
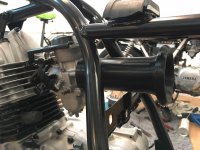
I found a horn I had lying around from an old scooter that I really liked - much better than the big stock one and I like it better than all the aftermarket ones I have seen online as well. I know right, wtf, now I'm thinking about what the horn looks like! Who gives a! Well, it sits up front there just under the headlight so I was either going to re-locate it out of site, or get a nicer looking one. This was my solution
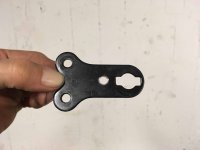
I just modified the bracket from the stock one to fit the new one and now it fits nicely.
Can't help but think the engineers at Yamaha were having a laugh when they designed this particular bracket! ;D
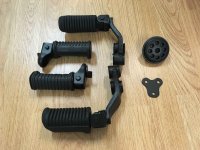
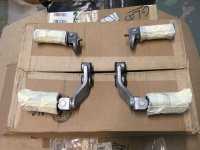
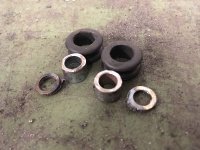
I got the spacers trimmed up for rubber mounting the guard and powder coated the other parts I have been meaning to.
I am not happy with the finish though. The only things that came up alrite were the rear guard and the handle bars. Which were both steel, while the other parts that came up poorly were aluminium. Hmmm. probably not a coincidence. Must be something in my prep. I think I'll start preheating before cleaning (I know you're supposed too!).
But I bought some 1000grit sand paper and sanded back the surface and then bombed them with some decent quality spray. Now just waiting for them to dry but they look waaay better. The paint finish matched nicely to the other parts too ;D
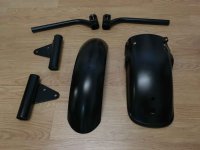
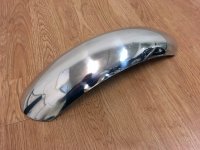
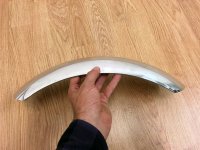
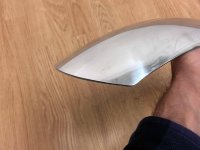
Custom front guard that I actually modelled up, prototyped and then paid for some tooling to be made to stamp out the shape and press them up ;D
Check out the most recent sample I just got from my supplier - a polished version I will offer. I just approved this sample so the factory is working on the first production run now. They will run for around 60usd for an unfinished one (to either paint or sand to give 'brushed look') and 75usd for a polished one. The idea is that it is as universal as possible - it looks good with tyres from 16'' to 18'' and can be used up front and even out back as a stubby rear fender.
I want one! Perfect idea and the market will respond. The need for quality over quantity is here man, don't stumble and cheapen your brand and you will do well.
Yeah thats the plan, although you would need to mark out and drill your own holes depending on where you want to position it - 2-ocklock, 3-ocklock etc
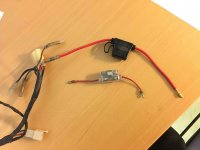
Now that testing is complete on the other bike, the results showed best power and torque with the medium length intake I designed. This means there's no room in the triangle for the battery where I had originally intended it to go.
Now the plan is to make up a special bracket to house the battery and hold the starter relay that goes behind the engine and under the swing arm. I made up a quick prototype in thin aluminium sheet then started modelling one up in 3D. I'll make a few prototypes to perfect it then cut it out of thick stainless plate I think. I reckon this will be pretty cool! Almost completely out of site
Don't worry, I still plan on having side covers ;D
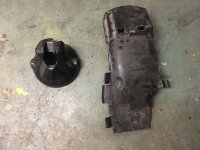
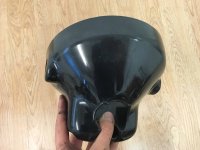
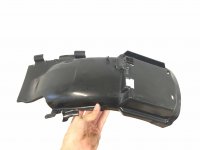
Im starting to put more and more things back on the bike which is exciting. Most things have either been re-plated or painted, but I don't have this option with the only two plastic items that are going back on - the headlight bucket and the inner rear guard.
They are not in bad condition by any means, but it would be nice to make them look a bit newer. Any tips for how to do this? I have heard shoe polish can work? Is this true? Otherwise a car polish with a little black colour pigment in it? I really don't want to paint them, that would be last resort.
Nor sure how you want your plastic pieces to look when completed, but I would just clean up the rear inner fender and put a good coating of wax on it. The headlight bucket - if it is not scratched too bad you can clean it up and spray it with a wheel clear coat (gloss or matte) and give it a coat of wax too. If you decide to paint, go with Krylon Fusion or use an adhesion promoter prior to the final color you want (hint - if you are going to a lighter color use flat white first).
Heat-gun might work depending on what type of plastic it's made of. Old trick that works on Volvos bumpers anyway. Just don't heat it to much. You just what to "sweat" it. Acetone can make small scratches "disappear" from plastic but it can also make it milky.
Personally I would try to make something out of aluminum or stainless.
The inner guard cleaned up fine without any thing other than soapy water. But the headlight bucket was different because of its exposure to the sun/UV I guess. It was faded and ugly in the exposed areas - like a dull brownish colour.
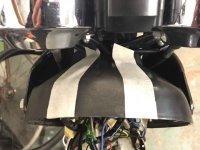
Experiments on the spare guard didn't really prove anything so I tried a couple of methods on the other SR's headlight bucket - that one is faded as hell.
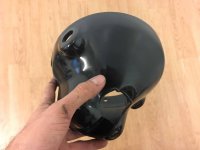
In the middle taped off section is how it is/was, then to the right in the photo has had some acetone wiped over it then off, then slightly rubbed out with a clean rag. Then to the left was an attempt to 'sweat' the plastic with a heat gun. Although this method had a good affect on the unfaded areas, in the other areas (where is was most brown) it seemed to lift out impurities in the plastic instead. It actually gave quite an even matte look but that was not quite what I was after.
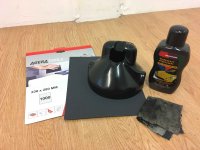
I figured I would go with the acetone method thinking that it would be spot on with two or three applications and a bit of polish. But I tried one more method first, and that was to sand away the discolouration with some 1000 grit wet and dry sand paper then polish it back with coloured car polish and a rag. This worked a treat so I went with that on the bucket to be used. There was a bit of elbow grease involved but it wouldn't have taken longer than half an hour. It was just the top section of it anyways.
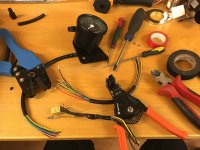
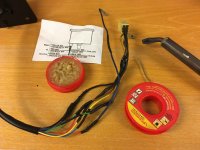
Then it was on to some electrical stuff - adapting the speedo to the stock wire harness. I like to just splice the stock plug and wires into the new one - soldering, heat shrinking then taping.
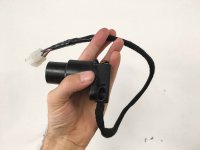
I also modded the stock inanition switch so that the wires come out the locking bolt hole rather than the back of it. Then lengthened the wires as well because this will sit in its bracket just under the tank. And lastly, repainted it and sanded the face off the front so it has a brushed look.
This site uses cookies to help personalise content, tailor your experience and to keep you logged in if you register.
By continuing to use this site, you are consenting to our use of cookies.