jmcelhan
New Member
Thanks to the videos by Herm Narisco's at DCC, and all the posts here on DTT, I decided to try making my own seat. This is the first time I've tried anything like this so it promised to be an adventure.
First I got the foam blocks from Micheals. They also had a can of 3M spray adhesive right there on the shelf so I figured, "Hey, that's convenient. I'll use that stuff to glue the blocks together." Unfortunately the 3M product was crap so I had to head back out to Home Depot to get some LocTite.
Anyway, here's how it started:
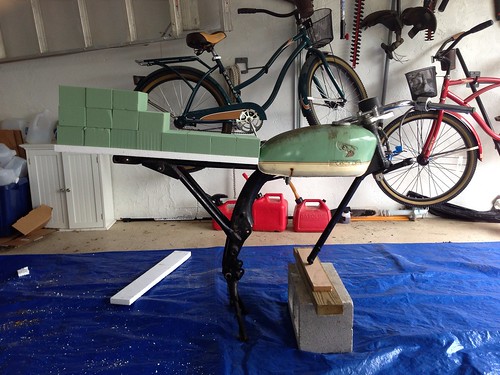
Untitled by jmcelhan, on Flickr
My next step was to file out the bottom so It sat a little lower on the frame. After that I drew the rough shape with a marker and started carving. Here's what I ended up with:

Untitled by jmcelhan, on Flickr
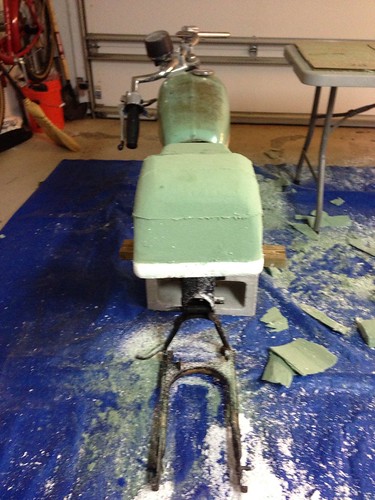
Untitled by jmcelhan, on Flickr
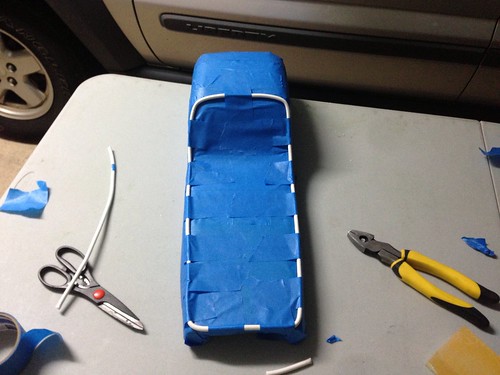
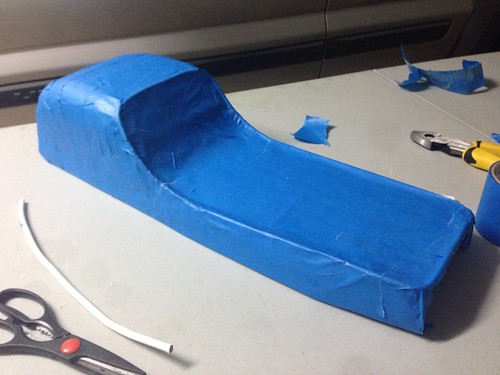
Folowing the steps from Herm's video, I started taping and used some coax cable to form the outer ridge.
Untitled by jmcelhan, on Flickr
Untitled by jmcelhan, on Flickr
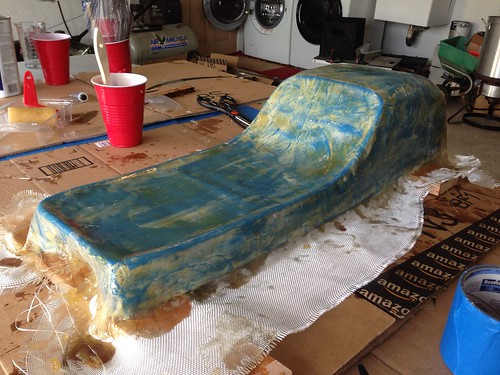
Now the fun part. I haven't done much with fiberglass, just enough to know that I hate the stuff. Still, after covering the mold with some turtle wax, I laid down a couple layers of the fiberglass cloth and resin.
Untitled by jmcelhan, on Flickr
After letting it sit for a couple of hours, I cut it loose and pulled out the mold, which to my surprise, came out in one piece. Unfortunately, this is also where I made a bit of a mistake. First, I probably should have put at least on more layer of cloth or mat down on the initial shell. Second, I probably should have let it cure over night. Why? Because the initial shell was a little too flimsy and ended up bowing out a little on the bottom near the seat area and bowing in a little on the bottom near hump area. Not a huge deal, it'll just require some extra sanding and some extra bondo to get straightened out.
Anyway, here's what the she first looked like on the frame:
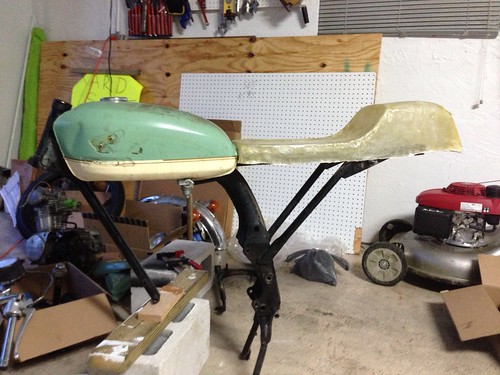
Untitled by jmcelhan, on Flickr
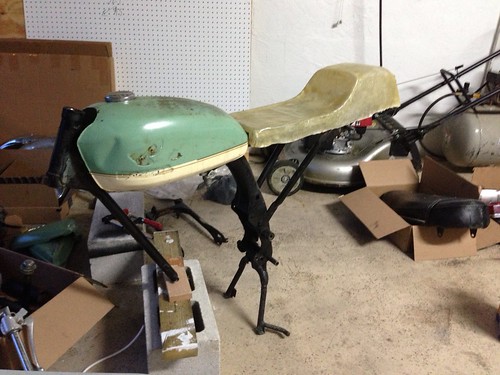
Untitled by jmcelhan, on Flickr
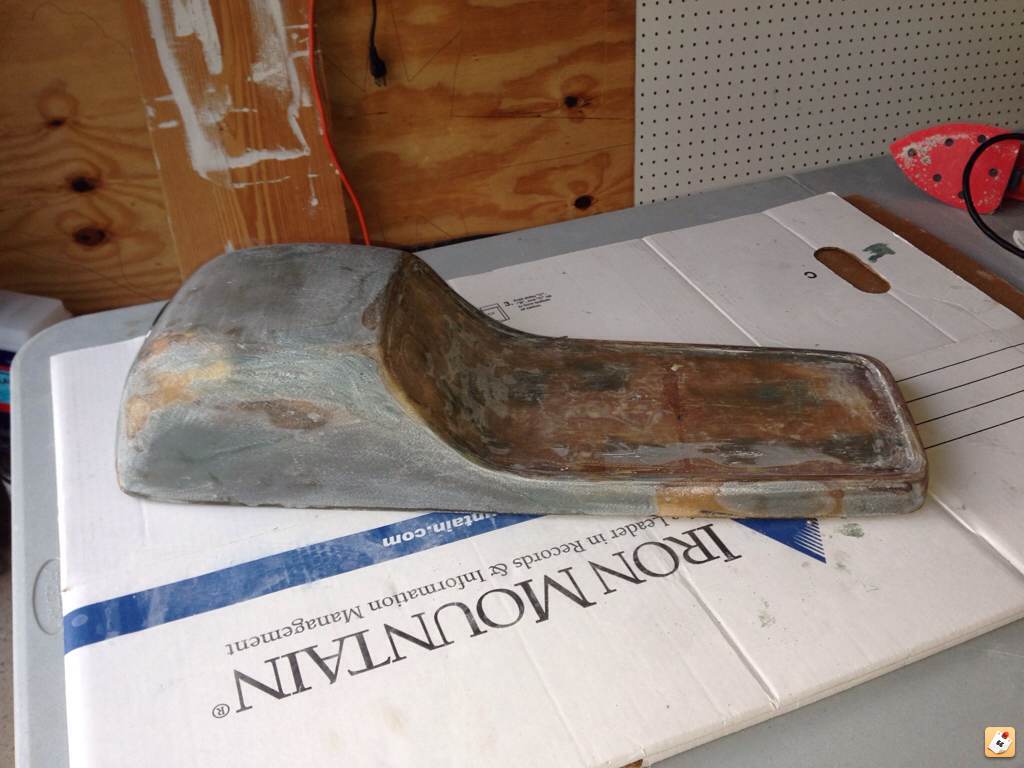
The next evening, I started beefing up the structure from the inside. I ended up putting about 3 more layers of matt and resin on the inside. After it cured for 24 hours, that thing was hard as a rock. So I started in on the initial sanding.
Here's what it looked like after the first round on 80 grit.
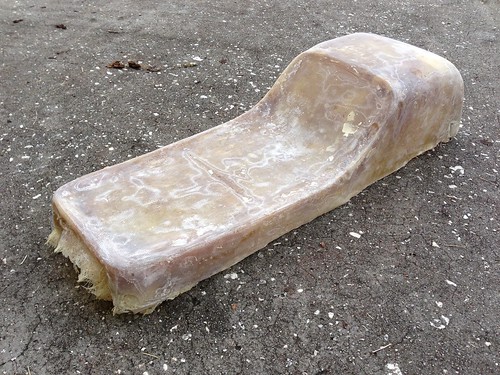
Untitled by jmcelhan, on Flickr
It's hard to see but the inside edge around outer ridge got filled in a little with resin so I had a hard time cleaning that out. I think I'll have to go back around it again with the dremmel to get it just right. Anyway, there's a lot more sanding to go. Ugh...
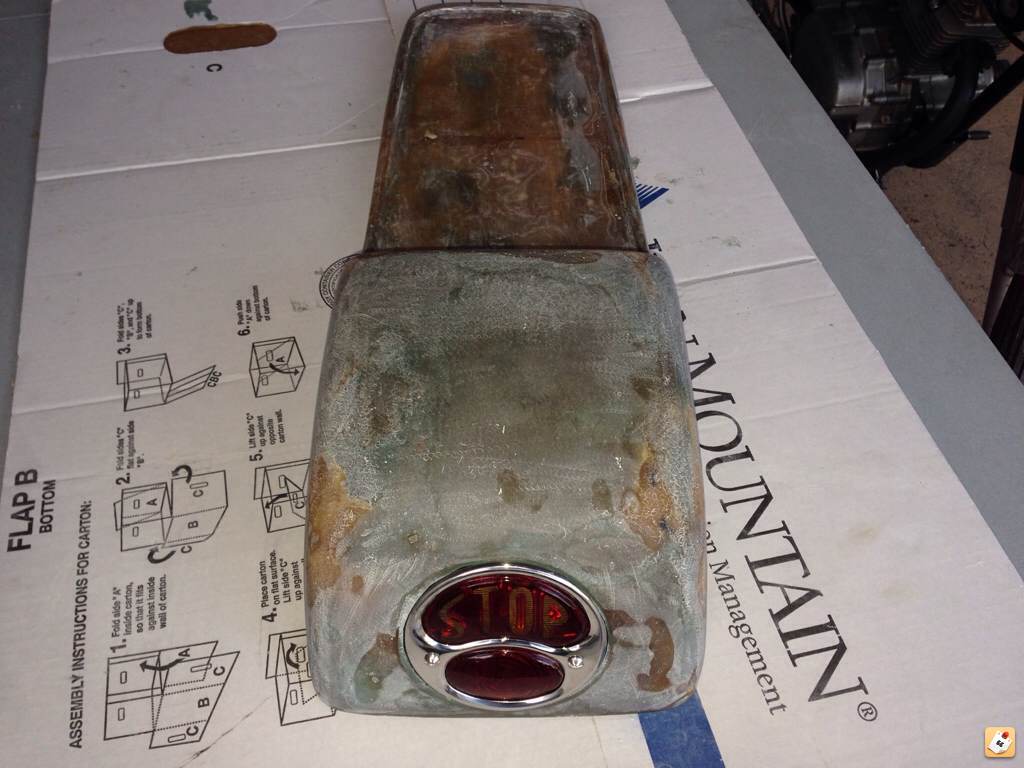
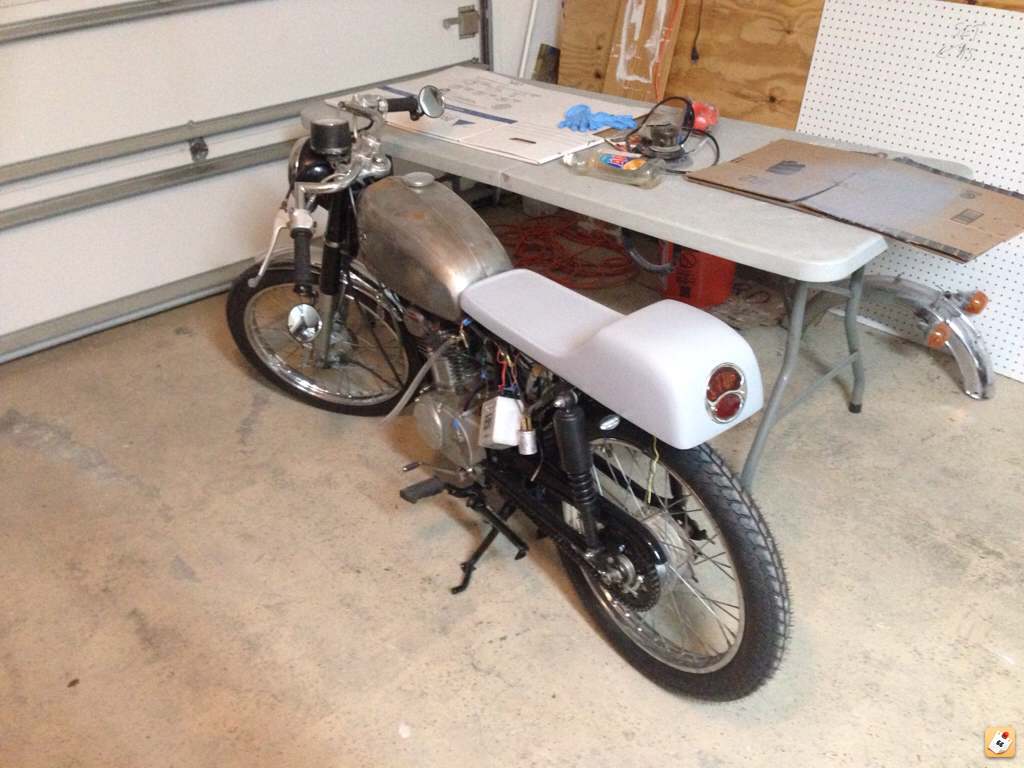
Finally, last night I trimmed up the bottom and mocked it up in the frame again. I'm going to have it sitting about a quarter inch to a half inch lower, but you get the idea:
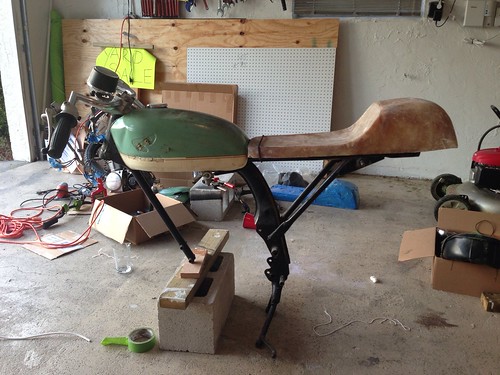
Untitled by jmcelhan, on Flickr
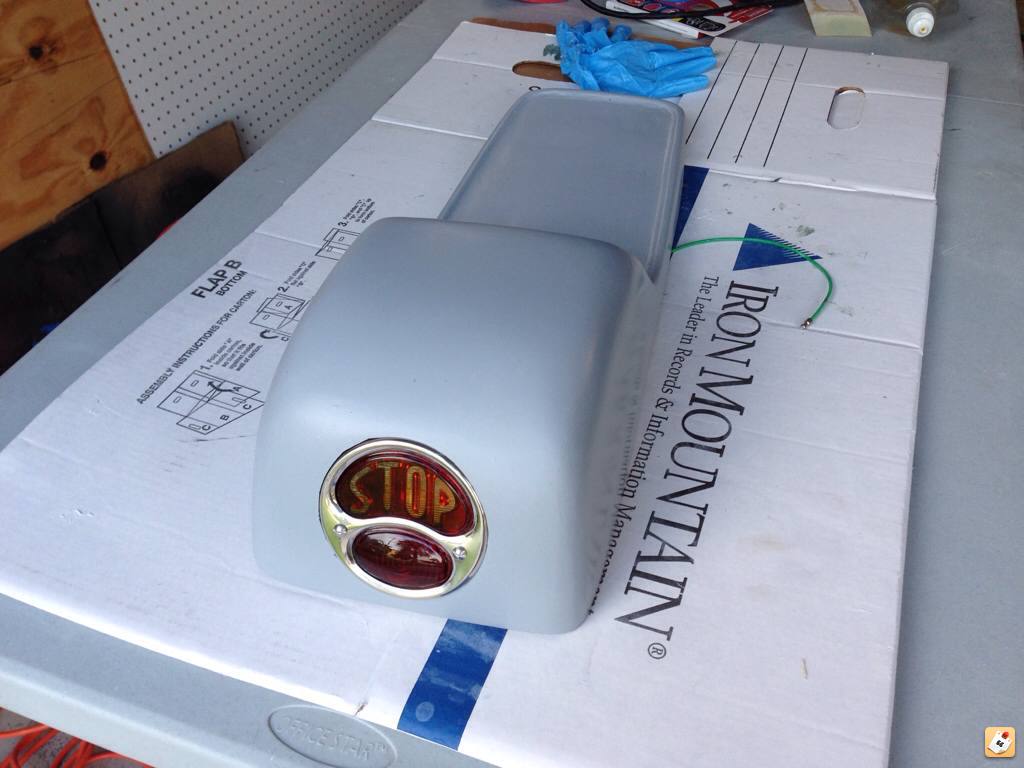
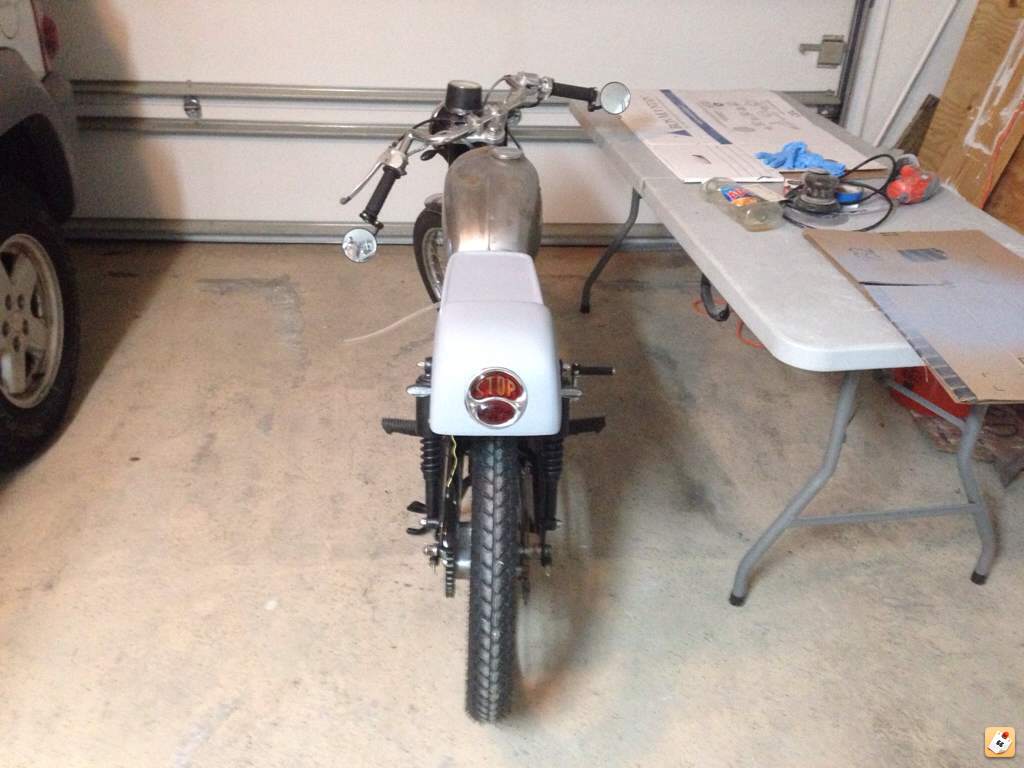
And here's one more with the vintage looking 6V brake light I'm going to eventually install. This is also the reason I went with a flat back hump rather than a more conical shape.
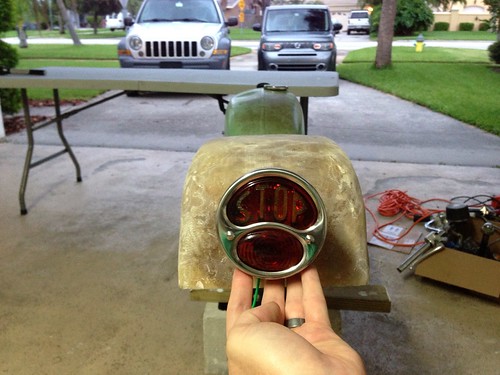
Untitled by jmcelhan, on Flickr
So if you've made it this far, thanks for looking. I'm hoping some of you will have a little advice for me. For instance. how much sanding do you normally do before smoothing it out with the body filler? Any other tips are more than welcome. I see a lot more sanding in my future....
Thanks again!
First I got the foam blocks from Micheals. They also had a can of 3M spray adhesive right there on the shelf so I figured, "Hey, that's convenient. I'll use that stuff to glue the blocks together." Unfortunately the 3M product was crap so I had to head back out to Home Depot to get some LocTite.
Anyway, here's how it started:
Untitled by jmcelhan, on Flickr
My next step was to file out the bottom so It sat a little lower on the frame. After that I drew the rough shape with a marker and started carving. Here's what I ended up with:
Untitled by jmcelhan, on Flickr
Untitled by jmcelhan, on Flickr
Folowing the steps from Herm's video, I started taping and used some coax cable to form the outer ridge.
Untitled by jmcelhan, on Flickr
Untitled by jmcelhan, on Flickr
Now the fun part. I haven't done much with fiberglass, just enough to know that I hate the stuff. Still, after covering the mold with some turtle wax, I laid down a couple layers of the fiberglass cloth and resin.
Untitled by jmcelhan, on Flickr
After letting it sit for a couple of hours, I cut it loose and pulled out the mold, which to my surprise, came out in one piece. Unfortunately, this is also where I made a bit of a mistake. First, I probably should have put at least on more layer of cloth or mat down on the initial shell. Second, I probably should have let it cure over night. Why? Because the initial shell was a little too flimsy and ended up bowing out a little on the bottom near the seat area and bowing in a little on the bottom near hump area. Not a huge deal, it'll just require some extra sanding and some extra bondo to get straightened out.
Anyway, here's what the she first looked like on the frame:
Untitled by jmcelhan, on Flickr
Untitled by jmcelhan, on Flickr
The next evening, I started beefing up the structure from the inside. I ended up putting about 3 more layers of matt and resin on the inside. After it cured for 24 hours, that thing was hard as a rock. So I started in on the initial sanding.
Here's what it looked like after the first round on 80 grit.
Untitled by jmcelhan, on Flickr
It's hard to see but the inside edge around outer ridge got filled in a little with resin so I had a hard time cleaning that out. I think I'll have to go back around it again with the dremmel to get it just right. Anyway, there's a lot more sanding to go. Ugh...
Finally, last night I trimmed up the bottom and mocked it up in the frame again. I'm going to have it sitting about a quarter inch to a half inch lower, but you get the idea:
Untitled by jmcelhan, on Flickr
And here's one more with the vintage looking 6V brake light I'm going to eventually install. This is also the reason I went with a flat back hump rather than a more conical shape.
Untitled by jmcelhan, on Flickr
So if you've made it this far, thanks for looking. I'm hoping some of you will have a little advice for me. For instance. how much sanding do you normally do before smoothing it out with the body filler? Any other tips are more than welcome. I see a lot more sanding in my future....
Thanks again!
")