1974 Honda CB360 Garage Find Cafe Build

I didn't want to give the safety lecture, but I'm glad you did.
Shitty tail lights ain't no joke.
 
Ok...Ok...point taken gentlemen, function over form in this case. I will just get the big ass red circle and call it a day. That said, should I just grab a regular tail light instead of the led? Any recommendations on a good flush mount? I have the roc city interceptor seat which has a nice piece of flat real estate on the tail for mounting.
 
Swivel said:
If I rode behind a friend with some wacko flashing ,spinning globe,brake modulating LED tailight thing I'd smash it with a big spanner.And he would thank me later.

Hey now, it was just gonna be bright and brighter. I wasn't planning a rave behind the bike or anything.
 
Stock XS is OK but maybe a bit big for the smaller seat?
I bought a few high level brake/tail light LED's a few years ago, they are a bit wide stock but about same width as number plate when the reflectors on sides are cut off
LEDLight2.jpg
 
I guess you mean the smaller one with the built in round reflector?
I've never seen one on an XS400, only ever seen 400 with the large rectangular light and separate reflector
BTW, the LED's in 'my' light' are clear but light up red if you wanted one to gut for circuit board?
Also has number plate light in the lower section
 
Just stumbled on this build. Good to see another builder in Lex on here!

I'm guessing you called Armstrong Powdercoating when you were talking about a 45 minute drive each way to get the powder done. The guy does good work and is fairly inexpensive, but damn he takes forever. Just got my hoops powdered by him and it took 8 weeks to get them back after he originally told me 2 wks... Had to call the guy and pester the shit out of him for the last two of those weeks every other day.

If you end up not liking that seat or worry that the hump is too big, it's not really that difficult to make a one-off yourself. A little floral foam, sandpaper, and a lot of time and you're good to go.

And check out Mike Wells Racing over on Industry. The guy is awesome and has built a ton of 350's and 60's.

Go Big Blue!!!
 
SeaBee said:
Just stumbled on this build. Good to see another builder in Lex on here!

I'm guessing you called Armstrong Powdercoating when you were talking about a 45 minute drive each way to get the powder done. The guy does good work and is fairly inexpensive, but damn he takes forever. Just got my hoops powdered by him and it took 8 weeks to get them back after he originally told me 2 wks... Had to call the guy and pester the shit out of him for the last two of those weeks every other day.

If you end up not liking that seat or worry that the hump is too big, it's not really that difficult to make a one-off yourself. A little floral foam, sandpaper, and a lot of time and you're good to go.

And check out Mike Wells Racing over on Industry. The guy is awesome and has built a ton of 350's and 60's.

Go Big Blue!!!
First off....Won & Done my friend!

On to the bike....Yeah, I'm talking armstrong and the heck with that. I'll just do it myself and get on with my life. I know Mike and while he does take a while he is freakin' amazing! I have been to him several times and I'm always happy with what he does. Great moustache too!

What are you working on right now? We will have to get together and ride when these projects get finished. Glad to find a local cafe friend.
 
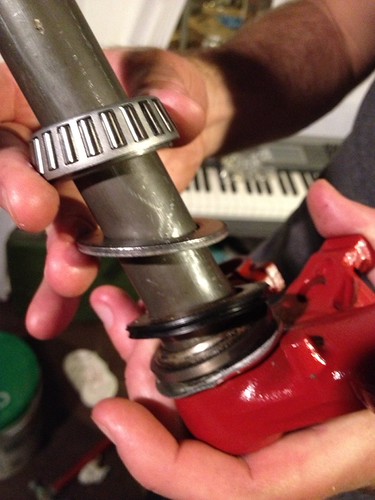
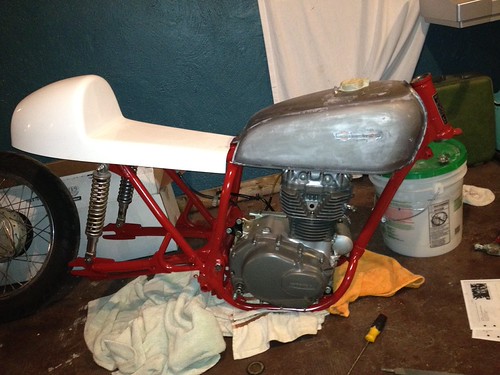
I was able to get the motor back in with the help of my brother in law. I installed the swing arm and things were really trucking along. Then we decided to tackle the all balls steering stem and I want to beat my head against the wall until I'm unconscious. Can someone please tell me how the hell this thing goes together? Here is a picture and I think its WRONG. Does it go.... dust cover with gap side up, thin washer sitting inside of dust cover and then bearings? IF that is the case, do I beat the hell out of it to get it to sit flush?

Untitled by loganrm, on Flickr

When I get this together is there anything special for up top? It was all going so well until I pulled out my all balls....


Here is a teaser shot....


Untitled by loganrm, on Flickr

I hope to get the seat mounting squared away tomorrow and get some primer laid down.
 
Hey nice build, I had to read from the start and found a couple of quotes v funny "new to marriage and had to come up with a pretty reasonable excuse for sliding of the couch mid evening" LOL this will change and she will ask you when you heading out to the shed! "all i wanted to do was get home and get into the dying cockroach position till the next morning" LOL hell funny.
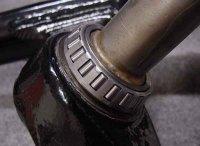
anyway just having a look at your bearing issue, looks to me that you are replacing the original ball bearings with the tapered type, but you have left the ball race on the bottom of the head stem, have you also replaced the race cups in the frame head to the tapered type?
here are a couple of pics, first is of a ball type and the 2nd is of the tapered cup hope this helps cheers andy...
 

Attachments

  • bearings.jpg
    bearings.jpg
    10.8 KB · Views: 1,348
  • tappered bearings.jpg
    tappered bearings.jpg
    6.8 KB · Views: 1,450
and some tapered installed
 

Attachments

  • tapered1.jpg
    tapered1.jpg
    35.8 KB · Views: 1,347
  • tapered 4.jpg
    tapered 4.jpg
    19.4 KB · Views: 1,355
  • tapered 2.jpg
    tapered 2.jpg
    36.1 KB · Views: 1,424
  • SteeringBearing2.jpg
    SteeringBearing2.jpg
    18.5 KB · Views: 1,382
loganrm said:
I was able to get the motor back in with the help of my brother in law. I installed the swing arm and things were really trucking along. Then we decided to tackle the all balls steering stem and I want to beat my head against the wall until I'm unconscious. Can someone please tell me how the hell this thing goes together? Here is a picture and I think its WRONG. Does it go.... dust cover with gap side up, thin washer sitting inside of dust cover and then bearings? IF that is the case, do I beat the hell out of it to get it to sit flush?

Once the old lower race is removed that thin washer should fill the gap left behind from that old race(only if that washer came with the new kit). One dust cover snaps onto the wide end of each tapered bearing. And yes, you will need to press the new bearing down into place, the easiest way to do that is to find a piece of pipe that is the same dimension of the small inner ring on the new bearing. Then slide the pipe down onto that ring(you don't want to harm the rollers) and tap the other end of the pipe with a hammer until the bearing is seated. So, once the old parts are removed, the order of the new parts from the bottom up should be - Washer(If it came with the kit) - Dustcover - tapered bearing(the dust cover snaps onto the bearing so they should go on together). The large outside rings of the new tapered bearings need to be tapped into the frame in place of the old races located in the neck as well.
 
Guys, once again thank you so much for all the help. It makes so much sense the way everyone has explained it but when your sitting in the basement (a few Modelo's into it at 1am) its like trying to decipher driving directions from a woman, we just drove around in circles taking several different routes until we wound up back where we started. I'm gonna head home at lunch and see if I can get this task knocked out.
 
Aside from not eating because I was working on the bike, I had a fantastic lunch. I got everything sorted out, the old stuff came off east with a chisel and the new one tapped on nicely with the help of an old pipe. Then.....


Untitled by loganrm, on Flickr


Untitled by loganrm, on Flickr

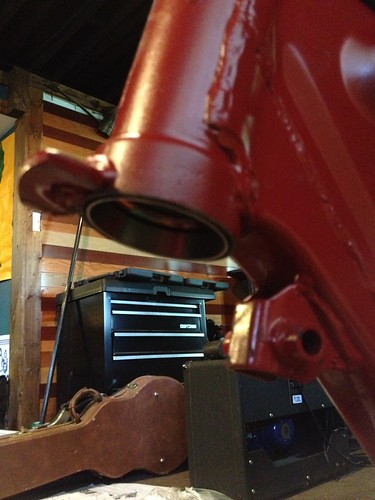
I assume that top one needs to sit in there flush but she did not want to budge even with several good blows with a hammer and wood block. The bottom one is sitting flush but it seems like it needs to travel up in there a little more because I can feel the gap.
 
loganrm said:
First off....Won & Done my friend!

On to the bike....Yeah, I'm talking armstrong and the heck with that. I'll just do it myself and get on with my life. I know Mike and while he does take a while he is freakin' amazing! I have been to him several times and I'm always happy with what he does. Great moustache too!

What are you working on right now? We will have to get together and ride when these projects get finished. Glad to find a local cafe friend.

Working on this 350 right now...
http://www.dotheton.com/forum/index.php?topic=28617

I've made a little more progress than what's shown, just too busy working on the bike in my spare time to update the thread! We'll def have to get a ride set up. You're a little farther along than I am, but I'm catching up! Seat and tank out for paint Friday, powdercoat once those are back, and assembly.
 
SeaBee said:
Working on this 350 right now...
http://www.dotheton.com/forum/index.php?topic=28617

I've made a little more progress than what's shown, just too busy working on the bike in my spare time to update the thread! We'll def have to get a ride set up. You're a little farther along than I am, but I'm catching up! Seat and tank out for paint Friday, powdercoat once those are back, and assembly.

I checked your build out earlier today. That motor is looking tops man! Makes me wish I'd spent a little more time on mine. Who are you getting to do your paint work?
 
Well that bottom wouldn't go in any further due to the old race still beng in there. I didn't know my races from a hole in the ground so that's cause for trouble. After breaking a hammer, 16" wood bit, a chisel and bending the hell out of some pipe I finally knocked it out. Got the new piece set in and the front forks and wheel on! I'll post pics tomorrow.
 
Back
Top Bottom