
1980 GL1100 "Orange Crush" build

CrashDown

Been Around the Block
Let me start off by saying, I'm posting this build on the Naked Goldwings Forum, but thought it would more then apply here. I'm just going to copy/paste all my build posts here, so soak it all in. These posts are over a 5 month span. Enjoy!

Hey guys, so I'm a noobie here. My name is Matt, I'm a taurus, I like Pizza, Mac and Cheese and all natural Cola. Now that all the dumb stuff is out of the way, lte me get to the first post of my new project.

I just recently finished the paint on my San Jose Sharks themed 2010 Honda Sabre
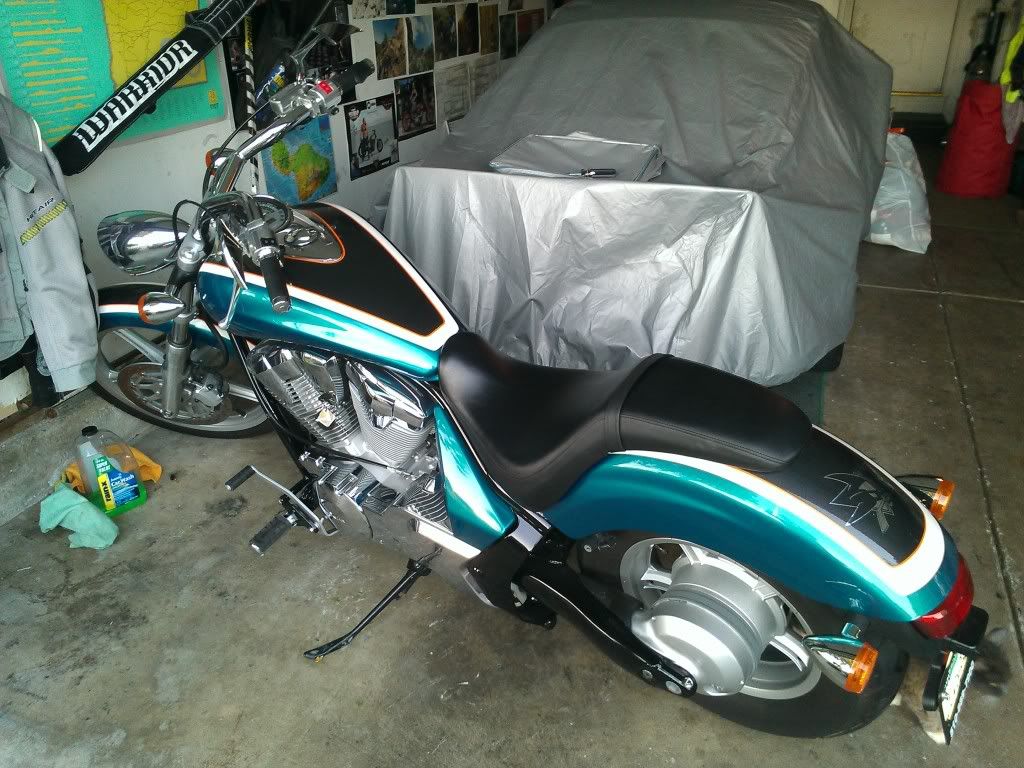
WP_000304.jpg

WP_000294.jpg


I'm a painter by trade and can't just leave something stock. This brings me to the Goldwing. A neighbor of mine showed up at the house a few weeks ago and asked if I wanted a bike? A 1980 GL1100. it was her brother in laws, he passed away, the son didn't want it. I could ahve it for free. So i jumped on it. The kid said it runs, blown stator, but the bike needs work. Here's how it looked on the trailer when I got it to the house.

412181_4150681727351_43753055_o.jpg


I couldnt decide what to do with it. bobber? Maybe just restore it and run it? But goin the Cafe route wom me over. I have a CL350 frame sitting waiting for me to cafe, but this is a complete bike! Easypeesy! Not.....

Ontop of the Stator being cooked, the starter is cooked. The fuse block from the battery to the startor is cooked. Battery is fried. When whoever put the Vetter fairing on installed it they hacked the wiring to the cluster. I was able to get it to kick over with starter fluid and bypassing the fuse block all together and it starts and purrs like a new bike for about 5 seconds. So i know she runs.

Okay I think. This is a complete overhaul. Everything is getting either rebuilt or replaced. So let the teardown begin!

Day1
470054_4157553139132_92835843_o.jpg

All Fairings, fenders, saddlebags, false tank removed. She's missing both side covers, gonna need to find those. getting that Vetter fairing off was a pain.

Day2
WP_000307.jpg

WP_000306.jpg

WP_000308.jpg

Scrubbed down the while bike. Engine degreaser and simple green are your friends! The block should clean up real nice. The valve covers look good as does the timing belt cover. Instrument cluster removed. Probably gonna go with just a Speedo/tach on the reinstall and no light cluster. Airbox was remover. Intake manifold looks nice and clean, no debris or anything.

Now my frist question. I really dont want to run those Nitrogen filled front forks. Does anyone know off the top of their heads what updated front end will literally bolt onto the neck? I ahve a XS1100 front end i was going to use on the CL350 that is a direct bolt on to that frame. And would be really happy if it was a simple swap to the GL frame.


I started on the False tank today at work. I'll snap some pics of that and post up tomorrow.

-Matt
 
Okay. I decided to do the Faux Tank first. painted and all so I will have a visual representation of where i want to take the bike, and what the overall theme is gonna be. So I brought the tank up this morning... Dissasembled it and started grinding.

WP_000309.jpg

Tank broken down, washed, then the halfs reasembled, ground down and ready for fusing.

WP_000310.jpg

Shots of the front and rear after being fused together with 3M Superfast Adhesive and Evercoat KittyHair
WP_000313.jpg

WP_000315.jpg


I could only manage to work on it 2 hrs today. But before I left for home I got a coat of Evercoat Glazing Putty spread over the outer and inner joins on the front half of the Faux Tank.
WP_000322.jpg

WP_000321.jpg

WP_000320.jpg

WP_000318.jpg


I remover the front under brace to see how strong the bond is witht he Adhesive and Kittyhair. And it's strong. Wont have to worry about any cracking with the underbraces in there.

Tomorrow I'll repeat the same process on the rear section. Pictures will be posted.

The color scheme I'm gonna go for is a Sunburnt Orange metallic as the overall color. Side of the Faux tank, real tank and center section of the side covers are going to be a Cream color with black pinstriping seperating the two. It'll also be sporting the Gold Honda Wings decal on the tank sides.

I'm shooting to have the Faux tank in primer by friday and have the whole thing orange by next friday at the latest.

-Matt
 
Update!

Thank for the advice on the front end. I'm gonna order the progressive springs this weekend along with a new stator. Anyone have any pro's or cons on these???
http://www.ebay.com/itm/110898092023?ssPageName=STRK:MEWAX:IT&_trksid=p3984.m1423.l2649
http://www.ebay.com/itm/290714785962?ssPageName=STRK:MEWAX:IT&_trksid=p3984.m1423.l2649
http://www.ebay.com/itm/310408562845?ssPageName=STRK:MEWAX:IT&_trksid=p3984.m1423.l2649

Im also gonna order the rebuild kit for both front calipers as they are frozen and in need of a rebuild. The rotors dont look all that bad actually. Also gonna order a new Steering neck bearings. But enough of that! Onto the tank, which is fake.... its a Fake, nonfunctioning gas tank.... way to go Honda, way to go....

So i got to work and got the back half of the tank all puttied up using the same method as the front half...
WP_000330.jpg

WP_000332.jpg

WP_000333.jpg


Then sanded...
WP_000336.jpg

WP_000337.jpg

WP_000338.jpg


Now it's time to test fit the gasket and bracket that level the airbox and gas door. I temp. fit it in the FAKE TANK (thanks honda....) with 2 split rivets so it wouldn't move around on me.
WP_000340.jpg


Once i was happy as i could be with all the gaps I pulled the peices back off and cleaned up the areas where they overlap. Then reinstalled them on the FAKE TANK (thanks honda...) and put a few tack welds on them.... The tacks aren't pretty. I'll do some pretty welds tomorrow.
WP_000343.jpg


Then checked the function of the key/lock to make sure the thing will open and close smoothly. It does, I win.
WP_000345.jpg


Tomorrow I'll get the center peices all welded together on my lunch break and then try to get the FAKE TANK (thanks honda...) sanded in 180grit and preped for primer on friday.

-Matt
 
Update:

Alright, had some time today to work on the "Shelter" . Got the door all stitch/skip welded. Not pretty though. The main welder at the shop broke down yesterday, so i had to use the backup, which sucks big time...


WP_000347.jpg


those gaps around the door are hideous....
WP_000348.jpg


Let's tighten them up eh??

WP_000349.jpg


Ahh the magic of Rage Gold body filler. So I'm gonna try to get the main section of the Shelter primed tomorrow. Not sure about the door. It's wavy (suprisingly not from my welding).

Check back tomorrow!

-Matt
 
Update!

So i got some things done on the Shelter friday at the shop.

More work on the Shelter Door gaps....

WP_000350.jpg

WP_000351.jpg

WP_000352.jpg

WP_000353.jpg

I opened up the gap slightly to negate any chances of the door rubbing against the rest of the shelter when on the road.

Then i turned my attention to the Shelter sides. I really dont like the raised swooping bodyline at the bootom edge of the Shelter side...
WP_000354.jpg


So i decided to grind and fill it, and make my out bodyline to mimic older flat sided Honda CB tanks...
WP_000355.jpg


This was as far as I got friday. But I brought the Shelter home this weekend. I was able to get the Left side of the shelter Finish sanded and ready for primer, as well as the Mono Door on the top... I was going to start of the right side, but forgot my grinder at the shop. DOH!

Tank from the top sitting on the frame... (mono-door looks good from this angle
WP_000358.jpg

From the side on the frame... (new shape more noticable)
WP_000359.jpg

And another shot of the Mono-Door from the front with the gaps all finished.
WP_000360.jpg


If all goes well i should have primer on it monday or tuesday.
 
Got the other side of the shelter shaped, and finish sanded in 320 grit....

WP_000366.jpg

WP_000367.jpg

WP_000368.jpg


And Now..... IT'S PRIME TIME!

3 good thick coats of EverCoat Featherfill G2 and she should be Orange and cream in a few days,...

WP_000369.jpg

WP_000370.jpg

WP_000371.jpg

WP_000372.jpg


Gonna get is sanded in 180-240-then 320 grits tomorrow. WetSand on wednsday, and Sunburnt orange on thursday!

-Matt
 
hey broskies!

thanks for all the kind words. I wish i did bikes for a living. They are sooo much more fun to work on then cars. I'd like to open a one or 2 man motorcycle paint shop here in the next 2 years or so. We'll see if we make it through 2012, and hope the world doesnt drop out from under us.

That said.... UPDATE!

Got the shelter dry blocked in 180............240..........and 320 grits. Then i said what the .... Wet Sanded in 600 grit in prep for PEARL WHITE! Thats right. The sides of the shelter, and the center of the side covers is going to be Honda Crystal White. basically a white base, with a peral midcoat and then finish the shelter off with three coats of clear. Heres the Shelter all prepped and ready to go hopefully for pearl white tomorrow night.

WP_000378.jpg

WP_000376.jpg

WP_000375.jpg

WP_000374.jpg


So I got the white base and the pearl midcoat all mixed up and ready to go. Then I decided to look for the orange i want to use. It had to meet 3 requirements. Contain only Pearl effect (no metallic), be on the yellow side and not on the redder side, and be obnoxious.

So here's the choice...
WP_000373.jpg

The color is called Atomic orange pearl! it's a factory GM color. So picture the main parts of the shelter, side covers, and the entire frame that orange. This is gonna rock hard!

More tomorrow!
-Matt
 
That's it! I've had it! Beige is sooooooo boring. Bring on the white Basecoat!


I went ahead and covered the entire Shelter in white base for 2 reasons:
1. It acts like a Sealer, making the overall finish of the job much more even
2. It will make the Pear Orange pop a heck of alot more.
WP_000384.jpg

WP_000385.jpg

WP_000386.jpg

WP_000387.jpg

WP_000388.jpg

WP_000389.jpg

WP_000390.jpg

WP_000391.jpg

The new lines on the Shelter really stand out now...

Let's get some pearl coat on there. 2 coats to be exact.
WP_000392.jpg

WP_000393.jpg

WP_000394.jpg


And now for 2 medium wet coats of Clear.
WP_000396.jpg

WP_000397.jpg

WP_000398.jpg

WP_000400.jpg

I tried to get angles where the pearl would show, but it didnt work out too well....


This is all being done in Spies Hecker Permahyde Waterbourne Basecoats. Which i hate doing 2 tone jobs in, but it's all we can shoot in Cali now...

Pearl orange tomorrow!!!
-Matt
 
And then there was ORANGE!

Got in this morning, and sanded the Shelter wetsanded smooth with P600 grit on my 15 minute break.
WP_000401.jpg


Then on lunch, got the areas that are staying pearl white masked off.
WP_000435.jpg

WP_000436.jpg

WP_000437.jpg


And then after work, loaded up Atomic Orange Pearl in the gun and it was off to the races.

1 coat
WP_000438.jpg


2 Coats
WP_000439.jpg


3rd and final coat
WP_000440.jpg


All unmasked and ready for clear
WP_000441.jpg

WP_000442.jpg


And here's how it looks with 2 Medium Wet coast of high gloss clear.
WP_000443.jpg

WP_000444.jpg

WP_000445.jpg

WP_000446.jpg

WP_000447.jpg


Now I just need to wait for the "Honda Wings" decals to come in and do the black pinstripe. Then it will be another 2 coats of clear and the main part of the shelter will be done. After that all attention will be on finishing the Mono-Door and get the Shelter completely assembled.

-Matt
 
Okay...... Started on the seat/tail on sunday. Went to start tackwelding the bar stock together that i'm making the framing of the tail out of and realized i have no welding gas. Will get some this week.

But managed to get this bracket removed...
WP_000459.jpg

I was able to just splatter weldthe bottom section of the tail frame together but it's ugly. I'll clean up the welds at work and snap some pics off.

But as i promised, the shelter will be finished by friday. And the Honda vinyl came in today.

So i got it all sanded down and the vinyl applied, and finished it off with silver pinstripping.
WP_000462.jpg

WP_000463.jpg

WP_000464.jpg

WP_000465.jpg

WP_000466.jpg

And now it's time for clear
WP_000467.jpg

WP_000468.jpg

WP_000469.jpg

And the main section of the shelter is now done! Aside from some light sanding and polishing.

Time to start on finishing up the mono door....

This bracket that is the remains of the lower doors hinge had to be removed.
WP_000461.jpg


And that's where i had to call it a day. I'll get the bottom of the monodoor all preped and the entire door primed tomorrow. Then looking at paint on thursday and assembly of the entire shelter on friday!

-Matt
 
I can't remember who asked how i was gonna be able to get the big main seal for the Monodoor in the Shelter with it all being 1 piece now. Well it is doable.... just be verrrrrrrrrrryyyyyy careful.
WP_000473.jpg

WP_000475.jpg


And i got the MonoDoor primed so that means Flat black thursday night and full Shelter reassembly friday/saturday!
WP_000479.jpg
 
Hey guys. Sorry for the lack of updating! I got the shelter finished, FINALLY. Then last friday at hockey practice, one of the goalies took a cheap shoot at me and took my legs out from under me. Upon hitting the ice I aparently gave myself a Level 1 AC Tear in my right shoulder. So the injury, coupled with the fact that I am also doing a full restoration on my uncles Triumpt T120 tank I havent been able to put in a ton of time into the tail/seat section I have decided to make.

Pics of the tail will come as soon as I get the base plate all welded and mounted to the frame.

But until then, here is some Shelter porn.... finally finished.
IMG_1190.jpg

IMG_1189.jpg

IMG_1186.jpg

IMG_1185.jpg

IMG_1184.jpg


The underside of the Mono-Door, complete with all the stickers. Notice i sprayed the inside of the shelter black.
IMG_1187.jpg

IMG_1188.jpg


I'm gonna try to get my uncles tank finished this week, then i can go and put in a week on the tail/seat. Still trying to find a local NGW member to help me get the frame stripped down. Hopefully one of you guys can help me out, sense i'm all gimpy.

-Matt
 
hey guys. Sorry for the lack of posts! I started to try to make a tail master to which I could make a mold and then part and maybe a few to sell, but it didnt work out all the well. used the wrong materials and just took too much time.

So instead I pulled out the tape measure and found a prefabbed tail that will fit with some slight mods!

http://www.ebay.com/itm/170655891510?ssPageName=STRK%3AMEWAX%3AIT&_trksid=p3984.m1423.l2649

It's off of a cb750, but the measurements are close enough that they are gonna work. Should be here in about a week. When it does I'll snap pics of it sitting on the bike and any mods I need to do to get it mounted before i start the paint work.

I also went over to cycle salvage and picked up one side cover (right side), but they didnt have any lefts. Anyone willing to sell any extras if they have them? PM me if ya do!

And now for the real good news. I spoke to a guy really local to me that has a booth and some shop space he is willing to let me use, if i help him with some labor on projects he has going on. So hopefully in a few weeks to a month I'll be offering my paint services to people Local to the Bay Area, or anyone who wants to send parts my way.

Any questions on anything, feel free to post/ask them!

Stay tuned!

-Matt
 
A ton of work has been done so far. I'm stoked about the progress. It's slow, but this is my first complete bike build. So here everything to catch you guys up!

The Shark bike has been fixed. It's all done, I redid the tank and Berkley Honda got the rest of the bike all fixed up and pretty. I think it looks better now then it did after it got hit. Needless to say, my boss is pretty forgiving about the things i do around the shop now. lol.

Oh yea, I have a place to do side work now as well. So if you guys in the SF bay area need paint work done, CONTACT ME!

Okay, onto the GL. I did a tank restoration on my uncles TR120R,
WP_000503.jpg

WP_000510.jpg

WP_000511.jpg

WP_000512.jpg

WP_000515.jpg

WP_000516.jpg

and in trade he came over on a saturday a week later and helped me get the GL Stripped down to the bare frame. Came apart a heck of alot easier then i thought. I know I'm gonna need guideance putting the beast back together though.
WP_000629.jpg

WP_000630.jpg

WP_000631.jpg


Once the frame was stripped i brought it up to the shop and started to gusset some of the stock welds. i also had to fix a cracked exhaust mount. nothing major though.
WP_000685.jpg

WP_000686.jpg

WP_000687.jpg

WP_000688.jpg

WP_000689.jpg

WP_000690.jpg

WP_000691.jpg

WP_000692.jpg


After the gusseting was fnished the seat arrived and I started to work on a way to mount the darn thing...
WP_000693.jpg

WP_000694.jpg

WP_000700.jpg

WP_000701.jpg

WP_000702.jpg

this rear mount has been beefed up and you'll see it in future posts.
WP_000703.jpg


Now with the seat sitting flat, lets see how the shape matches up with the shelter
WP_000696.jpg

WP_000697.jpg

WP_000698.jpg


At this point I had to all the mounting and fab work on the frame done and used a chemical stripper to get most of the black paint off.
WP_000743.jpg

Then came back over with a handheld sand blaster to remover the little bits that remained. Pics of that comming as well.

And then to top it off the boss asked if i could do some Race bodywork for a customer in Dubai. The bike is KTM's new RC8-R...
WP_000749.jpg

WP_000750.jpg

WP_000752.jpg

WP_000754.jpg


And if I could do a tank restoration on the owner of Scuderia West's wifes Harley Sportster
(before final clearcoat. the tank was taken down to bare metal)
WP_000742.jpg


And finally I got some free time to block, prime, block, seal and get pearl white and clearcoat on the seat for the GL.
WP_000756.jpg

WP_000760.jpg

WP_000761.jpg


tomorrow I'll get her all sanded, the number plates masked off and the orange pearl shot and cleared. Then it's vinyl numbers, pinstriping and final clear.

-Matt
 
Seat is finished! Here it is with the Shelter.

WP_000772.jpg

WP_000771.jpg

WP_000770.jpg

WP_000768.jpg


I'll get the frame all sandblasted this weekend and shoot it satin black early next week.
 
Short update!

Got the last little parts of black paint blasted off the frame today....

WP_000774.jpg


Satin black by the end of the week!!!

-Matt
 
LET THERE BE PAINT!

Hanging in the booth ready for wash primer and sealer....
WP_000776.jpg

WP_000777.jpg

WP_000783.jpg


after basecoat.... that's not black by the way. *wink*
WP_000778.jpg

WP_000779.jpg


SUPRISE!
WP_000782.jpg

WP_000785.jpg

WP_000786.jpg


The orange pearl in the basecoat is the same orange pearl in the bodywork.


And now for the official name of this build.... I hearby name thee... ORANGE CRUSH! Stay Tuned!

-Matt
 
Ahem.......

WP_000954_zpsb9c6cfea.jpg


Got some stuff done today. Hammered out the old neck races, ordered new races and bearings. Pulled the triples off the forks so i can blast and paint those. And fitted the seat and shelter to the frame so you guys could get a sneak peak. The "22" on the seat is my number on my Hockey team, and the Number of my favorite Sharks player, Dan Boyle.
 
Yup that's right... Time for another Daily Update....

Started off Lunch break by guidecoating the sidecover i primed yesterday.
WP_001017_zps1de464b6.jpg


Then using 180grit to block the main flat surface, then 320 grit to reblock the entire sidecover, i was ready to fill those little pinholes.
WP_001019_zps28a91dc7.jpg


All those little black dots are pinholes...
WP_001020_zps76d47f17.jpg


So i broke out the 2 part glazing putty and a razor blade and filled all of em.
WP_001022_zps878cc67e.jpg


Then blocked them down with 180 and 320 grits again. After it was sanded it was time to reguidecoat and wetsand with 600grit wet
WP_001023_zps34351256.jpg


Now that it's in the booth, I sopt sealed all the parts where i sanded through the primer during wetsanding.
WP_001025_zps93e352f3.jpg


2coats of white basecoat applied
WP_001026_zpsf8603288.jpg


2 coats of Pearl midcoat applied
WP_001028_zpsced3d678.jpg


And 2 coats of Clearcoat applied.
WP_001029_zpsf416ce02.jpg


So I'm right on track for having it painted by wednesday so I can give it to my Vinyl guy so he can get the sizing for my company logo right.

Tomorrow i'm getting the swing arm installed, triples pulled apart, and steering head races installed. maybe some other stuff. When the tax return shows up, new rear suspension for me!
 
Small Update.

Got the swingarm installed today. Quick question. The 2 big bolts are completely tight, but the swingarm has some lateral play (left to right) somewhere in the area of a 16th to an 8th of an inch Is that normal?
WP_001032_zps8dcff6c8.jpg


Then pounded the new AllBalls races in...
upper
WP_001033_zps8ca5f1b7.jpg

Lower - I didnt have it completely seated when i took the picture. It's all the way in there now.
WP_001035_zps221ccff3.jpg


psssst... your Balls are showing. My first Aftermarket sticker! that's good for 10HP.
WP_001034_zpscf86382f.jpg


And finished pulling the front end apart.
WP_001036_zpsb57b9e9b.jpg


I'm totally kicking myself in the butt. Last week I pulled the upper triple off, and now I have no clue where it is. I'm gonna tear the side yard apart tomorrow, and then check at work on monday. If its not there I'll be making a cycle salvage trip this next weeked.
WP_001037_zps34c06f63.jpg


That's probably it for this weekend. Need to do some degreasing of the engine comartment in my Porsche and clean my Daily driver. Should have orange on the side cover on Monday as well.

-Matt
 
Back
Top Bottom