Cb450 wiring issues

Ya I'm going to go back to them for now, and if it works then I'll send the pamco back for repair.

I'm new to the vintage motorcycles and have never set points, I have the tool and that link to Cincinnatiracers helped a lot, hopefully I won't screw it up. But I'll reinstall the points tomorrow and see if I get any spark. I'm working on slimming down the wire harness so all I have is the key, headlight, tail/brake light, coils and sparck moto rectifie/ regulator.

What advice do y'all have on slimming it down? I'm having difficulty wiring the rectifier because it is also a regulator. So do I just use the wires that go to the current rectifier and then add in the black wire from the regulator? Or is there more to it?
 
I recommend talking it through with Matt. He should be back from his trip tonight or tomorrow.

The fact that you had a connector melt after installing the reg/rec concerns me.
 
I sent him an email on Thursday, so I'm hoping to hear back tomorrow. For now I'm using my spare harness to install and set points tomorrow to be sure I don't damage anything else. I also have mikes xs coils that I'm going to install once I figure out a custom bracket for it. And with the pamco I would of been golden with a brand new ignition system, lol.
 
Matt will get you squared away.

I've got the mikesxs coils too.

When my pamco was bad I tried all kinds of different tests and it seemed like it should be working but the bike just wouldn't run. I put the points back in and it fired right up. I tried the pamco again making sure it was all wired correctly and it was but still didn't work. Pete sent me a new one. I put it in and the bike fired right up.

I have had a couple problems with the pamco. My sensors aren't exatly 90° apart so the left and right sides are a bit off. Also, I have the plate as far advanced as it will go and my timing is still very slightly retarted. Pete made the sensors on the new plates adjustable, but I have the old plate.
 
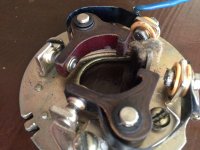
Do these points look good?
 

Attachments

  • image.jpg
    image.jpg
    775.7 KB · Views: 234
  • image.jpg
    image.jpg
    1 MB · Views: 241
  • image.jpg
    image.jpg
    1.1 MB · Views: 228
  • image.jpg
    image.jpg
    1,018 KB · Views: 236
  • image.jpg
    image.jpg
    949 KB · Views: 244
Can you please resend the email? I was having an issue with my web host and lost a few emails from last week.
 
The points "look" fine.

The only way you can tell if they are still "good" is if you can get them timed properly.

Once they wear out, you can no longer time the bike within the gap specs.
 
Thanks, I have them on the bike and I'm able to set and time them. Right cylinder isn't timing but I was able to determine it is a bad coil by switching the wires.

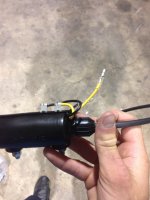
I have mikes xs coils on hand, but I'm confused about the wiring. Could someone please identify which wire is power and which one is to the points?

I want to assume black is the power and yellow is to the points, but I want to make sure first.
 

Attachments

  • image.jpg
    image.jpg
    966.8 KB · Views: 233
See here:
http://www.hondatwins.net/forums/50-electrical-discussion/13750-mikes-xs-coil.html

32118d1390160561-mikes-xs-coil-replacementcoilwiring.jpg
 
Awesome! At least you know your bike runs. Now you can see if the pamco is bad or not.
 
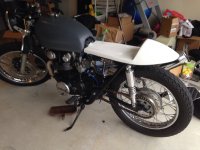
So I scooped this seat up for cheap on ebay, doesn't quite line up to. It's a little wide.

What are y'all's thoughts on narrowing it up? Grind off the lip the hugs the frame and just not have it there? Or cut a line up the middle and narrow it and then re fiber glass the underside?

Don't mind the crack, I am aware it's there
 

Attachments

  • image.jpg
    image.jpg
    720.3 KB · Views: 248
  • image.jpg
    image.jpg
    549 KB · Views: 252
  • image.jpg
    image.jpg
    679.7 KB · Views: 247
  • image.jpg
    image.jpg
    821.1 KB · Views: 240
  • image.jpg
    image.jpg
    1.5 MB · Views: 240
Leetillman351 said:
Or cut a line up the middle and narrow it and then re fiber glass the underside?

That's what I did with mine.

It's the Interceptor seat from Roc City. Designed for a CB750 so it's a lot wider than I needed for my 360.
 

Attachments

  • 216951_10150324397215159_7847900_n.jpg
    216951_10150324397215159_7847900_n.jpg
    57.4 KB · Views: 248
  • 579419_10151001039255159_416431377_n.jpg
    579419_10151001039255159_416431377_n.jpg
    46.4 KB · Views: 260
Looks sharp, I love that tank to.

I also thought about something along these lines (for the seat)
 

Attachments

  • image.jpg
    image.jpg
    13.3 KB · Views: 243
  • image.jpg
    image.jpg
    163.2 KB · Views: 239
Back
Top Bottom