GS550T cafe-inspired build

D-Mac

New Member
OK. For all of you purists, this is NOT a "real" cafe racer project. It was cheap though (at least the original bike anyway), and I've been working on it steadily since November, 2011. My goal is to learn as I go, so this project has already taken my in some fun new directions, including buying a welder and taking a welding course. I've also learned plenty the hard way!

I've been posting updates regularly on a couple of other forums, but thought it was time to bring it over here. If you like overly-detailed explanations and lots of pics you've come to the right place. To catch you up on my progress, I'll post a bunch of earlier updates. The last couple are actually from today. I'll keep it updated regularly from now on.

BACKGROUND:
I've lusted for a cafe bike for a while, but this is the first time I've owned an older bike that I felt OK about cutting up (my last project was a Honda CL-350 scrambler that was just too pretty to alter). As you will read, I got my little Suzuki for next to nothing, and it's in rough shape. I'm already in a LOT deeper for parts than I'd planned, so now my goal is to do things in a way that I'll be proud of in the end (or as close to it as I can get while doing as much as possible myself). I'm building this bike for me.

So sit back, pour yourself a beer and come along for the ride.

NOVEMBER 19, 2011

I bought this "Redneck Rocket" yesterday for a cool c-note. Rumor has it (from the guy I bought it from, who I actually trust) that it was running last year. Carbs were cleaned at that point. Original owner was in Indiana and last owner was up north somewhere.

Picking her up. That tank paint job has gotta go. I'm not exactly a fan of WWII German Eagles as tank art.
fa469299.jpg


Gauges. Sooooo close to 20,000 miles. Will she ever get there? Maybe, but not soon! At the top it actually has a light for each gear (kinda cool, but I'll probably get rid of it).
c9c25352.jpg


Carbs. Don't look too bad. With those pods, I'd better check the jetting at some point. So much to do.....
68ff277e.jpg


No seat with the bike. I originally thought it was the "L" version of the GS550 with the high stepped seat and 80s cruiser-ish stance (think Purple Rain). Thankfully, it's the "T" version, which has much nicer lines IMO. I'm going to completely remove the fender and replace it with a cafe-style seat.
5ad6d6fb.jpg


Hmmmm...interesting wiring "modification" No turn signals anywhere, no high beam, no running light. If you look closely you'll see that about HALF of all of the fasteners on the bike are missing.
25b335ff.jpg


Headers don't look to bad. Lots of sludge on the engine. Tach cable looks stripped out.
cefa6fec.jpg


Let's look underneath the tank.......easy enough since there are no bolts, rubber pieces, or anything else holding it on. Looks ok here.
d40f3b53.jpg


Brakes kinda seem to work with some pumping. A quick check shows that the brake fluid has the consistency of maple syrup (here is the front reservoir). Yikes! Rear cylinder is dry and the caliper clearly had a leak of some sort.
1e1d68b3.jpg


Threw in an old battery I had and everything lights up, but the bike won't turn over. Jumping the relay/solenoid yields an exciting light show and causes the starter to fire. Good. I didn't have fuel to actually start the engine, but I'm hopeful it will fire up. I'm thinking my problem is the handlebar switch or relay itself. Turns out the kill switch/starter were "modified" by a previous owner using aluminum from soda cans! Nice. Jumping it didn't seem to do anything, so now I'm looking at the relay.
e79eef9c.jpg


I really need a new key before this one snaps. This one isn't original and the lock number wasn't on the fuel tank lock, ignition lock, or helmet lock either.
6552779d.jpg


Over the winter I will tear some things off. We'll see where it goes from there. I'd like to convert her into a cafe racer, assuming the engine is ok. More soon.
 
Here's an update from the 1st week.....at this point I'd been messing around with electrical issues in an attempt to get the bike running. Although it did run (below), I've since torn the top-end apart anyway (more on that later).

-------

It turned over by hand ok, so it didn't seem like there was a ring stuck in there, and the fact that all cylinders were similar was actually a promising sign to me. The carbs look a lot better than the rest of the bike (previous owner cleaned them last year and drained them properly), so I popped on my aux fuel tank and plumbed it in......what the hell.

I was in a rush, but couldn't help myself. I had only 2 minutes until I had to run to a meeting at work, but I HAD to try and fire her up. Nothing. Cranked and cranked and cranked (with brief breaks) and nothing. Damn. Battery was running low at this point.

Just as I turned off the garage light it occurred to me that I had forgotten the most OBVIOUS thing. CHOKE Duh. :lol:

Pulled the choke, pushed the starter, and after about 5 slow cranks SHE FIRED RIGHT UP! All cylinders (I think). A little popping, but nothing serious. WOOT! SHE LIVES!!!!!!!!! Made my whole day (with this kind of project you gotta savour the small victories).

Now to bankrupt myself loving her to death. That Ducati I wanted is rapidly disappearing into the horizon with every minute I spend on this rat project. Next steps are to try and repair the charging system problem (after confirming it exists) and then I'll start to really strip her down. I bought a bench buffer last week, so it's gonna be a long winter of sanding and polishing I think.
 
Update from later in November 2011.....

--------

Well, that was nice while it lasted.

The bike still runs - it's just that the long agony of what it's gonna take to make her run right is now starting to set in.

Compression - still sucks. I'm really thinking it's my compression gauge at the point because the bike will fire up instantly in the cold (I can't even hear the starter - it's like it senses that I want it to start and it just runs). If I can find a better one soon I'll try it. If not, I'll do a leak-down test at some later point after the engine is removed and go from there.

I've never witnessed such poor running in my life. The backfiring through the pod filters is pretty entertaining. Jetting is likely waaaaay off, carbs are probably dirty, and based on how much gas it leaking I'd say that at least one float bowl is stuck. Hopefully the igniter is ok, but the coils look to be about 1000 years old and the spark is weak. So lots of good reasons for its problems.

As the p/o told me, the bike is not charging either. I've spent several hours chasing electrical deamons that might be causing the issue. What's frustrating is that the stator and regulator/rectifier test good in every way, so I'm now looking at possible issues with the harness itself (and I'm finding PLENTY, but none is "the" culprit yet). In their wisdom, Suzuki did all sorts of interesting things with the wiring. For one it's super small and has the absolute cheapest bullet-style connectors I've ever seen. They also got creative and decided that one leg of the stator should run through the HEADLIGHT so that it would shut down unless the headlight was on (I chased the damn wire all the way up and nearly all the way back before pulling out the correct wiring diagram and finding that out). I'm now going to bypass pretty much every unnecessary circuit and see if that helps. If not, I'll probably end up replacing the stator and r/r (which are both widely known to be absolute crap on these bikes even if they test well). The fact that earlier owners patched wiring together with PAPER CLIPS (yup!), household wiring connectors, and by just twisting ground wires together in various places isn't helping :crazy: I've never seen a bike with so many frame grounds on it either.

I'm going to end up rebuilding the entire wiring harness by the time I'm done. That'll probably be a good project for next summer (when I take a motorcycle electrical class).

I'm anxious to start tearing things off, but I'm trying to be patient enough to identify some of the major issues first.
 
DECEMBER 4, 2011

Update time!

Since the petcock is completely blocked (even on prime I can’t get any fuel to come out, and the PO disconnected all the vacuum lines long ago) I rigged up an old fuel cell to the bike to try and start it.

Below is a video of the bike running (EDIT: Never mind it won't work.....). There is backfiring through the carbs and out the pod filters. Nice. With holes in the exhaust and loose aftermarket filters it’s obviously very lean. Carbs are probably pretty clogged as well and compression readings are still in the basement too. No matter – I will eventually run a leak-down test and likely rebuild the top end anyway. Carbs will get a full cleaning, rebuild, and complete rejetting on a dyno (I have some access to one and I’ll be doing a complete tune once it’s back in running order…..which will be a loooong time).

Now that I’ve determined that the R/R and possibly the stator are gone, it’s time to start pulling stuff off the bike. The next task was removing the exhaust pipes. Recall those rusted bolts on the headers? I soaked them in PB blaster+WD-40 for three days with cycles of heating and cooling. All were nice and loose when I started to remove them. Result? Less than ideal….
cb5323e1.jpg


Only THREE exhaust bolts came out cleanly. It turns out that another three were ALREADY broken off in the collar (!) and held on by some sort of glue/JBWeld/wire!? Lovely. I guess the previous owner decided that it would be ok to just glue the old bolt heads back on and forget about it!? The two that I broke snapped off with very little torque. Crap.
444f1fb2.jpg


I broke out into a bit of a cold sweat when the first one snapped off, but all but one stud is protruding a little, so there’s still some hope. I will continue to PBBlast them. Worse-case scenario I’ll deal with it when I remove the cylinder (a little EDM can always save the day if I decide not to drill it out).

Behold the OEM exhaust. Really heavy! It will likely be replaced with a 4-1.
e164457c.jpg


Up next was removing the rear wheel. It went well, but I rushed a bit and everything got hung up on the rear axle. A little maneuvering and it was out (needs grease, and I probably should check the run-out too).
6d4787c7.jpg


I removed the carbs next. Boots were stiff, but it’s very easy on this bike compared with some of the twins I’ve worked on. Note how they’re “bleeding” fuel on my work bench……right near a charging. I really gotta get a fire extinguisher for the garage.
722a1303.jpg


Then I removed the intake rubber pieces…..
897d57ba.jpg


….and I saw LOTS of this inside the engine!
bffee0a1.jpg


It looks like the PO was in love with gasket sealer. It flaked off in huge pieces in my hands. I wonder how much of this stuff the engine has digested?

More in the next post….
 
More from December 4, 2011

Next up I removed the counter-sprocket cover……the screws were already pre-stripped. Here it is removed.
357f7761.jpg

My little impact driver was having no effect, so I ran off to Sears and bought a much larger one. Heh heh. It made short work of three screws. The other three were too far gone, so I dremeled slots into two of them and got them off! This is my first time struggling this much with fasteners (small impact driver and heat has always worked for me before). I also have a set of Japanese screwdrivers, which usually helps, but these were just too far gone.
e0d15c31.jpg

The big problem was the one remaining screw at the back of the sprocket cover. It’s recessed, so all attempts to dremel a slot in it resulted in me carving a slot into the cover! Doh! I ended up drilling it off, and the release in clamping force allowed me to spin the shank off with my fingers. Unfortunately, since I couldn’t get the drill centered, I accidentally machined a little out of the cover. Argh.
cad69b23.jpg

It’s a minimally important screw since it’s not fastening anything that holds in oil. I’ll probably stick an o-ring in there and see if that works. Replacement on Ebay is only $14 if that fails. It’s a bummer that I got so close to getting it off flawlessly. I’ll need to be more careful with the cases.
Check out what was behind the sprocket cover. This is AFTER I removed about 2lbs of soil, pine needles, and pine cones from back there!
1d4f4733.jpg

Upon removing the sprocket cover, I discovered that the counter-sprocket was COMPLETELY LOOSE (not even hand tight). The only thing holding it on was a single bend in the locking piece! The sprocket is badly worn and looks to be an original (it has the right number of teeth anyway and it looks like a sprocket with 20,000 miles on it).

Then it was off to the store for a 21mm socket to remove the oil drain plug. There was definitely some gas mixed in with the oil - likely from the stuck float bowls combined with the lack of a vacuum operated petcock shut-off. I was careful to check the oil level before I started the bike (made sure it wasn’t too full or thin), but I’m glad I didn’t run it too long like this! (The smaller dish to the right contains old brake fluid).
6784a1e6.jpg

My last project for the weekend was to remove and disassemble the calipers – also a first for me.
I got them off the bike easily enough (although I forgot to loosen the rear ones on the bike so I marred the cover getting them apart in my undersized bench vice. Here’s the rear, which looks worse than the front.
b8f36fed.jpg

Would you trust your life to this?
12a4ebf8.jpg

Inside, the seals and boots looked worn, but intact. The pads will be replaced along with all of the seals, etc. (no sense taking a chance on brakes!) Getting the caliper pistons out was a BEAR – especially one of the rear ones, which was rusted in place. After applying high pressure air, I got the worst one to turn enough to grab it and pull it out. I marred it in the process, but it is definitely getting replaced anyway.
Ugh.
5d3380f3.jpg

I’m now boxing up everything I’ve removed so far. I’m off to buy a small parts washer (and fire extinguisher) tomorrow and then I’ll be looking over the calipers, removing and looking at the master cylinders, and pulling off more bits in preparation for removing the engine.
I will have lots of time to work on the bike over the next couple of weeks.

I’m a little ahead of myself, but any suggestions for a color scheme? I really like red/black/silver, but I’m clueless about what colors to put where. I’ve looked over all sorts of café bike pics but I have trouble making up my mind, so I’m very open to options. Everything is getting repainted except the engine if I can help it (although I might paint the cylinders to set them off from the bike a little).
 
DECEMBER 7, 2011

Big day today. Went out to the garage, pulled out some electrical connectors, undid some bolts, and before I knew it there was something not quite right……

e67fd2f4.jpg


Ah there’s the missing “piece!” All set up for a warm winter inside.
b19885b0.jpg


Now that the engine is out (HEAVY for a little 550!) I can work on pretty much anything. I’m itching to pull apart the forks and start sanding/polishing them and the wheels. Brake calipers and master cylinders still need to be rebuilt. Hell, EVERYTHING needs to be rebuilt!

So much to do…...I feel like I’m a loooong way from seeing this bike on the road, so I’m going to split my time between further disassembly and making some improvements. It’s gotta go farther backwards before it can go forwards.
 
DECEMBER 11, 2011

Here’s the latest on the build:

After I removed the engine, I thought I’d spend the rest of the week on the brakes, but I lost my motivation when I saw all of the exposed parts after the engine was out. I decided to remove the front wheel and forks, and take apart one of the forks so that I could polish it (one was leaking and the other didn’t seem to have much fluid in it).

Forks. Tough to tell here, but the fork lowers are in rough shape.
Bike307.jpg


Fork cap.
Bike310.jpg

To get the forks apart, you need to push down on the top cap to remove the snap ring. I’ve never dealt with forks like this before, but it wasn’t hard once I found a volunteer to help. Once one fork was apart I hit the lower with stripper and then sanded it with 220 to smooth the more severe pitting. This is gonna take a while! (and no pics until I’m closer to finishing). I went out and bought 220, 320, 500, 800, 1000, 1500 wet sandpaper, and lots of polishing supplies (buffer wheels and wire wheels for my new bench buffer, and some Dremel attachments). I’m not very patient, so this will be a good learning experience for me. I left the other fork intact so I have a reference in case I forget how it goes back together. :)

I also spent some time this week tearing down the rest of the frame. I labeled all of the wiring as I went along, which I hope will make reassembly easier. Compared with my last bike project, I’m starting to understand what all of the wires are for. Some pics……
Bike321.jpg

Bike331.jpg

Bike330.jpg


Getting some of the bolts loose was a little tough, but the impact driver and punch set I picked up last week saved my bacon on several occasions. Finally, I was down to removing the last few bits from the frame. Might as well strip everything off I guess.

Swingarm. That chain has gotta go!
IMG_1018.jpg


Frame with steering head. Sorry for the crappy pic.
Bike385.jpg


Steering head removed! Only one set of races remain in the frame.
IMG_1017.jpg


I then packed up the various smaller bits and moved them to my shop/lab.
IMG_1019.jpg


Next up will be some cleaning/stripping/sanding/polishing. I’m also thinking I’ll start ordering a few replacement parts this week (new bolts/seals etc.) We’ll see how it goes.

At some point I’m going to start sorting out my design plans. I’m going to café this bike, but I haven’t decided exactly how much. Right now I’m leaning toward “all out” which would include cleaning out the area where the battery/airbox sits and relocating all of that stuff to the rear. I’ve never done anything like this before, but I’m taking a welding class in January, so that ought to help. I’d like to powdercoat the frame too, but I’ll need to know exactly how everything will fit before I can send it out. I might go ahead and start looking over the tank and making a seat soon, and then design everything else around them. Make sense?
 
DECEMBER 12, 2011 (part 1)

I had a few thoughts late last night.

Rather than go with clubman-style bars, I'm thinking of going all the way and doing clip-ons. That way I could grind down bar holders on the top of the triple tree and maybe mount a gauge a little more flush with the top. Make sense? I might be able to fabricate a new triple tree at some point as well (I'm taking a machine shop class next summer or it should be easy enough for someone with a C&C machine to do).

I'm still not sure about the gauges either. I could rebuild mine and use them, although I want to simplify the front end a bit though so I will almost certainly dump the huge cluster between the speedo and tach, and maybe replace everything with a combined gauge (Acewell makes a cool one for $$$). That means moving the neutral and oil pressure indicator lights too. The bike actually has a gear indicator (not bad for 1981), which would be kind of cool to keep, but that's a lot of extra wires. Maybe I'll make a bracket of some sort with LEDs showing the gear indicator? Maybe just keep an "overdrive" light for 6th gear?

So many decisions.

I think I've decided on a color scheme. I'm going with silver + black accents.

--------
DECEMBER 12, 2011 (part 2)

I started the morning off looking over the front and rear brake calipers. Wow….they’re BAD! I ordered OEM replacements for all of the various seals and fasteners on the front, along with some aftermarket pads. For the rear calipers I ordered pretty much everything except the caliper body (which is rough enough too but can be refinished). Not cheap, but I don’t take chances with brakes. I suppose I could have just gone with another set of calipers, but I would like to be somewhat true to the vintage of the bike. I also broke down and ordered the Haynes manual to go along with the OEM and Clymer ones (might as well have them all – it’ll be worth it when I start the engine work).

I am planning to repaint the calipers soon. I didn’t take apart the master cylinders, but I think they’re in better shape.

Next I looked at the ignition switch. Unfortunately, none of the eBay sellers has this number available (my key is mangled). The switch itself is also bent at the top (!) and badly dented/faded, so I might just get a replacement anyway. We’ll see.

Putting that aside, I picked up the fork I’ve been working on. I measured the springs from the disassembled fork and they checked out fine. I then continued sanding the lower fork leg I removed last week. Here it is after a 220 grit sanding.
74f241da.jpg


I went up and did a little sanding with 500, 800, and 1000. I should likely have spent a little more time on 220-1000 (I spent forever with the 220 getting the pitting smooth), but I was trying to avoid having my hands bleed too much (!)Here is a leg in comparison to the one that hasn’t been touched. Ready or not this is ready for polishing!
81930589.jpg

4d8bfa33.jpg


I then set up my new bench polisher. Within 10 minutes the leg was looking like this (a little brown followed by white compound on a softer wheel).
8bcb408e.jpg


I didn’t really need this much shine, but it just came out that way and I kind of like it. It still needs a hand polish to be complete (and I polished it again after this pic was taken). It’s not perfect (if you look closely you can see varying degrees of cross marking), but it’s more than good enough for me. It’ll be faded soon enough anyway, but it looks 1000x better than when I started. FINALLY, some PROGRESS.

Should I clearcoat the leg or just leave it and polish it regularly?

I also dropped by the hardware store and picked up an angle grinder. I’m gonna need it to grind down the top triple tree and to cut off the rear of the frame.

I spent some time taking off the rotors from the wheels and I brought the wheels to my lab. I cleaned a little of the grime off the engine as well.

Tomorrow I won’t have any time to work on the bike, but I’m planning to do more stripping and sanding starting on Wednesday.
 
DECEMBER 15, 2011

Update:

Tuesday afternoon I dropped by a large industrial shop and picked up some grinding wheels to grind aluminum. I’m going to use them to carve off the handlebar mounts from the top triple tree bracket. It’s full café for this bike. I mention this event only because while at the shop picking them up the President of the company backed up and scratched/dented the side of my wife’s new BMW. I spent the rest of the afternoon driving to a distant body shop for an estimate. $1300 to repair, and this is only the second time I’ve driven her car (I normally drive a van on the verge of becoming a true “beater”).
Things got better Tuesday night when I took apart the second fork. It put up quite a fight, but it’s done. Here it is mostly disassembled. Looks rougher than the first one on the inside. The OEM manual calls for ENGINE OIL mixed with TRANSMISSION OIL. Since we now have this stuff called FORK OIL, I will be experimenting with that instead of the voodoo recipe when the forks go back together.

Fork from hell.
51b43d90.jpg

I woke up bright an early yesterday morning, sent the kids off to school, and headed directly for the “lab.” I must have been feeling sadistic because this morning I decided to try and get the crankcase and alternator covers off before I even had my morning coffee. Over 20 ancient Phillips screws (mostly #3 size) stared back at me....laughing. The left side ones looked pretty good (intact), but the right ones were deliciously pre-stripped.

I started with the left side to warm up (alternator cover). It wasn't so bad. My impact driver made short work of ALL of the screws. Once inside, the stator looked like crap - no wonder the bike won't charge properly. A lot of little washers came flying out of the starter gears, but the parts diagram will help me here.

-------
WARNING: A pointless and overly-detailed account follows. If you don’t enjoy reading about endless frustration and silly drama, please close your browser NOW.

So next I tackled the right (crankcase) cover. ELEVEN rounded off screws. Ugh.

Screw #1 – no go with the impact driver; no go with a punch on an angle, no go with vise grips. OK. Time for the Dremel, which is at home, so on to #2 for now….

Screws #2 through #6- WOOT! Some tense moments, but these all broke loose.

Screws #7 –Nope. Nadda. Frozen hell.

Screws #8 & 9 – Easy as pie with the driver.

Screws #10 and #11 – It was CRITICAL that these break loose because they are partially buried by the engine. One false move here and I might have to use the drill (and the last time I did that I machined the cover badly). Using ALL of my skills, I carefully set the driver and struck it soundly. Nothing. Again. Nothing. Again 25 more times. Nothing. Then #10 stripped out. The #11. Damn. Damn. Damn. 10 more minutes of various tools. Nothing.

So I went back home to get the Dremel. On the way outside I dropped it. Oops! I broke my last cutting wheel. ARGH. So it was off to Tractor Supply. What?! No cutting wheels? Off the local hardware store….none either?! Fine, off to the nearest “real” town 25min away.
About $100+ in tools later (got a 6” bench new vise on sale + screwdriver set + locking pliers set), I bought my $5 pack of cutting wheels and headed home. I really gotta stay away from the tool section. It’s killing my budget for this project.

Wait! That’s not a dremel wheel…….
9008389d.jpg


Back in the shop, I carefully cut slots in Screws #1 and 7. No problems. Both broke loose with the slot impact attachment.
Then it was on to Screw #10. I had to cut a little toward the edge of the screw because of a lack of room, but after about 10 attempts at slicing into it, I got just enough to get a good bite and it came out. YES!

Finally, it was Screw #11. It was almost totally buried (pic below). By flipping the engine on its side and sliding the wheel in, I could just touch the screw, but the wheel was skimming the side of the engine. I wrapped the engine in duct tape as a “warning” to myself (if the tape started cutting, I knew I was getting too close). I had to lean over the table to reach the screw as I carved, and carved, and carved. It was pretty much hopeless. I was starting to score the engine, but I gave it one last try and barely managed to get a tenuous bite with the driver. I had one more shot to break it loose before I had to get out the drill. I reached back……took a deep breath, and smacked the hammer square onto the driver……and.......it spun loose. Yes!

Screw from HELL.
10729625.jpg

I finished up the morning removing the oil sight glass. It was badly clouded and the seal on the outside looked terrible. The inside seal had been “repaired” with some sort of pink-colored substance that looked like silly string. I think it was some kind of GLUE ?! Anyway, it was flaking off and I was planning to blast the case with stripper anyway, so it had to go. I punched it out and it will be replaced.

---------
After lunch I spent a little time stripping and sanding the side covers and fork leg #2. This is gonna take a while! I also pulled the timing cover and discovered that it was so badly ground down with road rash that it’s not worth salvaging. In an ironic twist, a previous owner had replaced the “DOHC” Suzuki cover insert with a black piece of plastic that had the Harley Davidson emblem on the back side. Classy. I also pulled out the stator.

Broken stator. It has since been removed from the case and tossed unceremoniously on the floor.
8a9626e0.jpg


A shot before stripping.
59c03b3e.jpg


A pic of the stripping process. Yummy.
b565819e.jpg


The fumes from the stripper spray nearly put me into some kind of 80s flashback (one side effect of the spray is that it impairs your ability to absorb oxygen into your blood!), so I quit early for the day and arrived home to find that my Haynes service manual had arrived. Excellent.

--------
This morning I did some mock ups of various seat types. Not enough pics, but here’s one that was rejected (seat too short - you can't see the rear "hump" here because I didn't bother to make one yet). I re-installed the rear fender to give me a sense of where the rear wheel goes. I will NOT be using the rear fender.
60db0238.jpg


Tomorrow I will finish the seat mock ups and pick a design. I plan to spend the rest of the day sanding parts.
 
DECEMBER 16, 2011

Ended up without much time to work on the “rocket” today (damn I hate that tank – can’t wait to strip it).

Did some parts sanding for an hour. Very slow progress. I’ll be out of 220 grit long before I’m done with it.
I did a better mock-up of a café seat/cowl. The rear of the frame sticks up about 4-5 inches, so the template is NOT lying properly flat yet. Obviously I’ll be cutting off the rear part of the frame that sticks up past behind the shocks, but that’s for a bit later (planning on doing it in January). Overall, the frame is really well suited to a café project.
Imagine this seat style, but sitting about 4 inches lower than shown here.

ae67ab80.jpg


e41536b8.jpg


9900c6a8.jpg


The whole thing is close to 29” long and the seat part is about 17” long and ~9-10” wide, so I’ll be able to move around a little. The hump is about 6 ½” tall at the highest point, which should be enough to conceal a battery (I’m thinking AGM battery, which I could mount sideways if needed). Hiding the other electrical components will be a little harder, and I have no ideas yet about how to do it exactly, but I’ll sort something out. There’s no avoiding it – I’ll be diving into the world of fabrication soon enough.

I hope to spend a little more time stripping/sanding parts tomorrow. I have a looooong list of stuff I need to order, but it will likely have to wait until the new year. I’ve started too many different parts already). At some point soon I’ll have to bite the bullet and start order some more expensive parts (many of which cost more than I paid for the bike!) For now, I’ll stick to making a few things look pretty.
 
DECEMBER 17, 2011

Ended up doing a lot of shopping today. :(

I did manage to spend a few hours sanding and polishing though. I’m happy with how the second fork lower turned out, but the cases could be a LOT better. They still have some character marks on smudges on them (although I haven’t polished them beyond the wheel, so some of this will come out). Still, I kind of like the “dull” aluminum look on them since it will blend better with the engine, which will be painted grey. I still have the generator cover and sprocket outer cover left to polish, but both of mine are so badly scratched/cracked that they are probably too far gone to use. I’ll probably buy replacements on eBay or at the local salvage yard in a few weeks.

Before:
59c03b3e.jpg


After (no flash – a roll of tape is sitting on the top of the tall case where a new “Suzuki” emblem or something similar will go):
926677d1.jpg


Tomorrow I start on the wheels. Keeping true to the original design, I’m planning to sand/polish the outer rims and “spokes” and then mask them and re-paint the inner parts with VHT wheel paint (black). If it doesn’t look good or last well I can always have them powdercoated later. If I get a chance I will also paint the caliper bodies.

After looking over some frames, I’ve decided that I will be have the frame and swingarm powdercoated after all. It just looks sooooo good. If anyone has suggestions for good powdercoaters in southern Michigan, let me know.
 
DECEMBER 20, 2011

My fingers got a lot of exercise over the past two days.

Yesterday afternoon I ran some errands, which included picking up more wet/dry sandpaper and some paint. I ended up buying VHT caliper paint (dull black) for the calipers and painted parts of the wheels because everyone sells it and it came recommended.

I then scrubbed the wheels with a scotchbrite pad and various brass/steel brushes. They were nasty, but having a giant sink at work made things easier. 30 years of grime can take its toll. Looking at the codes on the tires, one appears to have been made in 1991 and the other is older (old coding on it indicates that it was made in the 7th year of a decade – likely 1987, or maybe even [gasp] in 1977 since the sizing is non-metric on that one. Both are cracked badly and will be replaced before the bike hits the road.

Wheels started like this…..
3dc29f0d.jpg


The wheel bearings still moved ok, but I could see some rust on them. What the hell, I might as well replace them now. They are originals with 20K and 30 years on them – mostly sitting. I drove them out and only one looked really bad. What a mess.
This morning I removed the third rear bearing (the large one in the outer hub). The dust seal was nearly gone on it, but the bearing drove out easily.

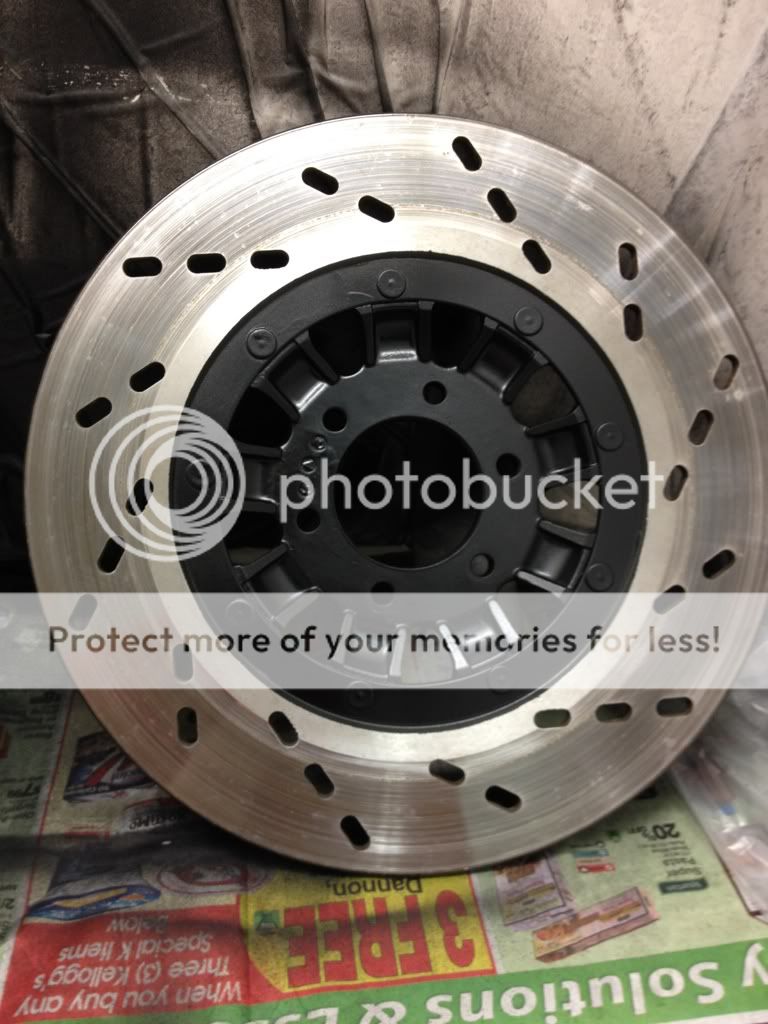
Then I did a little sanding. I started by removing the rear rotor and sprocket from the hubs and cleaned them up. Then I carefully cleaned and sanded the paint on the rotors themselves.

Cleaned rotors ready for new paint.
af099e3a.jpg


After TWO MORE hours of sanding I managed to get the rim of the front wheel partially done with 220 grit. This is taking FOREVER. I figure I’ll need a full day of sanding just to get the wheel hubs and spokes clean. Then I’ll mask them off and re-paint the inner hubs and replace the bearings. My fingers are badly cut/bruised/scraped from all the sanding and busting knuckles on rusty fasteners. The grease embedded in my hands looks permanent.

A wheel after a little sanding. I still have to do the spokes, polish the bare aluminum and re-paint the hub.
ce4ddba1.jpg

-----------------------

I spent the rest of the day exercising my fingers by going on a major buying spree! My dad sent me a little cash for my project, so I decided to put it to good use.

I started by ordering many, many OEM seals, clips, nuts, washers, bolts, side cover gaskets, new sight glass, and replacement studs/nuts for the oil filter cover. Basically enough replacement fasteners and replacements for wearable parts to rebuild the forks and wheels (it’s CRAZY how quickly this stuff adds up!) I paid a little more and ordered everything from Bike Bandit because there’s still no sign of any of the parts of the brake calipers I ordered about two weeks ago from another supplier. From the looks of it I’m doing a lot of catch-up on decades of neglected maintenance. Good learning experience for me though.

In a departure from sticking with Suzuki parts, I ordered new aftermarket shocks (low end knock-offs) to replace the rusted-out ones that came with my bike. I got them for about $100 via eBay and from what I hear they’re at least as good as stockers and they look 100x better. I’m pretty excited about it. I wanted them now so that I can see how they affect the frame geometry.

I also ordered a stainless steel bolt kit and replacement wheel bearings/seals from Z1. These guys are super-reliable and ship quick.

Then I bit the bullet and ordered a new aftermarket stator from Electrosport. Since I have the alternator cover completely apart, I figured I might as well do this now. I’ll get their regulator/rectifier once I get closer to doing the wiring.

After that, I realized that I had won a couple of used parts on eBay (e.g., a bracket, a Suzuki emblem, a NOS ignition cover to replace mine, which is absolutely destroyed). I broke down and bought a few other parts I’ve been watching as well.

I finished my “shopping spree” by buying a set of clip-ons and a composite seat from Dime City Cycles. They have a great looking seat and a 10% off sale going on this week, which put me over the edge. I’ve spent many hours staring at these things. We’ll see how they work out. My “motorcycle account” is officially drained for a while, but all of this stuff should give me plenty to work on over the next month.

My valve cover gasket and breather gasket from “real gaskets” arrived today. Excellent stuff.

I’m taking a little holiday break, but I’ll be back sometime next week with another update. Happy holidays!
 
DECEMBER 29, 2011

I hope everyone is having a great holiday! I'm back from vacation and starting in on the bike again. Since I don’t have too many bike pics from today (at least none showing much progress), here’s what I’ve been up to lately.

Went and saw this…..
818c4a79.jpg

Hung around here (Santa Monica pier)
4e10c091.jpg

And I lost a little money at this place, although my wife did much better and we ended UP $4.50 cents on the casino. I’ve already used the money to buy more sandpaper!
3d28eca1.jpg

While I was gone, the UPS guy got cozy with my housesitter, and a nice pile of boxes was waiting for me when I got home.

Parts, parts, and more parts. I can already tell that I’m missing a few critical things for the rear caliper. Argh. At least I have enough to rebuild the forks now, and hopefully the front caliper. My clip-ons came in too!
936b844f.jpg

Stators – old and new
56ddd783.jpg

Gen cover – old one was ground down to the point where I decided to replace it. The new one will be stripped and polished to match the crankcase covers.
0db95f41.jpg

Sightglasses – new and old.
2391b14e.jpg

New cheapo shocks. The extra bushings that came with them are a good replacement for the stock ones. Unfortunately, they don’t stay inside the larger rubber bushings on the shocks very well. I hope this isn’t a problem. I might wrap the metal bushings in a piece of inner tube to make them a snugger fit. They are a tad longer than the stock ones.
0fdd55b4.jpg

I did do some work on the bike today, but nearly all of my time was spent sanding the front wheel with 220 paper (6 HOURS today alone!) I’m about 75% done with the 220. The rest should go much faster. The tough part is sanding down all of the little ridges cast on the spokes. I hope to get the sanding/polishing/masking/painting done over the next week, but my hands are KILLING ME. Although they had 10 days to heal on vacation, it didn’t take long for new blisters and open wounds to show up. I know this is gross, but it seems like the outer layer of skin on my fingers is actually SANDED OFF. Ouch. Feels like a burn. I gotta find a new way to sand this stuff or I’ll be typing with my face by Monday!
402d0bd5.jpg
 
DECEMBER 31, 2011

Happy New Year!

I got a little work done today. Yup. More sanding. Got the rear wheel sanded with 220 on one side (yesterday I finished the front wheel with the initial sanding). Not terribly exciting, but it’s coming along. Wearing nitrile gloves with mechanic’s gloves over top is helping my hands. Too bad I trashed my fingers before I figured that out. It’s been slower sanding without the use of my thumbs (!), but I’m on track to finish polishing them next week so I can finally start painting.

I also checked over some of the parts I received last week. I’m now ready to reassemble the forks. I will do this next week when I have access to a fork vise.

I do have something that might be worthy of a pic or two. I finally got around to securing my new vise to the workbench and decided to have a go at modifying the top triple tree. Since I’m now going with clip-ons, I don’t need the original handlebar mounts. I’d like to fabricate a new triple tree top, but for now I’ll settle for modifying the old one.

I broke out the hacksaw and cut the tops off most of the way down (there’s a faint casting line on them that makes a nice cutting point). Very easy and quick.

Cutting.
5003c4e4.jpg

Here’s what they used to look like (pic actually taken after I cut the tops off, so I placed them back on to give you an idea). Excuse the protective duct tape.
cb9e76e8.jpg

One side removed.
a86d13cd.jpg

Both sides removed.
39483d68.jpg

Angle from the front.
2f357aec.jpg

Next I will use my angle grinder (with a proper wheel for aluminum) to smooth them out a little. I’m not sure exactly how much I can remove safely, so I’ll probably just round off the sides. Then I’m planning to strip off the paint and shine them up.
 
JANUARY 2, 2012

Daily update.

I went in for a few hours late last night and did some wheel sanding. This afternoon I finished the initial sanding (220 grit) on both wheels, and quickly sanded the front wheel with 400, 500, and 1000 grit. Then I took it home to buff it with an assortment of drill attachments.

Front wheel ready for buffing.
bfa69a7c.jpg


One side polished. Not perfect by any means, but it shines!
60f5d975.jpg


Other side polished.
80e7b958.jpg


I will wash and dry it thoroughly, mask off the polished edges and re-paint the inside this week. FINALLY! I’ll likely finish sanding and polishing the rear wheel first though so I can paint them both at the same time.

I got some better looking emblems off e-Bay and attached them to the covers. Here they are…..
a092e6cc.jpg

5cb5d432.jpg


New sight glass installed. I used a little Yamabond and pushed it in level from the outside. Hope it holds!
cf3353e1.jpg
 
JANUARY 4, 2012

As of 2am, both wheels were polished and fully cleaned.

Rear wheel polished. Didn’t come out quite as nice as the front, but it’s a major improvement. The tire is actually a little too fat for the rim. Since this isn’t a wannabe chopper anymore it’ll be replaced with a proper fitting tire.
80e7b958.jpg


Ready for paint, right?

Ummmm no. I spent most of the day just making off the wheel. I went through a lot of tape and a bunch of sharp blades. I’m planning to go to the lab tonight and do the painting. I’ll be using caliper paint (dull black) for the inside. No clear coat will be used (I must like polishing too much).

Front wheel masked.
443ebc97.jpg


Rear wheel masked.
628cd251.jpg


I apologize if this thread is grinding along endlessly, but if so it’s an accurate reflection of how I’m feeling about these wheels. I can’t wait to get them done and get on to something else. I did take a break to do some grinding on the top triple clamp yesterday. I’m not too thrilled with how it came out, but it’ll work. The paint on it is very thick (not coming off yet after two applications of stripper). I haven’t decided if I’ll ultimately repaint it or polish it up.

The next pics will (hopefully) be of painted wheels!
 
JANUARY 5, 2012

Ok folks, the wheels are FINALLY painted!

I used my fume hood in the lab as a paint booth. It worked great and eliminated the fumes.
63451cca.jpg


Front wheel……ready……aim…….
35bcbc2f.jpg


……fire!
617ea842.jpg


Several coats later, here it is! It looks better in person than the pic would suggest (even better without the camera flash too). I’m happy. As it dried it started to look more even as well.
5b02cd1f.jpg


Considering I’m a painting rookie, it went pretty easy. I took my time and there were no runs in the paint. I put on four coats – two light and two medium. If I add clear coat, it’ll be after it dries completely and I have a chance to shine up the aluminum first (it’s pretty dull and still needs a hand polish). Then I’ll replace the wheel bearings, reinstall the rotors/sprocket/etc. and change the tires.

Rear wheel being painted.
b4db6bb1.jpg


Rear wheel is done! It came out better than the front.
2ba0387a.jpg


I left the inner hub grey because the original paint was in great shape and it’s hidden by the cush drive anyway.
cb1d677c.jpg


I stored them somewhere nice and safe….under my desk at work. :D
779c5165.jpg


Tomorrow I’ll likely paint the rotors and shine up a few other parts. I’m thinking I'll rebuild the forks on Friday.
 
JANAURY 7, 2012

Daily update:

I got a few nagging things done today.

First, I put in a big parts order. This included a few brake caliper parts I forgot to order last time, fasteners for the rear brake arm, a bunch of exterior engine fasteners/caps (might as well start getting this stuff now), swingarm bearings/seals etc, steering head bearings and other related things, and sprockets+nuts+washers. Easily my biggest parts order to date. A lot of this won’t get touched until the frame is done, but I don’t want to have to wait weeks to do anything at that point.

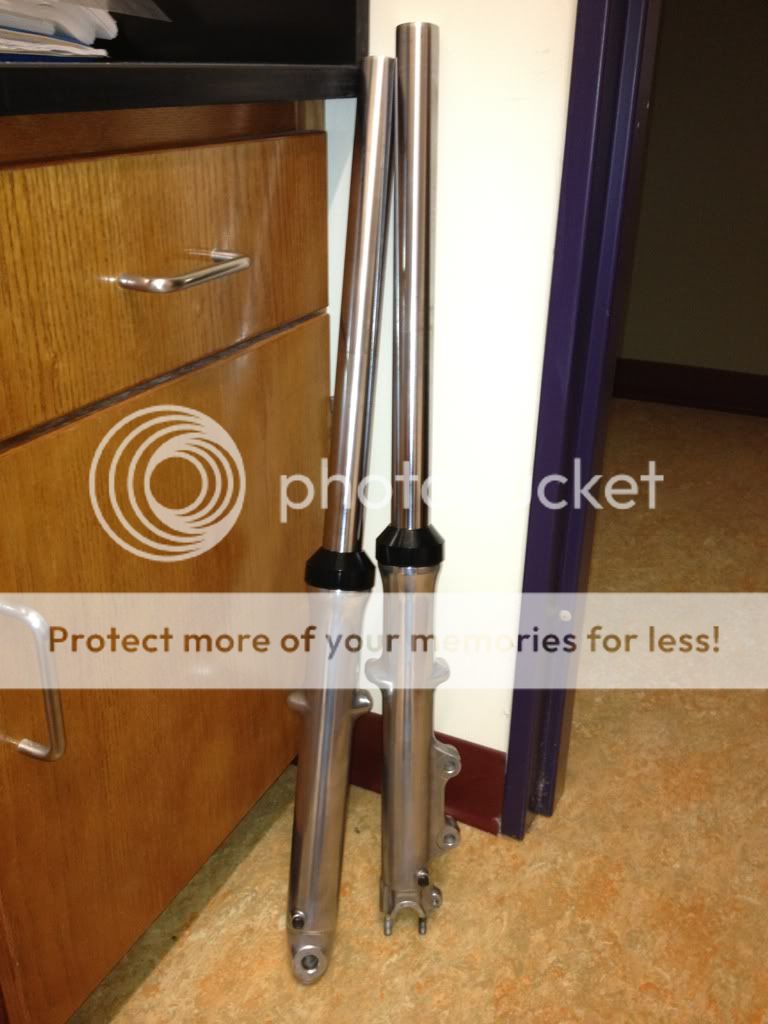
This morning I went to the shop where I’m taking motorcycle classes and rebuilt my forks. I used their fork vise and oil leveling contraption to help things along. I replaced the o-rings, washers, seals, dust covers, and snap rings. It didn’t go so well though in that I made pretty much every rookie mistake possible with the first fork (although nothing past the point of no return). Mistakes included: forgetting to put the drain bolt back in before filling the fork (duh!), overfilling a fork badly because the suction on the fork oil leveler syringe was broken (so I thought I hadn’t added enough oil when I had really been adding too much and it just wasn’t sucking any up) and then I accidently pumped the fork, which shot about 100mL of oil all over the place. I almost put the first seal on backwards too. I managed to scuff up a bit of the lower tubes as well. In the end, it got done and nothing leaks.

Finished! (I hope)
d0f07e0d.jpg


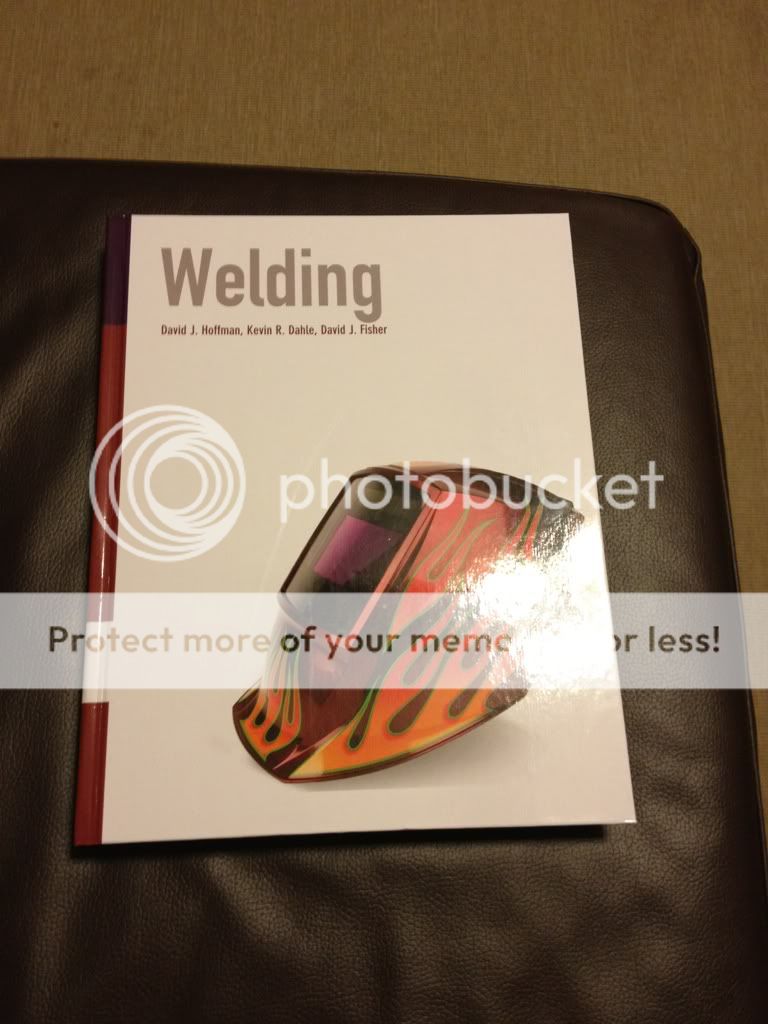
Then I picked up a book for the welding course I’m taking starting next week. I had no idea there were so many types of welding! Should be fun and useful. I will need to cut and weld some things on the frame.

Welding textbook. I immediately found myself immersed in the world of stick, MIG, and TIG.
cc705b61.jpg


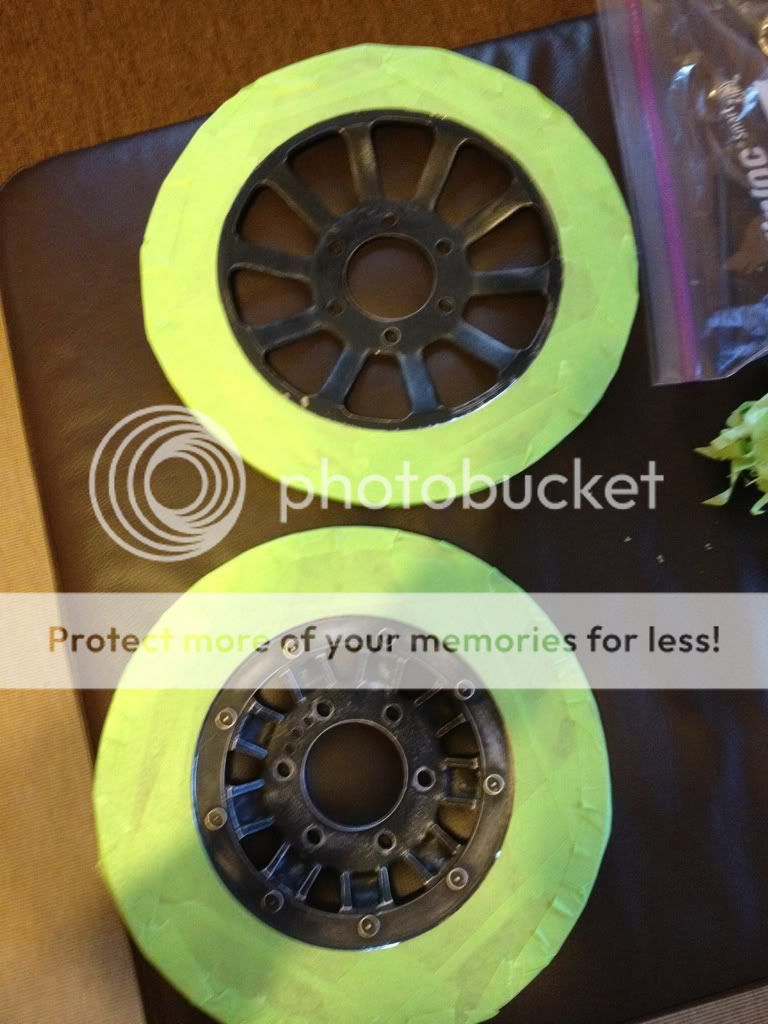
Back at home I masked off the rotors.

23aa2652.jpg


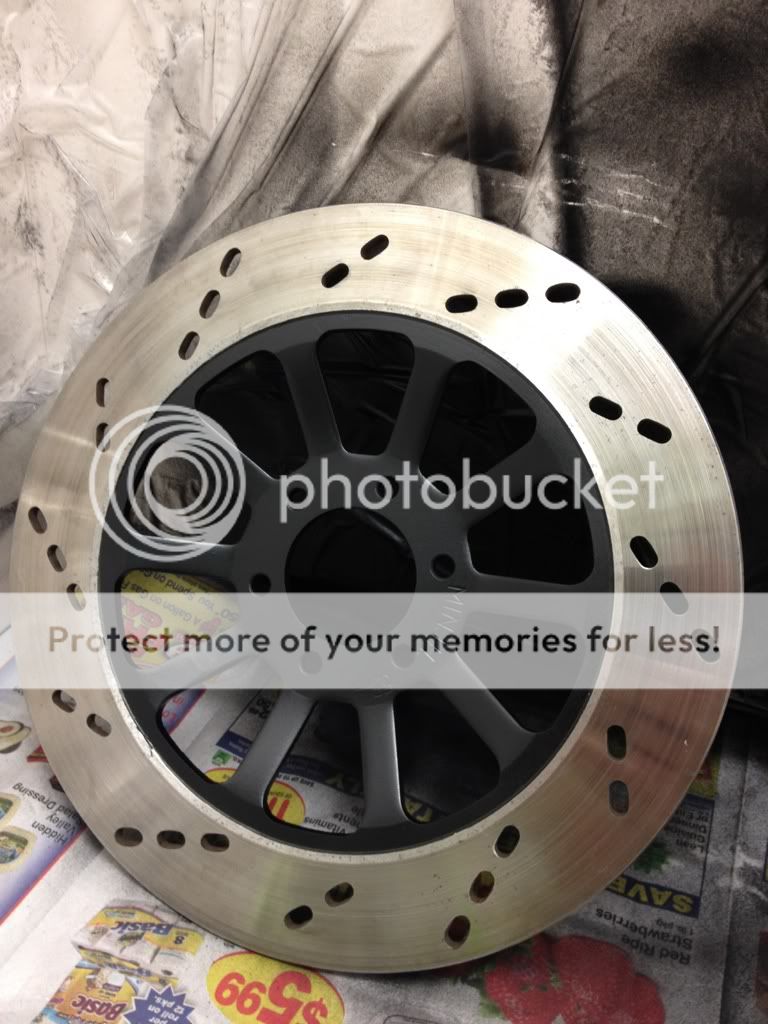
Then I went back to my “paint booth” at the office and sprayed on some new black.
I goofed a little on one part (check out the black spoke at 8 o’clock, it ran a bit as I was trying to reach the sides of the rotor spokes).

1969b4d6.jpg


Rear rotor
ba75d6be.jpg


I still have to sort out what to do with the chipped paint on the outside rims of the rotors (I'll either sand it off or repaint it once the inner rotor dries).

Also took this part from the rear wheel……..
db71ad84.jpg


…..and made it look like this….
6a6c42d6.jpg


COMMENTS NEEDED: [EDIT: in the end, I went with my original idea of silver/black. I wasted a LOT of bandwidth on this issue...... ::)]

My original plan was to paint the engine with VHT Universal Aluminum (silver color). Now I’m really leaning toward blacking out the engine using VHT Black Oxide, except for new chrome cam covers at the top, OEM (silver/chrome) fasteners, and my bare polished crankcase covers of course. It would look kind of like the engine on this GS.

http://www.thegsresources.com/halloffame/2007/gs_photo_dec_2007.htm

Any thoughts on this idea?
 
JANUARY 16, 2012

Cool videos! These guys really know their stuff.

I’ve been doing a few little things here and there. Still no sign of the seat I ordered yet. If it doesn’t come soon I might just make my own.

A few days ago I installed the new stator. It was a bit weird because the wires come out of it facing the opposite direction of the old one so I the wires do a 180 turn under the stator. Hmmmm. They don’t seem to stick up but there is very little clearance for the rotor. I’ll probably re-check it before I try and start the engine. It would suck to have the rotor take out the stator wires! After wrestling with the left-side cover I installed it as well as the covers on the right side. All covers got stainless steel fasteners (with anti-seize of course).

Left side newly reassembled. Somehow I managed to scratch the polish job. Oops. Rag must have been dirty. I haven’t decided whether I’m going to paint or polish the sprocket cover.
dbc4c37a.jpg


Right side reassembled. This is before I shined the covers again (looks a lot better now). I should probably have done the clutch springs too. I’ll likely do them and check the plates when I remove the cover again to paint the engine.
94342c68.jpg


Then I decided to tackle the oil filter cover. When removing the filter a while back I noticed that one studs was stripped. I ordered replacement studs, washers, and nuts for it.

Double nut technique for stud removal. Worked like a charm!
82206dba.jpg


New stud installed. I’ll probably replace the other two studs later since they look bad and the threads are pretty horrible them (they hold for now, but replacement is super easy).
88ac75be.jpg


Last night and this afternoon I masked off and painted various bits of the calipers. I decided to go with gold (kind of weird – I know). I’m thinking that they will match the trim color of the new shocks (it isn’t perfect, but fairly close) as well as the gold trim on the “DOHC” case logo. I’m also planning some gold trim on the tank/fender. I missed a few spots so I’ll wait a week (as per instructions) and do the touch up before curing them.

Parts ready for paint. I used various lab holders to hold onto them. The threaded holes in the calipers were masked off with disposable ear plugs and rubber stoppers. Works awesome!
faf5a966.jpg

e30702f3.jpg


Painted bits.
4638bb2a.jpg

c5ae11bd.jpg


Re-painted this part that attaches to the wheel.
ec048a5b.jpg


I picked up a little oven on sale for baking small parts to cure the paint. It would be nice to have a larger one for the wheels and engine bits, but it will work for now.

This week I’m planning to press the lower bearing off the steering head. I also need to remove the swingarm bearings at some point and reinstall the wheel bearings. All frame bearings must go since I’m having the frame and swingarm powdercoated.

I’m cross-posting to two forums and only put this info on one. Bottom line: I discovered this week that the swingarm is dented. I’m probably going to use it anyway since it measures straight and it’s box welded behind the dent. Dent is visible here……. [EDIT: it turns out the "dent" is supposed to be there!]
2b12f7f6.jpg
 
JANUARY 20, 2012

I was pretty busy this week (working on non-bike things), but I did manage to find a few minutes here and there to replace the wheel bearings. The front ones were especially stubborn. I hope I did them right.

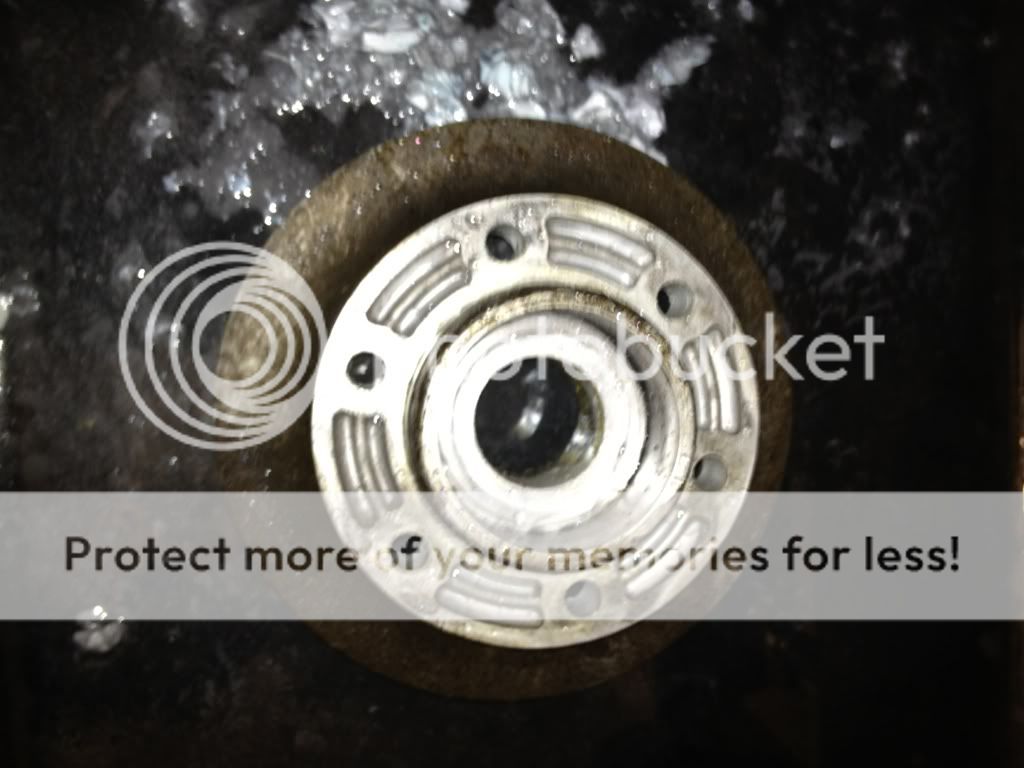
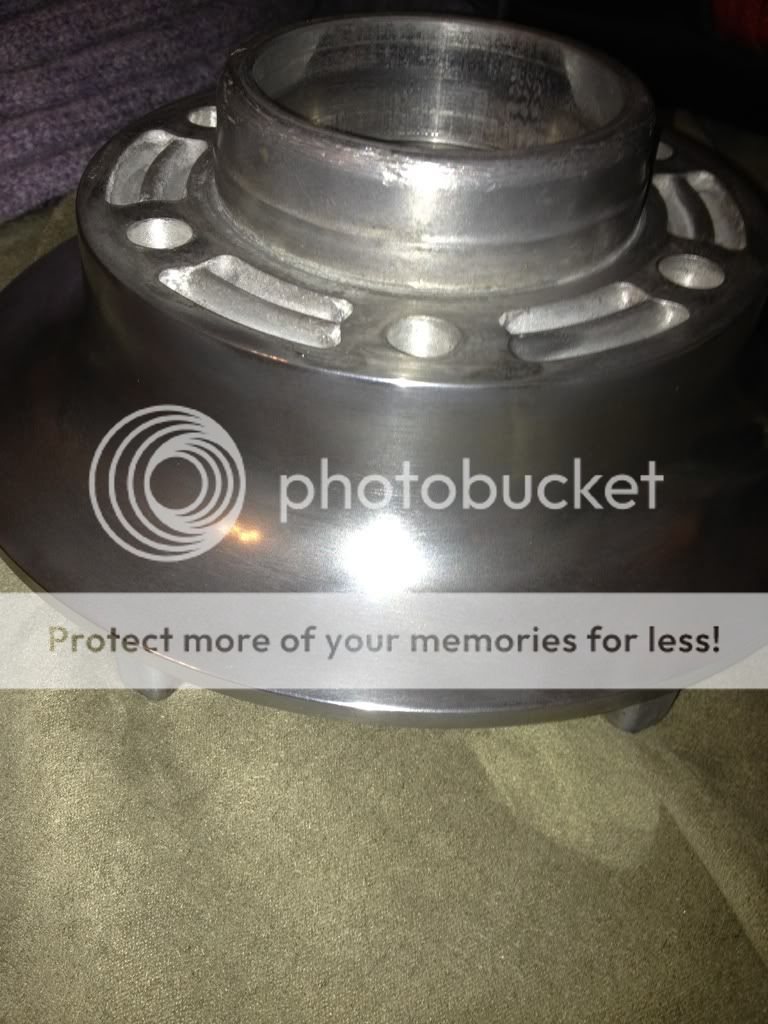
Here is the rear sprocket drum back together. Check it out…..

Before: A pile of greasy, gouged, and rusty metal.
60797d5b.jpg


After: Much better (I haven’t bent the tabs down yet in case I need to remove the sprocket for some reason before final assembly).
4f35caf4.jpg


I also finished painting the rotors today. I went ahead and re-masked them so I could paint the edges. Here they are ready for paint.
d836fb08.jpg


This weekend I’m going to bake the rotors to cure the paint and re-mount them. Then the wheels will be done other than needing new tires. I will also touch up the calipers and bake them.

I also removed the lower steering head bearing/race from the stem. I had planned on using some special tools at the shop, but nothing fit quite right so I ended up breaking the bearing with a chisel and then using a drift to remove it from the stem. Whew! The lower tree will be re-painted black.
 
Back
Top Bottom