Before you do anything electrical - DISCONNECT THE GROUND CONNECTION FORM THE BATTERY. Never work on electricals without doing this, or I pretty much guarantee that Mr. Murphy will rear his ugly head. If you're lucky all that will happen is a blown fuse. If not, well... have a fire extinguisher at-hand (seriously). I usually wrap a piece of electrical tape temporarily around the negative battery lead, just to be 100% sure it doesn't accidentally touch the frame or something else and fry anything. YOU HAVE BEEN WARNED.

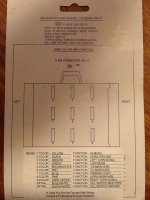
With the battery disconnected, start by identifying each of the required wires on the bike's stock harness (cut-off, starter, beam, signals, etc.) using the wiring diagram you linked to, and label them with a little flag of masking tape. Then do the same for the wires attsached to the new controls you bought (there's a list that came with the new switch clearly identifying what wire is connected to each control).
Then, assuming you want to plug the new controls' wiring directly into the stock wiring harness, you'll probably have the best luck by seeing what connection the stock wires have (typically bullet-type connectors), and replacing the plastic connection block with those. Radio Shack has 'em - just bring the stock unit with you and hold it up alongside the replacement connectors to guarantee the right ones are purchased.
Buy about 3X the number of connectors you actually need - trust me on this (you'll see why below) - it'll only cost you about $5 extra and will save you the headache of going back to the store later on.
While you're in the 'Shack, you'll also need to buy a good wire stripper/crimper (costs about $25 - do yourself a favor and get the good kind with the side-action spring-loaded strippers... DON'T SKIMP and get the cheapie ones). I'd also buy a spool of wire of the approximate same thickness as the stock wiring (costs about $2) to do some tests, since this is your first time (see below).
When you get everything home, do a few test cuts, strips, and crimps on donor wire until you perfect the process;
DON'T do your first strips/crimps on the actual controls themselves, as the cleaner and tighter you do them = the longer they'll last and the safer they'll be. Testing like this will teach you how much insulation to strip off and how to best seat the connector you'll crimp on. When properly installed, you should be able to tug on the connector pretty hard and it will remain firmly in-place without pulling off or slipping. If the connector moves
AT ALL try again and keep practicing until you can reliably install a connector properly the same way every time. If you DON'T do this, expect the controls to fail in short-order (probably while you're riding 100 miles from home), stranding you or even worse.
Once you've perfected the cutting/stripping/crimping process, cut the connector block from the new controls and crimp on your actual, final connectors. Then,
with the controls still off the bike, plug everything in, reconnect the battery, and test all controls. Again: DO NOT mount the controls or re-run any of the wires into their actual final locations until you test each and every connection - history shows that AT LEAST ONE will fail to function properly if you re-install everything nefore you test, which will mean disassembling everything all over again to re-check. ;D
Assuming everything works, unplug the controls, run all the wires into their proper locations, button everything up, then enjoy several years'-worth of maintenance-free, safe, and reliable operation.