
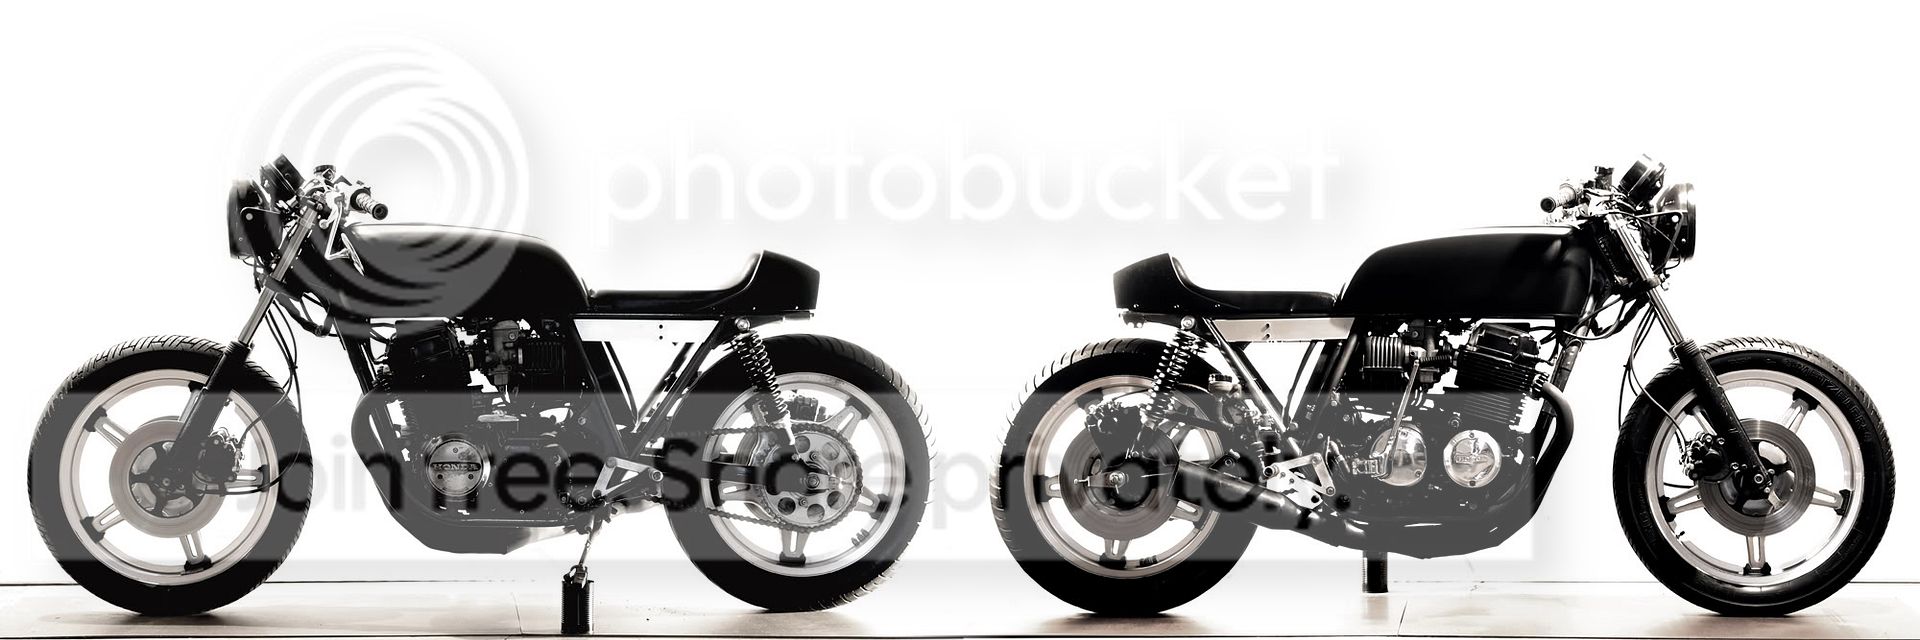
So here is the documentation of my CB750F's three stages of build. I haven't been active on this forum much because right after I started my account, I got super busy. Enough with the sap story excuses, heres the result...
And here's the build...
Version 1 started with a mostly stock 1977 CB750F. The previous owner had installed an aftermarket 4-into-1 exhaust, drag bars, and a small cafe fairing with really awesome purple tint.
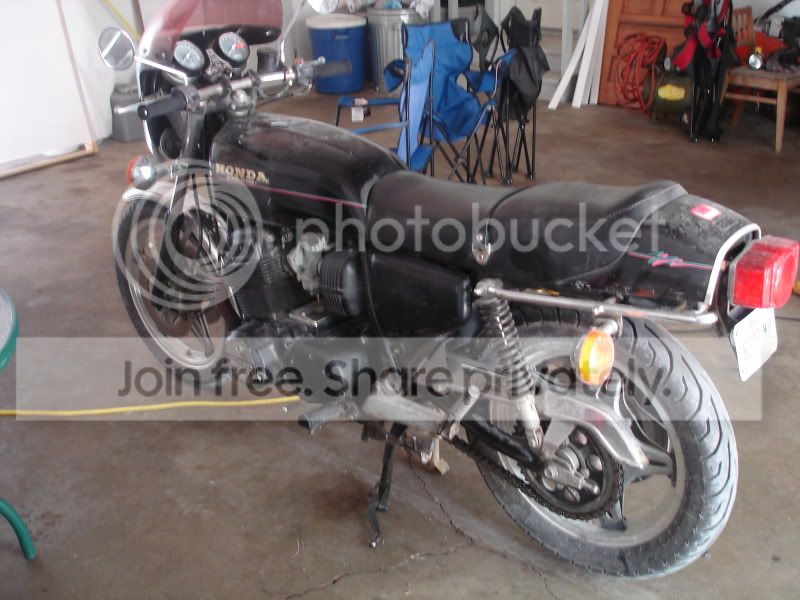
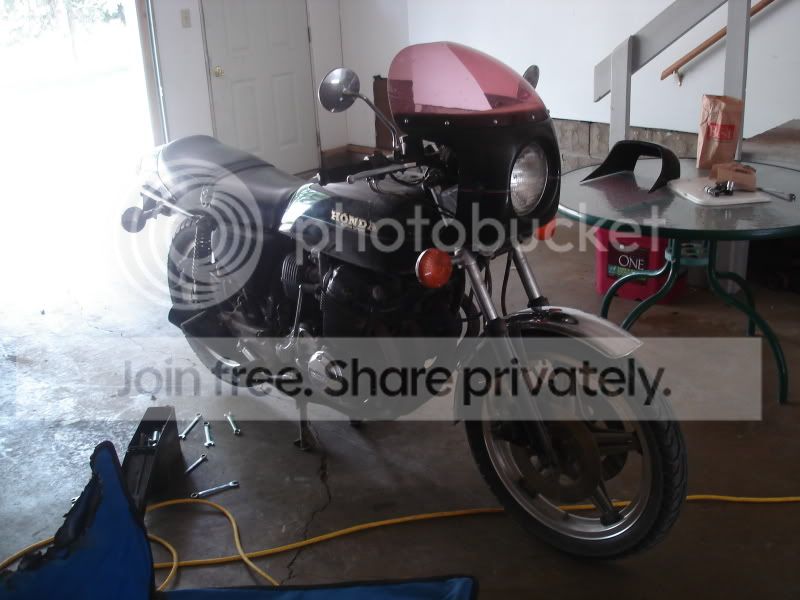
Aside from needing a good carb cleaning and some ignition adjustments, the bike was in solid mechanical order. I had been searching for a while when I finally came across this bike so I had already planned out much of what I was going to do.
I started by fabricating a set of rearsets.
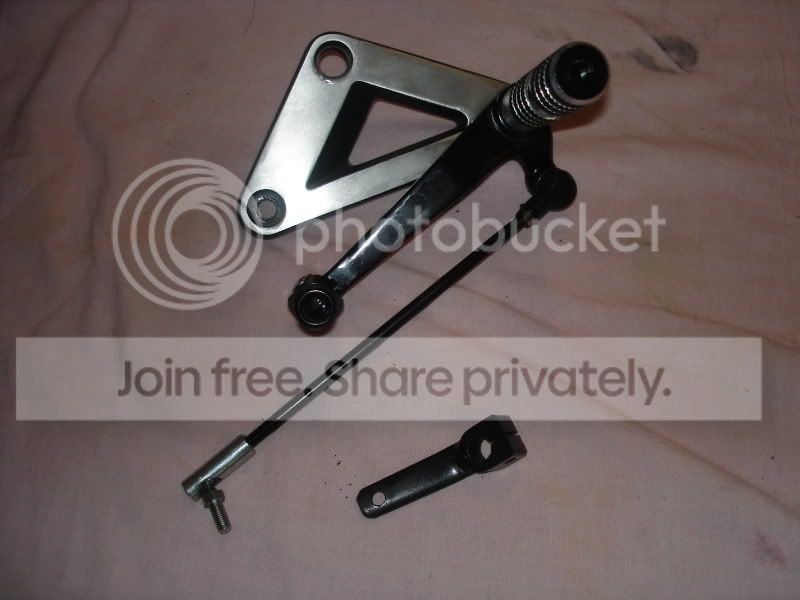
These are made from the buddy peg mounts off an 80's shadow. They attach using the swing arm bolt and a stud I welded to the frame. The pegs are simply BMX bicycle pegs [one inch dia, sourced on ebay for $7] The levers are cheap-o ebay "upgrades" for modern sport bikes. The shifter being for a GSXR 1300, the brake was a modified lever off a CBR 949. Not sure how much of an "upgrade" these things are, or how pathetic the stockers were, but the brake lever broke and I would not recommend using them. The levers ride on bushings made by my neighbor who just so happens to have a full size lathe in his garage.
Once I had the rearsets in place, I turned my attention to the seat. First I trimmed the rear of the frame back slightly.
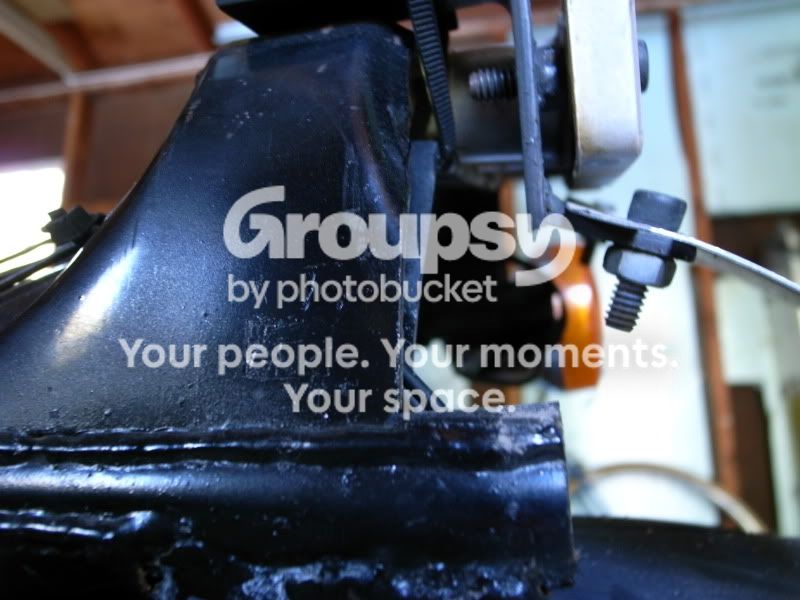
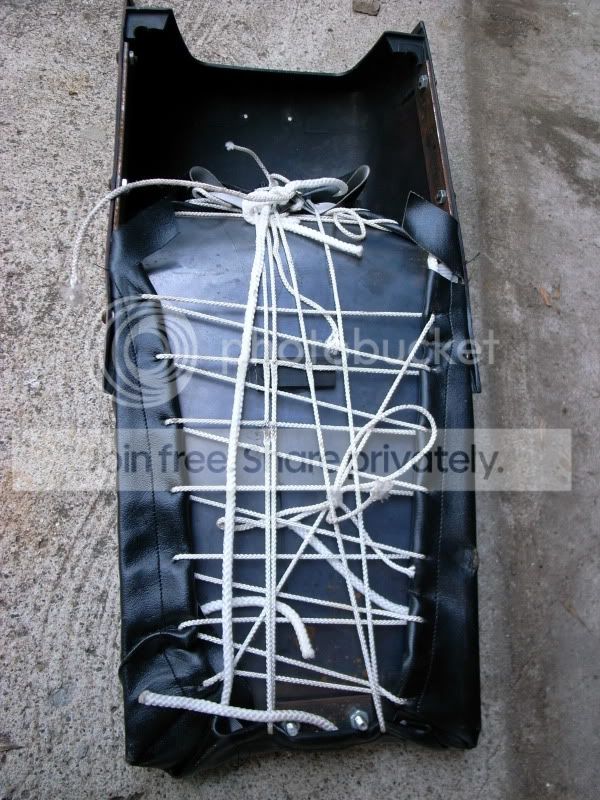
Then for the tail I simply took the stock tail section and cut out the inner portion. Then I made a seatpan and covered it with 2 layers of foam and marine vinyl. The bottom looks pretty crude but no one will ever see [unless they are reading this...] it so it doesn't bother me.
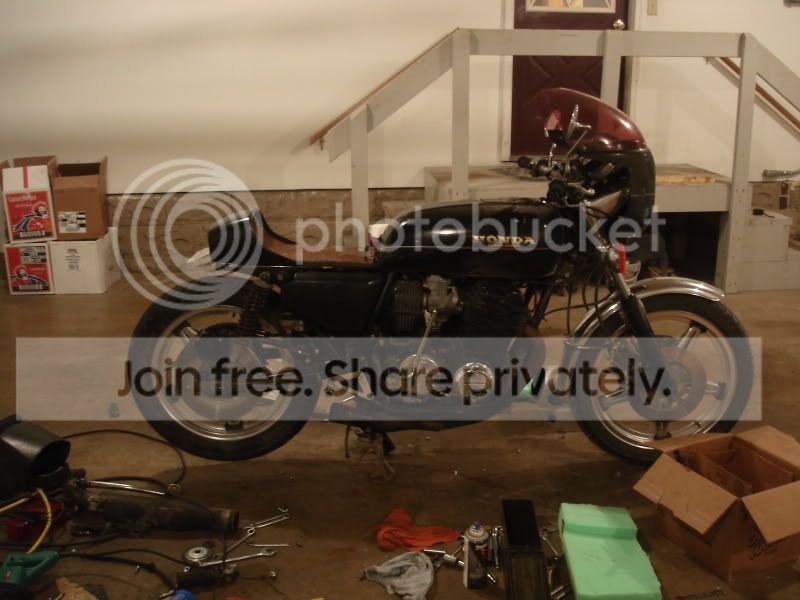
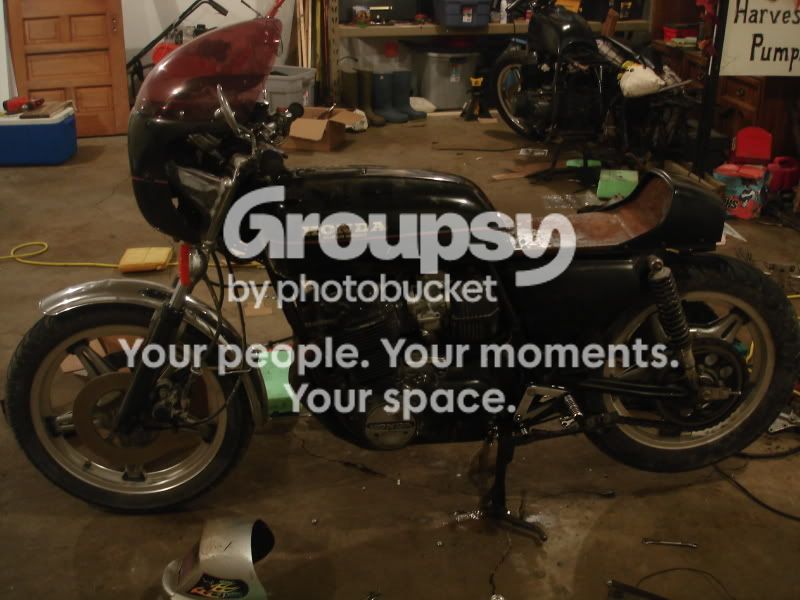
But what DOES bother me is the (not so) huge fairing making the front end of the bike look way too tall. It simply had to go.
The tank was also changed out for an old one I had that had shaved emblems and a killer rattle can flat black paintjob. To top it all off I had a vinyl shop cut me some Honda and SuperSport decals, and picked up some vinyl pinstripe tape to give the bike a real classy new look.
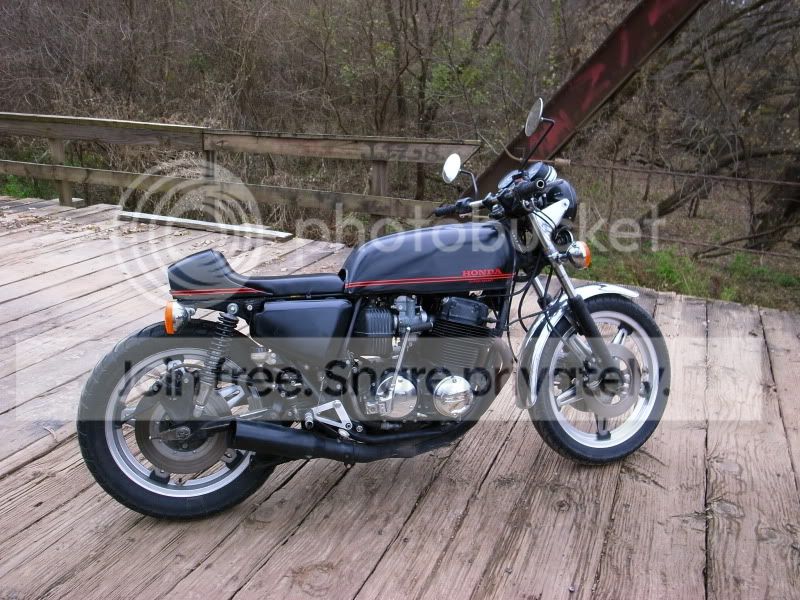
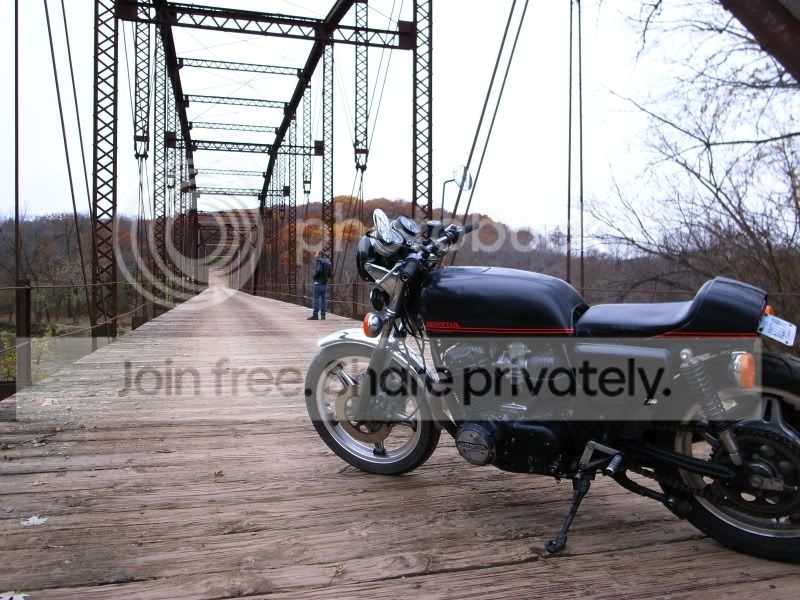
I rode the bike happily for a summer before tragedy struck.
Some dumbass thought it would be a fantastic idea to kick, knock, push, whatever my bike over in a parking lot. Its hard to come up with the words to describe my anger/sadness when I walked out of the building to find this in the parking lot...
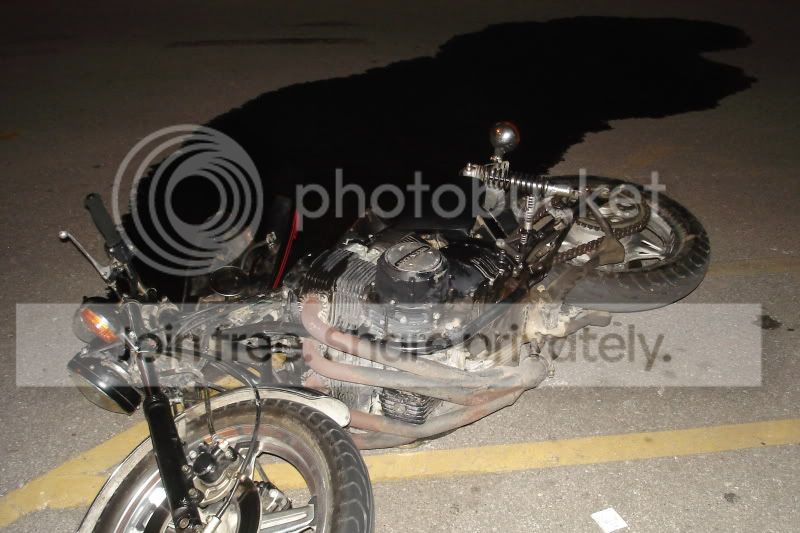
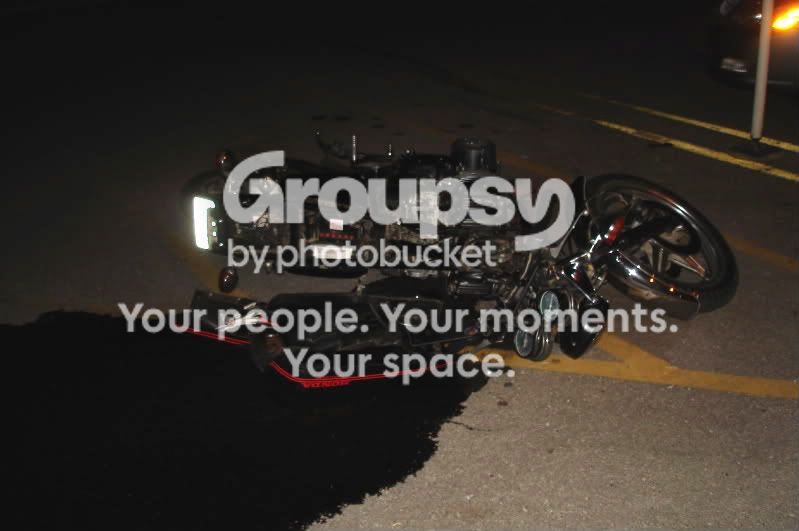
I stood around out there, while some guy from facilities came and put spill dry out on the asphalt, and watched my bike sit there until the campus police arrived to document it...
After the incident I assessed the damage, which really wasn't all that bad. The fuel had destroyed my super badass rattle can paint, my tank had some new dents and my tail section was pretty scratched up. A broken front brake lever and a tweaked rearset mount were the extent of the mechanical damage. [one of the benefits of having solid mount pegs]
Despite how lucky I got as far as the damage was concerned, I decided it was time to revise and improve. V_2 was underway.
This time around, I skipped the spray paint. I was sick of being paranoid of even the tiniest drop of fuel hitting the tank during a fill up. I also decided it would be easier to just repaint my other tank, which was perfectly dent free, than to repair the dents in the old one. So armed with a new tank and a much more stylishly minimalistic paint job, I went on to addressing other issues. For one, the frame was a mis matched mess of paint where I had welded and ground and re-welded, I opted to have it soda blasted and, then I laid down a fresh coat of Hammered Finish black paint, which dried to a more gunmetal gray color than I was imagining. Once the tank and frame were reunited I decided to turn my attention to cleaning up the rather cluttered and messy handle bars and fork. The first thing to go were the hideously huge stock turn signals, as well as the stock headlight mount. Replaced with a mount I made with some 1/4inch rod and a couple of bicycle seat post clamps. The next to go were the mirrors, well 1 anyone. The right hand mirror moved to the left hand side where it was installed upside down. While the forks were off, new seals went in and Mikes XS cartridge emulators. They went back on with a bobbed front fender. The brakes also got a little upgrade with some stainless lines, and the drag bars the previous owner had installed got new grips.
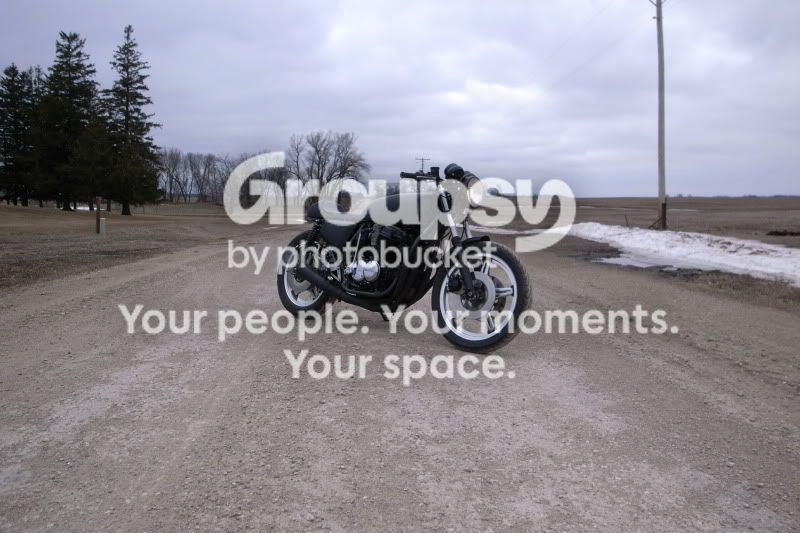
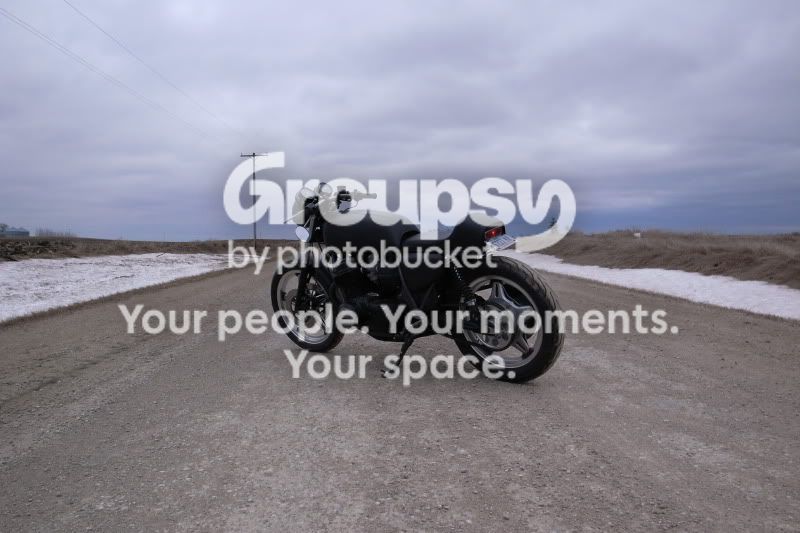
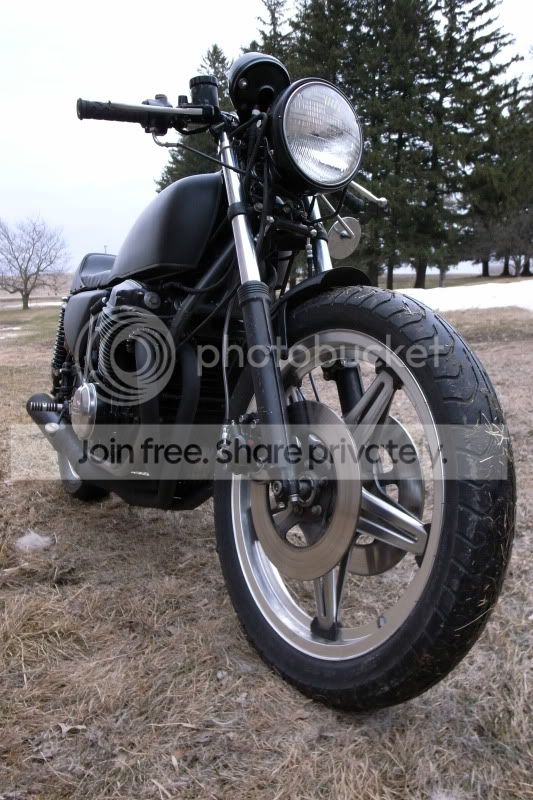
And I had forgotten about these, the gauges received new faces and integrated LED warning lights.
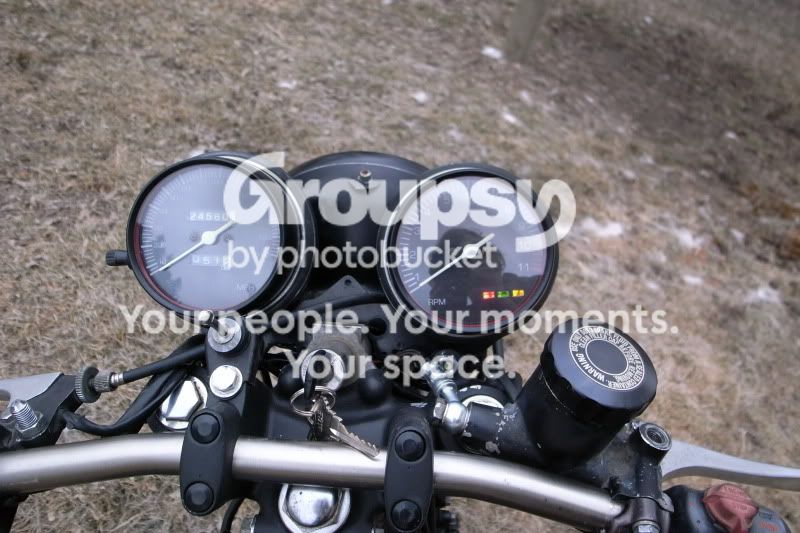
Now it was starting to look like what I had in my mind's eye.
Aside from my roommate accidentally backing over it with his charger, all was good. The damage caused by that little run in left her with no front fender (I like it better gone anyway) and I got new handlebars at his expense. There also is now a tiny dent in my otherwise perfect tank, which I haven't bothered to fix, and probably never will.
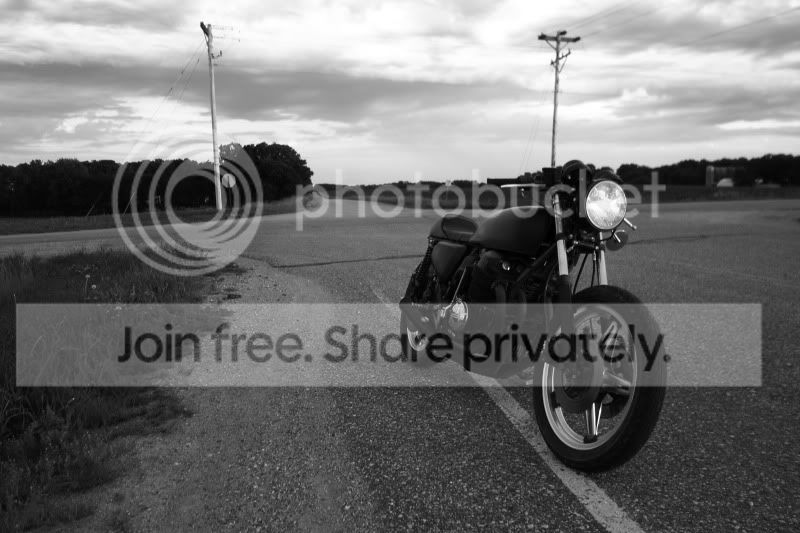
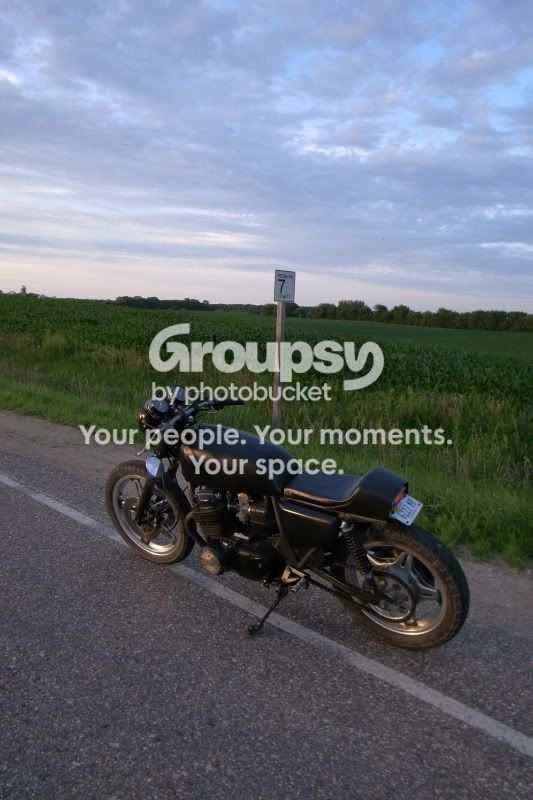
The bike ran strong and was a blast, until Honda's quest to wring every last horsepower out of the F2 engines came up to bite me in the ass.
valve guide failure.
So she went back under the knife, this time for full set of stainless valves and shiny new bronze guides. I also tried my hand at some mild porting while I was int here, and to be honest cannot notice 1 bit more power because of it. Do I feel good about trying though? yes.
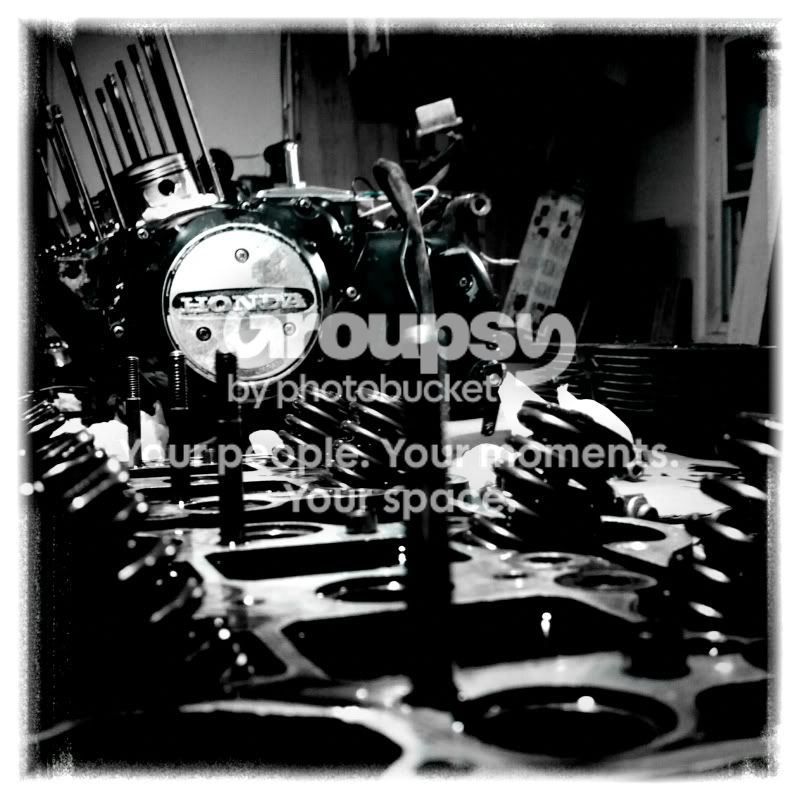
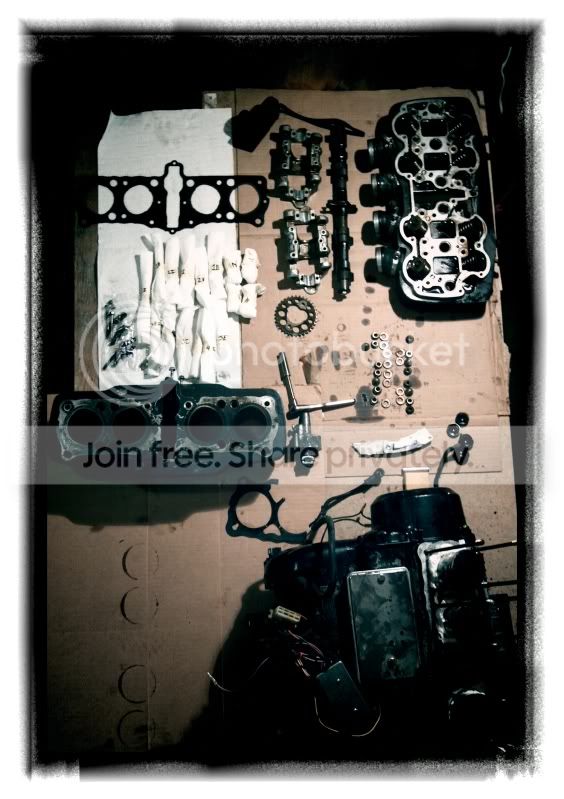
While she was without a heart, the last of the aesthetic mods took place. I wanted to clear out the triangle and found this really beautiful Honda CB750 with the oil tank tucked away between the frame rails behind the airbox. I did my best to emulate their success and all I have to say from that is that it was one GIGANTIC pain in the ass, that being said... it looks awesome. I also minimized the electronics to a small battery, enough to run the bike as kick only, and removed all associated electric start and turn signal components. The battery and the rest reside under the seat in a small tray, behind two aluminum side panels. It was during this build she also got some new rubber and a secondary seat that can be changed in 10 minutes and gives the ability for 2-up riding.
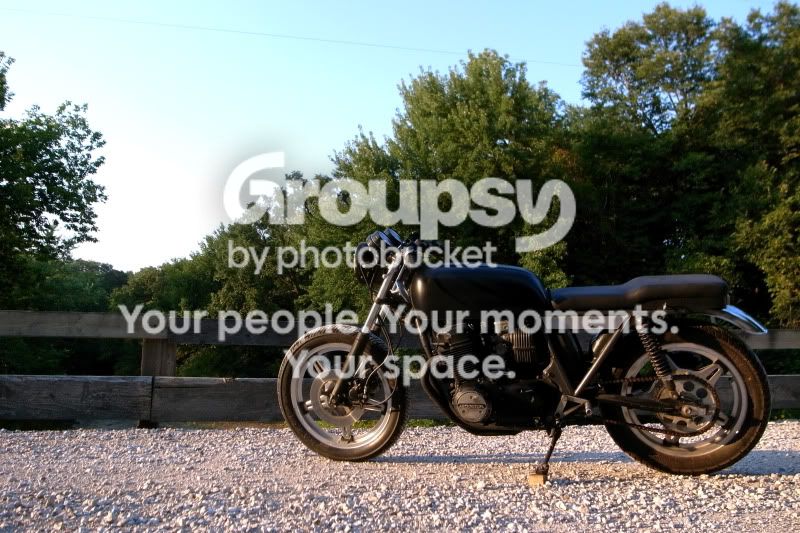
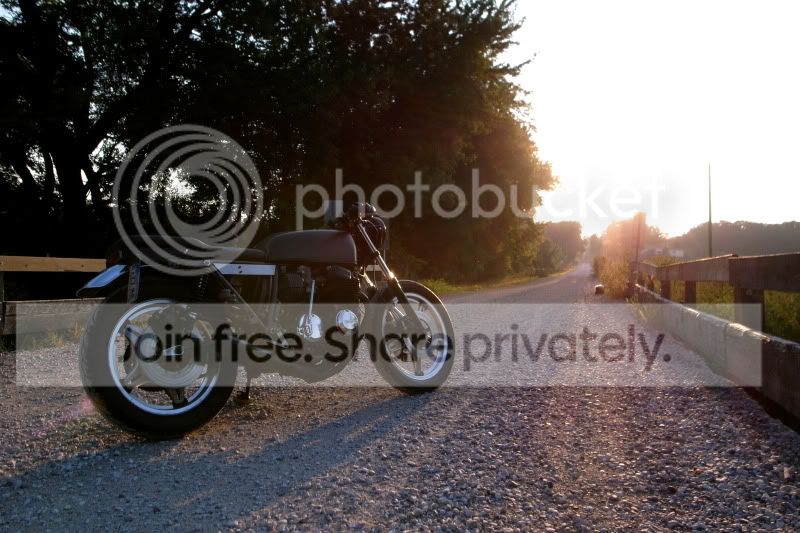
And in the end... to return to where we began... the glamour shots...
Sorry for the long post everybody.
And here's the build...
Version 1 started with a mostly stock 1977 CB750F. The previous owner had installed an aftermarket 4-into-1 exhaust, drag bars, and a small cafe fairing with really awesome purple tint.
Aside from needing a good carb cleaning and some ignition adjustments, the bike was in solid mechanical order. I had been searching for a while when I finally came across this bike so I had already planned out much of what I was going to do.
I started by fabricating a set of rearsets.
These are made from the buddy peg mounts off an 80's shadow. They attach using the swing arm bolt and a stud I welded to the frame. The pegs are simply BMX bicycle pegs [one inch dia, sourced on ebay for $7] The levers are cheap-o ebay "upgrades" for modern sport bikes. The shifter being for a GSXR 1300, the brake was a modified lever off a CBR 949. Not sure how much of an "upgrade" these things are, or how pathetic the stockers were, but the brake lever broke and I would not recommend using them. The levers ride on bushings made by my neighbor who just so happens to have a full size lathe in his garage.
Once I had the rearsets in place, I turned my attention to the seat. First I trimmed the rear of the frame back slightly.
Then for the tail I simply took the stock tail section and cut out the inner portion. Then I made a seatpan and covered it with 2 layers of foam and marine vinyl. The bottom looks pretty crude but no one will ever see [unless they are reading this...] it so it doesn't bother me.
But what DOES bother me is the (not so) huge fairing making the front end of the bike look way too tall. It simply had to go.
The tank was also changed out for an old one I had that had shaved emblems and a killer rattle can flat black paintjob. To top it all off I had a vinyl shop cut me some Honda and SuperSport decals, and picked up some vinyl pinstripe tape to give the bike a real classy new look.
I rode the bike happily for a summer before tragedy struck.
Some dumbass thought it would be a fantastic idea to kick, knock, push, whatever my bike over in a parking lot. Its hard to come up with the words to describe my anger/sadness when I walked out of the building to find this in the parking lot...
I stood around out there, while some guy from facilities came and put spill dry out on the asphalt, and watched my bike sit there until the campus police arrived to document it...
After the incident I assessed the damage, which really wasn't all that bad. The fuel had destroyed my super badass rattle can paint, my tank had some new dents and my tail section was pretty scratched up. A broken front brake lever and a tweaked rearset mount were the extent of the mechanical damage. [one of the benefits of having solid mount pegs]
Despite how lucky I got as far as the damage was concerned, I decided it was time to revise and improve. V_2 was underway.
This time around, I skipped the spray paint. I was sick of being paranoid of even the tiniest drop of fuel hitting the tank during a fill up. I also decided it would be easier to just repaint my other tank, which was perfectly dent free, than to repair the dents in the old one. So armed with a new tank and a much more stylishly minimalistic paint job, I went on to addressing other issues. For one, the frame was a mis matched mess of paint where I had welded and ground and re-welded, I opted to have it soda blasted and, then I laid down a fresh coat of Hammered Finish black paint, which dried to a more gunmetal gray color than I was imagining. Once the tank and frame were reunited I decided to turn my attention to cleaning up the rather cluttered and messy handle bars and fork. The first thing to go were the hideously huge stock turn signals, as well as the stock headlight mount. Replaced with a mount I made with some 1/4inch rod and a couple of bicycle seat post clamps. The next to go were the mirrors, well 1 anyone. The right hand mirror moved to the left hand side where it was installed upside down. While the forks were off, new seals went in and Mikes XS cartridge emulators. They went back on with a bobbed front fender. The brakes also got a little upgrade with some stainless lines, and the drag bars the previous owner had installed got new grips.
And I had forgotten about these, the gauges received new faces and integrated LED warning lights.
Now it was starting to look like what I had in my mind's eye.
Aside from my roommate accidentally backing over it with his charger, all was good. The damage caused by that little run in left her with no front fender (I like it better gone anyway) and I got new handlebars at his expense. There also is now a tiny dent in my otherwise perfect tank, which I haven't bothered to fix, and probably never will.
The bike ran strong and was a blast, until Honda's quest to wring every last horsepower out of the F2 engines came up to bite me in the ass.
valve guide failure.
So she went back under the knife, this time for full set of stainless valves and shiny new bronze guides. I also tried my hand at some mild porting while I was int here, and to be honest cannot notice 1 bit more power because of it. Do I feel good about trying though? yes.
While she was without a heart, the last of the aesthetic mods took place. I wanted to clear out the triangle and found this really beautiful Honda CB750 with the oil tank tucked away between the frame rails behind the airbox. I did my best to emulate their success and all I have to say from that is that it was one GIGANTIC pain in the ass, that being said... it looks awesome. I also minimized the electronics to a small battery, enough to run the bike as kick only, and removed all associated electric start and turn signal components. The battery and the rest reside under the seat in a small tray, behind two aluminum side panels. It was during this build she also got some new rubber and a secondary seat that can be changed in 10 minutes and gives the ability for 2-up riding.
And in the end... to return to where we began... the glamour shots...
Sorry for the long post everybody.
