Sleek & Sexy CL360

HerrDeacon said:
Have to agree, really nice style. For all we know the work your doing is crap, but these pics make it look amazing. ;D j/k

Thanks a lot! It's really nothing, just a digital SLR with a decent lens, but it does look better than some of the camera phone shots you see around here! ;)

OK... so here's an update with the paint from yesterday... detail shot of the frame so you can see what the finish looks like:
34.jpg


We did manage to get these shocks apart, it was really pretty simple... just took some muscle. Took a lot of scrubbing to work the rust off of the springs, but most of it's gone! Here they are after paint, and chopping those covers:
32.jpg

33.jpg


I think I might paint those chopped covers black, too, before I put them back together.

So it looks like my progress might slow down a little. I'm getting to the point where I'm going to have to start spending money to move forward any further. I just have to pace it a little so as not to start pissing anyone important off (wife).
 
Look awesome buddy. I was really quite amazed how easy those shock came apart ;D

I felt like an old war hero disassembling a hand gun in 4 seconds ;)
 
zixxerboy said:
I'm confused. I suggested scratching stuff you want to make shiny is a bad idea and 2 different people take me task.

If there's a nick or scratch in the part sand and polish out that area. How a wire wheel cleans up a scratch is beyond me. Typically under the faded clear is tarnished but very smooth aluminum. To scratch it all up just to remove the clear is just... F-ing stupid.

Why not use 40 grit sandpaper to remove the clear coating? Exactly!
Don't want to steal the thread, but I must respond. Dude, I think you missed the hole thing. It started back when you yelled, "NEVER SCRATCH....yada, yada, yada something you want shiny, or something like that. Man when you polish, that is exactly what you are doing. Here is what Andrew Brooks of ABC/CETEM Polishing has to say (ABC/CETEM is a well established name in the polishing industry):
"There is no mystique in producing a fine mirror finish...,

What is a mirror finish? If you look at a polished surface magnified a couple of thousand times it looks like a view of the Rocky Mountains. Because the peaks and valleys are so small and close together and the tops have been rounded off from polishing, they reflect the light and to our eyes the surface appears as smooth as silk, although it is not.
Absolute flatness is actually impossible to achieve but we can get very close. Therefore all we are doing (Hey dude are you still with Andrew? Don't miss this part!) when we polish to a mirror finish is making a series of finer and finer scratches and eventually rounding off the peaks. This is achieved by stepping down through the abrasive grades until we achieve the finish we require. Various methods are employed ..." If you are interested, more information can be found here http://polishinghelp.blogspot.com/ Lots of good info on polishing if you care to learn something.
BTW, This is an awesome build and the bike is going to be reeeeeal nice!!!!!! Please keep the photos coming.
 
Troybilt

I think it is you who is missing the point. I understand that under a microscope even shiny chrome looks like the rockies.

Here is the point you and others missed. Under this faded clear is a surface that is very smooth (very very fine scratches if you will). This is because the part came from die cast mold that was highly polished to start.

If you remove the clear coat with a wire wheel you scratch the part. Not very very fine scratches that can't be seen with the eye but large noticable scratches as can be seen in the picture. Now you need to go through the process of removing them only to get back to the very very fine scratches you started with. That is my point. I you don't get it I give up.
 
SausageMahoney said:
definitely painting the underside of the front fender.

so i had a pretty unsuccessful night. the wet sand on the bucket didn't work so great. i don't think i had enough clear coat and i need something for buffing. borrowed my dad's dremel and started working on polishing up this cover on the engine. sure looks a lot better but i'm getting a lot of lines and grooves from the wire brush:

i found that the wire brush polished the best, and i finally figured out that i need to work with the grain. however, it still leaves a lot of tiny grooves & lines. i also noticed that using super fine grain sandpaper (1500 & 2500) was working down the grooves, but dulling the finish. what do you guys suggest for polishing up that aluminum?
Another thing that you can try that I've had alot of success with over the years is "Micro Mesh" sanding pads.... They come in a 9 pc set from 1500 to 12000 grit.... I use 'em for polishing acrylics on a lathe, but they do one hell of a job on aluminum as well... Work with them wet and rinse them out when you're done, and they'll last damn near forever! I believe mine are about 4 yrs old at the moment...
Good luck with that build... It looks like its gonna kick ass!
 
BigBSBusa said:
The shocks look great. I'm gonna have to do the same to mine and not looking forward to it.
Not sure what type of shocks yours are, but mine just popped right out. The tricky part was getting them back together. We put the 'covers' in a vice and just muscled the springs down and popped them back in. It was actually a lot easier than I was thinking it was going to be.


STATUS UPDATE-- Sorry, I've let this build thread go cold over the last week or two, but I've reached the point where I'm about 90% done with the stuff I can do on my own without spending any cash-- so in the meantime I'm just tinkering on small stuff in the garage while I gather some funds and start ordering parts. First thing, I'm sending the engine off to be tuned up and inspected for problems-- but of course the shop has been closed for a couple weeks for vacation and opening up again next week, so that delayed things slightly. No worries, though... I should have the engine sent off next week, then back for painting & more polishing.

Today I started measuring out and mocking up different seat options with cardboard. I'm considering going with this seat from Roc City... looks like it will be a good fit, although the cowl is just *slightly* higher than I would prefer:

http://www.roccitycafe.com/cbss.htm

Unless of course Mysta2 wants to glass me a copy of his seat! *HINT HINT*

If anyone has any other suggestions for seats, I'd like to find something with a bubble style cowl that sits right at about 6-7 inches tall (from the base, maybe 4-5 inches above the top) and around 8-9 inches long, with a nice moderate curve all the way down the back. I'm also looking at some seats from air tech, specifically the CR1104, the C4, and the Bates1.

So anyways, that's the status. Just slowly getting parts ordered and sending the engine off, then sending off parts for powdercoating. Of course, I'll update as soon as I've got some progress made and more pictures.
 
So I think you guys might dig this-- after thinking about my seat options until the wee hours of the night all week... I decided to just build my own. So I built a brat style seat today... for 10 DOLLARS!! It only took a couple hours of work, too.

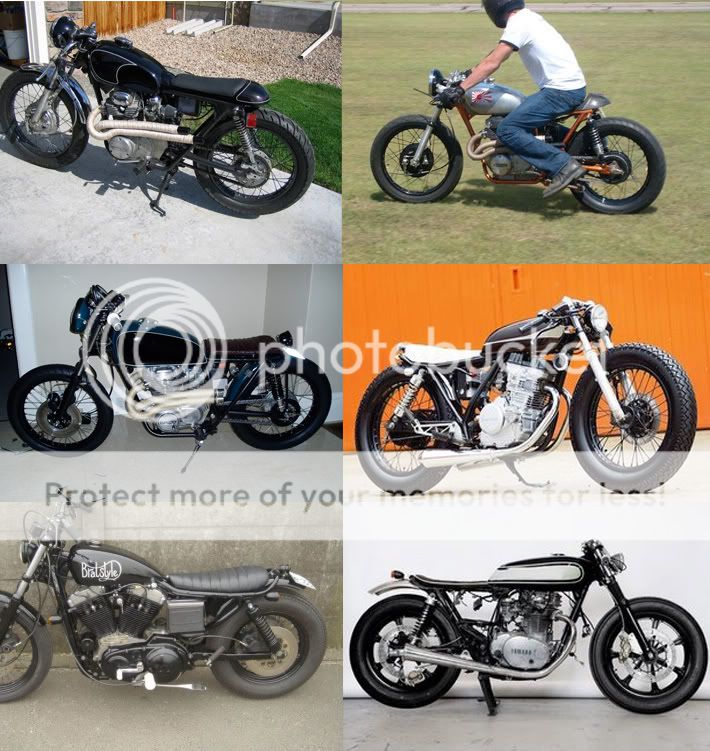
I've noticed lately that almost all of my favorite bikes have really low profile seats, almost no hump, if any. I've always loved brats, too. These profiles are what I was going for with this seat:

EXAMPLE1.jpg


So anyways, I don't want to go into the details cause this isn't a seat build thread... but here's what I did in a nutshell: Took apart the old seat, removed & threw out the old cover, shaved down and shaped the foam, chopped 2 inches or so off the back end, bought some marine vinyl and polyester foam (for $8!) at the fabric store, bought some heavy duty polyseter thread ($2), sewed up the 'quilted' pattern, and this week I will set about attaching it permanently to the pan.

Old seat:
35.jpg


Old nasty insides:
36.jpg


Measuring out before shaping:
37.jpg


Rough shaping (sorry for the bad picture):
38.jpg


Starting to sew. I borrowed my mom's ancient sewing machine that you see in this picture, but it kept jamming... so I went over and used a friend's brand new digital sewing machine. The difference was laughable. I would highly recommend a newer machine if anyone plans to try to do anything like this!
41.jpg


After sewing. One of the lines is a little sketchy, you can sortof see the ripples, but I don't think it will be noticable once it's on the pan and pulled tight:
39.jpg


Mockup using gator clips to hold it onto the seat:
40.jpg


Mockup on the frame with the old tank:
42.jpg


I think tomorrow I will shave more out of the foam to remove some more volume, and chop another inch or two off the back. It's still a little bulky and maybe a little long for my taste, plus it sits a little high with all the extra fabric under the seat. Also, I don't like how it bunches up towards the front so I'll have to do something about that. Still have a little work to do on it.

So anyways, maybe not quite as nice as the seats from brat style Japan or Vanem- no piping or anything- but not bad for $10! I just saved myself something like $200! Best thing is, it will just bolt right back on!
 
Okay, so my $10 seat turned into a $50-60 seat. After trying to figure out the best way to recover the seat, I went to the upholstery shop down the road and they convinced me to just let them do it. My sewing job was boo boo-- the machine was making the stitches too close and I ended up basically perforating the cheap vinyl, so it probably wouldn't have lasted very long. They are doing new (better quality) vinyl, quilting it, and re-covering for $45. Not bad, and it will definitely look WAY better. I'm anxious to get it back.

After hacking a few inches off the back, I had previously cut the shape pretty square, and I had chopped off the back lip. So today I rounded out the back corners a little, then fashioned this metal strip to the back end to fill in the underside. Once covered there won't be a big gap between the seat and the frame:

45.jpg


44.jpg


43.jpg


This weekend I am hopefully doing some grinding/welding on the frame, repainting it, getting the wheels off to be powdered, and painting the engine. PROGRESS!

Oh yeah, here's a VERY quick and crappy photoshop mockup I did the other day that should give a basic impression of how this thing will turn out:

MOCKUP2copy.jpg
 
That looks very good. I'm basically doing the same thing on my RD400. The final bits arrive in the mail today, so I should begin finishing it out this weekend.

PM me if you want an easier seat making method :) Though I suppose you're done now...

--Chris
 
JRK5892 said:
man that looks MEAN! just awesome!!! Rino Liner that sucker! would look awesome!

Yeah, I was looking at shark, lizard, rattlesnake, and ostrich when I went in to the shop... too much money!!
 
i think you should ditch the side light and go for a very small fender (to match the front) with a flat black sparto light setup... that would be killer.
 
QUESTION:

My first trip to the powder coater was a disaster! I dropped off several parts, including the brake pedal and the gear switch and realized after leaving I don't need to powder those because I'm doing rear sets. Then I realized while there that there's a rubber gasket in one of the brake drums I need powdered. I got it back home and that rubber is in there solid-- I don't know how to get it out or if I'll be permanently damaging something if I mess with it too much. So either I figure out how to get it out, or I can powder the wheels & the rear brake drum, and paint the front rotor at home. I think that might end up kindof cheesy, as I may or may not be able to match the powder. Any ideas?

Second question: I'm going satin black on the frame/engine, and glossy black on the tank. Should I go gloss or satin on the wheels? I initially went with satin but I'm second guessing that. I have until Monday morning to change my mind!

Thanks!
 
if you go with a gloss black powder... (eastwood high gloss black) that is a PERFECT match to rustoleums Black appliance epoxy paint... i mean SPOT on!!! look at my rear wheel here, the spokes are all done in the epoxy and the drum I did in high gloss black powder.. where is the rubber? dont you have spokes? did you tear your wheels down for powder then? I hate satin black, so over done! go gloss!
while painting
2egdyqs.jpg


done and installed:
2zzufjp.jpg


Perfect match! just prep prep prep!
 
Back
Top Bottom