Sorry, its taken me a while to get back to this topic. You asked how I did the headlights on the V-Rod, well here you go. Look at my previous post to see what it looks like installed.
If you look at the stock V-Rod, it has a single headlight that hangs from a mount on the top triple tree. I had to fab up a new mount for twin lights that used that stock mounting point, and allowed me to use the Buell headlights that fit the XB9 or XB12 faring (the farings are both the same).
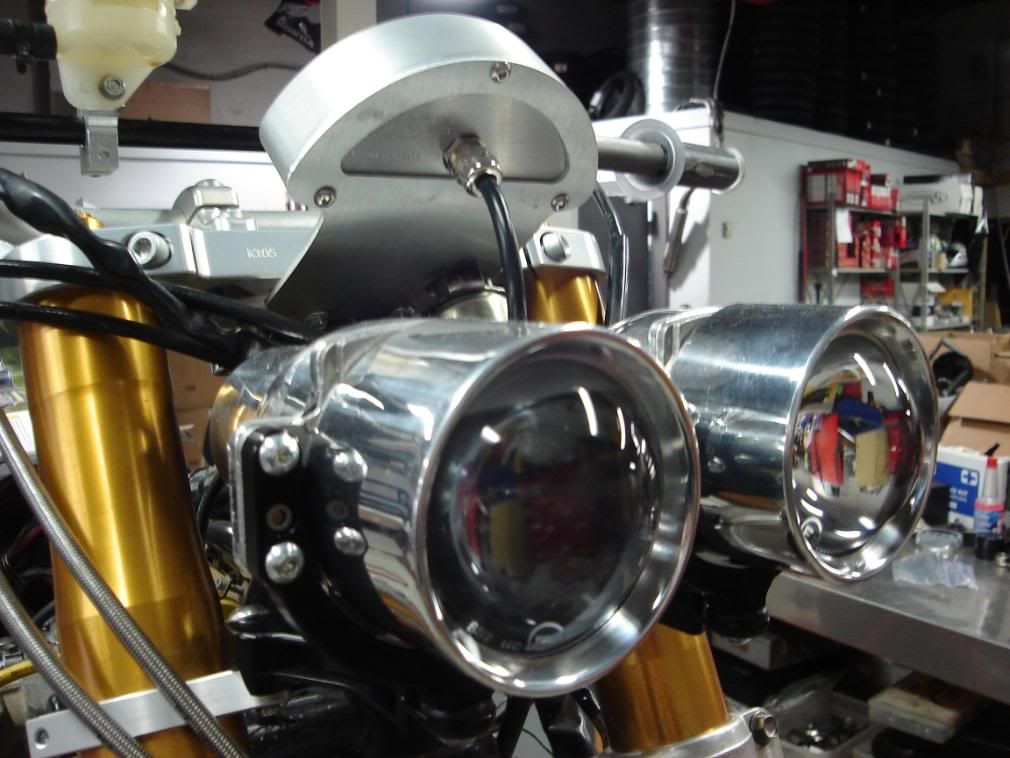
Here's a picture of the hardware that my son and I made:
Follow along:
1. In the upper left is the mount that holds the top of the the fairing. It's a simple handlebar clamp with a stalk that bolts to the stock V-Rod windscreen mount that I used on the inside of the Buell fairing. We then had to make the outer mirror block off plates.
2. At the bottom is the mount for the bottom of the fairing that also serves to mount the turn signals. The large piece is a made of hex stock that takes the place of the upper triple tree pinch bolt. It's threaded on one end and tapped on the other end to allow the turn signal to screw in and hold the fairing. The smaller item is a short copy of the stock turn signal stalk to help keep the turn signals in roughly the stock location.
3. In the center are the "spectacles" that we made. They bolt into the stock headlamp location and completely support the twin headlamps. The lamps just poke through the fairing. Sorry I don't have any pictures that I could find of the mounts without the fairing attached.
If I had to do this for a cafe, I would still use the handlebar mounts and the triple tree bolts. For the spectacles I would fab up a plate mount and attach it to the fork ears. I think I still have the part files and if anyone is interested I can send a print.
An interesting story is how we put this all together.....my son Matt did this three years ago when he was a high school senior at a technical high school studying computer aided machining. I designed the parts in Autodesk Inventor, as I finished I would send the part files to him via e-mail at the school. He could print the blueprints and then took the part files into MasterCAM to toolpath the Haas VF2 CNC for the "spectacles" the round parts were hand turned on a lathe. E-mail in the morning, finished parts when he got home from school!!!!


")