Vincati Build

GoFarKid

New Member
I have always wanted a Vincent, since I was about 14 (That is 50 years ago), now its time. Ill post the journey on here.

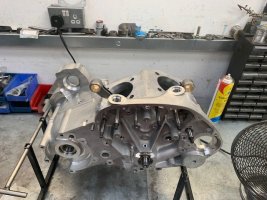
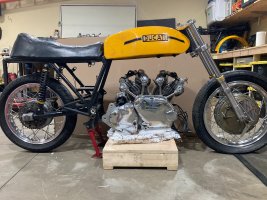
It all starts with the engine. I asked John Mossey, of JMC in the UK, to build me a Black Shadow spec, brand new engine. Loosely, the specs are 8.5:1 Compression, Black Shadow cams, 5 speed Quaife gearbox. It arrived at my place in Washington DC in 2024.
 

Attachments

  • IMG_0440 (002).jpg
    IMG_0440 (002).jpg
    2 MB · Views: 14
  • IMG_3062 (002).jpg
    IMG_3062 (002).jpg
    2 MB · Views: 8
  • IMG_4226 (002).jpg
    IMG_4226 (002).jpg
    79.2 KB · Views: 7
  • IMG_4227 (002).jpg
    IMG_4227 (002).jpg
    86.1 KB · Views: 9
  • IMG_1423.jpeg
    IMG_1423.jpeg
    2 MB · Views: 9
  • IMG_1425.jpeg
    IMG_1425.jpeg
    1.9 MB · Views: 7
  • IMG_1427.jpeg
    IMG_1427.jpeg
    1.9 MB · Views: 7
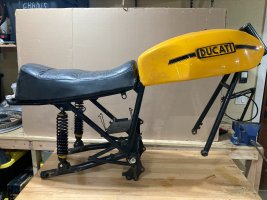
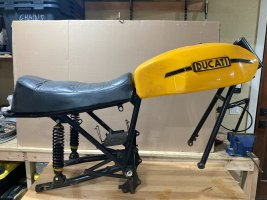
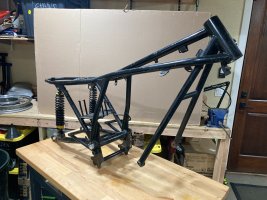
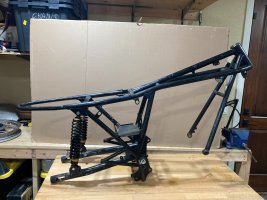
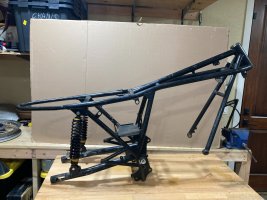
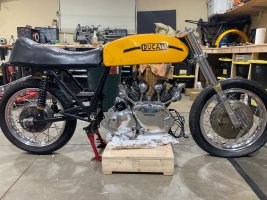
Next I had to source a Frame. Originally i thought of using a Ducati Darmah, but then pivoted to a 1974 750 GT. I found one on Ebay, with a really nice Tank and Seat, so that created a great starting point
 

Attachments

  • IMG_4548.jpeg
    IMG_4548.jpeg
    1.7 MB · Views: 7
  • IMG_4546.jpeg
    IMG_4546.jpeg
    1.8 MB · Views: 7
  • IMG_4545.jpeg
    IMG_4545.jpeg
    1.8 MB · Views: 7
  • IMG_4544.jpeg
    IMG_4544.jpeg
    1.5 MB · Views: 6
  • IMG_0339.jpeg
    IMG_0339.jpeg
    2.1 MB · Views: 7
  • IMG_0336.jpeg
    IMG_0336.jpeg
    2.2 MB · Views: 5
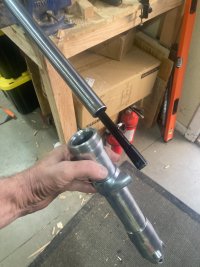
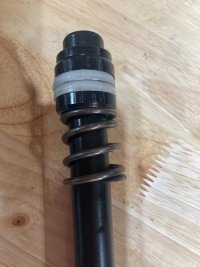
I had been searching for a couple of years, and finally found a set of 38mm Ceriani Replica (actually Nuovo Forcelli Italiana) forks. I had to strip them down, and finding replacement stanchions was impossible (the old ones had a slight bend / wrinkle to them), so I had "Forking By Frank" to manufacturer me a brand new set!
 

Attachments

  • IMG_4556.jpeg
    IMG_4556.jpeg
    1.8 MB · Views: 7
  • IMG_4557.jpeg
    IMG_4557.jpeg
    1.3 MB · Views: 7
  • IMG_4558.jpeg
    IMG_4558.jpeg
    1.7 MB · Views: 6
  • IMG_4649.jpeg
    IMG_4649.jpeg
    1.7 MB · Views: 5
  • IMG_4650.jpeg
    IMG_4650.jpeg
    1.3 MB · Views: 5
  • IMG_4652.jpeg
    IMG_4652.jpeg
    1.1 MB · Views: 5
  • IMG_4653.jpeg
    IMG_4653.jpeg
    1.5 MB · Views: 5
  • IMG_4655.jpeg
    IMG_4655.jpeg
    908.5 KB · Views: 6
  • IMG_4659.jpeg
    IMG_4659.jpeg
    1.9 MB · Views: 6
  • IMG_4660.jpeg
    IMG_4660.jpeg
    1.1 MB · Views: 7
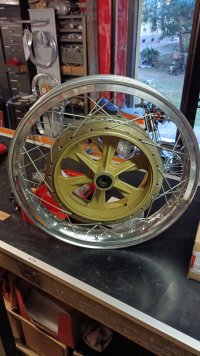
OK, so next, I found an Italian supplier of a Fontana 250mm Quad LS front brake, and a really nice set of 38mm Tripple Tree Tops and Bottoms. I had to make my own spindle out of a Grade 8 Bolt on the SouthBend Lathe!
 

Attachments

  • 0bdc8761-7e61-423e-aa9a-f5392db7052b.JPG
    0bdc8761-7e61-423e-aa9a-f5392db7052b.JPG
    223.7 KB · Views: 7
  • 30a018d2-e95a-4df1-b93e-5a355d0ba752.JPG
    30a018d2-e95a-4df1-b93e-5a355d0ba752.JPG
    226.6 KB · Views: 7
  • IMG_8129.jpeg
    IMG_8129.jpeg
    2 MB · Views: 6
  • IMG_8134.jpeg
    IMG_8134.jpeg
    1.9 MB · Views: 6
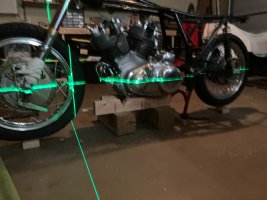
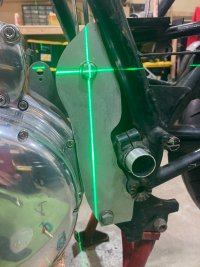
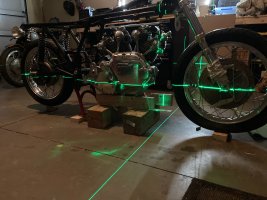
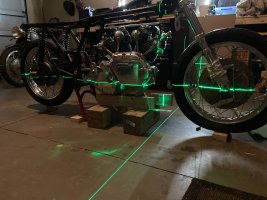
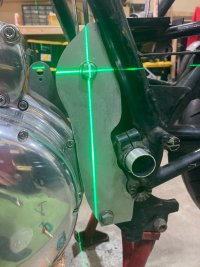
The really scary bit was then starting to put it all together. I had to first cut the front down tubes off the Frame (The point of no-return, and start to position the engine under the frame, to figure out the right position. I used a laser to get alignment of the Frame center line, the Engine, and especially to make sure the Chain drive from the Vincent Engine to the rear Sprocket. Once that started to come together, I had to build the rear engine mounts. I had a lot of Help from Phil Pilgrim in Australia for this. He was a fantastic help
 

Attachments

  • image3.jpeg
    image3.jpeg
    1.9 MB · Views: 7
  • image11.jpeg
    image11.jpeg
    495.3 KB · Views: 7
  • image14.jpeg
    image14.jpeg
    320.2 KB · Views: 6
  • IMG_4544.jpeg
    IMG_4544.jpeg
    1.5 MB · Views: 7
  • IMG_4671.jpeg
    IMG_4671.jpeg
    1.7 MB · Views: 6
  • IMG_4677.jpeg
    IMG_4677.jpeg
    1.9 MB · Views: 4
  • IMG_4714.jpeg
    IMG_4714.jpeg
    1.8 MB · Views: 5
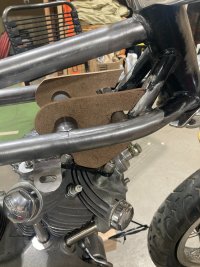
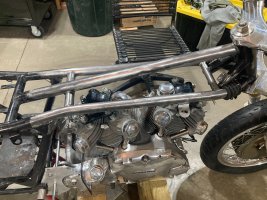
Next I had to fabricate the Top Cylinder Head mounts.
IMG_0095.jpeg
IMG_0097.jpeg
IMG_0104.jpeg
They require welding a set of cross tubes to the frame, and fabricating vertical plates to hang the cylinder heads. This is an important part, to get the alignment, and vertical height of the engine together
 

Attachments

  • IMG_4714.jpeg
    IMG_4714.jpeg
    1.8 MB · Views: 6
  • IMG_4704.jpeg
    IMG_4704.jpeg
    2.1 MB · Views: 6
  • IMG_4675.jpeg
    IMG_4675.jpeg
    1.8 MB · Views: 6
  • IMG_4671.jpeg
    IMG_4671.jpeg
    1.7 MB · Views: 5
  • image13.jpeg
    image13.jpeg
    433.1 KB · Views: 6
  • image11.jpeg
    image11.jpeg
    495.3 KB · Views: 6
  • image5.jpeg
    image5.jpeg
    511.1 KB · Views: 7
A Few more images of the Top Mounts
 

Attachments

  • IMG_0547.jpeg
    IMG_0547.jpeg
    1.7 MB · Views: 8
  • IMG_0533.jpeg
    IMG_0533.jpeg
    1.6 MB · Views: 9
  • IMG_0531.jpeg
    IMG_0531.jpeg
    1.8 MB · Views: 7
  • IMG_0232.jpeg
    IMG_0232.jpeg
    2 MB · Views: 6
  • IMG_0231.jpeg
    IMG_0231.jpeg
    2 MB · Views: 6
  • IMG_0109.jpeg
    IMG_0109.jpeg
    2.1 MB · Views: 5
  • IMG_0107.jpeg
    IMG_0107.jpeg
    1.3 MB · Views: 7
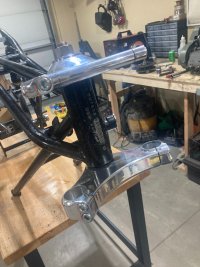
Next, I had to build the Steering Yoke carrier, bearing mounts, and steering lock for the tripple tree. Again, the central shaft was a Grade 8 Bolt.
 

Attachments

  • IMG_4613.jpeg
    IMG_4613.jpeg
    1.7 MB · Views: 6
  • IMG_4612.jpeg
    IMG_4612.jpeg
    1.7 MB · Views: 7
  • IMG_0188.jpeg
    IMG_0188.jpeg
    1.4 MB · Views: 6
  • IMG_0187.jpeg
    IMG_0187.jpeg
    1.2 MB · Views: 7
  • IMG_0186.jpeg
    IMG_0186.jpeg
    1.7 MB · Views: 6
  • IMG_0185.jpeg
    IMG_0185.jpeg
    2 MB · Views: 6
  • IMG_4615.jpeg
    IMG_4615.jpeg
    1.4 MB · Views: 8
Back
Top Bottom