CB400 Four project

noexit

Been Around the Block
I don't see any CB400 Four projects on here, so here's mine.

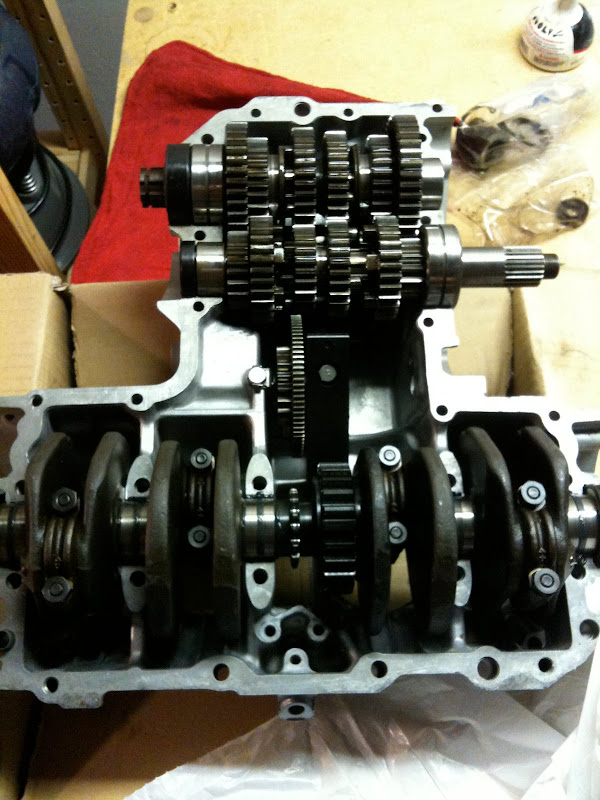
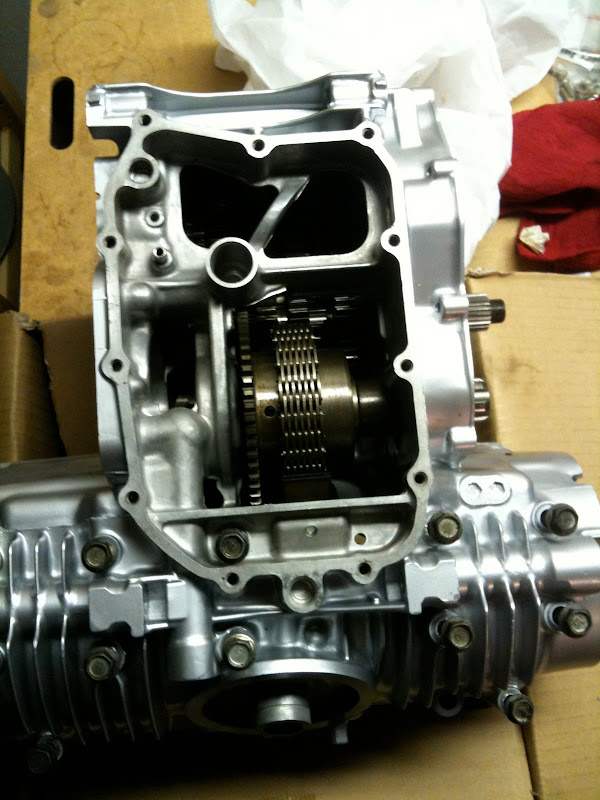
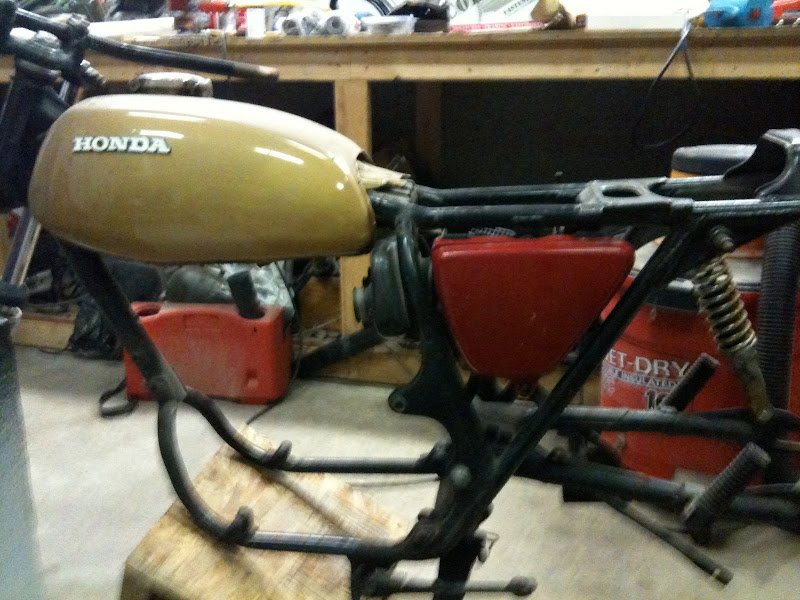
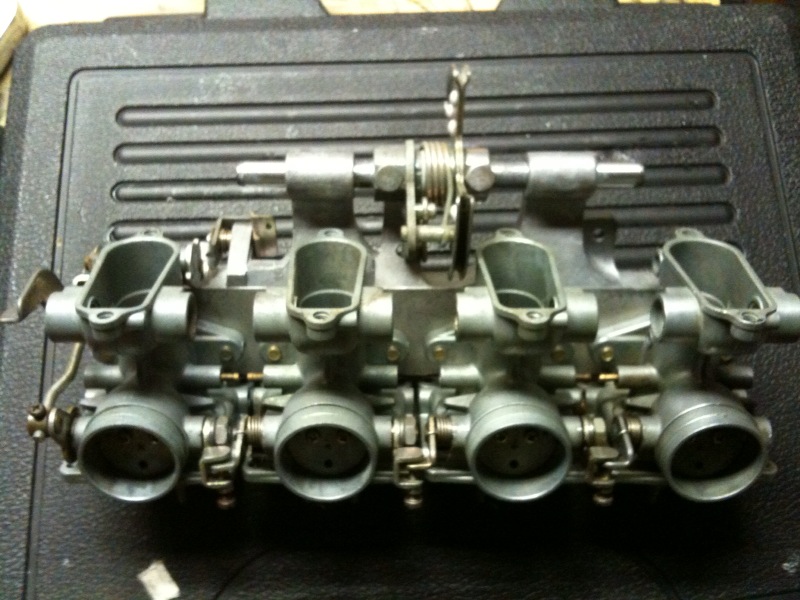
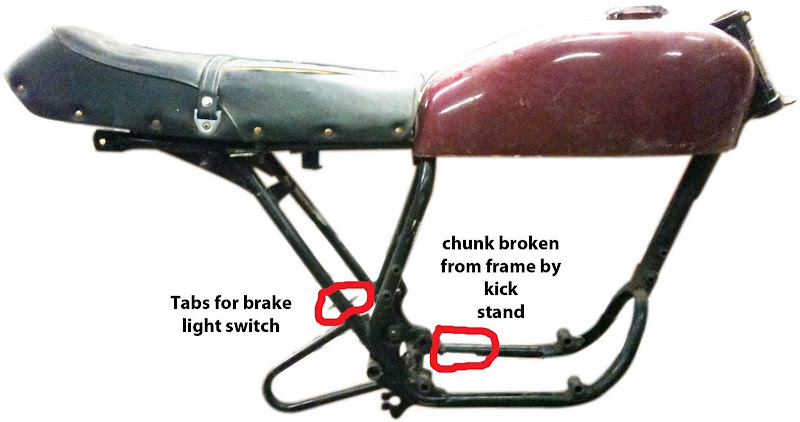
A good friend of mine bought a pretty nice stock CB400F for a crazy cheap price from a friend of his (same guy that sold me a 1956 pre-unit Triumph 500 engine) and it came with two parts bikes, which he gave to me for free. I got two mostly rolling frames with two engines, a couple boxes of parts, and one title.

<a href="http://picasaweb.google.com/noexit/CB4001/photo#5196683431319020818"><img src="http://lh4.ggpht.com/noexit/SB5UDC3tpRI/AAAAAAAABko/jl-aXd0mPzM/s800/SANY0004.JPG" /></a>
<a href="http://picasaweb.google.com/noexit/CB4001/photo#5196683396959282434"><img src="http://lh4.ggpht.com/noexit/SB5UBC3tpQI/AAAAAAAABkg/w_sm-xQTW-Y/s800/SANY0001.JPG" /></a>
<a href="http://picasaweb.google.com/noexit/CB4001/photo#5196680781324198962"><img src="http://lh3.ggpht.com/noexit/SB5Roy3tpDI/AAAAAAAABic/G6ASUXCJfdg/s800/SANY0017.JPG" /></a>
<a href="http://picasaweb.google.com/noexit/CB4001/photo#5196680892993348706"><img src="http://lh5.ggpht.com/noexit/SB5RvS3tpGI/AAAAAAAABi0/TYOj3YDgusU/s800/SANY0014.JPG" /></a>
 
I'll be following this thread as I will be starting a project soon with a similar 1977 CB400f basket case.

Please keep us posted with your progress.
 
It's a good think I went to check up on my project! I'm been working quite a bit on my engine sine the last I posted. 8)

The cam cover and side covers are polished, head and cylinders are clean, and the cases are painted. I have one stubborn bolt that didn't want to come out of the bottom half of the case, so I've had to drill it out and am waiting for my uncle to return from China so I can bring it into his machine shop and drill it out for a helicoil. Other than that, the engine is ready so go back together, and it will be time to start on the frame.

I was about to order an alternator last week, but I already have one! It's in the pic at the top of the page!

I moved into a new house with a big, under used basement, so I have my own workspace now. I hope to have a lot more progress this winter.

IMG_0141.JPG

IMG_0143.JPG
 
Do a search and you'll see there are a few CB400F projects on this site right now. Here's mine. http://dotheton.com/index.php?topic=9603.0 Its progressing at a snails pace.
 
Ran into a couple problems two weeks ago when I was bolting my case together. I applied the Hondabond and started bolting everything together, when I realized that I forgot to check the torque on the cam adjuster. So I had to take it all apart before it dried. I cleaned everything up and started over. I reapplied the Hondabond, then I misread the torque specs on the M6 bolts, and broke the M6x100 and had to tear it apart again. I put an order in for new M6 bolts, and the should be here Monday.

Today, I went to my dad's shop where the frame is, and had a visualization session. I brought out the frame and stuck a tank and seat on it to try to figure out what I wanted to do, and where everything is going to go, and what tabs I'm going to grind off. My conclusion was, stock tank (there's a CL350 tank on it in the pic), custom seat, scrap the center stand, battery box, side covers and air box. The only problem is that the plastic bit from the carbs to the filter box is thin because the outside two carbs are pretty close to the frame. Will pods fit?
IMG_0182.JPG
 
the best luck i've had with case bond like that is actually apply it, press the case on, then let it sit for a day before torquing it down, when it dries out a little before compressing it, it works best... learned that from a guy who rebuilt old triumphs, they never leaked again
 
rockcitycafe said:
the best luck i've had with case bond like that is actually apply it, press the case on, then let it sit for a day before torquing it down, when it dries out a little before compressing it, it works best... learned that from a guy who rebuilt old triumphs, they never leaked again

How thick do you coat it, and what do you use to apply it? Do you apply it to both sides or just one half?
 
Carbs are just about ready to be put back together with rebuild kits. I cleaned them up with a soda blaster. I think that's been my best cleaning tool investment yet. It put a really nice, almost brand new finish on the carb bodies, and clean up is just warm soapy water.

carbs.jpg
 
noexit said:
How thick do you coat it, and what do you use to apply it? Do you apply it to both sides or just one half?

apply it to one side, evenly, then install the cover and lightly press it to the crankcase so all the surfaces meet, then put the screws in to hold the cover (just hand turn them in, no pressure) and leave it for a day, then crank it down
 
Please tell me about this soda blaster setup. I have a sand blaster. Is it just another blasting medium?
 
GIJoeBob said:
Please tell me about this soda blaster setup. I have a sand blaster. Is it just another blasting medium?

It's a different medium, but it requires a different blaster setup than aluminum oxide or glass. I have a Harbor Freight pressure blaster that was about $70 or $80 on sale. It holds about 10lbs of bulk soda and has a siphon feed in the tank. I'm sure there are plenty of discussions on here that get into greater detail.
 
that engine looks great. Did you polish it. Soda blaster and sand blasters are gold when working on these things. You can build your own soda blaster I built mine out of a clear rubbermaid container.
 
Cool project. It's nice to see a few 400F's that are in mid progress.

I've recently picked up another project and will eagerly follow and post along side the rest of you. A couple of weeks back, I managed to get a rolling CB350F chassis less engine. On my bench sits a low mile 400F engine I scored for $35 bucks last winter. As soon as Christmas is over, I'll be working on this project in earnest hoping to finish up late spring next year. I've been through the whole drill last year with the my first 350F cafe bike. All of it seems like Groundhogs day. I'm hopeful that I can apply what worked well and cut down on some unnecessary time f*cking about.

Oh, you asked if pods fit...they sure do. Just be prepared to do some jetting to get it 90% perfect. You will NEVER get it to be quite as smooth as the airbox. I have pods on the 350F and like the way they look. It's a trade off.
 
thompsonmx100 said:
that engine looks great. Did you polish it.

Nothing in the pictures I've uploaded so far is polished. I thought about it, but there are so many seams in the casting that I'd have to grind down, and getting in between fins is a b*tch. Both halves of the case (even though no factory lower that I've ever seen was painted), the oil pan, and the oil filter were cleaned and rubbed down with ScotchBrite and painted in Duplicolor aluminum engine enamel. I've heard good things about this paint. Some has scratched off from when I brought it to my uncle's machine shop to have a helicoil put in, but I'll sand it down a repaint the scratched areas after I get the case together. Some of the color has also rubbed off along the edges when I wiped the mating surfaces of the case halves with acetone. This has me afraid that gas may effect the finish.

Other parts of the engine; side covers, cam/rocker cover and breather cover are polished. I still need an alternator housing/cover. I also have a stainless fastener kit from Z1 (that I helped make!) that will be holding these polished parts on.

Edit: The paint I use on my engine is Duplicolor DE 1615. The Duplicolor website says it's gas resistant, and withstands temps up to 500°f.

Owned said:
Oh, you asked if pods fit...they sure do. Just be prepared to do some jetting to get it 90% perfect. You will NEVER get it to be quite as smooth as the airbox. I have pods on the 350F and like the way they look. It's a trade off.

Sirius has a jet kit with 4x #75, #85, #90 and #95 Jets. Think this will do it?
 
Got some work on the frame done yesterday.

Picked up a spare tank from my friend's house to I could stick it on the frame with the seat. I think I might base my cafe seat off this pan, that way I can use the stock hinge and seat lock. Started grinding off tabs. Those two on the left are for the brake light and pedal return spring, right?
frame%20mock.jpg


Anyone know what this one is for? I didn't cut that one off yet, but I don't think I need it.
IMG_0196.JPG


I was going to remove the brackets for the center stand and weld the side stand from my other frame onto this bike where it's broken off and taken a chunk of the frame with it, but I'm wondering if I should bother with the side stand and just patch it up. I think a center stand is more handy anyway, and it's not such a big bike that I can't always use the center stand. Removing the center stand would shave a few pounds though.

I also brought the wiring harness home with me so I can start dissecting and recording it. I'm going to make a new custom harness, and maybe a couple stock harnesses for sale while I'm at it if anyone's interested (and depending on some rubber boots).

It's a pretty good looking bike just sitting there on my workbench with a tank and seat on it though, isn't it?
 
Sirius has a jet kit with 4x #75, #85, #90 and #95 Jets. Think this will do it?
[/quote]

The kit will work sure. But, I think you'd be fine to buy the 85's and call it a day. Maybe the 90's...but the 95's are way too big unless you've punched out the displacement. You may save a few bucks and just buy the 85's.
 
Back
Top Bottom