
We noticed you are blocking ads. DO THE TON only works with community supporters. Most are active members of the site with small businesses. Please consider disabling your ad blocking tool and checking out the businesses that help keep our site up and free.
You are using an out of date browser. It may not display this or other websites correctly.
You should upgrade or use an alternative browser.
You should upgrade or use an alternative browser.
1962 BSA DBD34 Gold Star restoration (1000 miles and more)
- Thread starter swan
- Start date
Re: 1962 BSA DBD34 Gold Star restoration (hardware going to the plater!)
Thanks Joe and everyone else.
I do not want to say "never again", but I will prepare hardware with a better cabinet and compressor next time. I feel so happy and lighter now that the hardware is FINALLY shipped out. Looking forward to getting it back and to start going clockwise.
Thanks Joe and everyone else.
I do not want to say "never again", but I will prepare hardware with a better cabinet and compressor next time. I feel so happy and lighter now that the hardware is FINALLY shipped out. Looking forward to getting it back and to start going clockwise.
Re: 1962 BSA DBD34 Gold Star restoration (hardware going to the plater!)
I have visions of some 300 pound guy astride the bike and kicking it over and over and over again, and eventually the right leg of the centre stand begins to give under the sheer load pounding away above it I plead guilty to a similar crime on a Velo Viper a decade or three ago, but to my credit, I was much closer to 200 pounds.
The way you have simply shrugged it off, fixed it and got it away for coating with the minimum of fuss all bodes well for what comes next. You've found the site, you've done the archaelogical cataloging, and your now into preservation. When you get into the assembly phase, keep zillions of pictures coming. I am sure I am not alone in picking up an unexpected emotional attachment to this journal and to the bike itself.
It has also given my two current projects a new lease of live. I have a tidy Super Rocket that was destined to become the ubiquitous RGS replica. This thread has changed my mind, and now its simply going to be a stonkingly good Super Rocket.........I have decided that i;ll re-inforce what it has always been, and I shall shy away from making it a replica of anything at all. A good lesson for me,
Re: 1962 BSA DBD34 Gold Star restoration (hardware going to the plater!)
Bumpthump, I am 150 lbs wet and sent off the center stand to powder coat without actually looking at it in the context of the whole, and failed notice the obvious fact it was bent. Two steps forward, one back...
There will be zillion (or less) photos coming soon. Engine build, gearboxes, wheels and the pivotal moment she becomes a rolling chassis. It is humbling to be an inspiration to you and your bikes. I love Super Rockets and A10's in general and sold a Bitsa A10 I was going to make into a replica Rocket Gold Star when I found my Goldie. In the future I would love to find an A10 and restore it to factory stock. Start a build thread on this forum for you project(s).
Re: 1962 BSA DBD34 Gold Star restoration (hardware going to the plater!)
I certainly will! It just goes to show how we all influence (and can be influenced by) others. I guess I've always held Gold Stars, Rocket Gold Stars and Velo Venoms as the pinnacle of my bike world (setting aside the fiscal madness that is now Vincents and Broughs). The Rocket Gold Star has long been the replica of choice simply because it's so achievable...............a chrome tank here, a frame tweak there. In a sense, it has done down the Super Rocket, and in another sense, it has elevated it, because comparitavely few now exist which haven't been sacrificed at the altar of RGS reps. I'm kind of glad that I woke up to the "idea" that keeping a Super Rocket as a Super Rocket is a worthwhile thing to do!
Slightly off topic, but a friend in Glasgow is toying (well, he's gone a little further than that), with the concept of using a Harley engine and gearbox to create his own homage to a Brough Superior...........bespoke frame and all. He's got it going on under the working title of a "Rough Facsimile". His madness makes me smile.
Re: 1962 BSA DBD34 Gold Star restoration (hardware going to the plater!)
Hardware arrived safely at the plater and I will call on Monday for an update. Hopefully I have a pile of freshly plated hardware just in time for X-mas. I ordered many missing bits of hardware, fiber washers etc as well as new tappets from Phil Pearson. Waiting (im)patiently to start going clockwise, build the motor, gearboxes and have a rolling chassis soon! The center and engine stands are back from my powder coater and I had them redo my front engine cover for there was a flaw in the coating. I also polished and buffed the timing cover to a mirror finish and started the primary, but am out of town this week, so I will get back to them on Wednesday.
Bumpthump, have you spent time on the Super Rocket pages? http://bsa.hailwood.com/
Re: 1962 BSA DBD34 Gold Star restoration (hardware going to the plater!)
Thanks for the link to the Super Rocket stuff. I've come across some of it previously, but I had a good look over it last night. I hadn't realized that the nacelle was virtually compulsory in the uk, and that a tach (if optioned), was kind of just bolted on to the side. Mine has (a very ropey) nacelle but no tach. Pretty original, but needing much work. Thanks for the steer to the pages.
Thanks for the link to the Super Rocket stuff. I've come across some of it previously, but I had a good look over it last night. I hadn't realized that the nacelle was virtually compulsory in the uk, and that a tach (if optioned), was kind of just bolted on to the side. Mine has (a very ropey) nacelle but no tach. Pretty original, but needing much work. Thanks for the steer to the pages.
Re: 1962 BSA DBD34 Gold Star restoration (hardware going to the plater!)
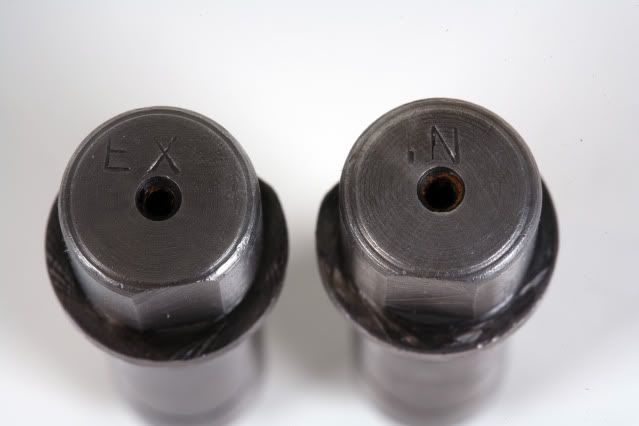
Still waiting to hear from Quality Plating. Another small step forward, my new light-weight tappets just arrived from Phil Pearson in the UK. Of course they are beautiful, machined by the man himself.
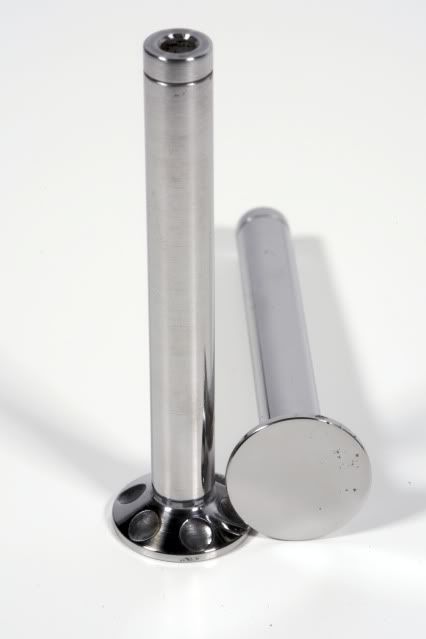
Still waiting to hear from Quality Plating. Another small step forward, my new light-weight tappets just arrived from Phil Pearson in the UK. Of course they are beautiful, machined by the man himself.
Re: 1962 BSA DBD34 Gold Star restoration (hardware going to the plater!)
Thanks jbrtwork. I just spoke to Quality Plating and my hardware will ship tomorrow so I will have it late next week. A photo of my newly plated hardware will be the centerfold!
Thanks jbrtwork. I just spoke to Quality Plating and my hardware will ship tomorrow so I will have it late next week. A photo of my newly plated hardware will be the centerfold!
Re: 1962 BSA DBD34 Gold Star restoration (hardware going to the plater!)
Mr Pearson never seems to disappoint does he? That's just a function of a man who knows the engineering required, and doesn't then indulge in commercial scale cost cutting in order to lower manufacturing costs. He charges what it costs to make it right, and in the long run, that's what matters. She's still shaping up to be one hell of a Goldie!
Mr Pearson never seems to disappoint does he? That's just a function of a man who knows the engineering required, and doesn't then indulge in commercial scale cost cutting in order to lower manufacturing costs. He charges what it costs to make it right, and in the long run, that's what matters. She's still shaping up to be one hell of a Goldie!
Re: 1962 BSA DBD34 Gold Star restoration (motor assembly!)
Bumpthump, you are so right.
Happy Holidays everyone!
I am very happy to have 3 days off, not having to travel or do anything but wrench my bike, listen to music, drink and eat. I have a fridge full of fantastic Minnesota beer (Summit Pale and Black IPA, Surly Furious and Bitter, local home brews and growlers from Fitgers Brewhouse, Duluth and Town Hall, Minneapolis.) I do not recommend getting trashed and wrenching but I enjoyed a long leisurely pint while the music was turned up and was working on my Goldie. The sun was out and hell, even the Minnesota Vikings won today!
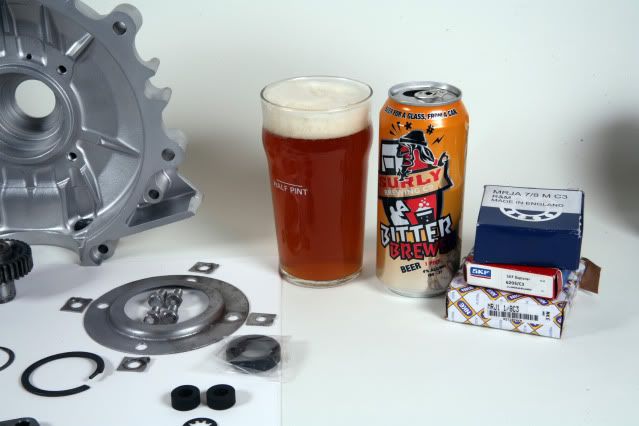
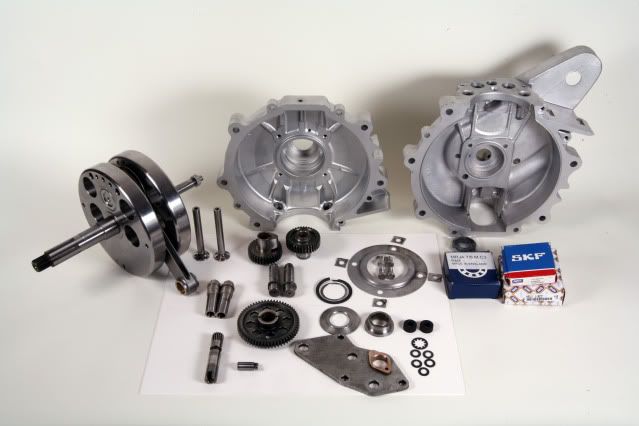
With the arrival of my new tappets and in anticipation of my freshly plated hardware arriving next week, I started rebuilding the motor. Here we go with lots of images...
All the lower motor parts were meticulously cleaned and inspected. My worked bench was cleaned and all the necessary parts, tools and lubricates were at hand. I heated my crankcases to 200 degrees F. in my oven and tossed the bearings, bearing races and camshaft spindles in my freezer.
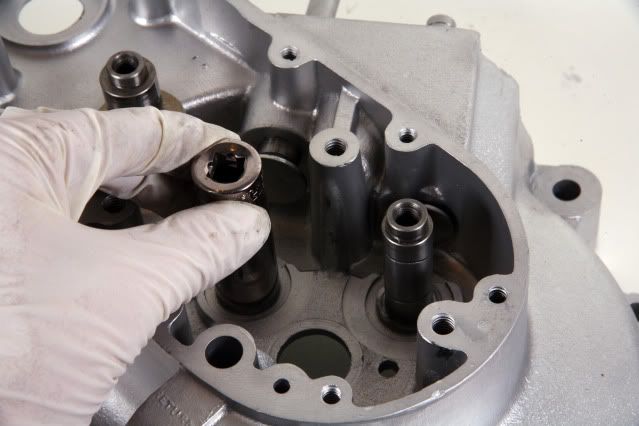
I pulled the timing side case out of the oven, installed the tappet guides with some anti-sieze lubricant on the threads and touch of black oil resistant silicone on their tops to prevent oil leaks. New tappets (cam followers) were slipped in with plenty of engine assembly lube
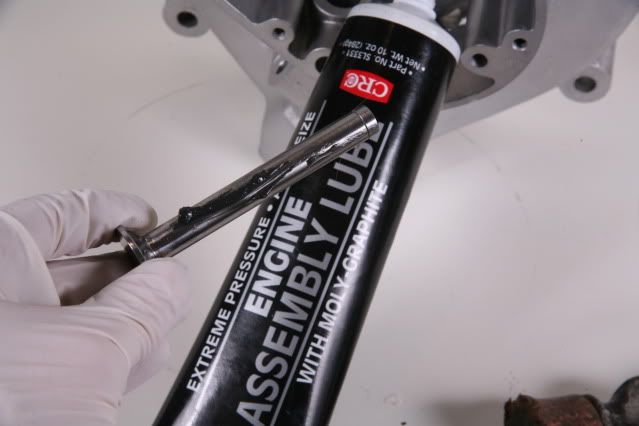
(here's to you John Healey).
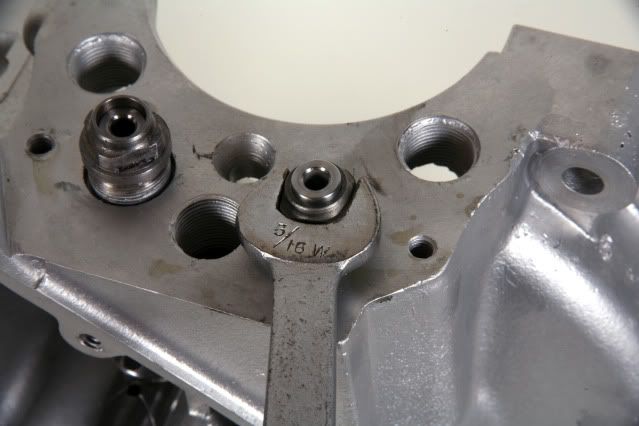
Next the camshaft spindles were taken put of the freezer, lightly drifted in with a 5/8 extension socket so that the flat portion of the spindle is parallel to the bases of the tappets. The exhaust on the exhaust side and the intake on the intake side and they went in easily with a few taps.
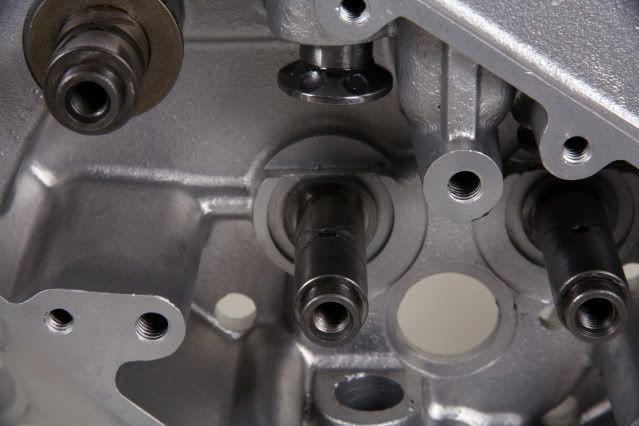
While the case was still hot, I pulled the timing side bearing race out of the freezer, lightly greased the exterior and tapped it in to place. It too went in easily. The trick is to warm the entire case, not just the area around the bearings, so they expend enough to accept the races and bearings.
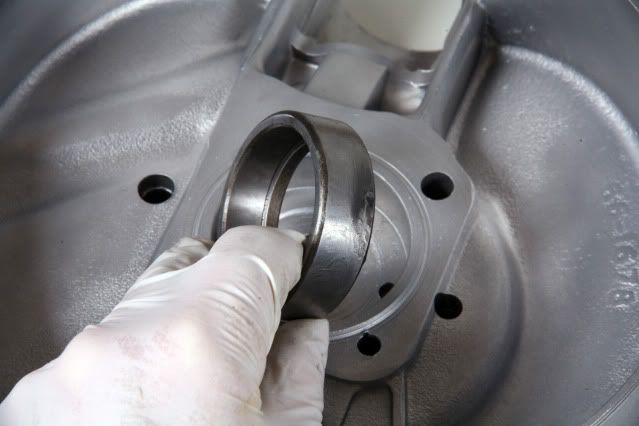
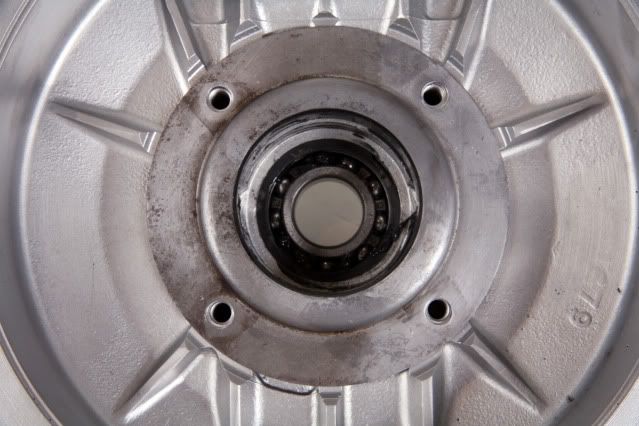
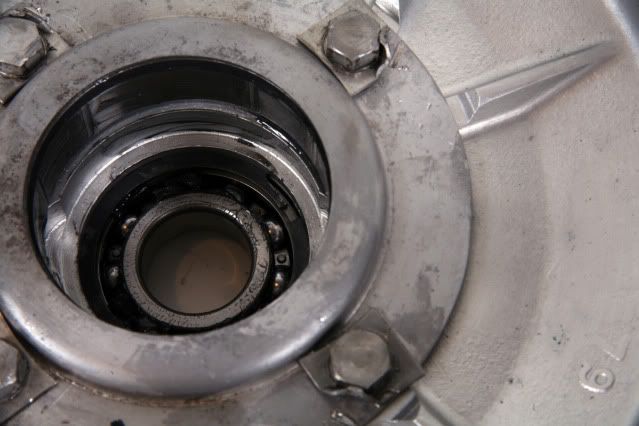
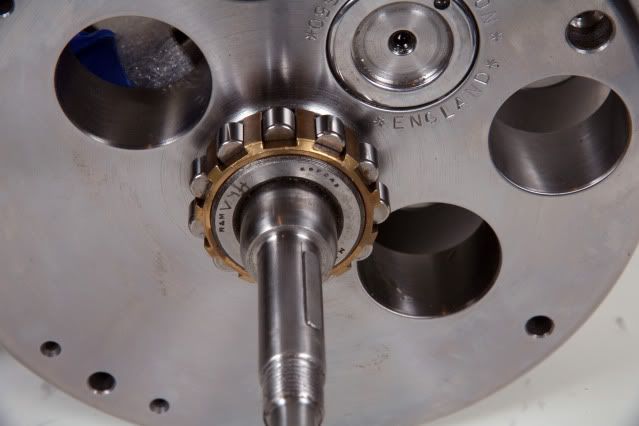
The drive (primary) crank case was taken out of the oven, the factory shim was installed and held with a smear of grease then small outer ball bearing was drifted in with a smaller diameter collar tie and a gentle taps from a dead blow hammer. No problem and the retaining ring was installed.
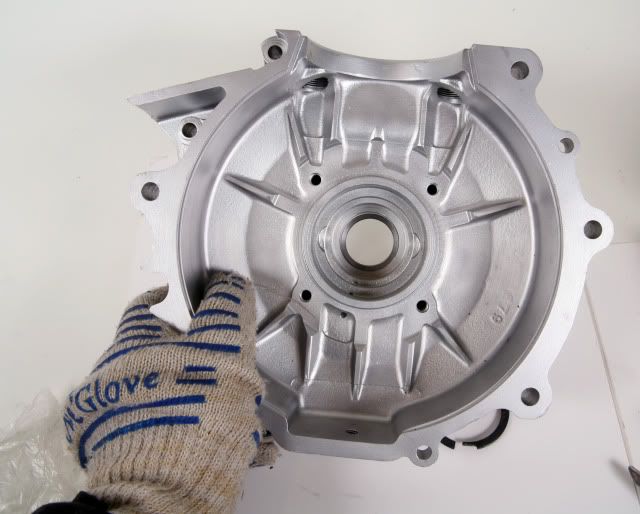
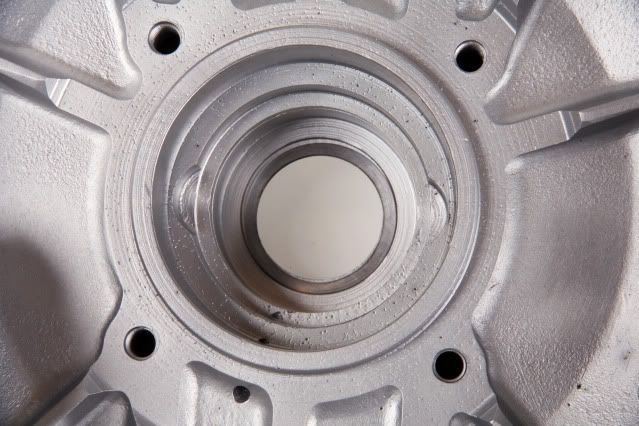
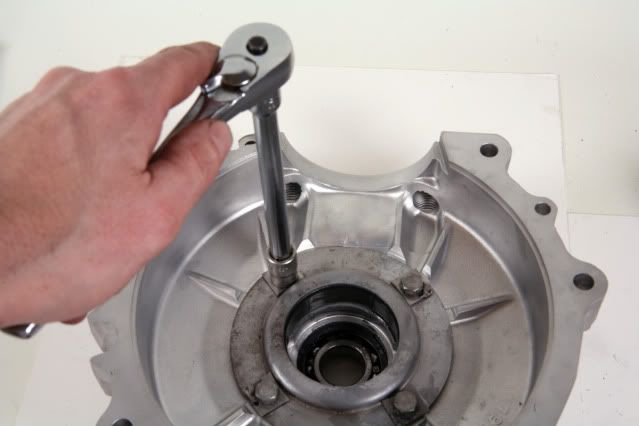
The large roller bearing race was lightly greased, drifted in with the shouldered side toward the outside of the motor and set flush up against the case. The bearing retaining plate was placed over the drive side race and the screws were given a dab of blue Loctite and wrenched in with their locking washer orientated such that the arched sides were next to the bearing retainer, The washers were bent up, locking the bolts and bearing retainer in place. As far as I know, BSA only did this on Gold Star motors.
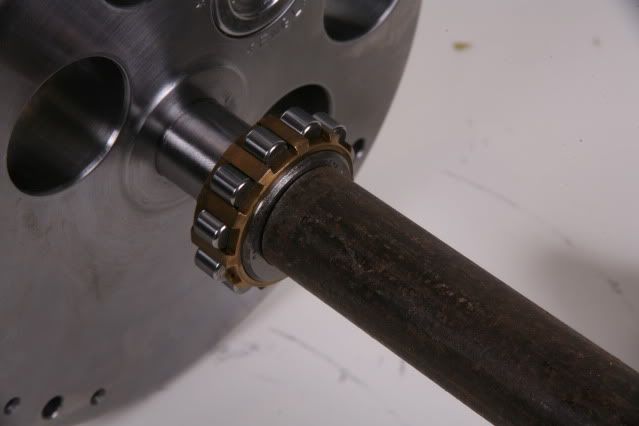
On to the crankshaft, that beautiful,beautiful crankshaft.
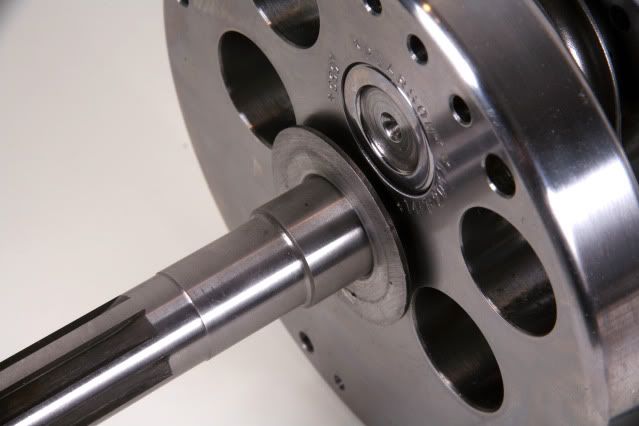
First the oil thrower/ spacer was fitted on the drive side of the crankshaft followed by an oven warmed bearing and distance collar spacer.

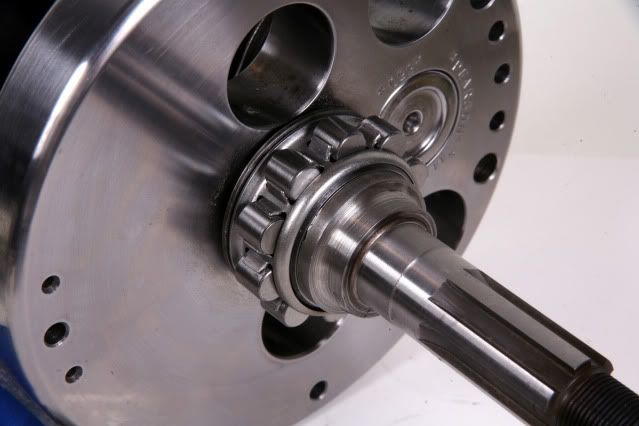
The timing side bearings were also warmed and drifted on using a 3/4" pipe and taps from a hammer until it was flush with the crankshaft. The races,bearings and other moving parts were all well lubricated.
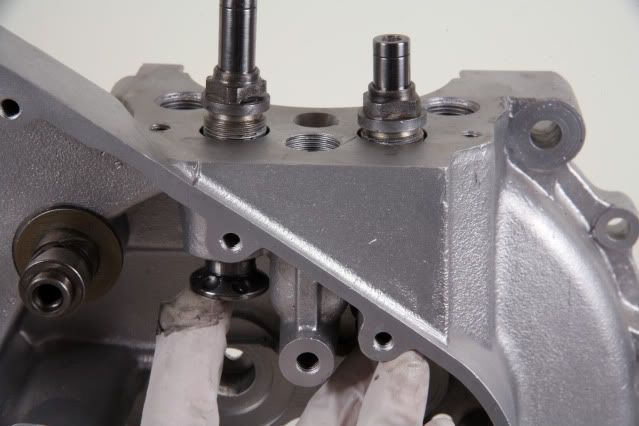
Now it was time to fit the two crankcase haves together over the crankshift. This is a dry build because I am waiting for the engine bolts and magneto studs to return from plating and I wanted to check the endfloat of the crankshaft and ensure the connecting rod is perfectly centered in the cylinder opening. So far there is no detectable endfloat and rod is centered, but I need to torque down the engine bolts to factory specs and then accurately measure the tolerences. If anything is off, I will need to take the motor apart, remove the bearings and add necessary shims.Once everything is good, I will seal each half of the crankcase with Yamaha Three Bond and hopefuly will not need to crack my lower motor for many, many years.

I added the camshafts and idler pinion and turned the crankfshaft-smooooth, so smooth!
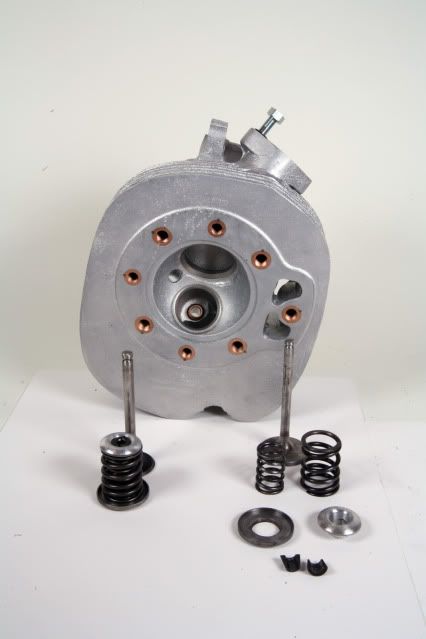
I started on the cylinder head, cleaned the valves, springs etc. I am going to do a bit more research, shopping and may decide to go with new valves, guides, springs and possibly new valve seats for unleaded gas. More money, but it will be worth it. I also need to clean and inspect the oil pump tomorrow.
Stay tuned and happy holidays everyone! Cheers!
Bumpthump, you are so right.
Happy Holidays everyone!
I am very happy to have 3 days off, not having to travel or do anything but wrench my bike, listen to music, drink and eat. I have a fridge full of fantastic Minnesota beer (Summit Pale and Black IPA, Surly Furious and Bitter, local home brews and growlers from Fitgers Brewhouse, Duluth and Town Hall, Minneapolis.) I do not recommend getting trashed and wrenching but I enjoyed a long leisurely pint while the music was turned up and was working on my Goldie. The sun was out and hell, even the Minnesota Vikings won today!
With the arrival of my new tappets and in anticipation of my freshly plated hardware arriving next week, I started rebuilding the motor. Here we go with lots of images...
All the lower motor parts were meticulously cleaned and inspected. My worked bench was cleaned and all the necessary parts, tools and lubricates were at hand. I heated my crankcases to 200 degrees F. in my oven and tossed the bearings, bearing races and camshaft spindles in my freezer.
I pulled the timing side case out of the oven, installed the tappet guides with some anti-sieze lubricant on the threads and touch of black oil resistant silicone on their tops to prevent oil leaks. New tappets (cam followers) were slipped in with plenty of engine assembly lube
(here's to you John Healey).
Next the camshaft spindles were taken put of the freezer, lightly drifted in with a 5/8 extension socket so that the flat portion of the spindle is parallel to the bases of the tappets. The exhaust on the exhaust side and the intake on the intake side and they went in easily with a few taps.
While the case was still hot, I pulled the timing side bearing race out of the freezer, lightly greased the exterior and tapped it in to place. It too went in easily. The trick is to warm the entire case, not just the area around the bearings, so they expend enough to accept the races and bearings.
The drive (primary) crank case was taken out of the oven, the factory shim was installed and held with a smear of grease then small outer ball bearing was drifted in with a smaller diameter collar tie and a gentle taps from a dead blow hammer. No problem and the retaining ring was installed.
The large roller bearing race was lightly greased, drifted in with the shouldered side toward the outside of the motor and set flush up against the case. The bearing retaining plate was placed over the drive side race and the screws were given a dab of blue Loctite and wrenched in with their locking washer orientated such that the arched sides were next to the bearing retainer, The washers were bent up, locking the bolts and bearing retainer in place. As far as I know, BSA only did this on Gold Star motors.
On to the crankshaft, that beautiful,beautiful crankshaft.
First the oil thrower/ spacer was fitted on the drive side of the crankshaft followed by an oven warmed bearing and distance collar spacer.
The timing side bearings were also warmed and drifted on using a 3/4" pipe and taps from a hammer until it was flush with the crankshaft. The races,bearings and other moving parts were all well lubricated.
Now it was time to fit the two crankcase haves together over the crankshift. This is a dry build because I am waiting for the engine bolts and magneto studs to return from plating and I wanted to check the endfloat of the crankshaft and ensure the connecting rod is perfectly centered in the cylinder opening. So far there is no detectable endfloat and rod is centered, but I need to torque down the engine bolts to factory specs and then accurately measure the tolerences. If anything is off, I will need to take the motor apart, remove the bearings and add necessary shims.Once everything is good, I will seal each half of the crankcase with Yamaha Three Bond and hopefuly will not need to crack my lower motor for many, many years.
I added the camshafts and idler pinion and turned the crankfshaft-smooooth, so smooth!
I started on the cylinder head, cleaned the valves, springs etc. I am going to do a bit more research, shopping and may decide to go with new valves, guides, springs and possibly new valve seats for unleaded gas. More money, but it will be worth it. I also need to clean and inspect the oil pump tomorrow.
Stay tuned and happy holidays everyone! Cheers!
Basement rat
Over 1,000 Posts
Re: 1962 BSA DBD34 Gold Star restoration (motor assembly!)
This much care, love, detail and time was never put in to it when it was first being made. Very nice.
This much care, love, detail and time was never put in to it when it was first being made. Very nice.

") Looking great!!
Looking great!!Re: 1962 BSA DBD34 Gold Star restoration (motor assembly!)
Thanks all for the kind words, I hope Santa was good to you all. Looks like IndieSol got his present early this year with a beautiful BMW.
Did not get very much done today due to social obligations and playing outside in the sun.
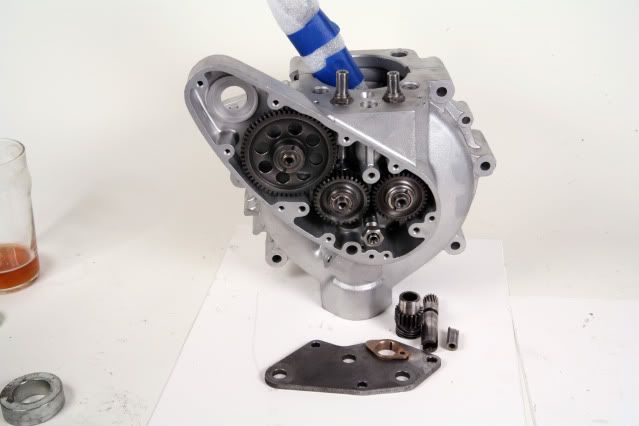
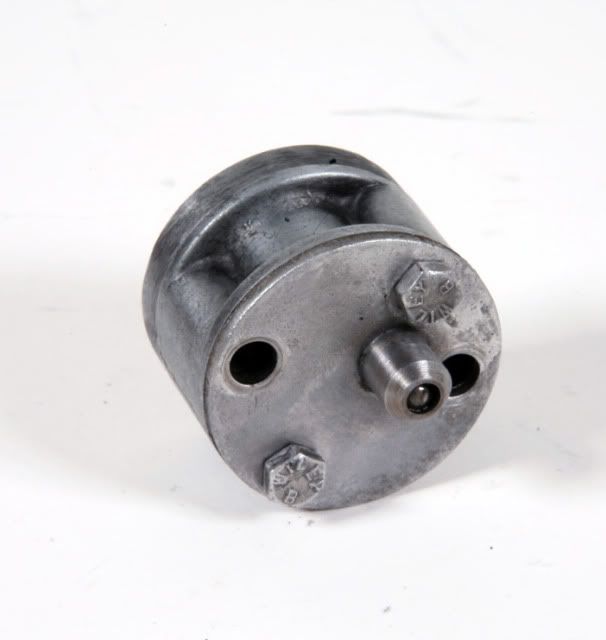
Oil pump was very simple to clean and no drama whatsoever. The trick is to not over tighten the two bolts all the gears will run smoothly.

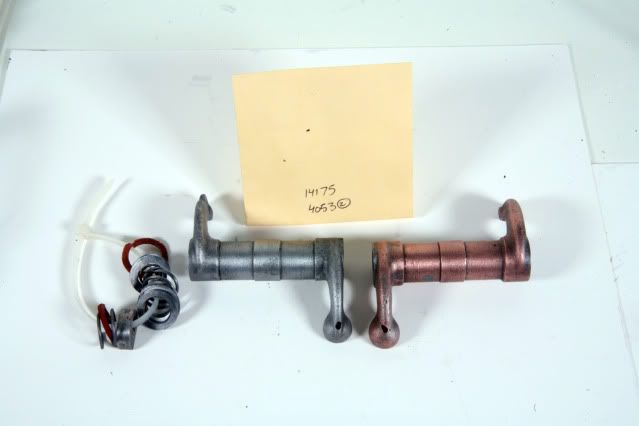
I cleaned the rockers, springs,washers etc and was surprised to discover one was copper plated ? Weird....
Need to do more research on my strange small intake cylinder head and continue sanding the primary and gearbox covers. Onwards...
Thanks all for the kind words, I hope Santa was good to you all. Looks like IndieSol got his present early this year with a beautiful BMW.
Did not get very much done today due to social obligations and playing outside in the sun.
Oil pump was very simple to clean and no drama whatsoever. The trick is to not over tighten the two bolts all the gears will run smoothly.
I cleaned the rockers, springs,washers etc and was surprised to discover one was copper plated ? Weird....
Need to do more research on my strange small intake cylinder head and continue sanding the primary and gearbox covers. Onwards...
Re: 1962 BSA DBD34 Gold Star restoration (motor assembly!)
Brilliant photos. Wish I could shed some light on the co,pper plating but I've never seen it before.............least, not so as I remember. I know some manufacturers did it to differentiate components of specific duty, but I don't get it with the rocker arms. I'm assuming of course, they are the same metal, and you don't have some weird PB hybrid one off!
This is going to be one amazing bike!


