
We noticed you are blocking ads. DO THE TON only works with community supporters. Most are active members of the site with small businesses. Please consider disabling your ad blocking tool and checking out the businesses that help keep our site up and free.
You are using an out of date browser. It may not display this or other websites correctly.
You should upgrade or use an alternative browser.
You should upgrade or use an alternative browser.
1973 1/2 BMW R60/5 restoration.
- Thread starter Kanticoy
- Start date
Re: Re: 1973 1/2 BMW R60/5 restoration.
Ha!
Redbird said:Ok, but if you crash the bike on the couch, you're gonna have to sleep on the floor :;D
Ha!
JustinLonghorn
No Purple Hearts, No Blue Ribbons
You can sleep in my shed.
AlphaDogChoppers
Science is true whether you believe in it or not.
Buncha fuckin' wiseasses!
Doin' work!
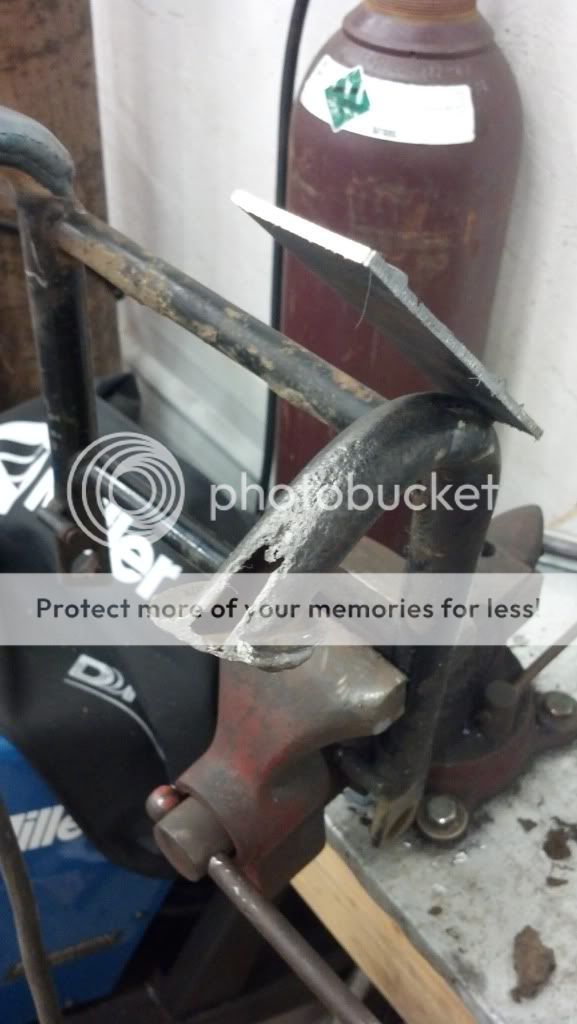
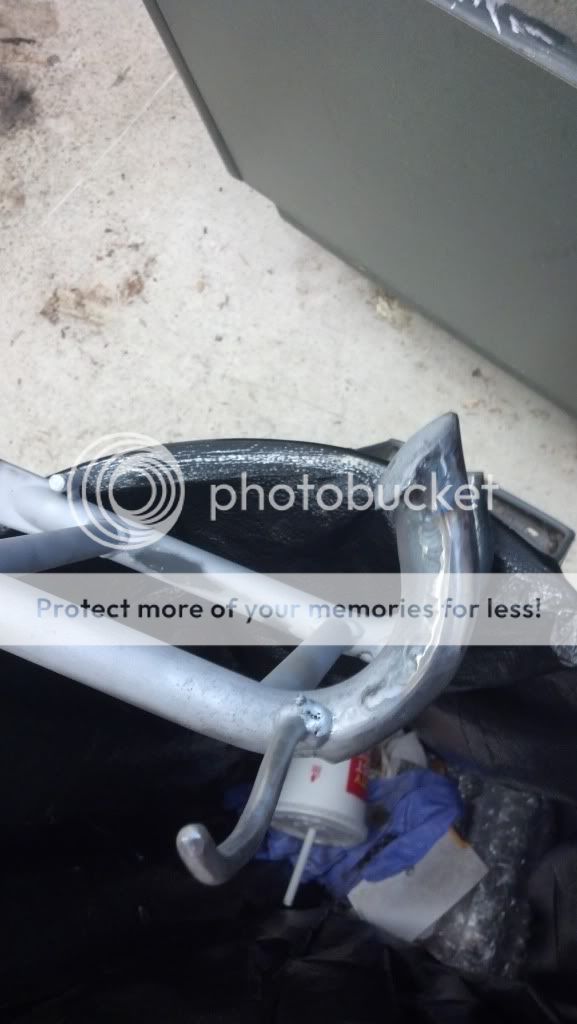
Today I repaired the corroded old center stand. It had sat in the moisture for so long and had been thinned out from dragging on surfaces over its life that the metal on the bottom of the stand had started to rot away. I sleeved the tubing with 1/8 plate, heated the flat bar, and formed it over the tube. I then TIG welded it all together. I also added back on the center stand "kicker" that you use to deploy it that had long since broken off. They were originally just welded to the outside of the tube and commonly were broken. I drilled all of the way through the center stand and used a piece of round stock to re-create the "kicker". Formed it to hook under the exhaust like the original, then good as new after a bead blast.
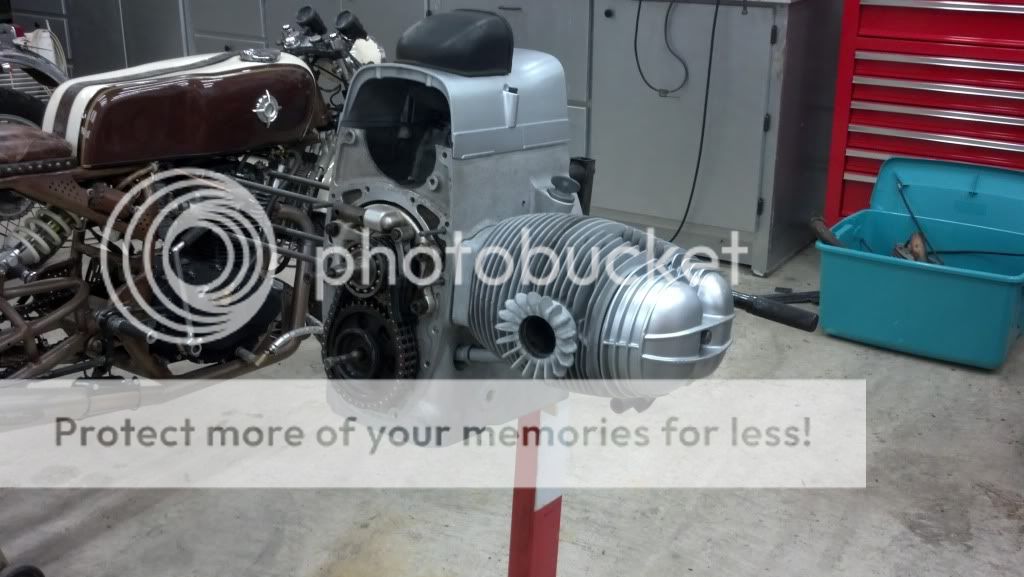
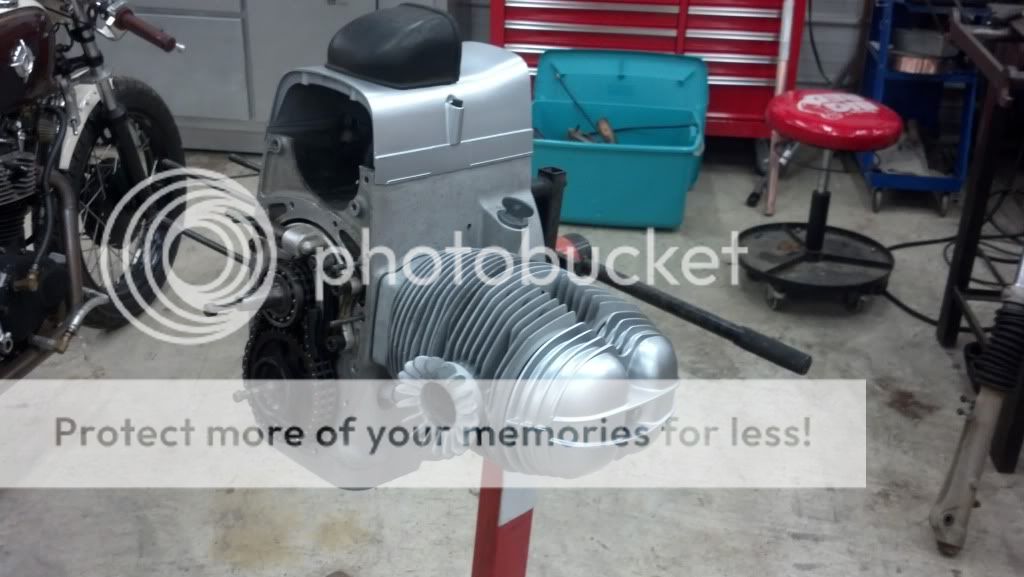
After that I bead blasted the exterior of the heads and the one good cylinder I have and mocked it up on the motor after installing the cylinder studs back onto the block. It looks pretty damned good to me.
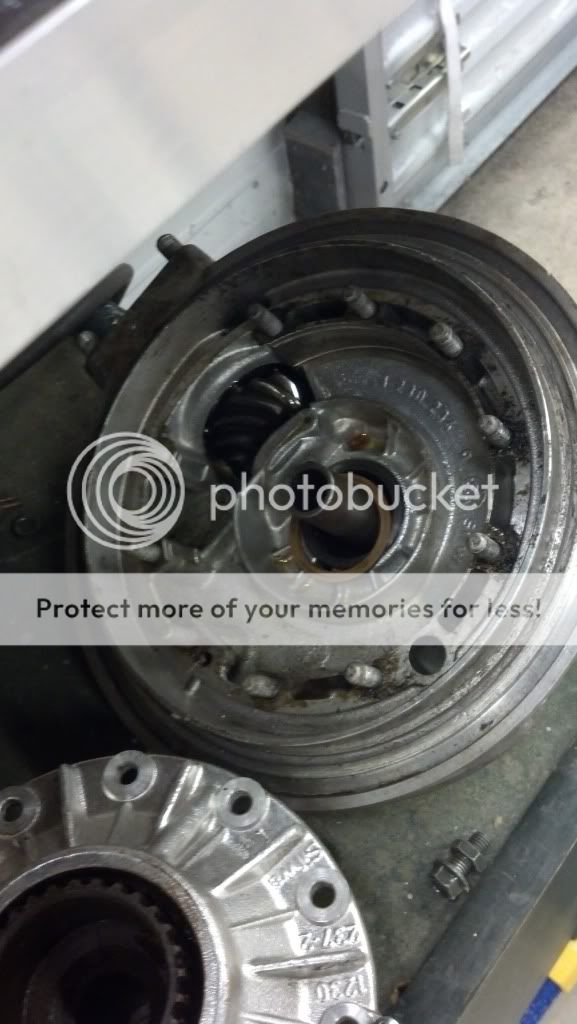
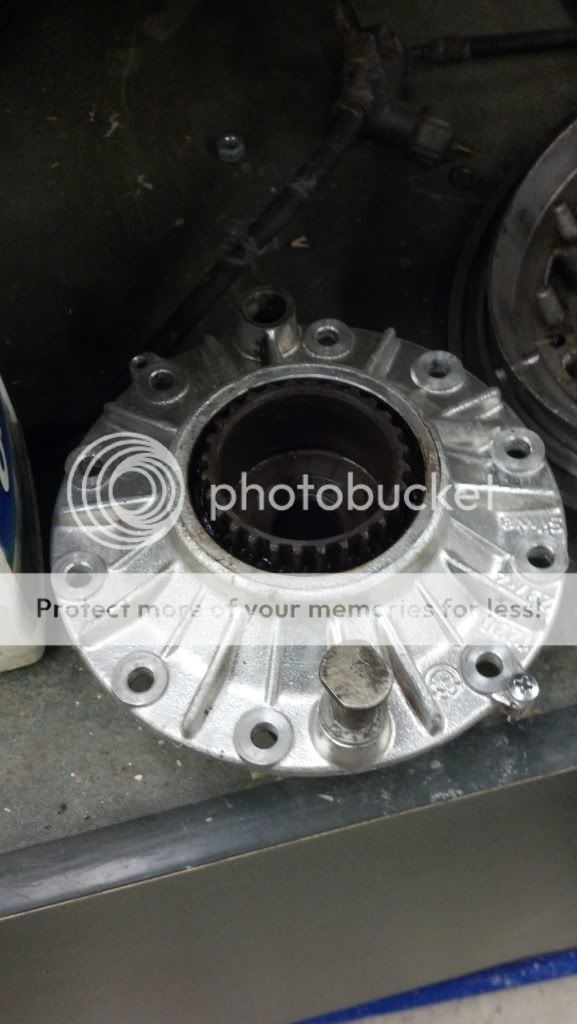
After that I broke down the rear final drive and inspected the splines, and the ring and pinion wear on the inside. It all looks brand new, and the bearings are perfect. Other than the original rear end oil being nasty, thick and stinky, all is well there. Cleaned up the internal parts and am ready to put it all back together with new gaskets and seals.
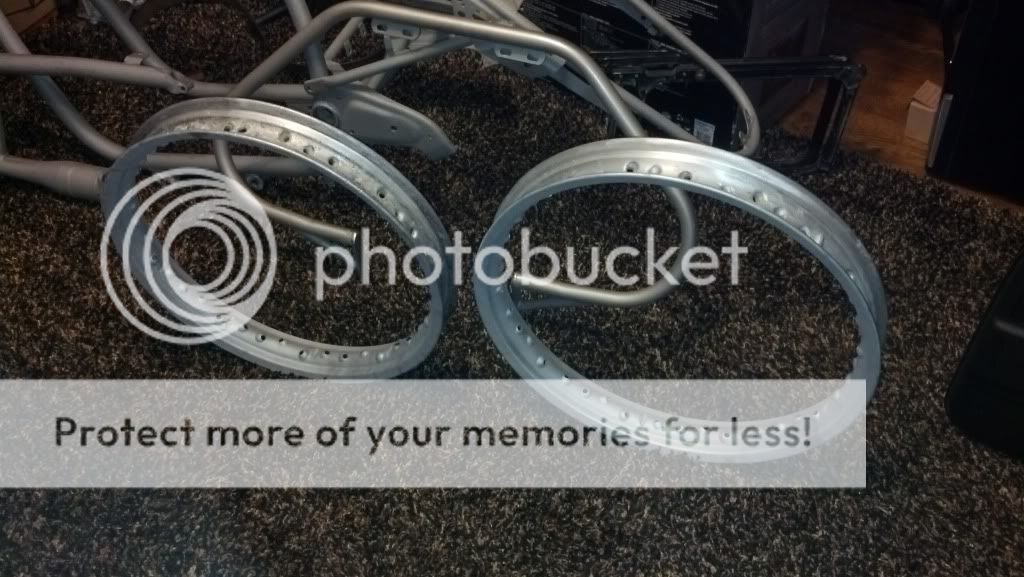
New (used) replacement Weinmann hoops came in today. The original front wheel had a really bad ding in the bead seat area, so scored these already media blasted for $50.
Moving along one day at a time!
Weinman Hoops:
Center stand before:
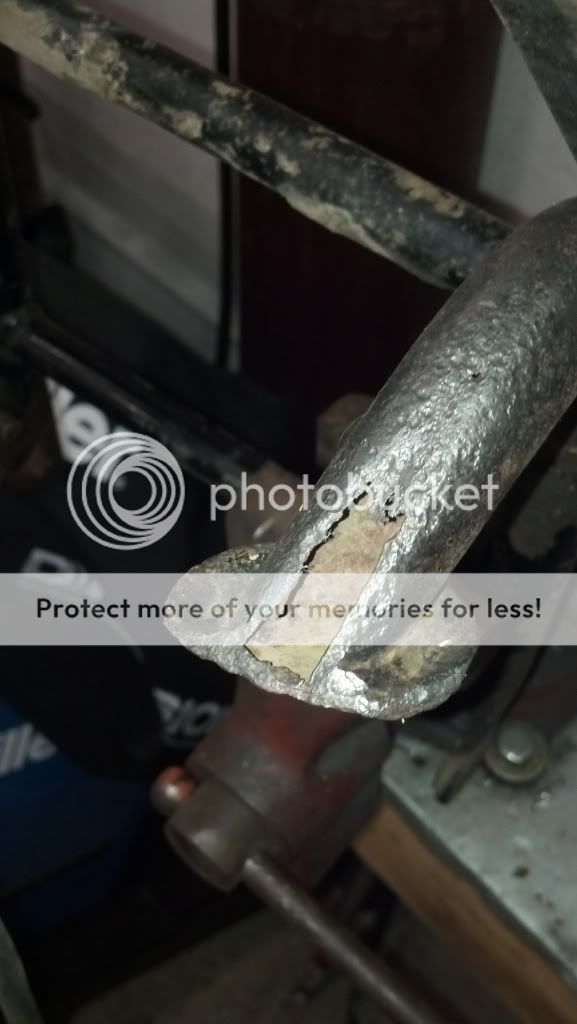
Plate getting ready to be formed after being tacked in place:
And done (camera died before I could take more pictures.
Rear final drive inspection:
Motor mock up:
Today I repaired the corroded old center stand. It had sat in the moisture for so long and had been thinned out from dragging on surfaces over its life that the metal on the bottom of the stand had started to rot away. I sleeved the tubing with 1/8 plate, heated the flat bar, and formed it over the tube. I then TIG welded it all together. I also added back on the center stand "kicker" that you use to deploy it that had long since broken off. They were originally just welded to the outside of the tube and commonly were broken. I drilled all of the way through the center stand and used a piece of round stock to re-create the "kicker". Formed it to hook under the exhaust like the original, then good as new after a bead blast.
After that I bead blasted the exterior of the heads and the one good cylinder I have and mocked it up on the motor after installing the cylinder studs back onto the block. It looks pretty damned good to me.
After that I broke down the rear final drive and inspected the splines, and the ring and pinion wear on the inside. It all looks brand new, and the bearings are perfect. Other than the original rear end oil being nasty, thick and stinky, all is well there. Cleaned up the internal parts and am ready to put it all back together with new gaskets and seals.
New (used) replacement Weinmann hoops came in today. The original front wheel had a really bad ding in the bead seat area, so scored these already media blasted for $50.
Moving along one day at a time!
Weinman Hoops:
Center stand before:
Plate getting ready to be formed after being tacked in place:
And done (camera died before I could take more pictures.
Rear final drive inspection:
Motor mock up:
Thanks guys!
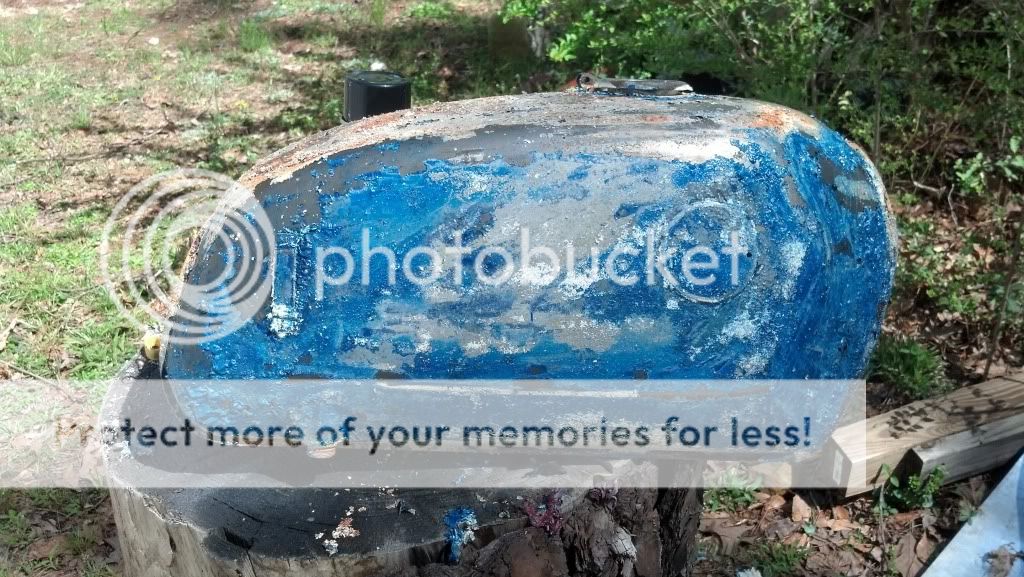
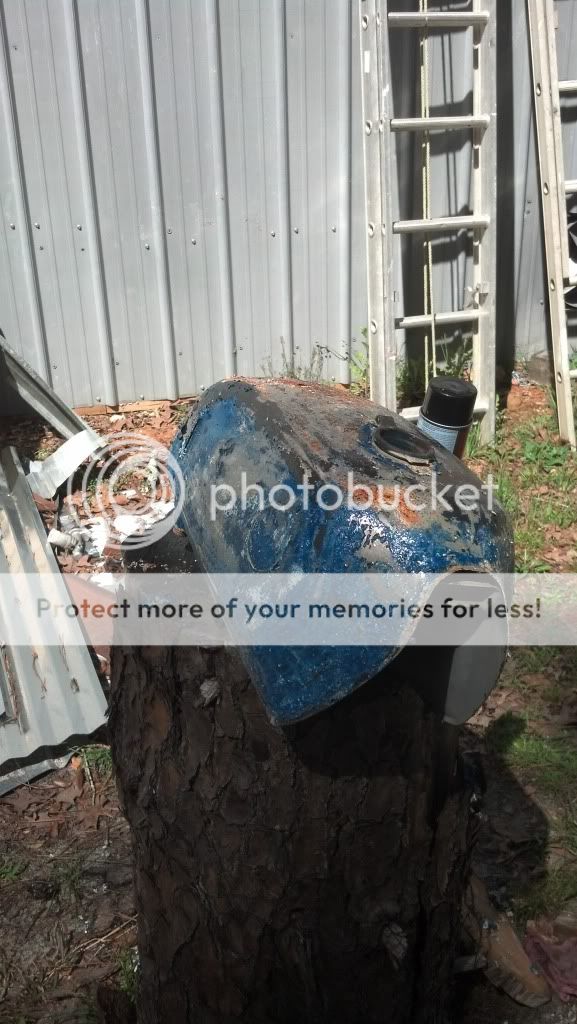
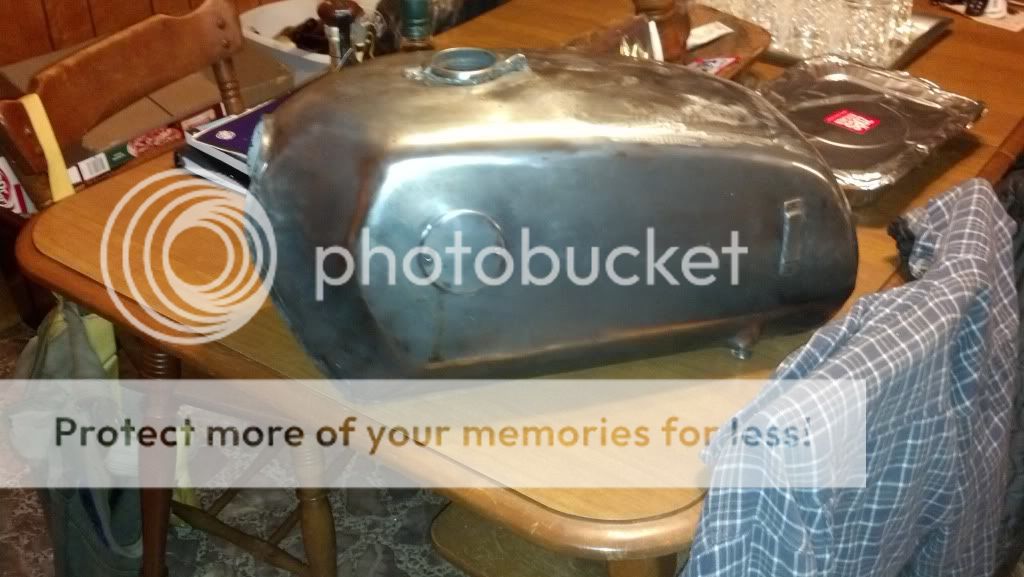
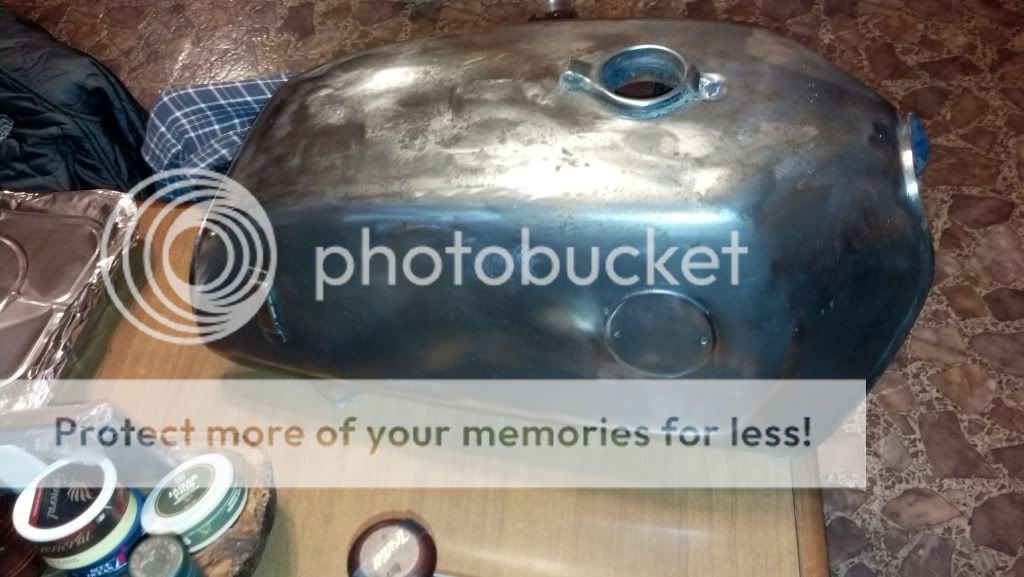
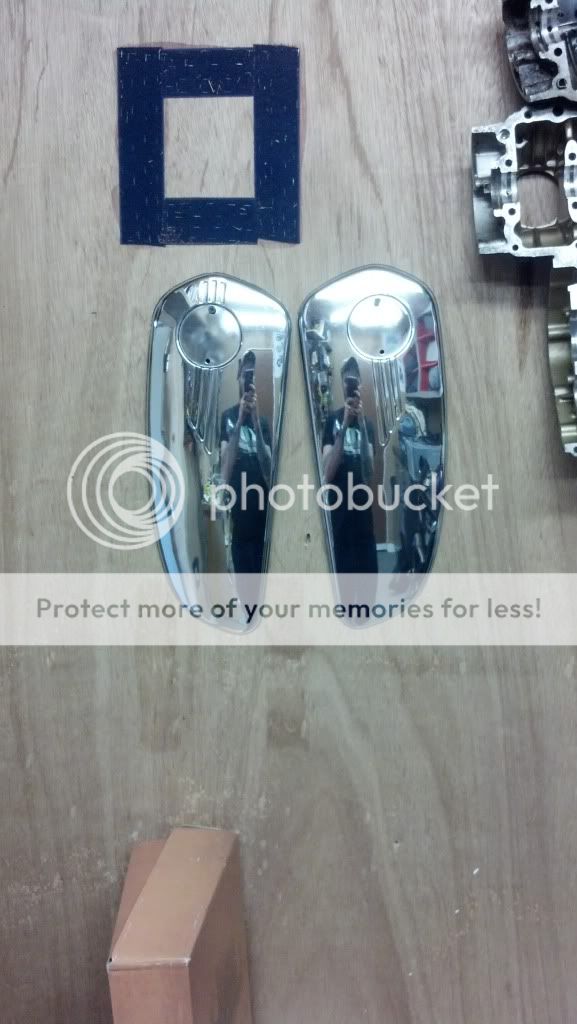
Had a nice surprise visit from Neal today, so I didn't get too terribly much done. What I did do however is strip the tank. That's when surprise number two comes in. Not a single dent or bit of body filler in the entire thing. Beautiful. Had some surface rust where the paint came off, but nothing that the DA didn't fix once the Aircraft stripper did its thing. Threw the (non dented!!!!) chrome "toaster" side panels on the buffer, and damned if they don't look brand new. In fact the only thing this tank needs is new cloissones for the covers since the enamel is pretty beat on the stock ones. I've got a little bit of fiberglass work to do on the rear fender where one of the mounting holes is wallowed out, and then strip them. After that she is good for paint. Big step. Pretty happy guy today.
Tank progression:
You can see the stock monza blue under all of that old crappy paint (counted 3 colors)

And done. Beautiful condition:
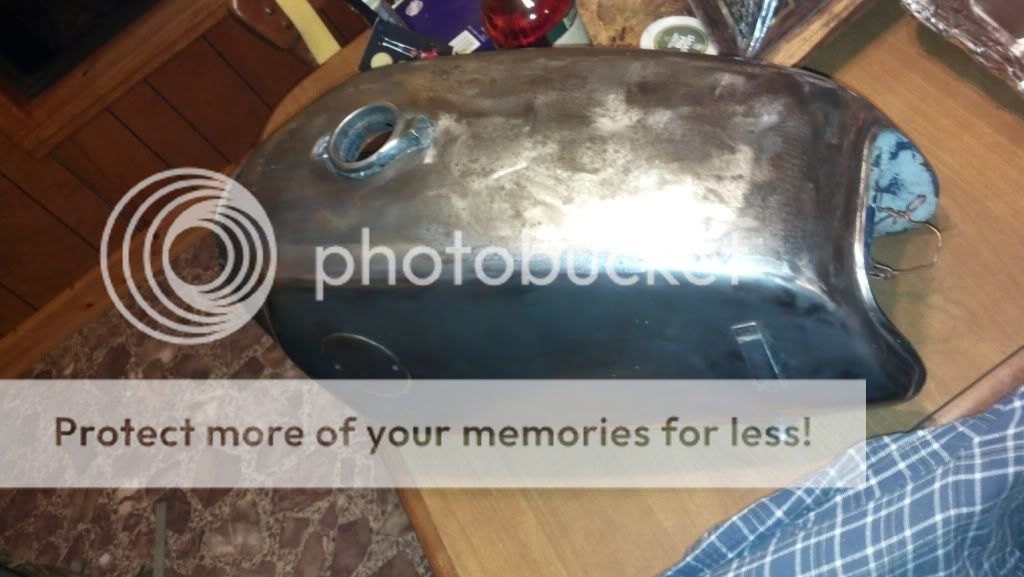
And this picture doesn't do this tank panels justice:
Had a nice surprise visit from Neal today, so I didn't get too terribly much done. What I did do however is strip the tank. That's when surprise number two comes in. Not a single dent or bit of body filler in the entire thing. Beautiful. Had some surface rust where the paint came off, but nothing that the DA didn't fix once the Aircraft stripper did its thing. Threw the (non dented!!!!) chrome "toaster" side panels on the buffer, and damned if they don't look brand new. In fact the only thing this tank needs is new cloissones for the covers since the enamel is pretty beat on the stock ones. I've got a little bit of fiberglass work to do on the rear fender where one of the mounting holes is wallowed out, and then strip them. After that she is good for paint. Big step. Pretty happy guy today.
Tank progression:
You can see the stock monza blue under all of that old crappy paint (counted 3 colors)
And done. Beautiful condition:
And this picture doesn't do this tank panels justice:
Rich Ard said:you lucky something something!
Yeah man, I would hate to know what this tank would cost on Ebay...
What sort of torch do you use to form the metal? I need to make the little 'hook' for my stand to make it easier to deploy. I did break out my welder yesterday and modified my stand for the deeper sump. You might want to do that before you paint yours seeing as it's already being worked on.
You remove the cross tube that is up near the pivot. It interferes with the deep sumps you can get aftermarket or from a mid 80's airhead.
I cut my cross tube off, and added flat stock braces on a 45 degree angle at the lower cross brace. Figured that would make the stand much stiffer for lateral loads.
I use a Victor torch from the 60's that my grandfather gave me. It's oxy/acetylene. It'll do just about anything I throw at it.
And thank you so much for that info! I had planned on running the deeper sump, but had no idea it would interfere with the stand. I'm glad you told me that before I got it powdered! I'm gonna make that happen. Thanks man!
And thank you so much for that info! I had planned on running the deeper sump, but had no idea it would interfere with the stand. I'm glad you told me that before I got it powdered! I'm gonna make that happen. Thanks man!
cyclefreak
Over 1,000 Posts
Work so far is awesome brother! Your gonna make a lot of people jealous when this thing is done. [Go ahead and put my name at the top of that list]. Plan on seeing me at the shop Sunday to work on my little project!
AlphaDogChoppers
Science is true whether you believe in it or not.
The key is finding that girlfriend at a good price...


