
We noticed you are blocking ads. DO THE TON only works with community supporters. Most are active members of the site with small businesses. Please consider disabling your ad blocking tool and checking out the businesses that help keep our site up and free.
You are using an out of date browser. It may not display this or other websites correctly.
You should upgrade or use an alternative browser.
You should upgrade or use an alternative browser.
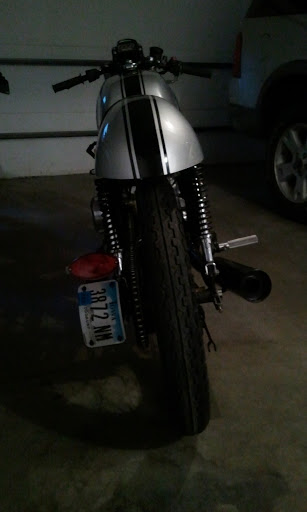
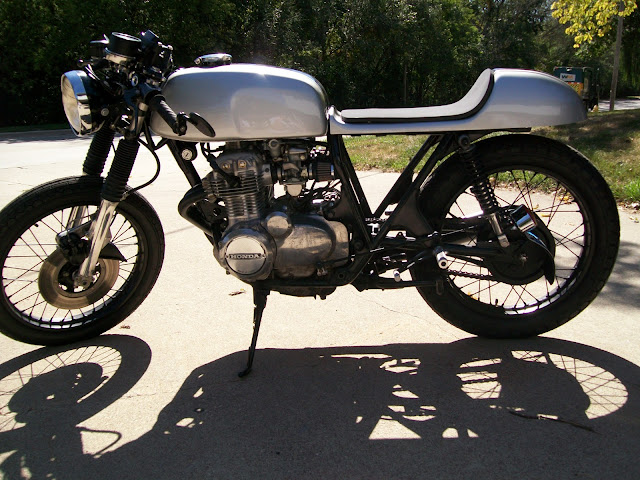
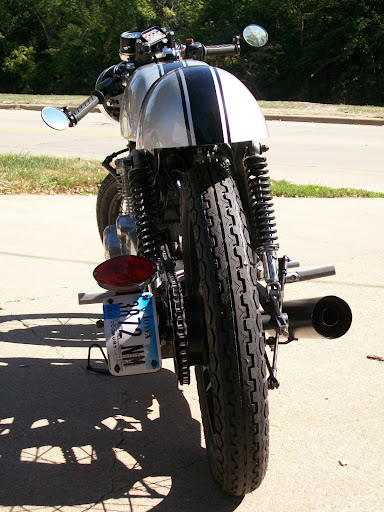
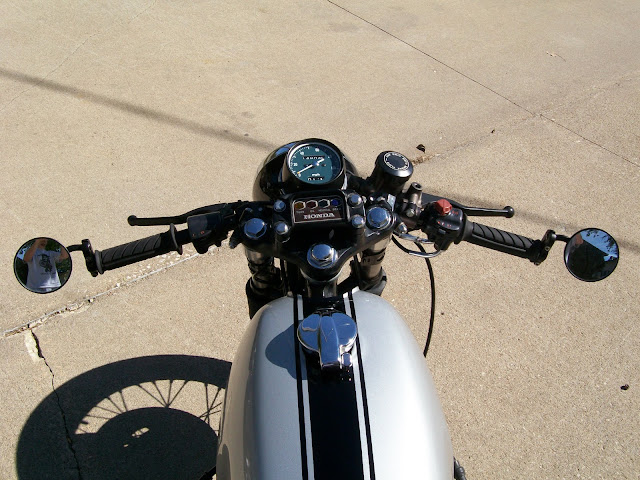
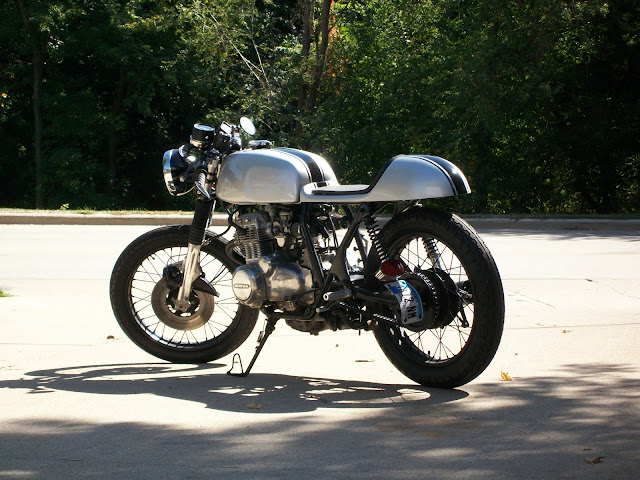
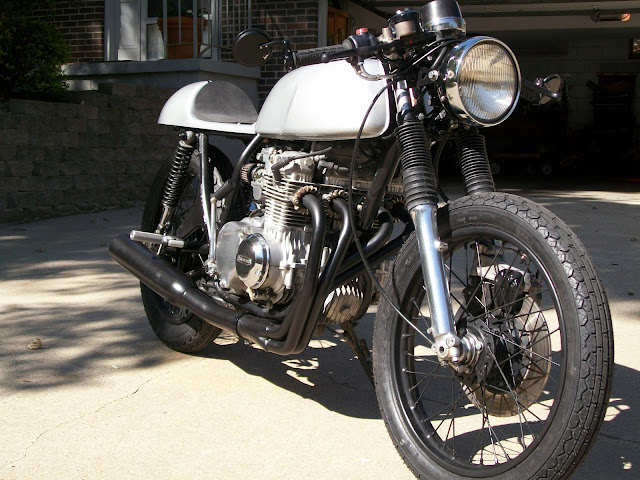
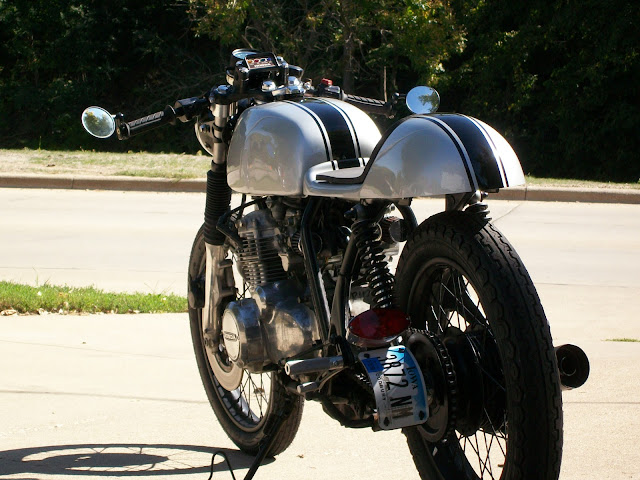
1974 CB350F My first CR project
- Thread starter riotten22
- Start date

riotten22
Been Around the Block
Click this link for another video: https://picasaweb.google.com/103528614259898676083/September182011?authuser=0&feat=directlink

riotten22
Been Around the Block
Erskine said:Nice clean build there mate")
Are you going to put some decals on the tank?
Wasnt planning on it unless someone has some cool ideas that may look clean and not to overboard.
riotten22
Been Around the Block
Here is a link to my build sheet with all the parts i used and total build cost:
https://docs.google.com/spreadsheet/ccc?key=0AidaLJ6RuAFcdFhYV3VWYjhtMUw2aUFaOXJUV2dOZ0E&hl=en_US
https://docs.google.com/spreadsheet/ccc?key=0AidaLJ6RuAFcdFhYV3VWYjhtMUw2aUFaOXJUV2dOZ0E&hl=en_US
riotten22
Been Around the Block
GoshenCafe said:Looks superb riotten! So the rearsets you got from Durgam_K had no clearance issues? Because I'm looking into getting rearsets for my 350f as well. I'll be kick starting my bike too so I want to make sure that will cleared as well.
Tested out the kickstart tonight works flawlessly. Rearsets are not in the way of the kick start what so ever assuming you will be mounting them to the passenger peg mounts...
CB350f Cafe
Been Around the Block
Great news! Yes I'll most likely be mounting them on the passenger peg mounts. I'll definitely have to look into getting them.
riotten22
Been Around the Block
Thanks! I know whenever I would look at someone's build I always wanted to know what parts they were, how much and where to get them so that spreadsheet was the perfect answer. Also used it to keep track of how much the build cost.sbaugz said:awesome build. I especially like that you posted the spreadsheet with parts, prices, and where to buy. Very smart and very helpful to those of us that want to know these things.
BriMed1983
Been Around the Block
Awesome job on the bike, love the way it turned out.
Also, liking the spreadsheet idea. Good way to keep cost's in check. So far, I have been tossing all my receipts into a large envelope.
Brian
Also, liking the spreadsheet idea. Good way to keep cost's in check. So far, I have been tossing all my receipts into a large envelope.
Brian
riotten22
Been Around the Block
IndieSol said:Turned out great. I like everything about it.
Thanks Guys ! I have been putting some miles on it and so far no major issues.
I am so jealous of this build. I have the same bike in my garage and I've been reading the DTT forums and staring at the bike just trying to plan my build. Then I see this. This is exactly what I wanted to build, right down to the color scheme.
Can I ask a few questions? How did you end up moving the wiring? Did you need to make a new harness, or was it just a matter of extending a few wires? Now that I assume you've ridden it a bit, how are the rear sets working out? How did you fasten the seat foam to the pan nd how did you fasten the pan to the frame?
Beautiful build. I've seen a lot of nice bikes on this forum, I think yours is my favorite.
riotten22
Been Around the Block
Nitsuj said:I am so jealous of this build. I have the same bike in my garage and I've been reading the DTT forums and staring at the bike just trying to plan my build. Then I see this. This is exactly what I wanted to build, right down to the color scheme.
Can I ask a few questions? How did you end up moving the wiring? Did you need to make a new harness, or was it just a matter of extending a few wires? Now that I assume you've ridden it a bit, how are the rear sets working out? How did you fasten the seat foam to the pan nd how did you fasten the pan to the frame?
Beautiful build. I've seen a lot of nice bikes on this forum, I think yours is my favorite.
Thanks ! Every time i walk in to the garage i get a little grin on my face I think it turned out awesome for my first build !
The wiring just required a longer positive cable and to extend the solenoid and voltage regulator wires. The seat is bolted down with 4 M8 bolts threaded into the frame rail and on the cross beam. The seat foam is fastened with velcro. Rearsets are awesome they work great other than the rear brake lever doesnt pull hard enough to slow the bike down. Pics in this post show how i mounted the electrical and seat pan.
riotten22
Been Around the Block
nicholas said:First, great build - thanks for sharing. Quick question - how did you get the Mac 400 exhaust to work on your CB350?
Thanks.
The muffler bracket was the part that didnt line up correctly. Had to use the longer metal bracket that came with the mac exhaust and drill a hole through it, bolted it to the welded on bracket then I mounted the bracket to the passenger foot peg bolt.


