
We noticed you are blocking ads. DO THE TON only works with community supporters. Most are active members of the site with small businesses. Please consider disabling your ad blocking tool and checking out the businesses that help keep our site up and free.
You are using an out of date browser. It may not display this or other websites correctly.
You should upgrade or use an alternative browser.
You should upgrade or use an alternative browser.
1978 Suzuki GS750 racer project
- Thread starter Weasel
- Start date
Weasel
3rd generation rider
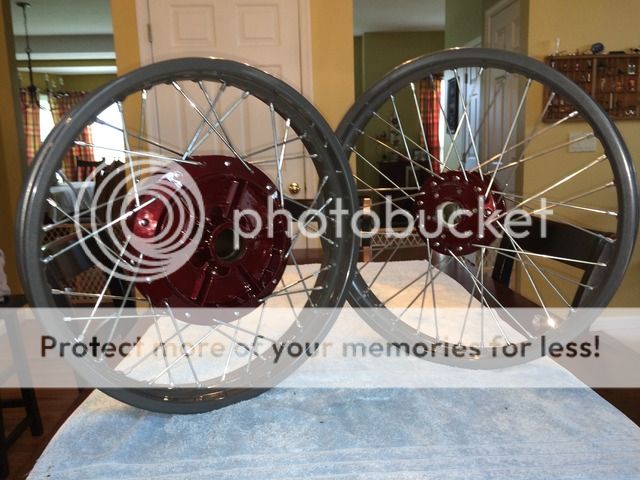
VonYinzer said:You can have spokes powder coated black...
Yes, you CAN but at $5 a spoke I WON'T LOL
Weasel
3rd generation rider
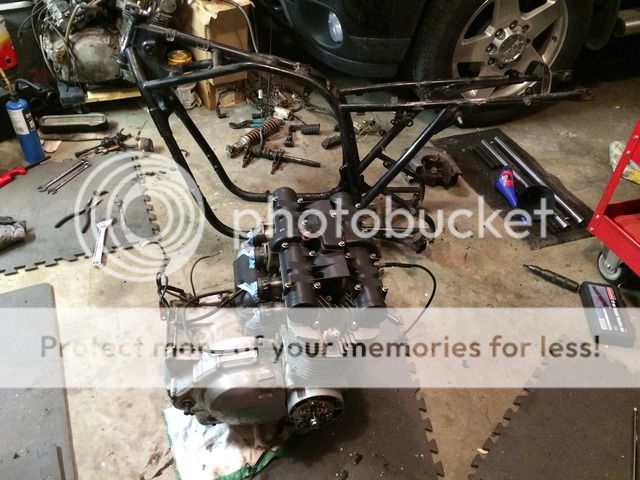
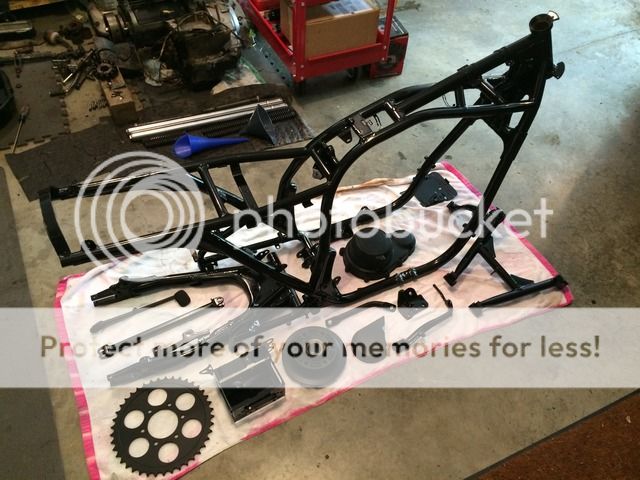
Final disassembly and frame goes to powder coat this week.
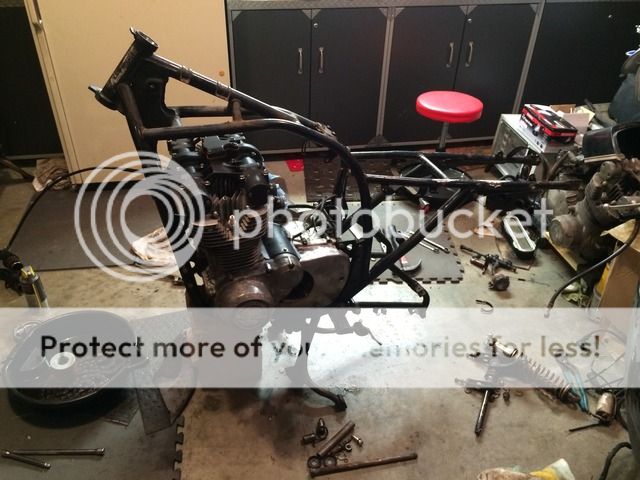
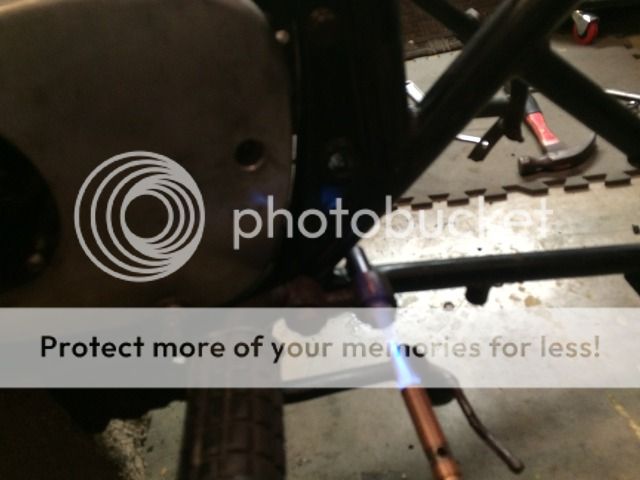
Had quite a few stubborn bolts but nothing a little heat can't fix.
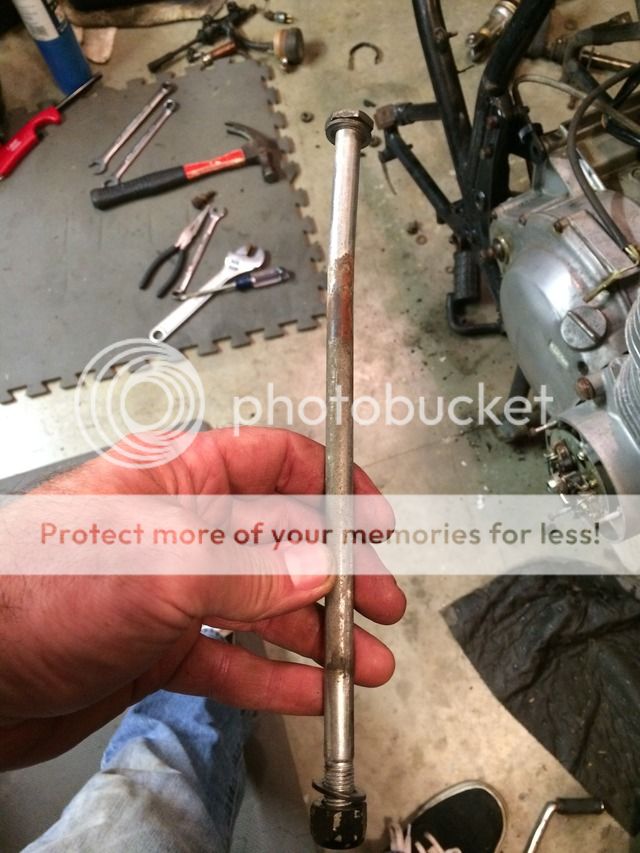
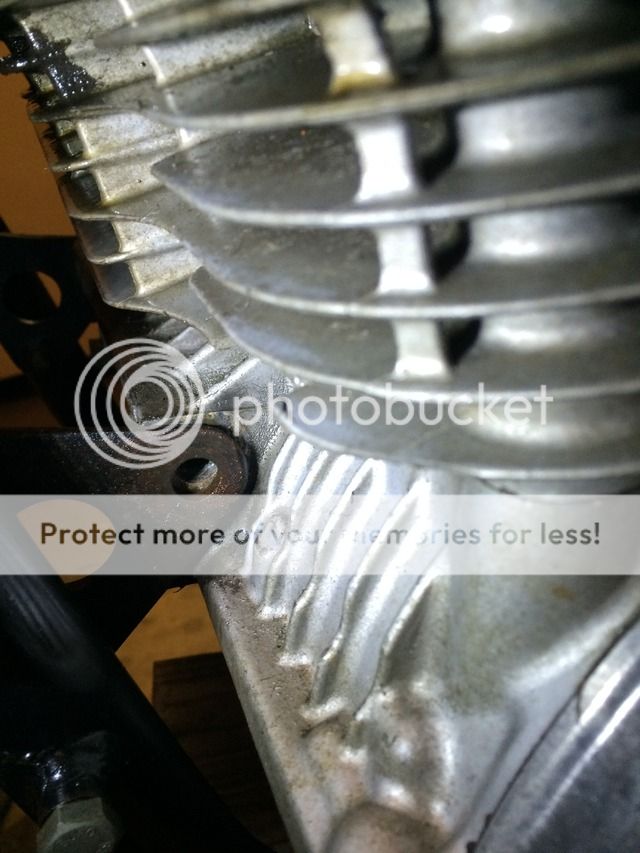
Was surprised to find the rear motor mount bolt bent...
And the mystery was solved quickly, there was no bolt in the front motor mount. In fact, there were several motor mount bolts missing. And this thing had been ridden that way, the front chain sprocket cover was loaded with grease & road grime. Scary the things POs can do to bikes. I'm pretty sure that "extra" motor I got was the original.
Had quite a few stubborn bolts but nothing a little heat can't fix.
Was surprised to find the rear motor mount bolt bent...
And the mystery was solved quickly, there was no bolt in the front motor mount. In fact, there were several motor mount bolts missing. And this thing had been ridden that way, the front chain sprocket cover was loaded with grease & road grime. Scary the things POs can do to bikes. I'm pretty sure that "extra" motor I got was the original.
Weasel
3rd generation rider
yozzer74 said:They look well bit different .
Not sure what you mean LOL
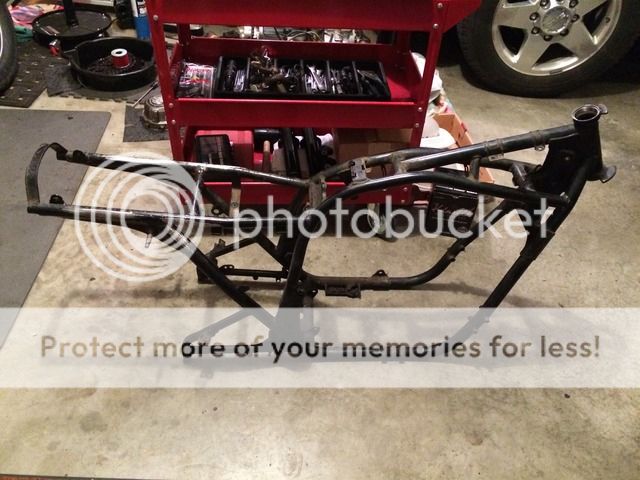
The stands have to come off and some clean up is in order but otherwise the frame is ready for powder coat.
I found 6 motor mount bolts missing on my GS550. Pretty bad, not even sure why some people think they can pull a motor when ya can't even remember to put all the bolts back in.
How are you going to combine the halves of your seat pan? When you are glassing using multiple layers of cloth the best way to do it and avoid weak spots is to lay out all the layers of cloth and wet them all out at the same time, making sure all layers are saturated (you can see it in the color).
How are you going to combine the halves of your seat pan? When you are glassing using multiple layers of cloth the best way to do it and avoid weak spots is to lay out all the layers of cloth and wet them all out at the same time, making sure all layers are saturated (you can see it in the color).
Weasel
3rd generation rider
6 missing mounting bolts? Goodness...you wonder what goes through people's minds.
I need to strengthen that seat pan/cowl I bought with a layer or two of glass. It's ok but you can move it if you push on it. But it was the longest one I could find. The top & bottom of the seat pan/cowl I bought have matching mounting holes. I plan to fiberglass the pan I made to the seat/cowl bottom. I would like to attach them to the bike with some rubber/metal studs so I can just pop the seat on & off. Hope that made sense.
Thanks for the glassing tips. I'll remember that for next time. My first pan turned out ok, it's not pretty but it doesn't have any weak spots.
Gotcha. For layering on top of already set up epoxy, be sure to sand down every bit of 'glossy' surface on the bottom of the pan, remove all dust and clean with acetone. Its crucial that the surface you are going to be adhering to has no glossy/shiny bits for proper adhesion.
For glassing the two together, I would recommend cutting a few strips of cloth to overlap the joint. 2 layers should be enough, but you can judge how thick/strong you want it to be. You can either do small patches (like 'spot' welds) or run the whole length of the joint.
For mounting, I epoxied in rubber isolated grommets from the hardware store and thread bolts in, its not the most convenient thing to get on/off though. You can also epoxy in any other type of 'quick release' systems. You can use the same method of using cloth to help strengthen the joints when you mount the studs in as well - cut a small circle with a hole for the threads/stud, and be sure to tape the stud off.
Weasel
3rd generation rider
I got the helmet lock & seat hinge tabs cut off, ground down and filed clean last night before bed. I also cut the ends of the frame that would stick out beyond my seat pan. I took the frame outside and hit it with some degreaser and left it overnight. Looks like I still need a quick power wash to get the stubborn grease and road grime off the bottom of the frame before heading to the powder coaters.
downeaster
New Member
Looking forward to seeing this go back together, nice job.
") waiting parts or got busy?? any updates to share?
waiting parts or got busy?? any updates to share?

