1979 BMW R100RS complete redo: "Shiny Crumpet"

Coming together

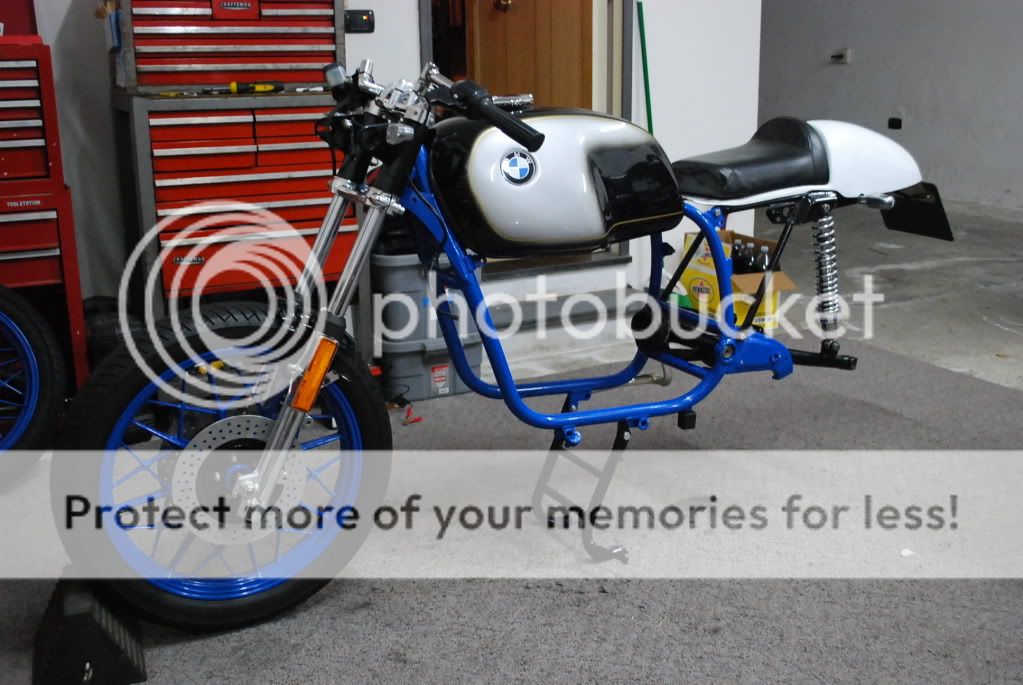
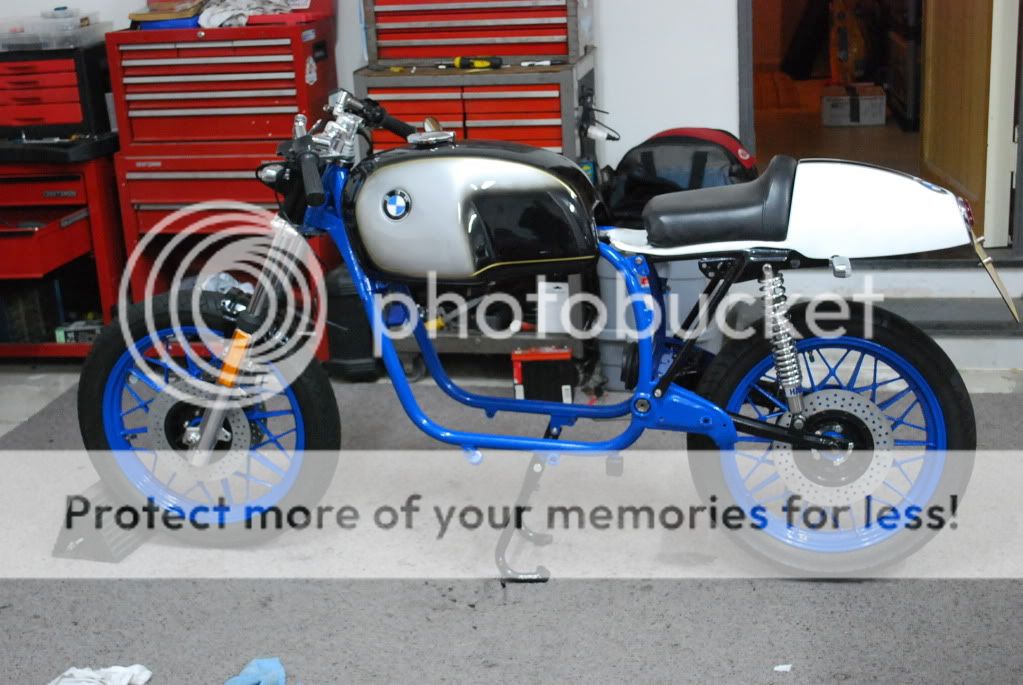
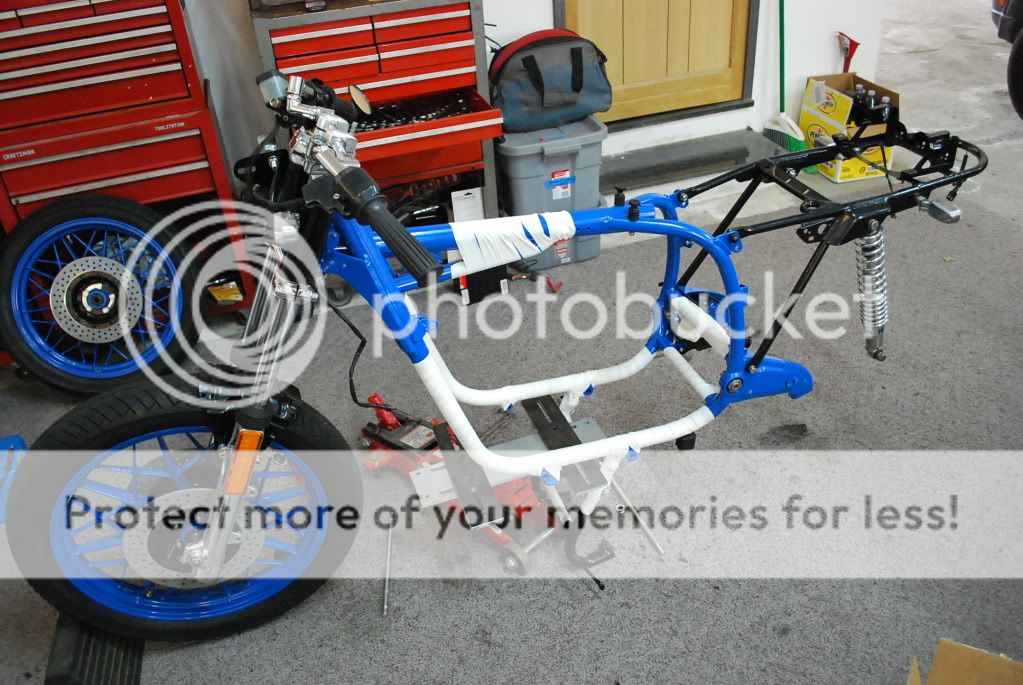
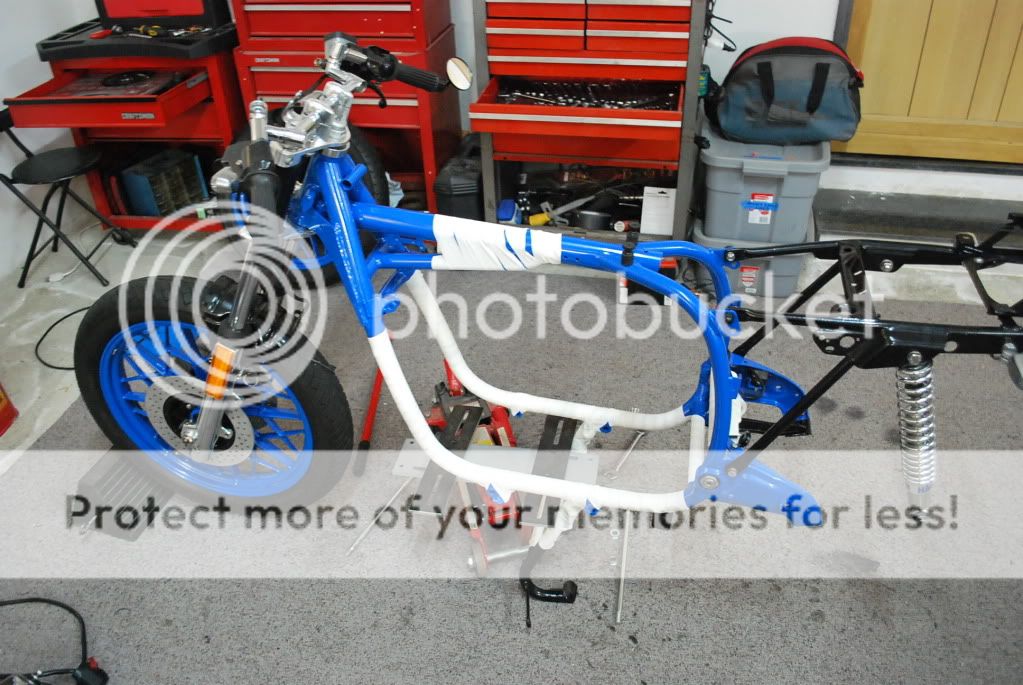
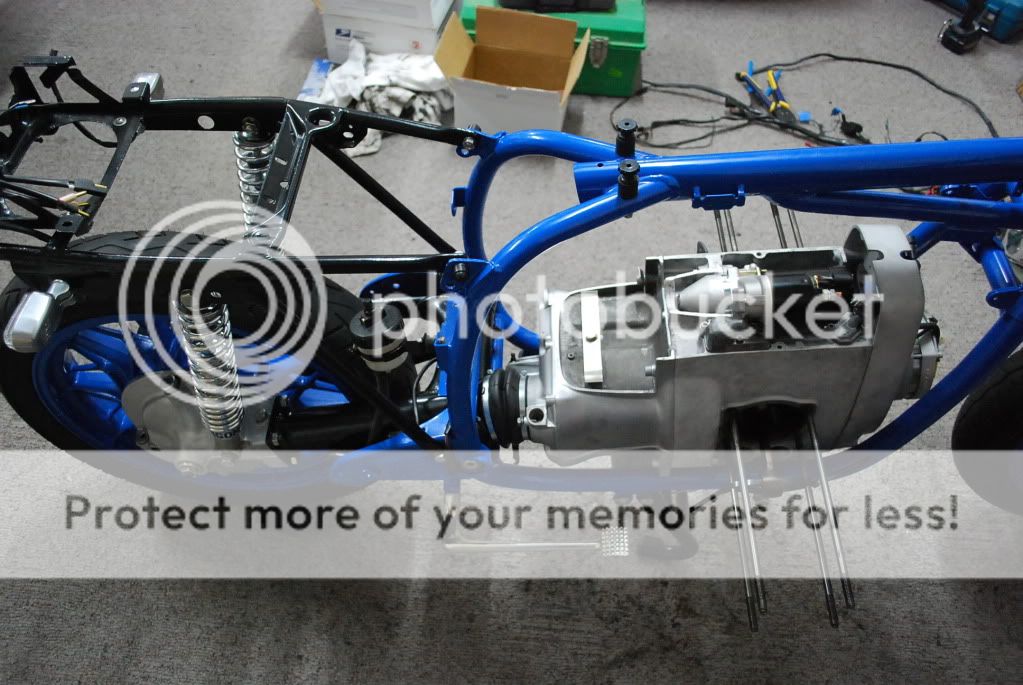
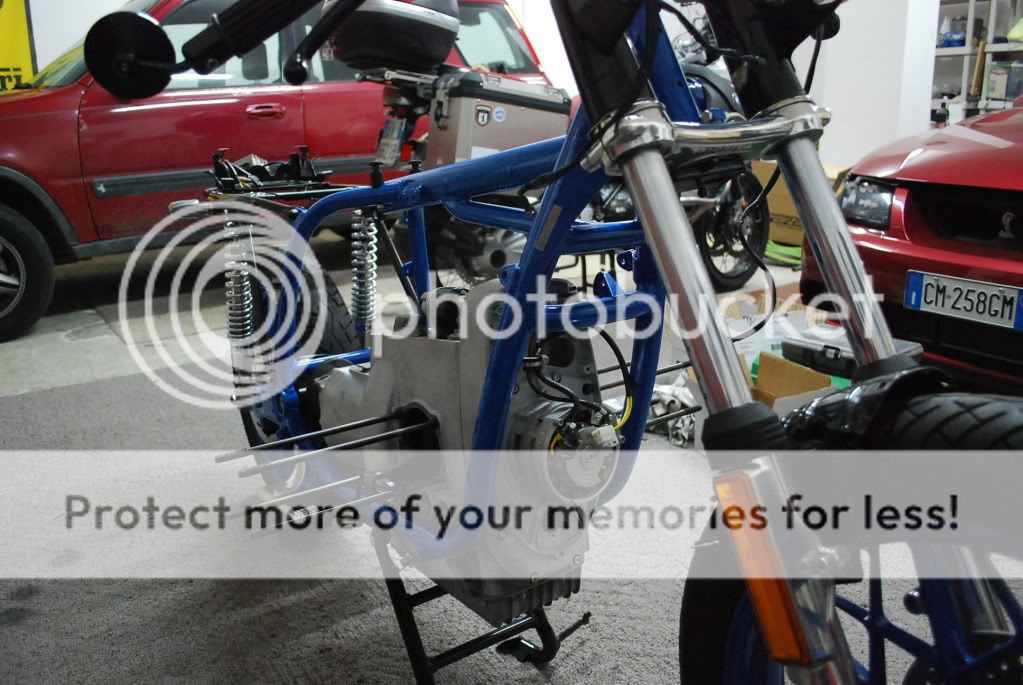
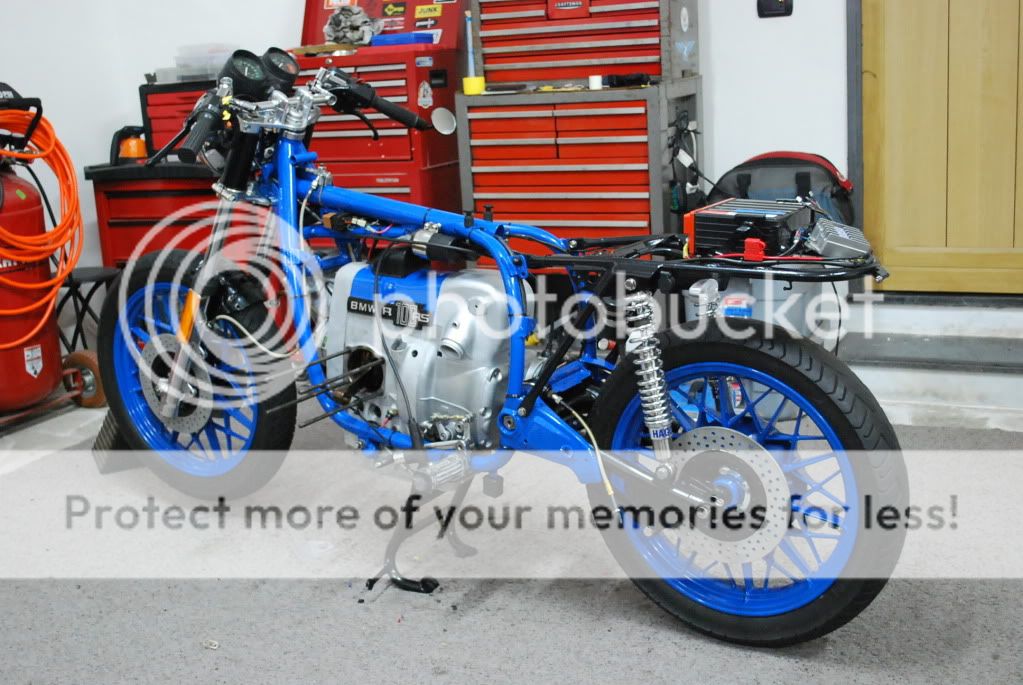
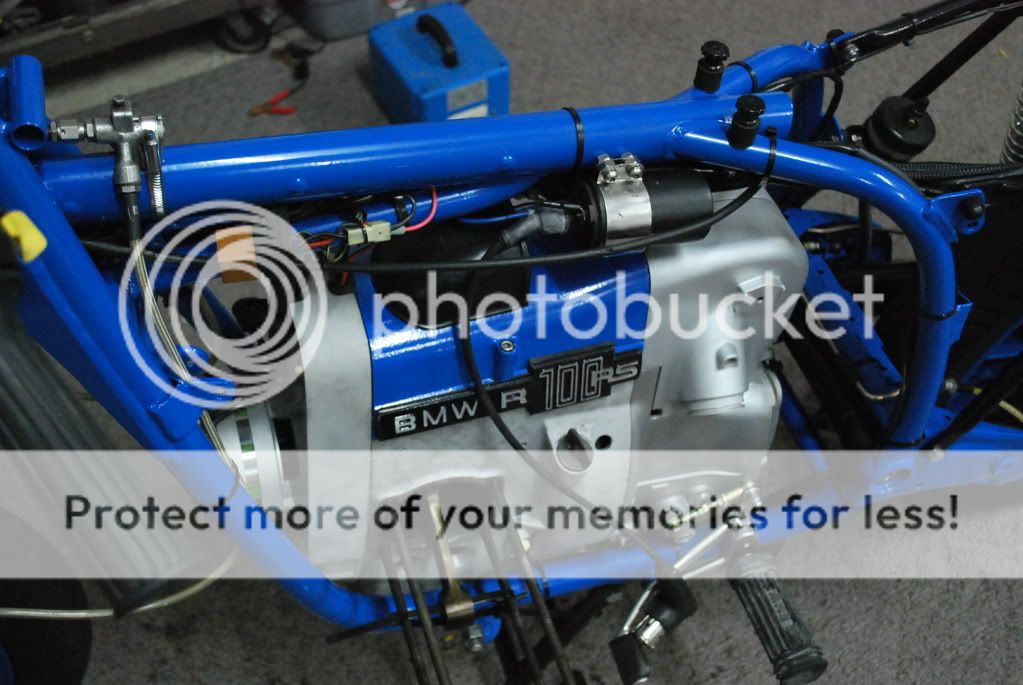
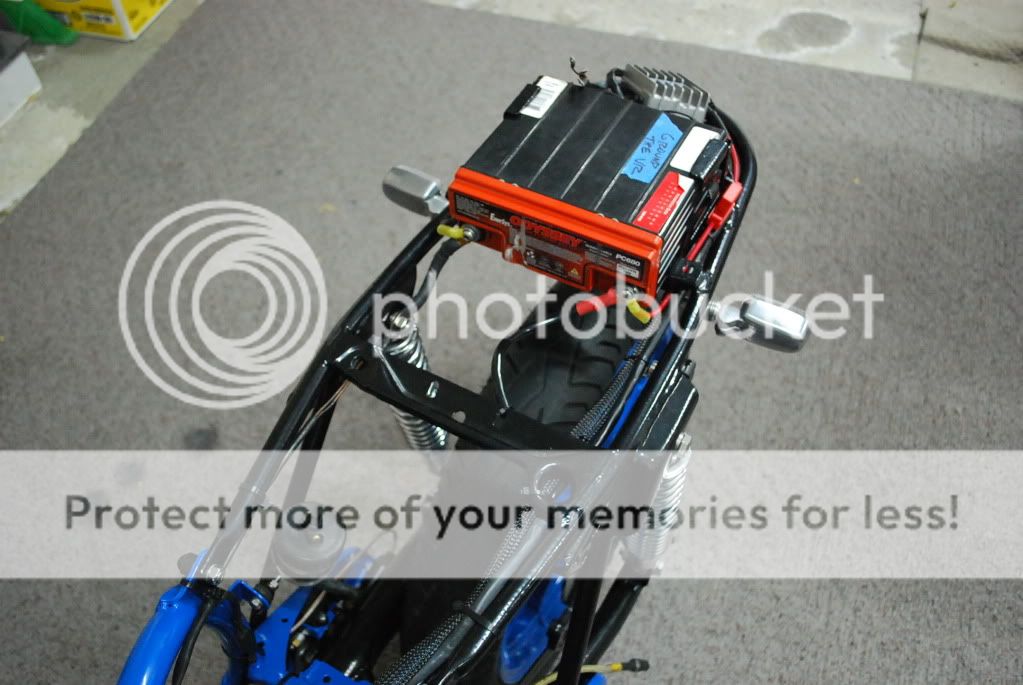
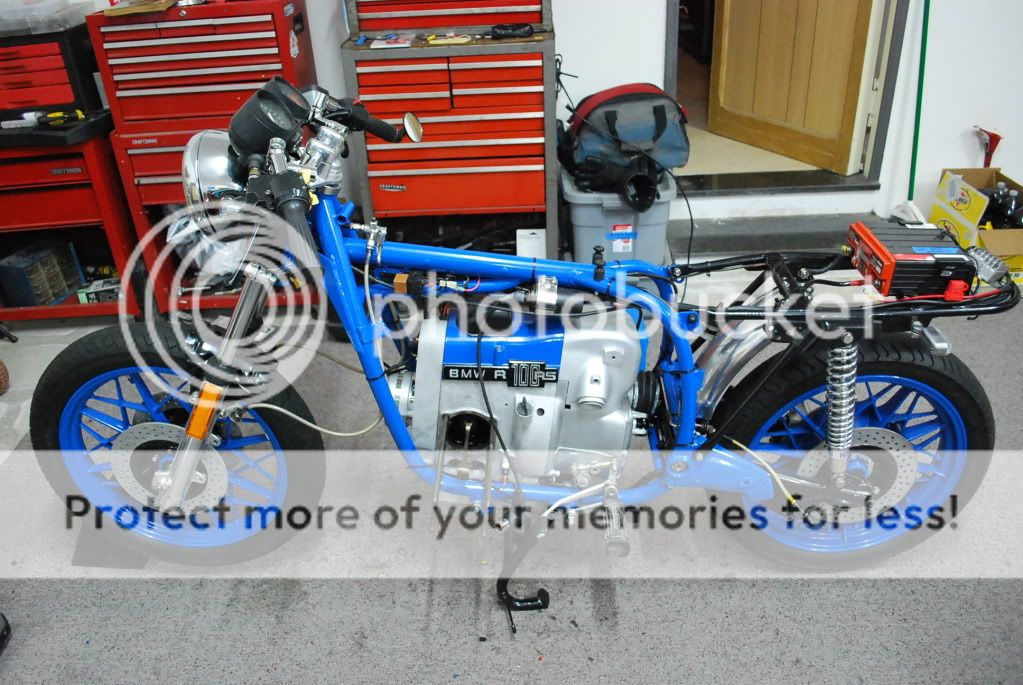
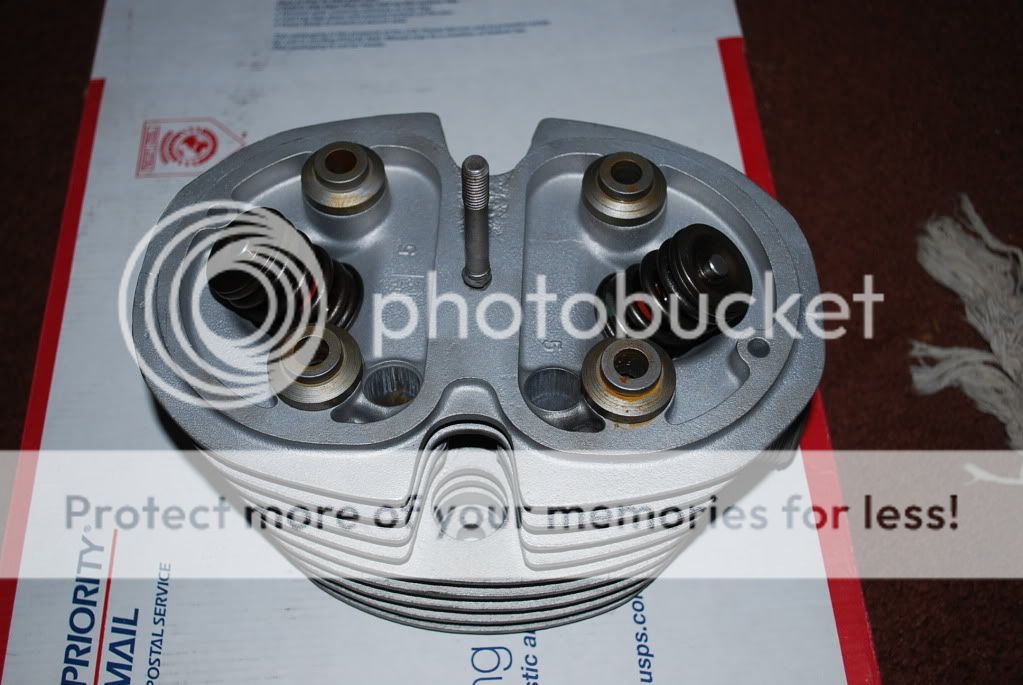
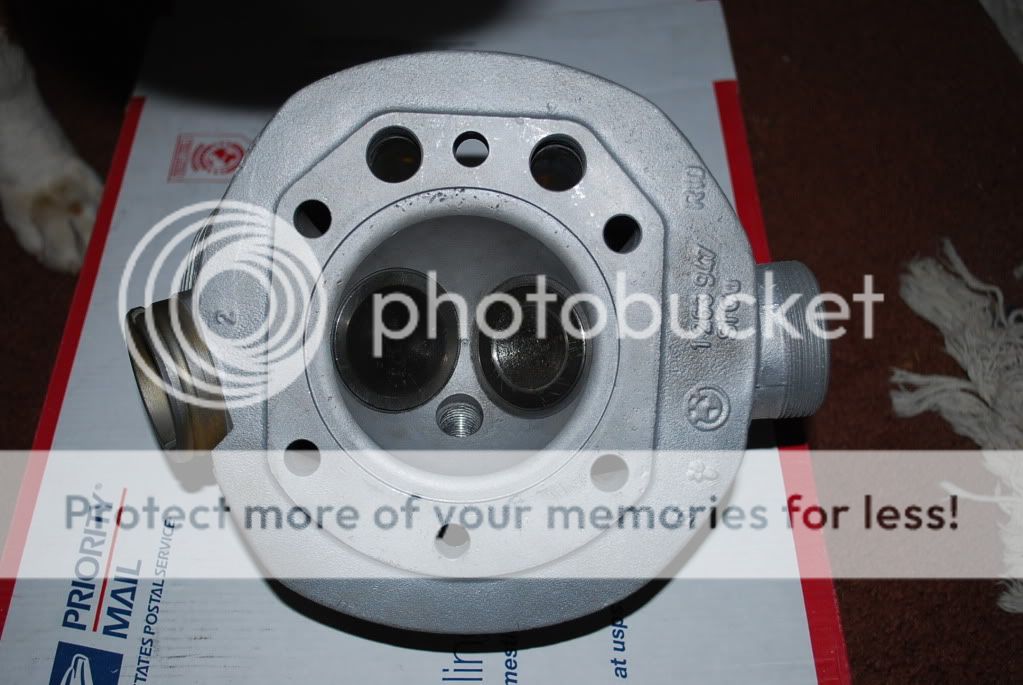
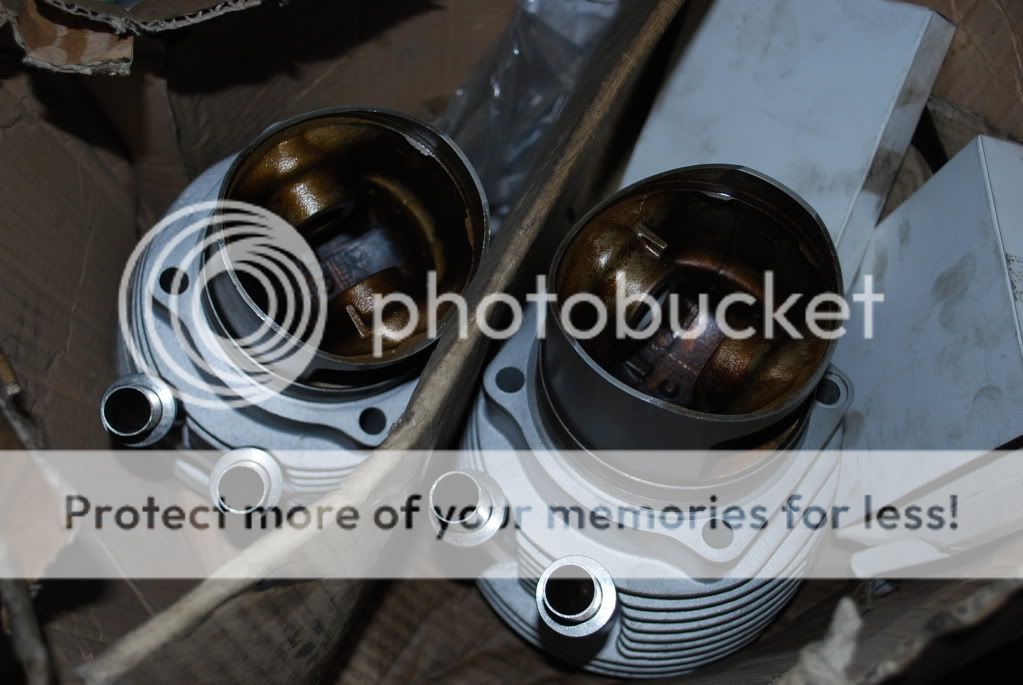
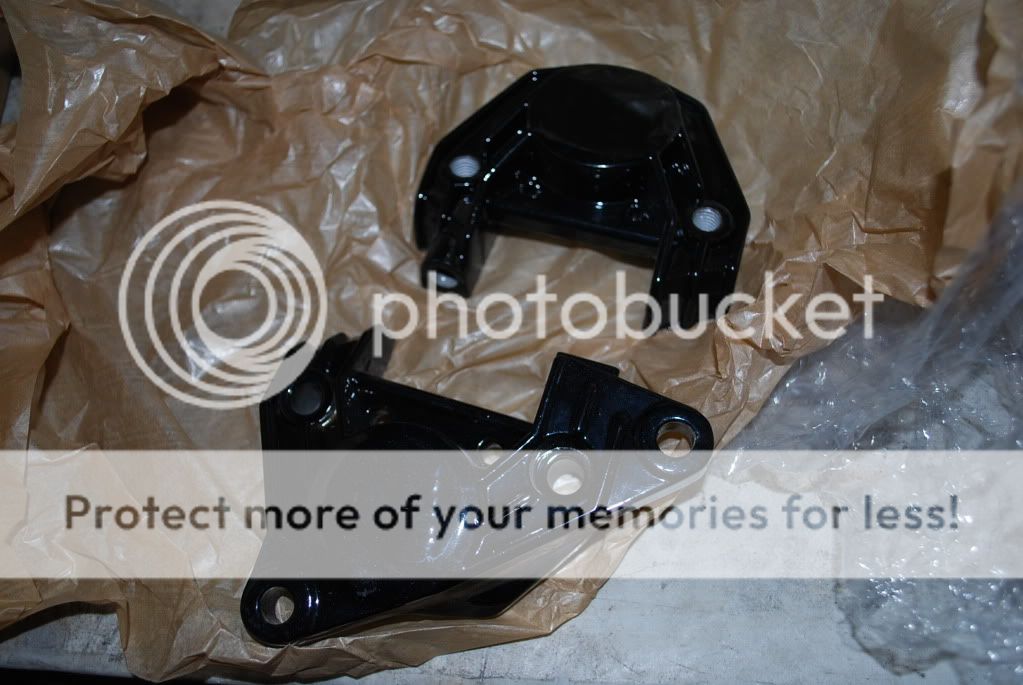
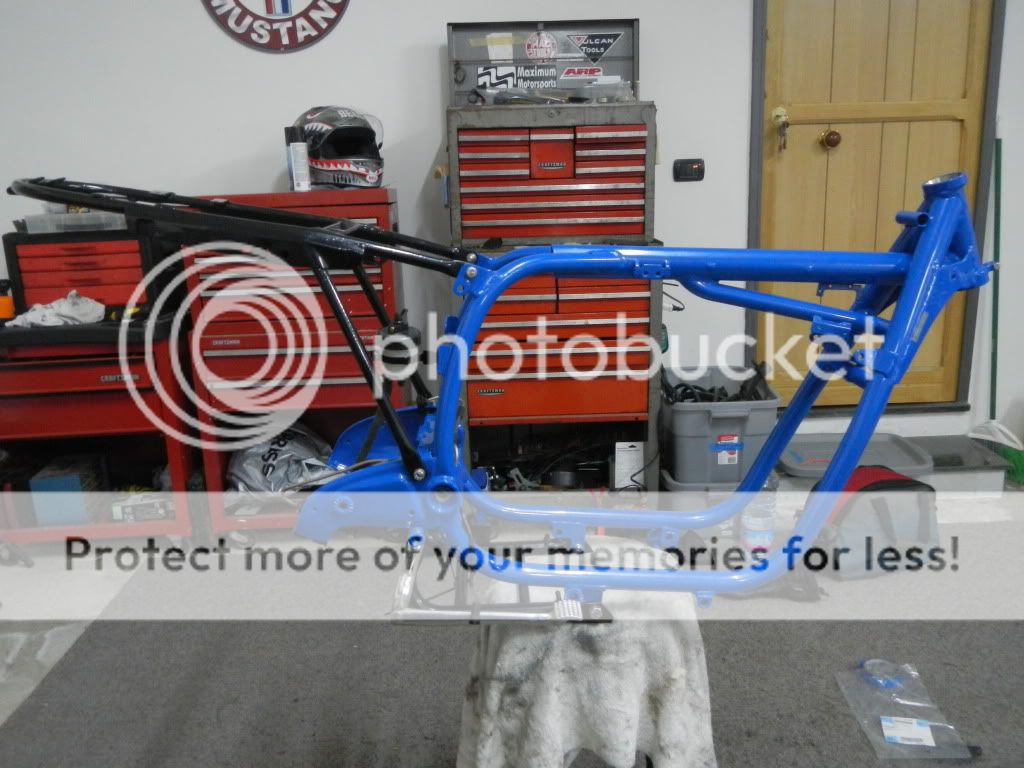
This is the post where I finally catch up with "time meow." After receiving almost everything from powdercoat, I jumped into reassembly. Frame and subframe come together nicely with new bolts.

DSCN0043.jpg


I spent a few hours cleaning up everything in the back brake setup. Painted, replaced the hose, scrubbed the reservoir, installed the rear brake switch. It looked great, for the day.

DSCN0045.jpg


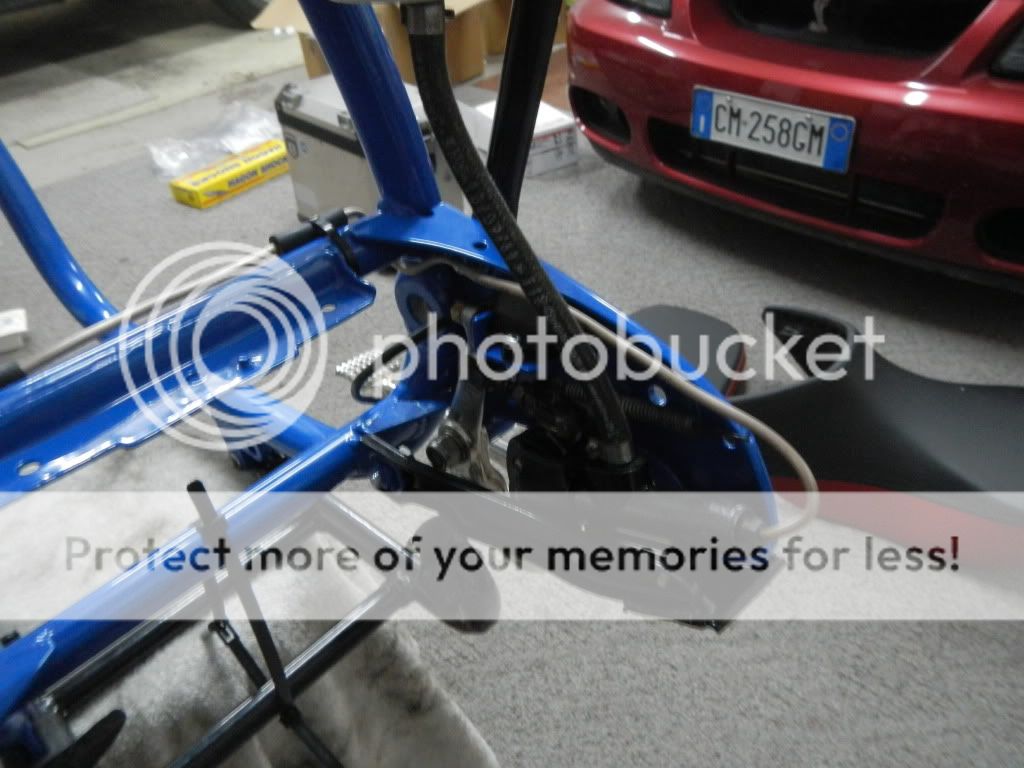
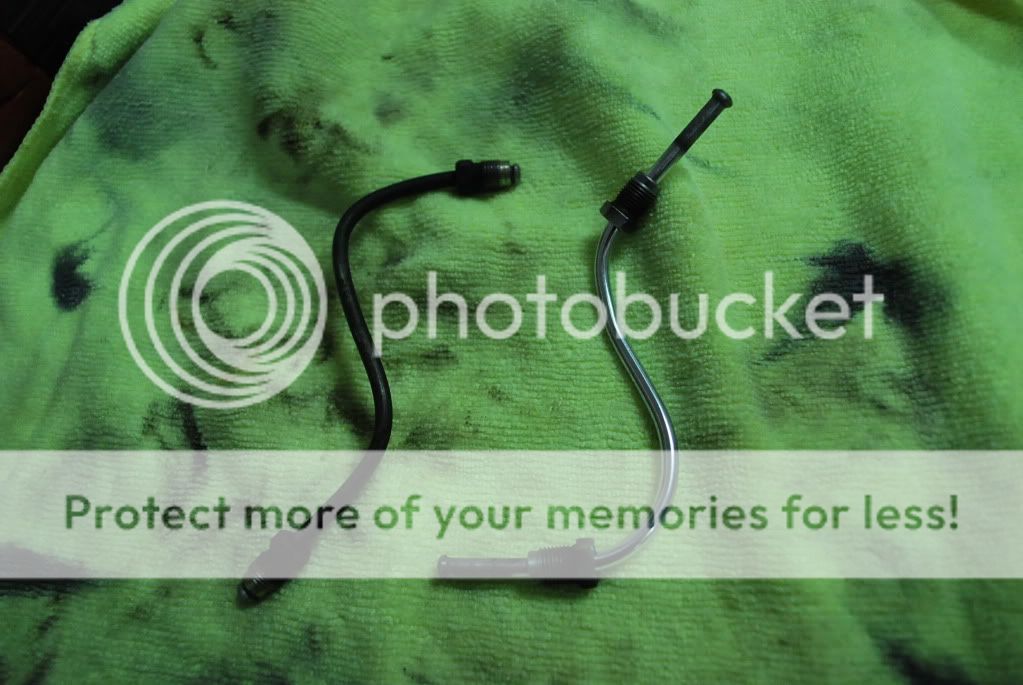
Next day I noticed some of the paint was wierd, and when I touched it my hand came back black. Crap. The master cylinder was leaking pretty badly. Ordered a rebuild kit. Ofcourse this was one of the few rubber bits that I had not replaced. ::)

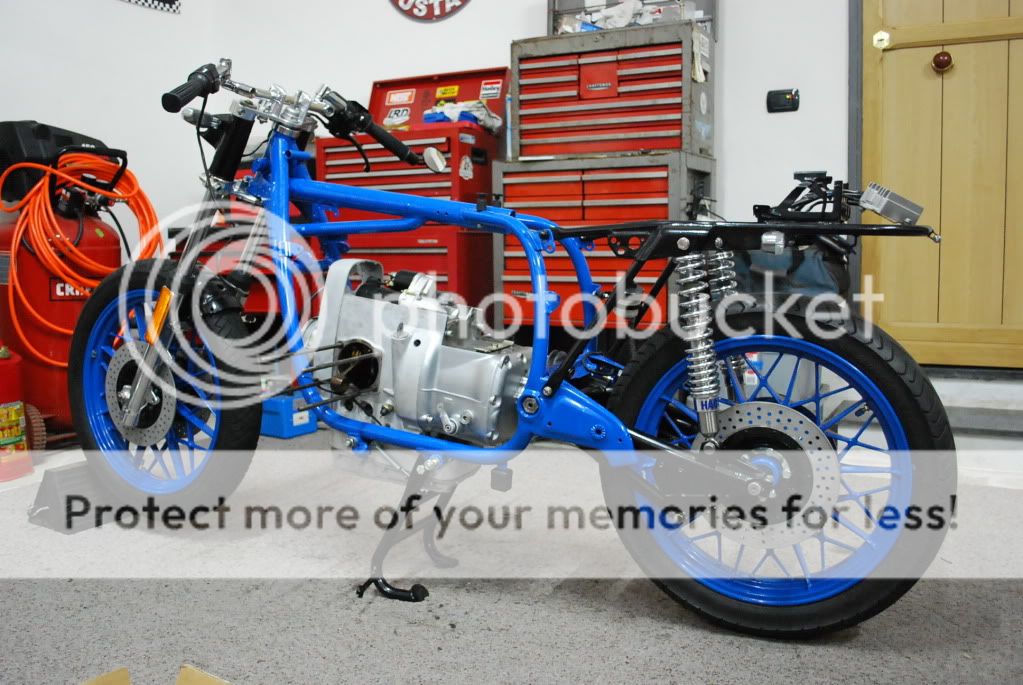
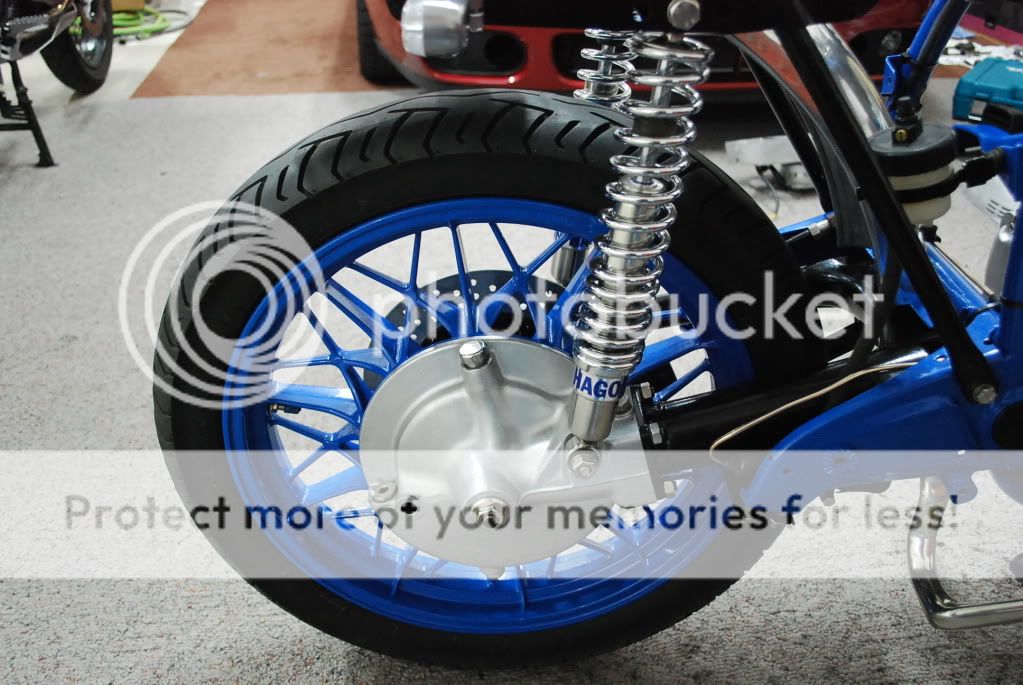
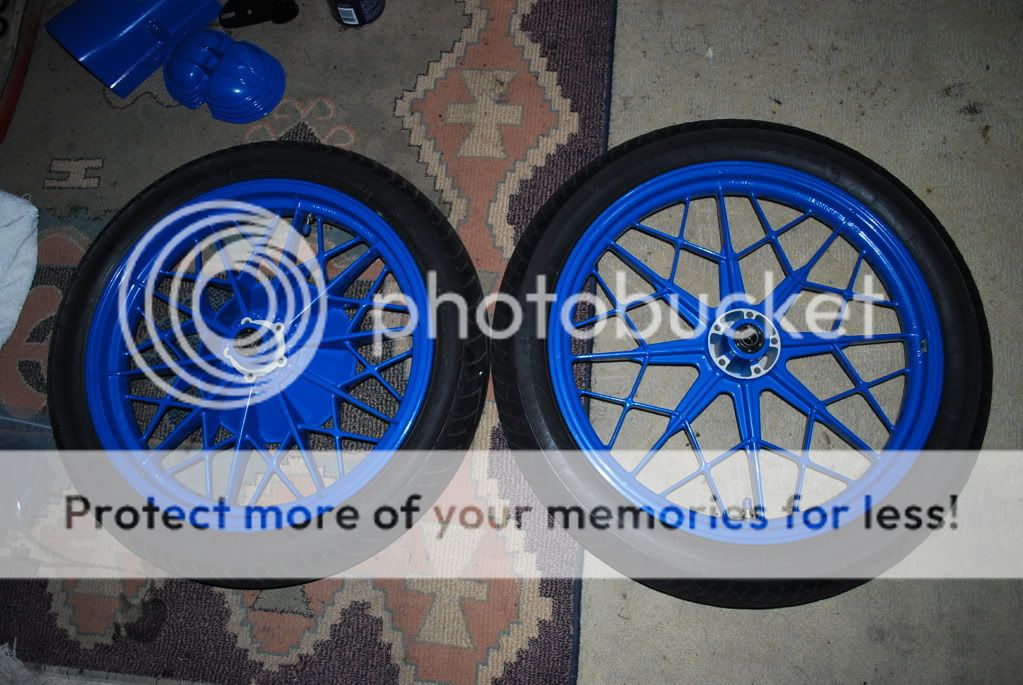
Also found some time to get the tires put on the wheels. The tires only make the beautiful blue color look even better. The shop was very professional and even found some blue valve caps.

DSC_0705.jpg


With pretty wheels I installed the brake rotors onto the wheel. Took some sanding on the powdercoat as well as some hammering with a rubber hammer to get them all installed. I fitted the lower triple, the freshly polished fork lowers, fender bracket, etc. I have yet to install a bolt that I did not first clean the threads and buff the heads to a shine. I was given advice to make sure I take lots of pictures before driving this thing, because it will never ever look that clean again, and I agree.
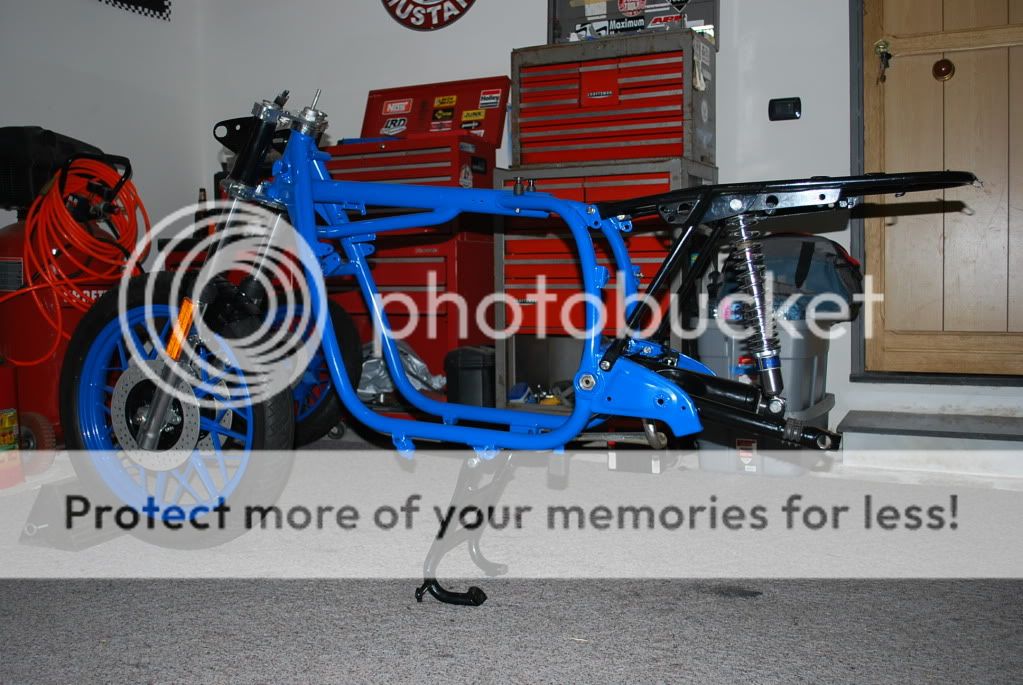
DSC_0710.jpg
 
Bike Show

Grazie, I am in Naples, and actually didn't know about the show till you mentioned it. I looked it up online, looks awesome. I am sure I can find a friend or two who would want to come along. The drive is pretty easy, and boring, on the autostrada.
 
A little mockup

Got some time, so I reinstalled the tank and cowl for a quick picture. With the rear wheel pushed in to place, it gives a pretty good idea of the final look. I haven't installed the rear wheel yet because tranny installation is made much easier by having the swingarm out, and removing/installing the swingarm is easier without the heavy final drive attached. The tank is painted, I bought it that way, but probably not how it will end up looking. The cowl is just the original gel coat color. This is my canvas, now to figure out what to do with it. I thought Black wouldn't look good, but the tank looks good on there. I am still considering putting a polished alloy front fender vice a painted original. This would match the small rear fender and the polished shocks and fork lowers. Opinions?

DSC_0717.jpg


DSC_0726.jpg


BTW, seat is just leftover from previous bigger tank. I have a new seatpan ready to foam/cover/install.
 
Really Great job!!
This bike could be a former Bmw HP2 megamoto.
Maybe this pic could be some paint inspiration... just an opinion...
Nice bike!!
 

Attachments

  • bmw-hp2-megamoto-ld.jpg
    bmw-hp2-megamoto-ld.jpg
    85.1 KB · Views: 265
Xavier,
tripped over this pic the other day. It was early mock up of the Mk3 I built.

I used the AJS 7R seat with a Triumph Metisse tank - also needed massaging at the back to clear the tunnel ! I used a Manx style alloy tank strap to hold everything in place.
When I sold the bike the guy didn't like the seat, so I replaced it with a Duke 750SS [ similar to the white Flat Racer seat ].

The AJS seat lives to fight on another Cafe Racer project.

BMWCAFERACER015.jpg
 
Heads

Beach, your cafe is very unique. Definitely makes mine look like a parts bin job. Yours is ACTUALLY custom. Bravo.

Since we gave the engine guy the go ahead, he jumped right in to the work. I unfortunately have to wait for new piston rings to come from the US (about a week and a half), but the heads are well on their way. All bead blasted, valves cleaned up, and new guides going in. They are also using a new style of valve guide that has a small rubber gasket on top vice being totally dependent on the bronze to seal. No pictures of that, but I'll get one em up when they return the heads.

IMG_0343.jpg

IMG_0346.jpg

IMG_0345.jpg

IMG_0344.jpg


Today, reinstall the cleaned oil pan and install the engine in the frame. I hope.
 
Thanx for the kind words Xavier. Loving the engine work BTW.
I still have the makings of an Airhead CR - R80/100 hybrid engine, 1978 R80 frame and a hole box of bits !

An Airhead still has that Iconic Cafe Racer look, with very few changes.

Do you subscribe to the German BMW Motorrader magazine? [ Published by M.O.]

There are some really wild bikes in there! A few trad 60's style, but more and more hybrids using modern Oilhead parts.

I'll probably end up using my collection of Airhead bits for my Max Deubel homage sidecar.
 
I have had a couple productive days. I had a major setup back early on, but I'll get to that in a minute. First, I painted the freshly cleaned oil pan. It is barely visible when installed, and the paint should ease later cleanup. When I removed it, it was so caked with grease that I was surprised there was anything left after I cleaned it.

DSC_0732.jpg


I moved on to cleaning the old gasket and installing the timing cover. A quick glance revealed that the timing chain and sprockets need to be replaced. I feel like an idiot that I had not examined it before now, but it looks like the chain is loose enough that it has deflected and hit the bearing carrier some. This created an impasse. Either stop there and wait 1 and half weeks for the parts to come in so that I could install them while the engine was out, or just go ahead and put the engine in the frame so that I could install the transmission, swingarm, and rear wheel. I went ahead and put it back together, and new parts will be ordered monday. The bike did run well before, with no noticable (to me) timing chain chatter, but maybe I didn't know to listen for it then.

Not the best picture, but you probably get the point:
DSC_0735.jpg

DSC_0740.jpg


I wrapped the frame with workout tape. It worked perfectly. Easy to apply, strong, stayed put, and came off easily. Installing the engine was as easy as putting my jack with transmission rack under the frame, then lifting the engine by hand in between the frame rails. It took 5 minute with a little sliding around and moving the jack. It was much easier ofcourse because there are no cylinders or starter, but the stock flywheel and clutch parts were installed.

DSC_0743.jpg

DSC_0744.jpg

DSC_0745.jpg


I was on a roll, so I lubed up the transmission splines and slid it on. Then I decided I would throw on the new valeo starter. Note for others: The ears on a valeo are threaded, so you just screw the original bolts in to from the transmission side with no nuts required. That would be great, except you cannot actually put in the left side original bolt. It is too long and hits the top of the transmission. I had a shorter allen around, so I used it. Thats was a lot of words to say that you might not be able to use the original bolts like the instructions say.

DSC_0747.jpg
 
Roller!!

At this point, I had an engine and transmission, so how about a swingarm? I didn't take many pictures of the work. Just standard installing the swingarm, centering it, installing the final drive, leave it loose till the axle is installed. Throw on the other shock, lube the wheel splines, put on the wheel, put in the axle, install the driveshaft bolts, install the driveshaft boot, get the clutch arm in, and somewhere in there, rebuild the rear master cylinder. Oh, and mount the Voltage regulator. It will get all the air it needs here:

DSC_0754.jpg


I reused one of the original horn brackets to triangulate it.

Without further fanfare, results of the day:

DSC_0762.jpg

DSC_0764.jpg

DSC_0761.jpg


Tomorrow, get the wiring harness in.
 
Good day all around. I have a question or two. Why not blue on the sub-frame? Wheels are blue and not the sub-frame? Second question is a rhetorical question more or less? Why does BMW (on this series of bikes) use a bolt-on sub-frame? It's a critical piece, not simply a place to sit (like many modern sportbikes) but also to mount the entire rear suspension points?
Cheers, 50gary
 
50,

I decided early on to make everything attached to the frame black except the wheels, so black subframe, side stand, center stand, swingarm. I just prefer the simplicity of just the blue frame. I have seen bikes where everything attached is the same color (not counting bikes with black frames, I just mean colored frames) and would have only done that if I went with a silver frame.

To answer the BMW subframe question, it is most likely due to modularity and cost. The same frame could be used for long and short wheelbase bikes. It may not be as stiff, but it has a great benefit: It is very easy to buy an extra subframe and modify that one and attach rather than working on your original item. You could have two subframes and two seats and have completely different looking/working bikes.
 
Norton asked the same question back in the early 60's [ sub-frame integrity ] and modified the part to be a weld on job with larger size tube.

I always remember [ and still use ] the advice I was given by my engineering degree tutor. "Take a problem [ or a suspected problem ] and then exagerate the forces / leverages and see what happens then ".

In this instance - imagine the top of the shock mounts moving sideways. Forget the weight of the rider and any other dynamics. Exagerate this movement - as if the tubes were pliable - and see where the forces are at their highest - where they bolt on the main frame.

Many Airhead racers fit a tubular brace between the front and rear downtubes to improve the torsional rigidity at the swing arm pivot.

Remember - no such thing as a perfect factory bike.......................
 
I have a local friend that's doing a BMW toaster cafe conversion and I'm trying to talking him into a welded on subframe. I'm doing a major cafe/track bike right now (Yam RT360 stroker) I very carefully cut the subframe off and took it to his shop. It fit like as if were made for it HAHA. Now just to convince him of the added integrity of the welded chassis?
Beachcomber, I read the same principle in the book "Engineer To Win" by Carrol Smith
Cheers, 50gary
 
50gary said:
I have a local friend that's doing a BMW toaster cafe conversion and I'm trying to talking him into a welded on subframe. I'm doing a major cafe/track bike right now (Yam RT360 stroker) I very carefully cut the subframe off and took it to his shop. It fit like as if were made for it HAHA. Now just to convince him of the added integrity of the welded chassis?
Beachcomber, I read the same principle in the book "Engineer To Win" by Carrol Smith
Cheers, 50gary

Gary - it's a priniciple that has served me well all my working [ and hobby ] life.

I'm proud to say that not one of my designs / projects has had a structural failure due to bad design / unsuitable material. That includes 1000 + bhp Dragsters and 400 + bhp Cobra replica circuit racers. Now a certain Colin Chapman approached the problem from the other end of the scale!
 
I had this weekend to just play in the garage, and next weekend I am flying to scotland, so I worked hard. I am still waiting for new piston rings to arrive, so no cylinders yet.

I had the powdercoater coat the entire starter cover badges with black, then sanded them down to reveal the aluminum letters again. I pinned a piece of sand paper to a piece of wood and went to work.

DSC_0770.jpg


The new voltage regulator box requires two thick wires from the alternator to the box, as well as a "power on" wire and a charging light. I ran the wires, then ran them through this trick webbed harness. It requires a special cutter for the ends that you can buy for the soldering iron. If you don't use the cutter, it frays almost immediately. I finished each end with big pieces of heat shrink.

DSC_0773.jpg


Got the bike completely wired and then tested everything. My neutral switch still doesn't work. I wonder if I am using the wrong switch for the transmission. If you ground the wire manually, the neutral light turns on, but the new switch (and old) just don't seem to want to ground.

DSC_0772.jpg

DSC_0774.jpg

DSC_0775.jpg

DSC_0779.jpg


I changed the oil filter, after extensive reading, and found the shim for the o-ring outside the actual o-ring. It was against the cover. I measured the depth, checked the chart, and put everything back together including a cover gasket. It was called for based on my measurement.

I also disassembled the carbs. The cork gaskets were very elongated at the choke suctions. Everything else looked okay. I am going to keep the original diaphragms and change out all the o-rings and the bowl gasket.

DSC_0780.jpg
 
I finished rebuilding the carbs. The jets have o-rings, definitely different than most carbs I have dealt with, so you have to wrap the threads of the jets with tape before installing the new o-rings. A pin-sol cleaning of the body and some scrubbing gave me decent looking carbs:
DSC_0797.jpg


I also changed out the timing chain. The original timing chain does not have a masterlink, so removing involves cutting off the old one with large bolt cutters. Bolt cutters turned this:

DSC_0784.jpg


In to this:

DSC_0791.jpg


New chain went on without drama, so I cleaned up the brake lines. Wire wheel, buff, then clear coat. Comparison shot:

DSC_0781.jpg


Last night I went by the mechanic and got the cylinders and heads. Valve job, new hone, new rings:

DSC_0793.jpg

DSC_0794.jpg

DSC_0795.jpg


Also picked up the painted calipers. We tried to powder coat them, but the aluminum kept bubbling, so they got primer, paint, and low heat in the oven to cure them.

DSC_0796.jpg


And I just like this shot:

DSC_0787.jpg
 
Back
Top Bottom