
We noticed you are blocking ads. DO THE TON only works with community supporters. Most are active members of the site with small businesses. Please consider disabling your ad blocking tool and checking out the businesses that help keep our site up and free.
You are using an out of date browser. It may not display this or other websites correctly.
You should upgrade or use an alternative browser.
You should upgrade or use an alternative browser.
1981 Yamaha XS400-"FLIGHT"
- Thread starter pr design
- Start date
Progress.
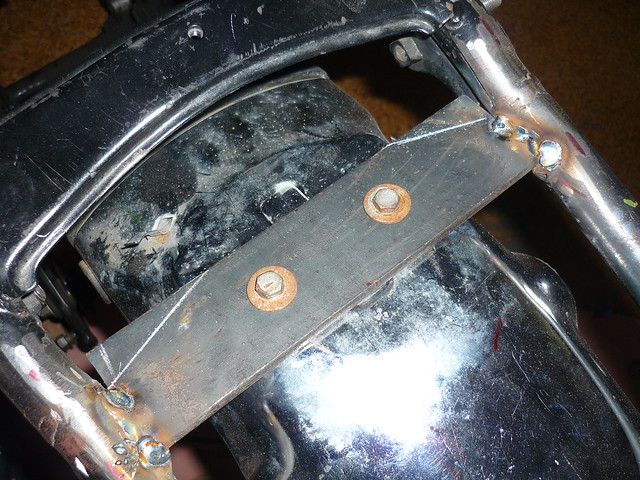
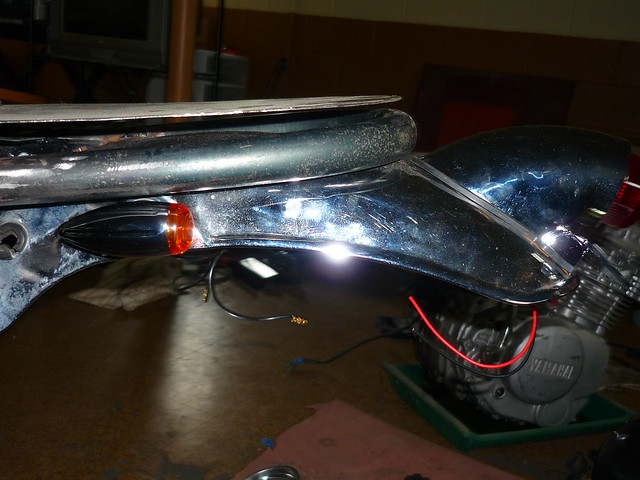
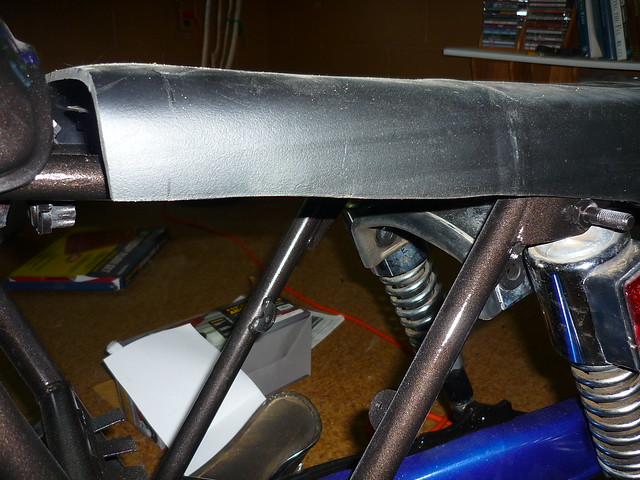
The last few weeks have been busy with work, but last Friday I got the brace to mount the rear fender welded to the frame.
You can see the white marks where I'm going back to trim off some excess.
This morning, even if Necky doesn't care for them, I marked and mounted the Sparto tail light.
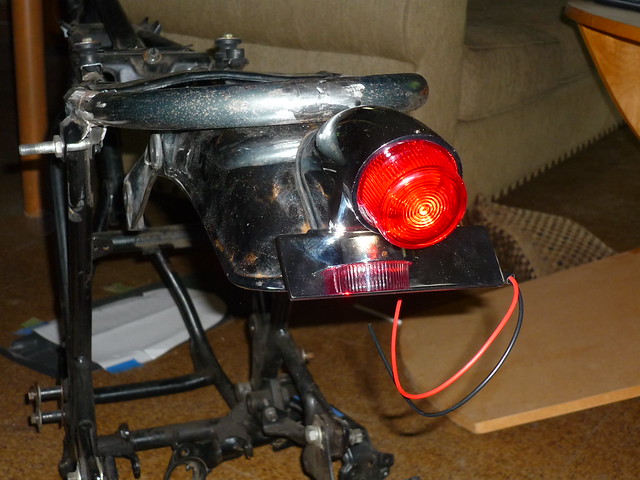
The thing is I think it is about the only light that looks finished. Blending with the original fender like it is meant to be there. I just think some of the smaller replacement lights look like an after thought. Like they forgot the need of the brake light until the design was done.
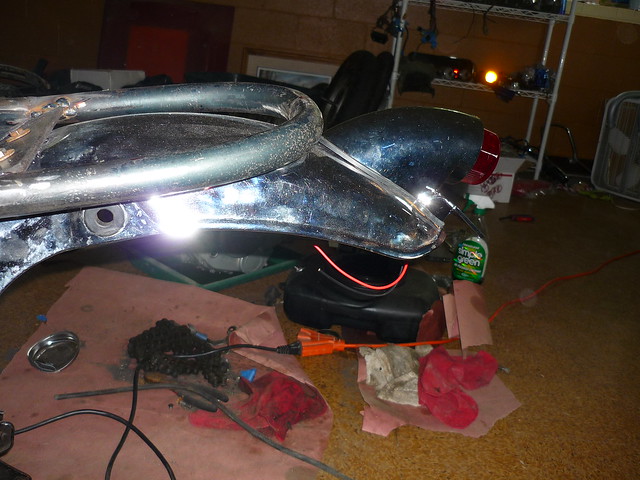
I have been debating the mounting point for the rear signals. I think that they might look better mounted back through the fender.
The original holes for mounting the fender to the frame are just sitting there with the vibration rubbers still viable, so I thought try them there.
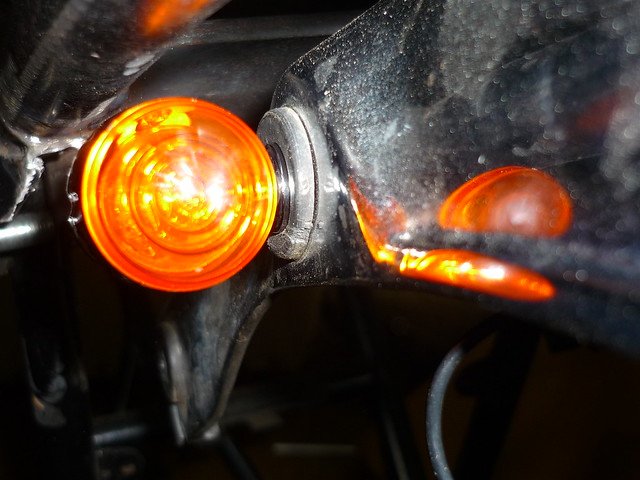
They tuck up really nice under the frame and from behind I think they look like the original position of the long armed signals.
The don't look too bad from that point either. Might just leave them there.

So parts are getting fit up. might add another brace for one more set of rubbers bumpers for the seat near the back.
Then time to get the frame painted so I can get it back together and actually rider her this summer.
The last few weeks have been busy with work, but last Friday I got the brace to mount the rear fender welded to the frame.
You can see the white marks where I'm going back to trim off some excess.
This morning, even if Necky doesn't care for them, I marked and mounted the Sparto tail light.
The thing is I think it is about the only light that looks finished. Blending with the original fender like it is meant to be there. I just think some of the smaller replacement lights look like an after thought. Like they forgot the need of the brake light until the design was done.
I have been debating the mounting point for the rear signals. I think that they might look better mounted back through the fender.
The original holes for mounting the fender to the frame are just sitting there with the vibration rubbers still viable, so I thought try them there.
They tuck up really nice under the frame and from behind I think they look like the original position of the long armed signals.
The don't look too bad from that point either. Might just leave them there.
So parts are getting fit up. might add another brace for one more set of rubbers bumpers for the seat near the back.
Then time to get the frame painted so I can get it back together and actually rider her this summer.

well I haven't posted in a couple weeks, but that doesn't mean I haven't been working on this stuff.
Just ordered a few parts from mikes xs. to go along with the gasket and clutch rod seal that I ordered from the local dealer. So I will have some new handle bar electronic controls to replace the jerry rigged ones that where on the bike. New friction plates and springs for the clutch. that should get the bike pulling better uphill.
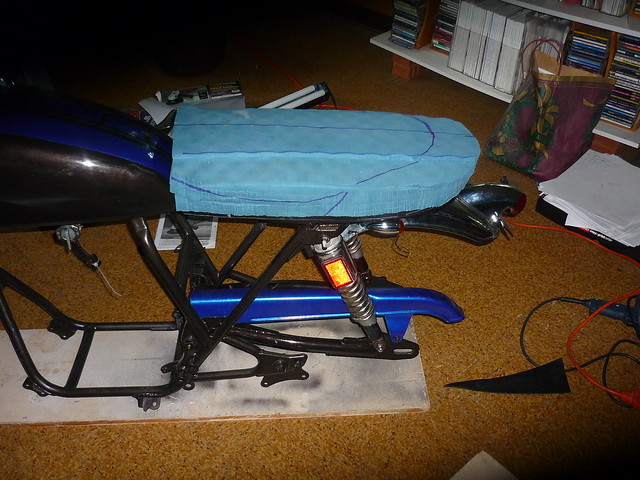
Over the weekend I started working on this seat project using a black plastic barrel. I haven't got it completely sorted out, but I guess you will be able to tell what I have been doing better with some pictures.
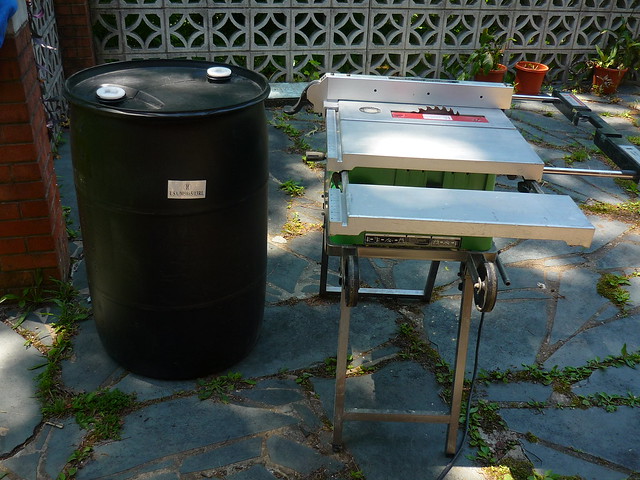
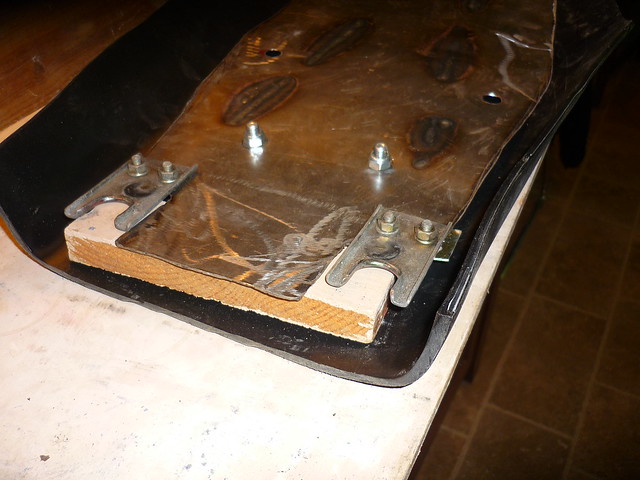
donor plastic
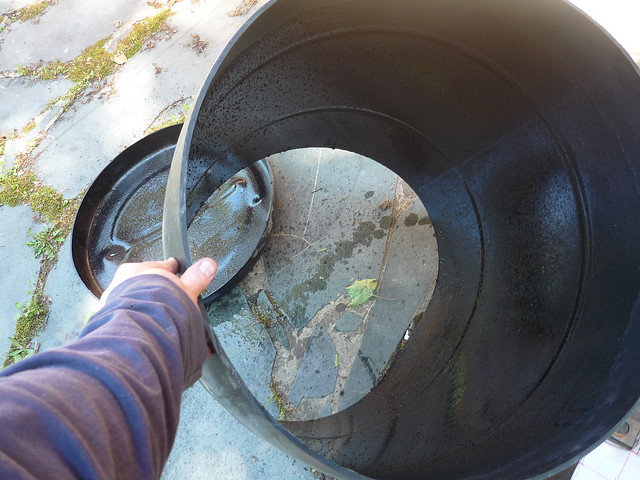
Trimmed a piece to closer to fit. drill it to attach to the metal pan.
Then I put it in the oven to soften up so I could mold it to allow the plastic to sit up high enough to let the front of the seat hardware to slide under the plastic.

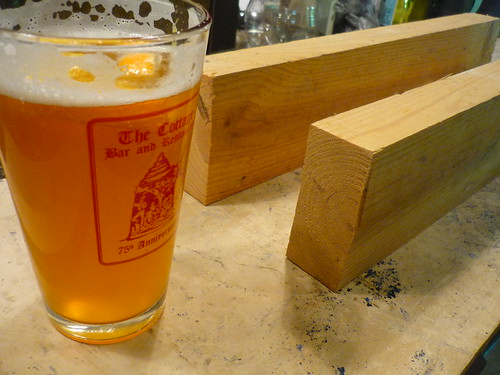 just something to sip on while I waited for the plastic to get malleable.
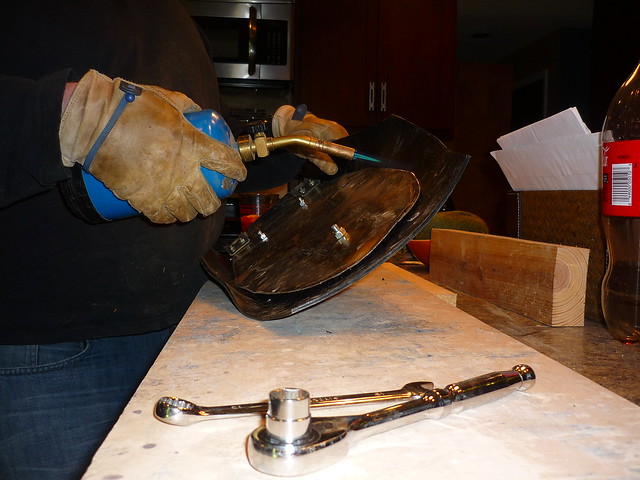
starting to pull the sides around.
And then put the torch to use.
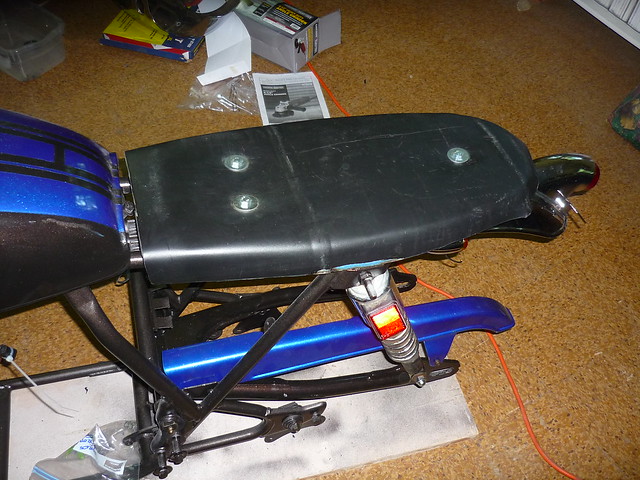
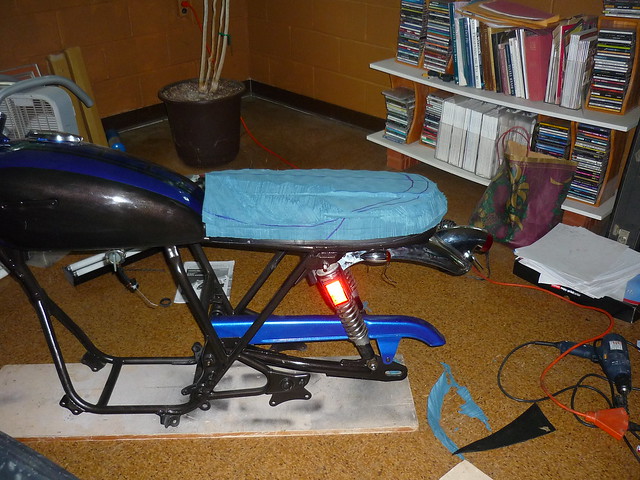
first fitting
Here is where I have trimmed it to so far.
I am debating whether to go to the top of the rail so that it looks like the seat follows the frame exact, or should it overlap half the frame?
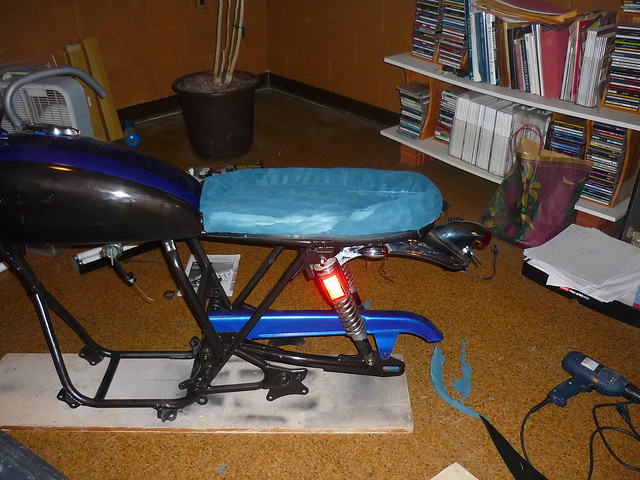
I have a could more minor things to tweak on it. There are a couple puckers on the back end. Not sure what I want to do about those or how to eliminate them without doing some cuts to relieve the excess material.
Just ordered a few parts from mikes xs. to go along with the gasket and clutch rod seal that I ordered from the local dealer. So I will have some new handle bar electronic controls to replace the jerry rigged ones that where on the bike. New friction plates and springs for the clutch. that should get the bike pulling better uphill.
Over the weekend I started working on this seat project using a black plastic barrel. I haven't got it completely sorted out, but I guess you will be able to tell what I have been doing better with some pictures.
donor plastic
Trimmed a piece to closer to fit. drill it to attach to the metal pan.
Then I put it in the oven to soften up so I could mold it to allow the plastic to sit up high enough to let the front of the seat hardware to slide under the plastic.
starting to pull the sides around.
And then put the torch to use.
first fitting
Here is where I have trimmed it to so far.
I am debating whether to go to the top of the rail so that it looks like the seat follows the frame exact, or should it overlap half the frame?
I have a could more minor things to tweak on it. There are a couple puckers on the back end. Not sure what I want to do about those or how to eliminate them without doing some cuts to relieve the excess material.
Thanks Texasstar. I trimmed it back this weekend. and I am ready for padding on it. Time to work on my sewing skills I am glad my mother taught me how to use a machine before I moved out on my own.
Also got my parts for the clutch rebuild. Started pulling the side cover over the clutch and 3 of the allen holes are rounded out. Like there is zero bite on the wrench. I think I will try the torc bit hammered in method to see what happens just an excuse to buy some torc bits.
I guess I will be buying some new stainless bolts for the side cover too. It would be nice to ride it some this summer.
jrswanson1
Humor Impaired
I wonder how well Kydex would work in this application.
I know that the tub top that I started with wasn't going to work. My thoughts on this is that the material needs to be thick enough that it will hold it's shape for the most part when the upholstery is stretched over it. I also want enough thickness for the staples to have something to bite into. I worried that the storage bin top would have cracked with the application of the staples.
I guess I need to get this part done so we can see how it "pans" out (terrible pun)
I'm not familiar with kydex but looks like it would function similarly. not sure how expensive it is either.
I guess I need to get this part done so we can see how it "pans" out (terrible pun)
I'm not familiar with kydex but looks like it would function similarly. not sure how expensive it is either.
jrswanson1
Humor Impaired
I don't know if any of these are long enough, but http://www.amazon.com/Kydex-Sheet-Thick-Calcutta-Black/dp/B0072JZHBE/ref=sr_1_1?ie=UTF8&qid=1370288627&sr=8-1&keywords=kydex+sheet
That kydex is expensive compared to the 10 dollar barrel.
So last week I bought a camping pad from wally world and cut it up and super77ed it together.
That got me to part one of the big block of foam.
Then some bread knife work to get the roughest amount trimmed up.
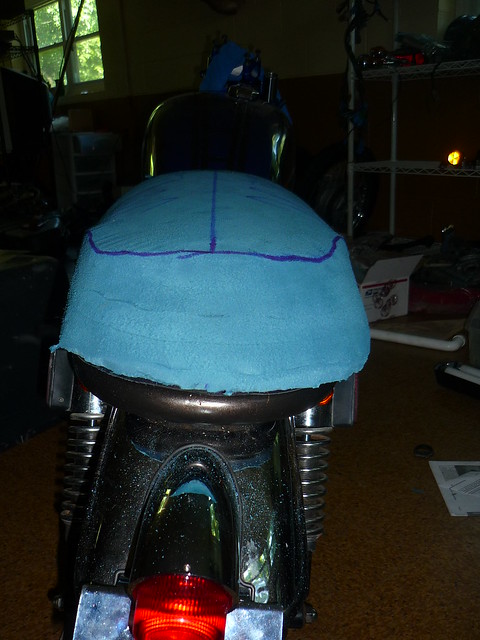
Once that was done the sanding disk got a work out shaping the seat with great efficiency.
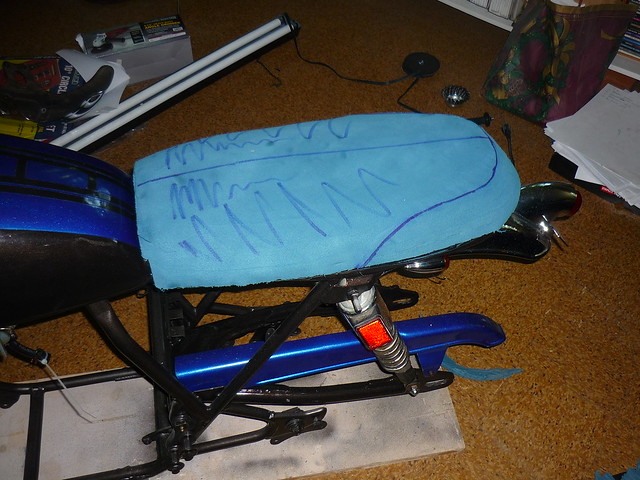
I think I only had about 6 test fittings.
I think this looks about the way I imagined it would when I started doing sketches of seats.
Took some upholstery samples that I had from an old job and started working out a material pattern.
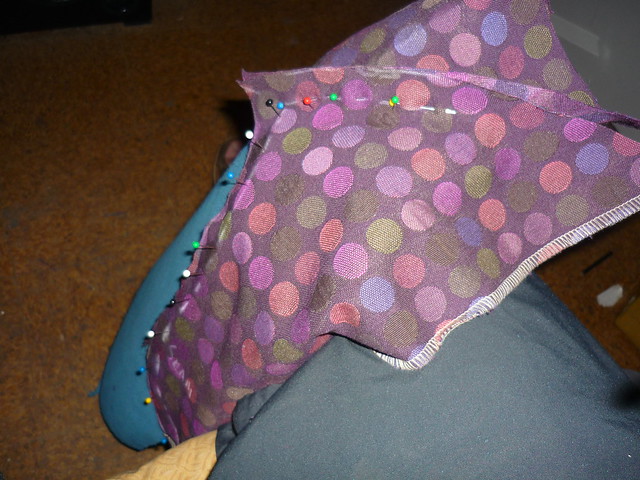
Got out the sewing machine and did a test run.
I think that the pattern will work It will require some trimming and a little more fitment, but I think she looks pretty nice for a tester.
So last week I bought a camping pad from wally world and cut it up and super77ed it together.
That got me to part one of the big block of foam.
Then some bread knife work to get the roughest amount trimmed up.
Once that was done the sanding disk got a work out shaping the seat with great efficiency.
I think I only had about 6 test fittings.
I think this looks about the way I imagined it would when I started doing sketches of seats.
Took some upholstery samples that I had from an old job and started working out a material pattern.
Got out the sewing machine and did a test run.
I think that the pattern will work It will require some trimming and a little more fitment, but I think she looks pretty nice for a tester.
mmaurin
Been Around the Block
nice little write up youve got going on the seat upholstery... i was trying to envision it in my head... the last time i sewed something real was with my grandma...
are you doing leather? any batting? is it comfortable to sit on?
how are you attaching it underneath?
are you doing leather? any batting? is it comfortable to sit on?
how are you attaching it underneath?
wership said:nice little write up youve got going on the seat upholstery... i was trying to envision it in my head... the last time i sewed something real was with my grandma...
are you doing leather? any batting? is it comfortable to sit on?
how are you attaching it underneath?
I will first say that I'm not sure how comfortable it is. I have sat on it, but without the wheels on the bike, the seating position is just, "off" the frame sits out of level withe the floor, and every time I sit on it it wants to rock backwards.
I bought some black vinyl the other day to work on sewing the quilting for the main part of the cover.
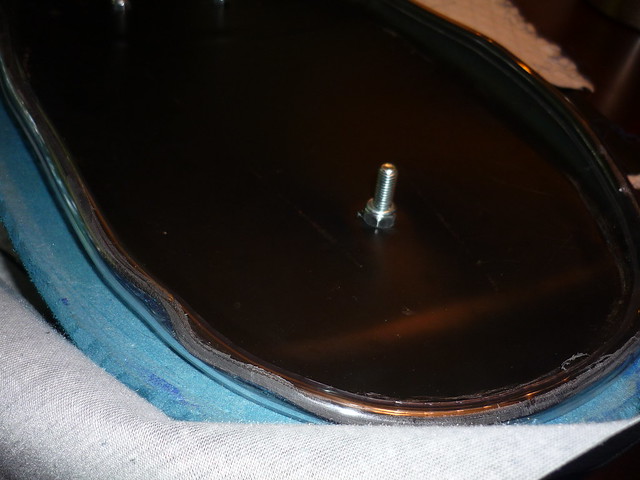
The Plastic part of the pan bolts to the metal pan. The metal pan locks into the front on the original mount, and then I will be adding a hinch bolt and pin to fix the rear position.
the upholstery will be stapled to the plastic pan just like it was on the original seat pan.
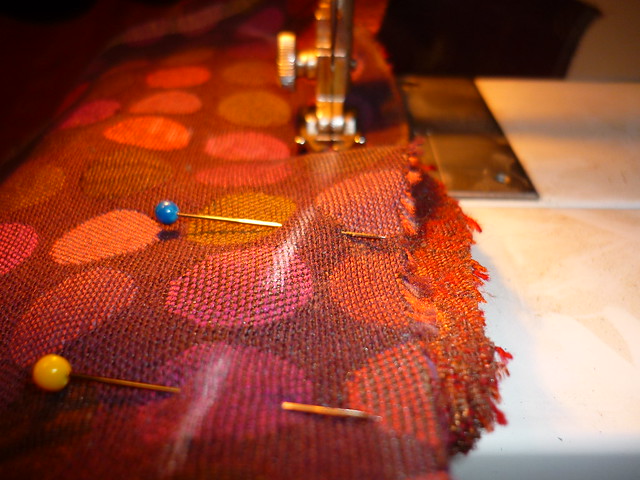
Well there are things that you learn when doing a project like this. Some might be mechanical, but some come in lessons that don't seem at all related to motorcycle building. This lesson was one in sewing.
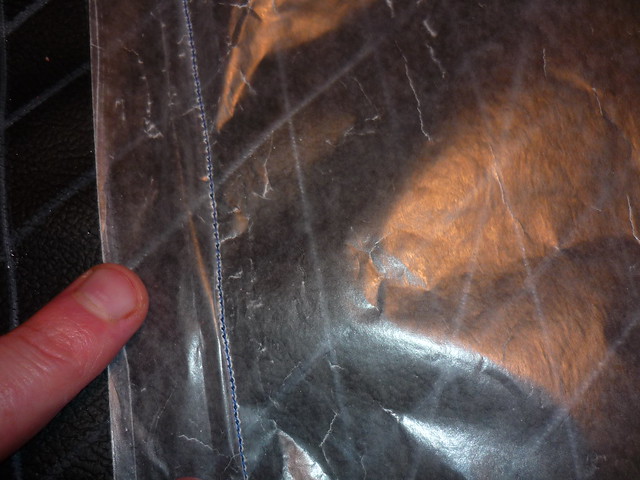
This starts with Vinyl.

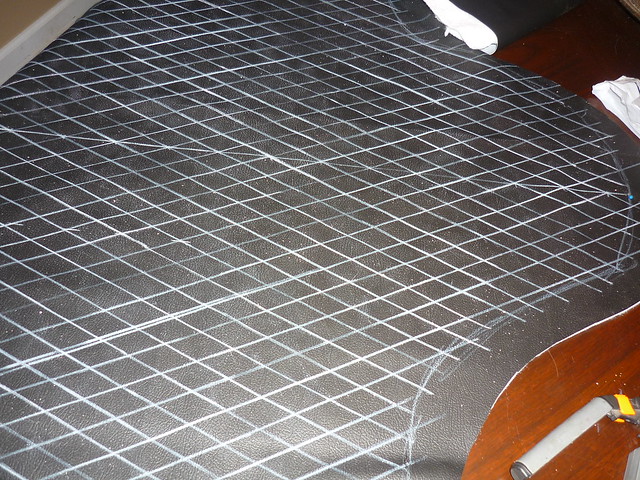
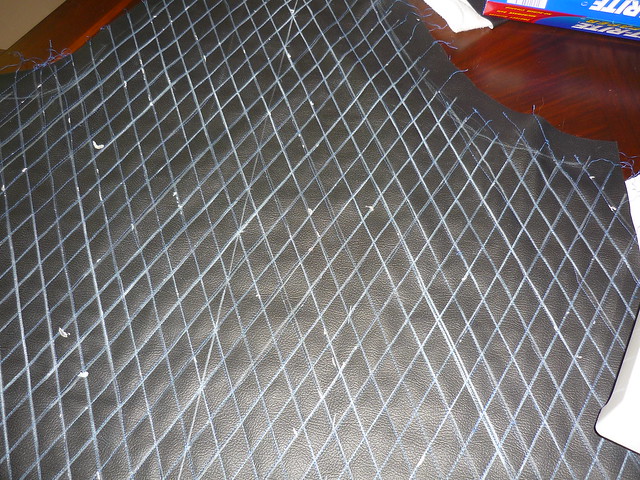
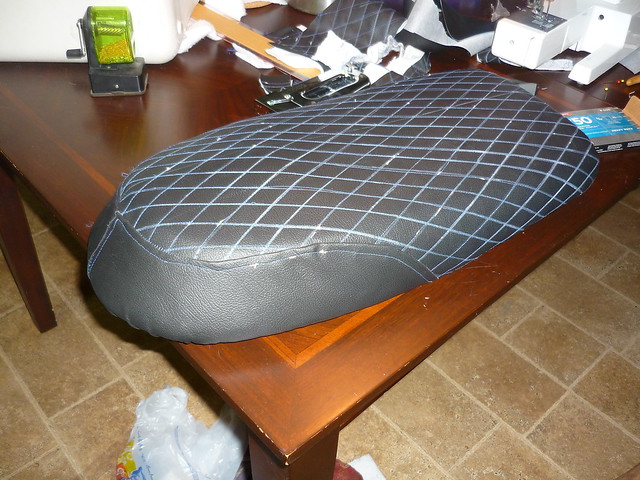
I decided on a design, and thought that it would be pretty cool to have diamond quilting on most of the seat. So after cutting out the pattern I laid out a 1" to 2" diamond pattern and drew a bunch of lines onto the vinyl so that I had accurate lines to follow.
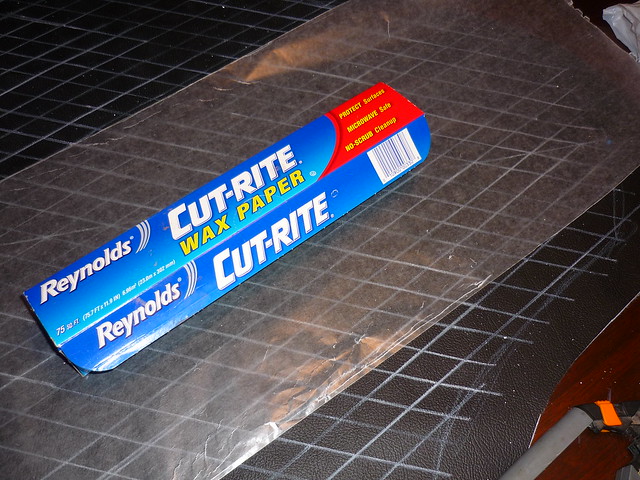
The key to my lesson was that when combining 2 materials for a quilted patten both materials need to pass through the sewing machine at the same rate or you are going to be an unhappy camper. I did multiple tests with multiple disappointing results. The fact was that I don't have a nylon foot for my sewing machine. The vinyl was sticking to the foot and causing the backer to slide while not sliding on top. After sleeping on it for the night, I came up with the idea of using Wax Paper. Slippery mostly translucent and thin enough that I could sew through it. It worked great.
After about 2 hours and 3 bobbin refills I had the diamond sewing done. Needless to say I think that I should have used a double thickness of backing material, because there is pretty minimal "quilting" on the panel.
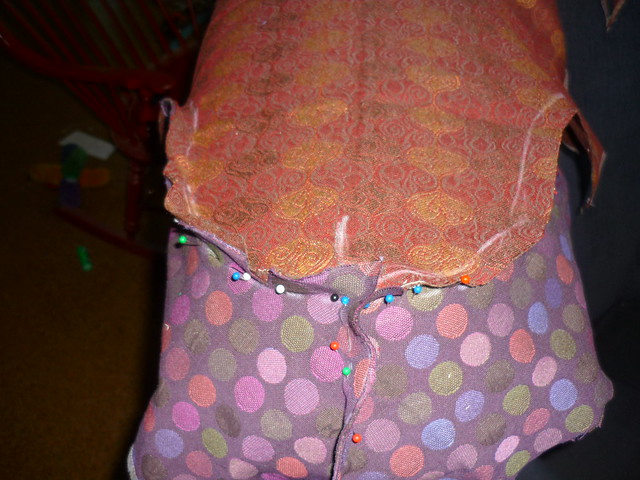
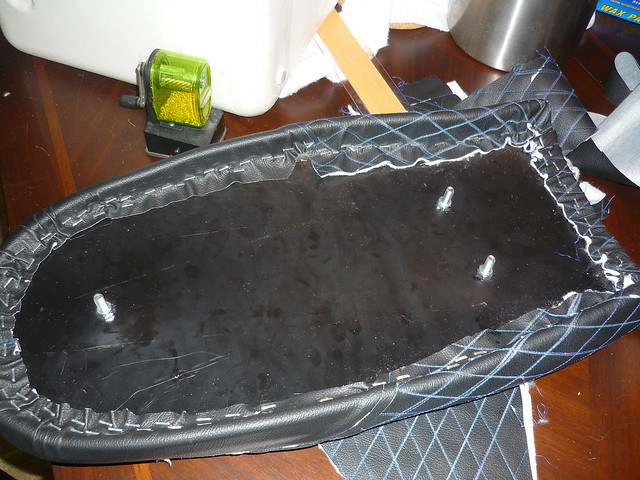
Next I got the back panels laid up and positioned. Then I flipped them and pinned them from the back.
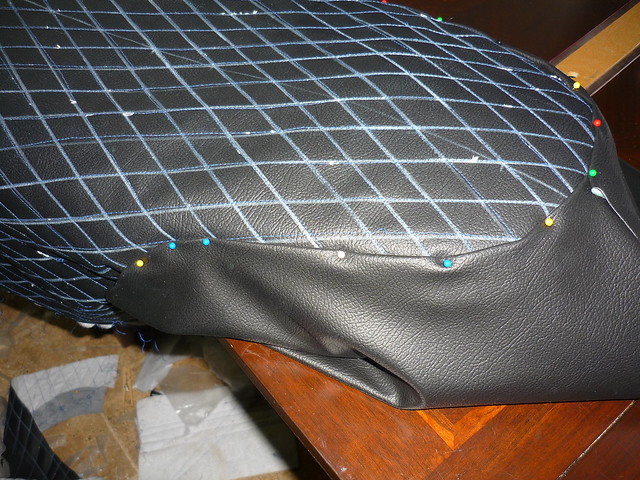
All the seams were sewn on the back side, then I went back and added a decorative and reenforcing stitch on the outside.
On the plastic pan I added a piece of vinyl tube split and slipped over the edge so that the material doesn't rub a hole or tear.
kind of hard to see in the picture.
First few staples to hold it all in position.
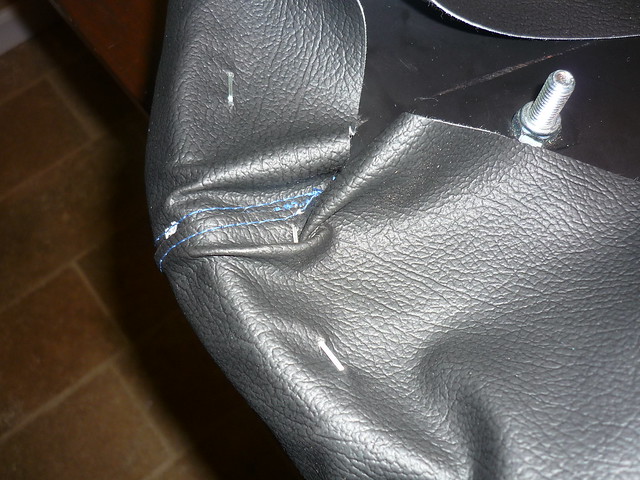
And after all the staples are in and the excess material is trimmed out.
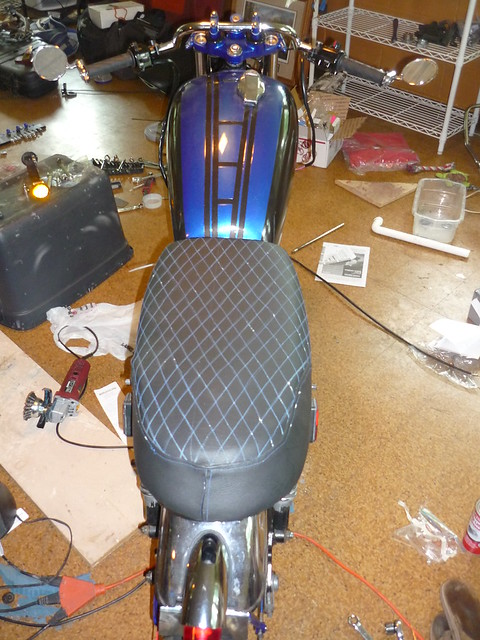
I also bought some truck bed liner spray paint and coated the metal seat pan with it. the bolted right up and dropped right into place on the bike. I couldn't be happier with the results. Are all the sewn lines straight, Not by I long shot. I think I have about 40 dollars total into my seat. A piece of scrap metal from my buddies shop, a 10 dollar plastic barrel, 9 dollars for vinyl and thread. and 14 dollars for the camping pad. bolts and some other things I'm sure I forgot like spray glue are in that too. New Church would have been nice, but for now. I think I will just be happy with the fact that I did that project.
This starts with Vinyl.
I decided on a design, and thought that it would be pretty cool to have diamond quilting on most of the seat. So after cutting out the pattern I laid out a 1" to 2" diamond pattern and drew a bunch of lines onto the vinyl so that I had accurate lines to follow.
The key to my lesson was that when combining 2 materials for a quilted patten both materials need to pass through the sewing machine at the same rate or you are going to be an unhappy camper. I did multiple tests with multiple disappointing results. The fact was that I don't have a nylon foot for my sewing machine. The vinyl was sticking to the foot and causing the backer to slide while not sliding on top. After sleeping on it for the night, I came up with the idea of using Wax Paper. Slippery mostly translucent and thin enough that I could sew through it. It worked great.
After about 2 hours and 3 bobbin refills I had the diamond sewing done. Needless to say I think that I should have used a double thickness of backing material, because there is pretty minimal "quilting" on the panel.
Next I got the back panels laid up and positioned. Then I flipped them and pinned them from the back.
All the seams were sewn on the back side, then I went back and added a decorative and reenforcing stitch on the outside.
On the plastic pan I added a piece of vinyl tube split and slipped over the edge so that the material doesn't rub a hole or tear.
kind of hard to see in the picture.
First few staples to hold it all in position.
And after all the staples are in and the excess material is trimmed out.
I also bought some truck bed liner spray paint and coated the metal seat pan with it. the bolted right up and dropped right into place on the bike. I couldn't be happier with the results. Are all the sewn lines straight, Not by I long shot. I think I have about 40 dollars total into my seat. A piece of scrap metal from my buddies shop, a 10 dollar plastic barrel, 9 dollars for vinyl and thread. and 14 dollars for the camping pad. bolts and some other things I'm sure I forgot like spray glue are in that too. New Church would have been nice, but for now. I think I will just be happy with the fact that I did that project.
I head up there to the general store every once in a while. Such amazing food.Bozz said:Looking good, Phil!
Cheers from Saxapahaw,
-Will
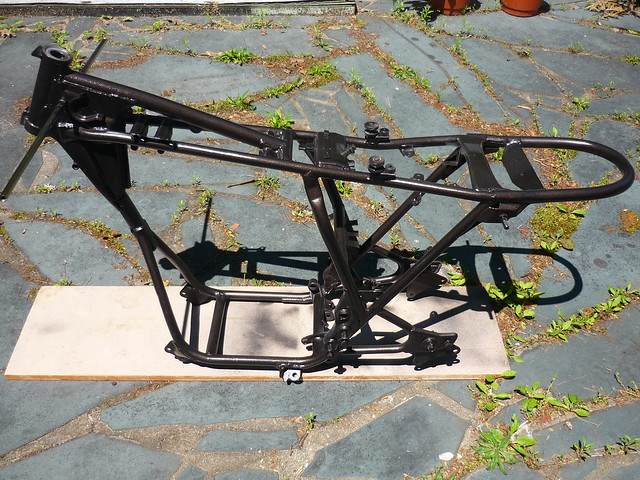
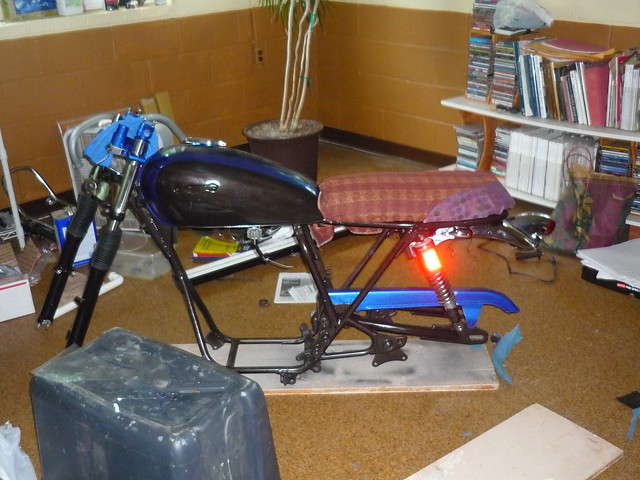
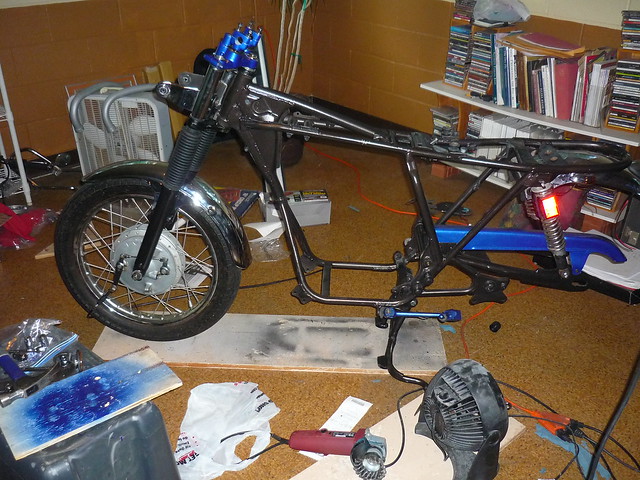
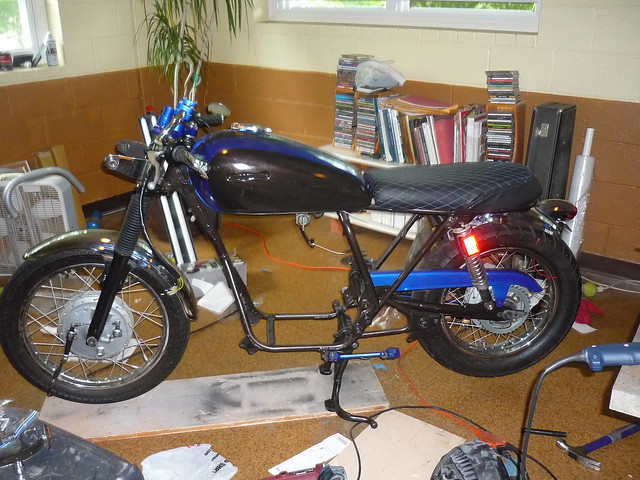
I Have a ROLLER!
I spent my time this weekend getting my wheels back on. All I can say is I'm stoked with how she is looking. I have spent plenty of time sketching on napkins at dinner or at the bar. And even though it isn't finished, it is good to see the sketching and the project starting to match up. Maybe at the end I will lay out the drawings that I have done and see how they compare.
I'm sure before this is all done I'm gonna have to pull wheels back off again more then likely, but this makes me feel like this is going forward.
I feel like the front forks are tweeked, but I think LazLoh gave me a link that explained what happened. So I will be loosening the triples front end back up and try to get that lined up right.
I also am a little concerned with my rear fender. I am a little worried that the wheel is going to rub on bumps, That might be resolved easy enough with a higher preload on the rear shocks. They are currently on the lowest setting.
Any way that is what is going on..........Oh I guess some pictures might be good
I have had a busy couple weeks of working on the bike.
The clutch has new friction plates and new springs.
There is a new seal at the clutch rod on the opposite side of the engine.
The entire engine got painted.
The engine got lifted back into the frame.
So I'd had 3 allen heads that had been rounded out by the previous owner. In order to get those out, I took the engine to my buddies metal shop and welded a nut on to the end of them. They all broke free no problem after that.


Stator wire that was broken. Soldiered it and heat shrinked it.
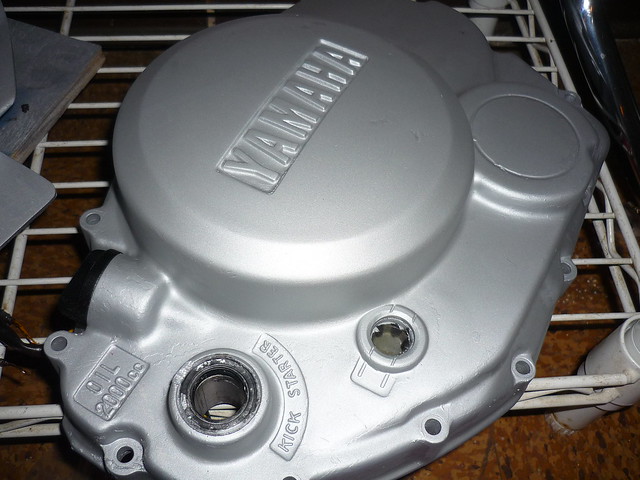
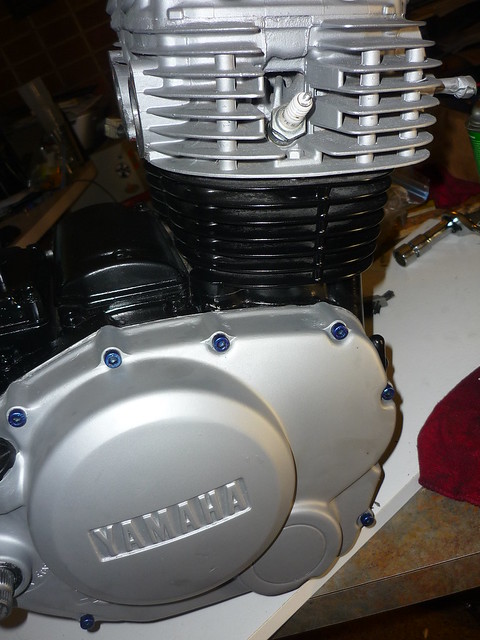
The cover cases had some bare metal some metal that looked like it had been painted at some other point in its life. So I just sanded the cover down and painted it with the same aluminum high temp paint that I bought for my header pipes. That is were my controversy started. I was looking at it saying that looks brand new. So while the other side cases were off I painted those as well.
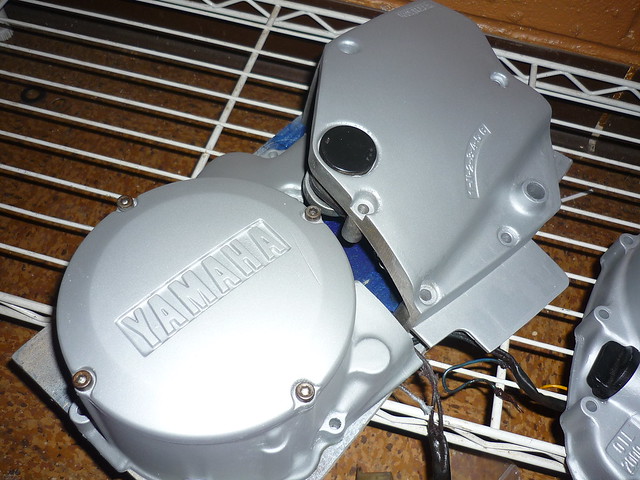
The problem was I was going to put them back on an engine that looked ok but not great.
So finally just decided that the engine was going to be blacked out.
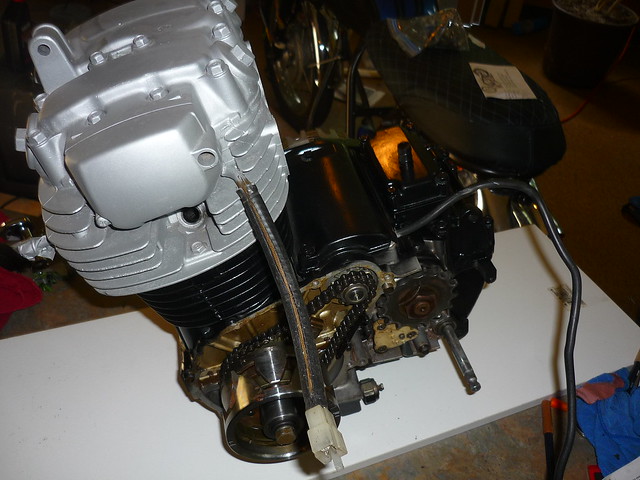
Yesterday when my friend stopped by he helped me lift the engine back into the frame and by last night I had it bolted back in place.
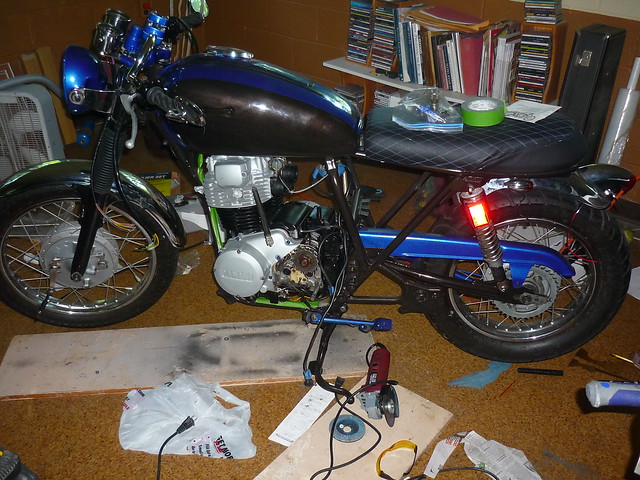
Started putting some of the electrical parts back on the bike last night. Slowly it is coming back together.
The clutch has new friction plates and new springs.
There is a new seal at the clutch rod on the opposite side of the engine.
The entire engine got painted.
The engine got lifted back into the frame.
So I'd had 3 allen heads that had been rounded out by the previous owner. In order to get those out, I took the engine to my buddies metal shop and welded a nut on to the end of them. They all broke free no problem after that.
Stator wire that was broken. Soldiered it and heat shrinked it.
The cover cases had some bare metal some metal that looked like it had been painted at some other point in its life. So I just sanded the cover down and painted it with the same aluminum high temp paint that I bought for my header pipes. That is were my controversy started. I was looking at it saying that looks brand new. So while the other side cases were off I painted those as well.
The problem was I was going to put them back on an engine that looked ok but not great.
So finally just decided that the engine was going to be blacked out.
Yesterday when my friend stopped by he helped me lift the engine back into the frame and by last night I had it bolted back in place.
Started putting some of the electrical parts back on the bike last night. Slowly it is coming back together.


