1983 Suzuki GS750E Cafe/Brat/Tracker? or whatever

While I was stewing in my mind over the seat ideas I finally got to work on the carbs...

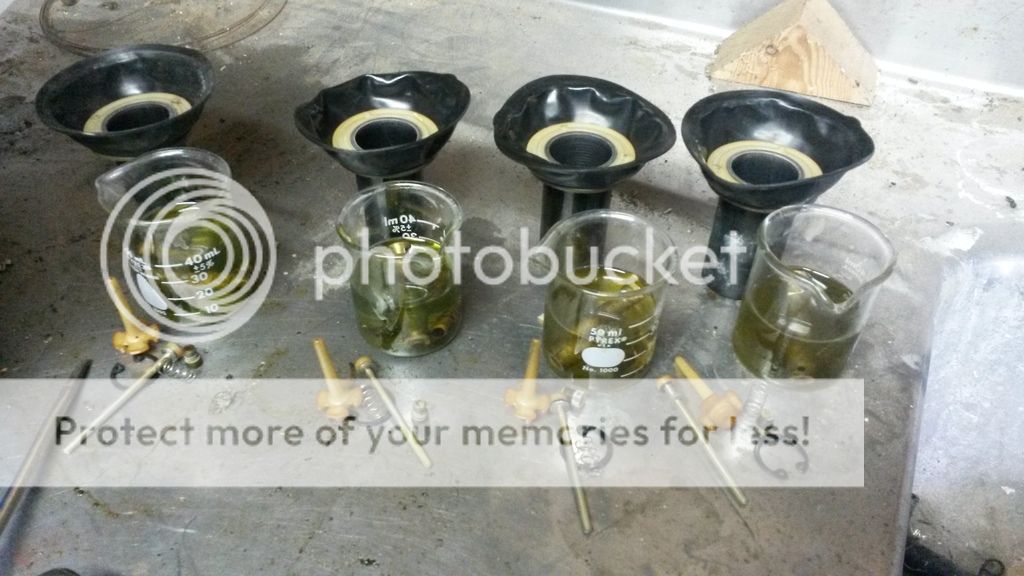
All of the pilots were completely plugged, the needle valves were completely locked up...no spring movement at all and 2 of them wouldn't even come out of the valve body, the needle jets were the worst I've ever seen...one was so bad I couldn't even pull it off of the needle.
I've got it all soaking in B-12. I also got the plugs out from the air mix screws and checked them. They were all set to around 2.25 turns out which I have to assume has to be stock since I would assume someone wouldn't have adjusted them and then stick the plugs back in.


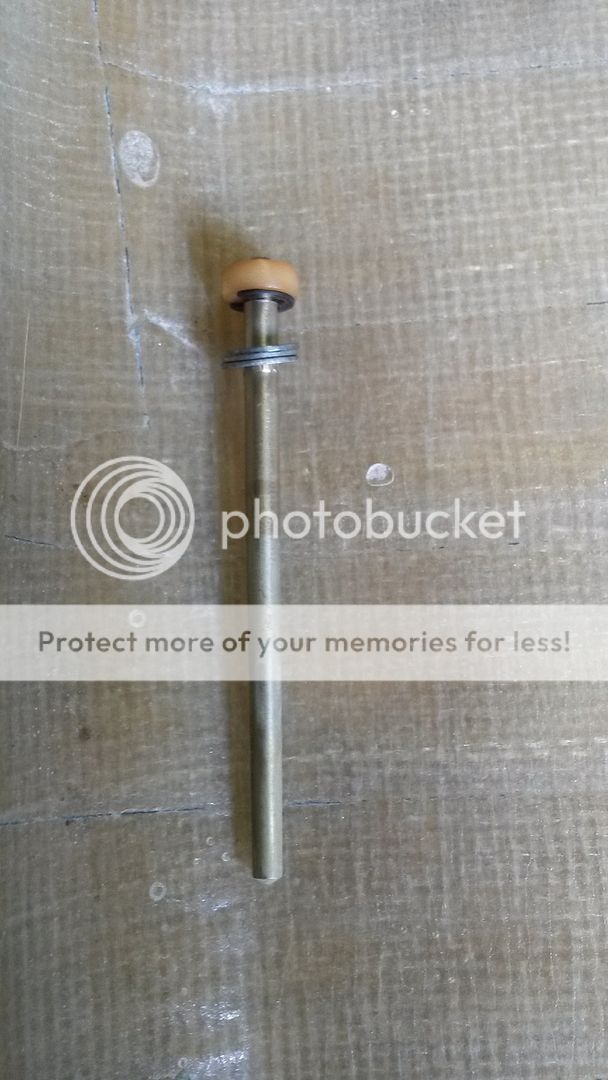
I finally was able to use a small pair of side cuts to grab the spring clip and get the needles out and this is what I see. I'm assuming that the stock needle configuration doesn't have the 3 shim washers?


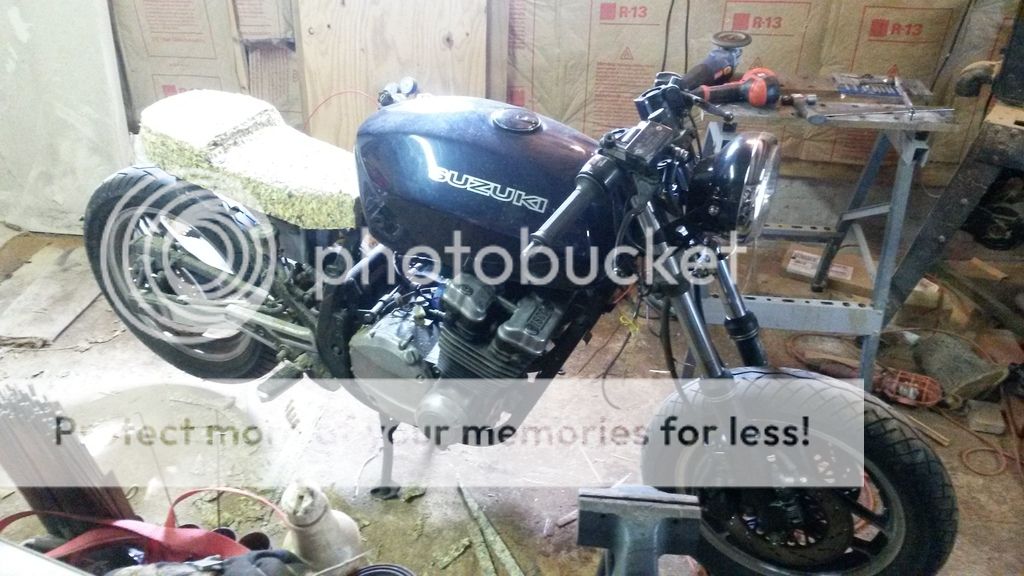
Back to the seat, this is the closest thing I can get to what I was seeing in my head for the seat. Kinda cafe-ish, but not the HUGE hump, so I trimmed the curve off of the 2 layers that I had added before to get more of a flat shelf like tail on it. I think I like it.


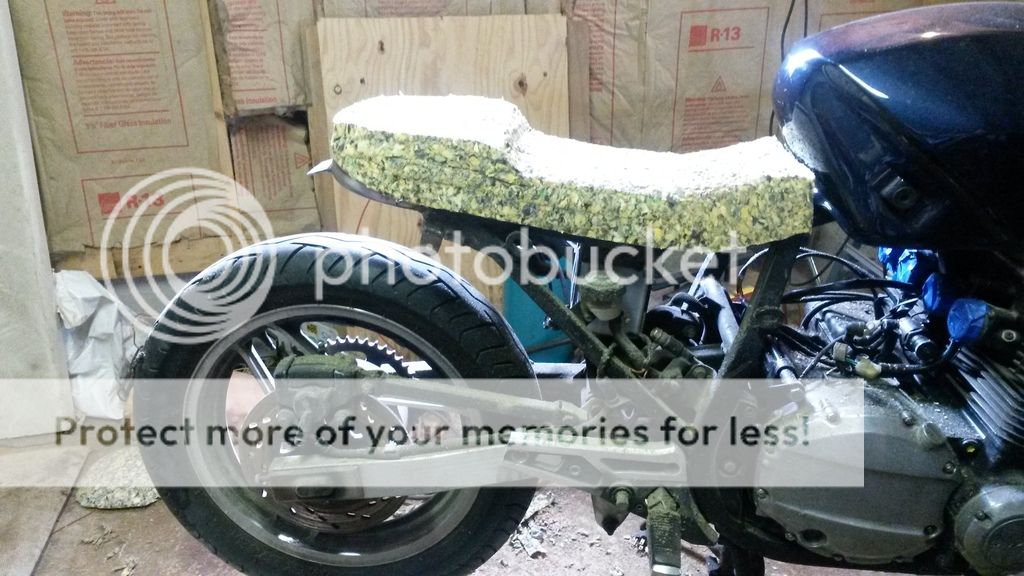
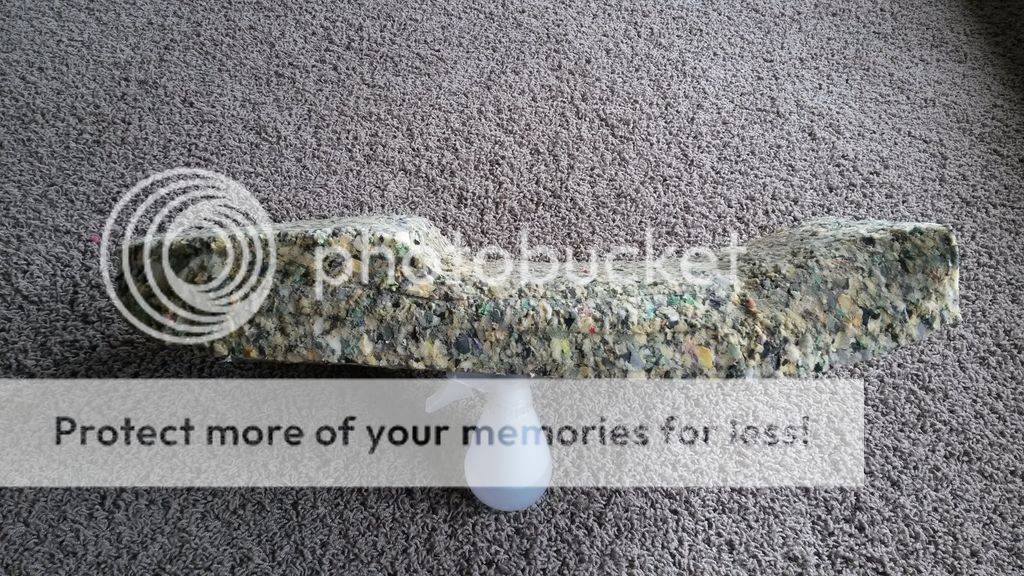
I've got to get some sew foam to work on the upholstery for this seat, but more importantly I've got to get these carbs clean and get the wiring harness out and sorted through.
 
Well before I get going on the wiring harness I figured I needed to get a placement figured out for the seat release lock and weld the tab back on. I wanted to put it on the left side of the bike, but it was going to end up right above the chain and the angle of the cable was a bit binding so I decided to try and make it work on the right side. It seemed to work ok with very little twist and bind in the cable.


Then I got the harness out...I don't even know where to route this stinking thing. I could wire it from scratch but I really didn't want to. My main problem will be how to hide the rats nest that I'm gonna have at the front end that would have been hidden by the stock headlamp fairing...what a mess...
I may try to hook up what I can and trim back what I can to reduce as much as possible
 
Really like your vision for the seat. Maybe a little trimming to get it to agree with the lines of the tank, and I reckon you're golden.
 
buzznichols said:
Really like your vision for the seat. Maybe a little trimming to get it to agree with the lines of the tank, and I reckon you're golden.

Thanks buzz,

where were you thinking of trimming? the only thing I can see is the under side near the front so the curve is more sweeping up to the nose...
I didn't notice it until seeing the pics and it's just a foam thing, the seat pan is a gentle curve.
 
coyote13 said:
Where did you find the pic of the seat you're using as a model? I really, REALLY like that

I was thinking the same thing when he posted it, even if it needs a better cover its nice
 
coyote13 said:
Where did you find the pic of the seat you're using as a model? I really, REALLY like that
Tune-A-Fish said:
I was thinking the same thing when he posted it, even if it needs a better cover its nice

Here's the link to this seat:
http://www.motorcycleseatsdirect.com/honda-cb450-cb-450-k5-k6-k7-1972-1973-1974-solo-dual-passenger-cafe-racer-seat/

They've got a ton of cool seats
 
I was in the process of re-assembling the carbs when one of those nylon mains twisted off...I decided to order a set of 125's as a starting point now that the nylon jets have been "disabled"

I got them the other day along with some materials to make new intake clamps. 3meters of 8mm band and 8 worm gear clamp adjusters.


I was a little iffy on how wide the worm gear adjuster is compared to the band width, they definitely won't fit down in the groove like the band itself will, but for less than $12 for 8 clamps was better than $4 a piece for 4 plus shipping and I'm cheap.


I finally got the carbs assembled. I raised the needles a total of .058" by using 2 of the 3 washers that were below the C clip above the clip and I kept one below for a spring seat. I took the nylon spacer off completely since it was a full .100" there was really no use for it under the C clip either.

Then I started making my intake clamps...the old ones are in terrible shape and I was missing one anyway, otherwise I would have tried to get the stock ones back into shape.
 
No pics, but I've been plugging away at getting things nailed down so a first start will be sometime in the near future.

I checked valve clearances and all of them were .002" or less which makes no sense to me. Manual says .004-.005" on both intake and exhaust valves, so for all of them to be .002" or less would mean that someone would have had to have set them to that level. Any wear and tear of parts including cam lobes, cam journals, rocker arms or build up of carbon on valves would ALL cause the gap to widen not shrink.(am I wrong in my reasoning here? or do the valves actually stretch over time?) I was just surprised that I had to adjust EVERY valve and not only that but that I had to double the current gap to get into the stock range. Just seemed very odd.

After doing all of that I was able to get the head cover back on, install the oil cooler, change out the filter, install the header(which is in terrible shape), and install the coils. I still need to get new plug caps...they look terrible, the boots on the plug end are all dry rotted and cracked. Once I do that and get the carbs installed I should be ready to fire this puppy up. Then it will be on to spraying a bit of black paint on all the raw steel exposed right now to hold me over until I blow this apart for clean up and paint, finish the wiring, and get the seat upholstery finished.

Should be ready to ride by summer
 
dilbone said:
No pics, but I've been plugging away at getting things nailed down so a first start will be sometime in the near future.

I checked valve clearances and all of them were .002" or less which makes no sense to me. Manual says .004-.005" on both intake and exhaust valves, so for all of them to be .002" or less would mean that someone would have had to have set them to that level. Any wear and tear of parts including cam lobes, cam journals, rocker arms or build up of carbon on valves would ALL cause the gap to widen not shrink.(am I wrong in my reasoning here? or do the valves actually stretch over time?) I was just surprised that I had to adjust EVERY valve and not only that but that I had to double the current gap to get into the stock range. Just seemed very odd.

After doing all of that I was able to get the head cover back on, install the oil cooler, change out the filter, install the header(which is in terrible shape), and install the coils. I still need to get new plug caps...they look terrible, the boots on the plug end are all dry rotted and cracked. Once I do that and get the carbs installed I should be ready to fire this puppy up. Then it will be on to spraying a bit of black paint on all the raw steel exposed right now to hold me over until I blow this apart for clean up and paint, finish the wiring, and get the seat upholstery finished.

Should be ready to ride by summer

It was my understanding that the valves constantly hammering on seats essentially 'wear' into the head, which would raise the end of the valve stem, reducing the clearance to the cam lobes.
 
Green199 said:
It was my understanding that the valves constantly hammering on seats essentially 'wear' into the head, which would raise the end of the valve stem, reducing the clearance to the cam lobes.

This is correct valves don't typically wear loose in a GS750 they wear tight. you need to read up on valve shim adjustment before attempting this service, you also will need to purchase shims and a good caliper and feeler gauge set.
 
Green199 said:
It was my understanding that the valves constantly hammering on seats essentially 'wear' into the head, which would raise the end of the valve stem, reducing the clearance to the cam lobes.

Makes sense, thanks


Tune-A-Fish said:
This is correct valves don't typically wear loose in a GS750 they wear tight. you need to read up on valve shim adjustment before attempting this service, you also will need to purchase shims and a good caliper and feeler gauge set.

This has adjuster screws, I don't know anything about shims. I didn't think the newer GS750's had the shims?
 
It's not that I've never adjusted valves before...I've never had a bike that didn't have adjuster screws. The xs650 was by far the easiest to adjust, then the cb550, then the gs750e, having to take the entire head cover off is a royal pain for this to be routine maintenance task. Luckily it was in pieces already so I didn't have to take apart half of the front of the bike to get it done haha

These are now all set to .004" so I'm good to go!
 
I decided to fill it with oil, get the carbs slid into the boots(which needed a hair dryer to soften them up they were so freakin hard), hook up the coils and grab the can of starting fluid.

I didn't even have any fuel line I could have hooked a funnel to and fill up the carb bowls, so this was just a "will it fire at all" test. Sure enough, it fired right up.

I'll have to get some fuel line and see if I can get it to run a bit, but it's looking good so far. Now to finish up the wiring. There is so much extra wire at the front of the harness that I'm gonna be doing some serious trimming and I still don't know how or where I'm going to hide it all.
 
I ended up picking up some fuel line from the hardware store and used a funnel and a mountain dew bottle to fill up the carb bowls. I don't have the throttle or choke cables installed yet, but I adjusted the idle screw to really high to get the fuel flowing along with some starting fluid. It runs ok, but I can't make out some of the racket it's making...
Seems like a knock...but it could be a timing issue or carb balance issue that is making it a bit rough. I definitely need to get the cables/controls installed so I can see what the deal is with this motor. I took a video of it running...crappy quality, but you get the idea.

https://youtu.be/C_SuJcS-fUg
 
Comp test plugs and adjust valves maybe get something on the carbs for filters most of the noise is sucking in air, but the top end is seemingly noisy too.
 
Yeah, I've still got some work to do for sure. I was able to get the choke and throttle cables on tonight. It definitely sounds like a low pitch knock but only when the rpm are really low, when I bump the idle up some it goes away...not sure what that is.

Otherwise, the throttle response seemed ok for no filters although the choke didn't help with sarting...I needed a little squirt of starter fluid in 2 carbs again to get it going. Hopefully this weekend I can get the chain, clutch cable, and some wiring done and maybe be able to go for a spin up and down the road.
 
dilbone said:
It definitely sounds like a low pitch knock but only when the rpm are really low, when I bump the idle up some it goes away...not sure what that is.


Cant see your video because I'm at work, but if the noise disappears when the idle is raised it could be a worn / rattly clutch basket. Happens a LOT on these GS motors....
 
Having the carbs balanced and the idle set a little high will help the clutch basket rattle, but they really need new cush springs installed.
 
Back
Top Bottom