We noticed you are blocking ads. DO THE TON only works with community supporters. Most are active members of the site with small businesses. Please consider disabling your ad blocking tool and checking out the businesses that help keep our site up and free.
You are using an out of date browser. It may not display this or other websites correctly.
You should upgrade or use an alternative browser.
You should upgrade or use an alternative browser.
'73 CB250 - Doing it right this time round.
- Thread starter Green199
- Start date
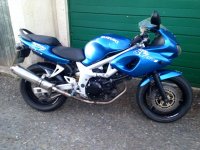
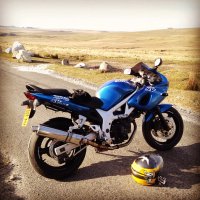
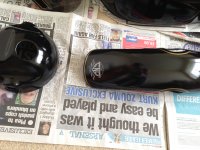
Finally got the SV done. Fixed the wiring issue and regained power. Plastic welded the fairings. Repainted with new decals. Fixed the seat mounts, and generally fixed a lot of the PO's mistakes. All in for less than £700 with £150 worth of parts to sell. Just need to replace the silencer (dented and got a small leak) with a new slip on and it will be good as new! ;D
Back to work on the CB now I suppose haha
Back to work on the CB now I suppose haha
Attachments
") gonna have a few quid back for ya efforts when / if ya sell gives ya a buzz to jump back on the CB project keep going mate summers on its way 8) ( like ive got room to talk haha ) :-[
gonna have a few quid back for ya efforts when / if ya sell gives ya a buzz to jump back on the CB project keep going mate summers on its way 8) ( like ive got room to talk haha ) :-[Whoa...been a while....far too distracted by my SV recently!
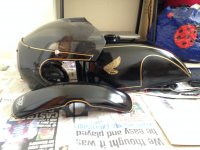
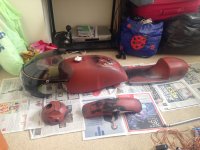
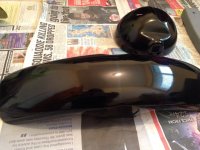
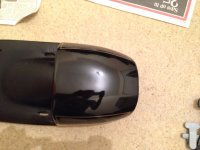
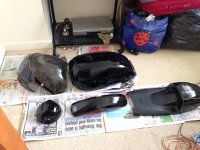
Anyway, I started cracking on with the body work and laid down a few coats of VW black paint on the headlight bucket and mudguard today. The headlight is totally obscured by the fairing so I haven't done any bodywork as such, but I've done a bit on the mudguard.
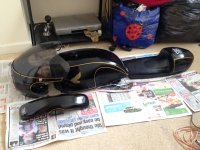
I should have used a filler primer really as there are a few small 'scratches' you can still see, but I will wet sand the ever loving shit out of the black and see if I can get them to go. Got quite a thick final coat on so should be ok for that.
The paint is quite a close match to the colour of the fairing, but I'm hoping once I lay some clear it will really bring out the depth of the black to help it match even closer.
Just got a few more bits to sort on the tank and tail and then I will start shooting them too.
EDIT - Just noticed the 'dent' on the right of the mudguard in the last pic. Don't know how the camera makes it look so bad but its not that deep or noticeable in real life. Its basically gonna be covered by the pinstripe anyway but I will see if I can level it out a bit by wetsanding.
Anyway, I started cracking on with the body work and laid down a few coats of VW black paint on the headlight bucket and mudguard today. The headlight is totally obscured by the fairing so I haven't done any bodywork as such, but I've done a bit on the mudguard.
I should have used a filler primer really as there are a few small 'scratches' you can still see, but I will wet sand the ever loving shit out of the black and see if I can get them to go. Got quite a thick final coat on so should be ok for that.
The paint is quite a close match to the colour of the fairing, but I'm hoping once I lay some clear it will really bring out the depth of the black to help it match even closer.
Just got a few more bits to sort on the tank and tail and then I will start shooting them too.
EDIT - Just noticed the 'dent' on the right of the mudguard in the last pic. Don't know how the camera makes it look so bad but its not that deep or noticeable in real life. Its basically gonna be covered by the pinstripe anyway but I will see if I can level it out a bit by wetsanding.
Attachments
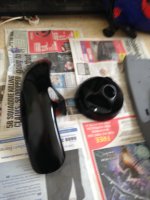
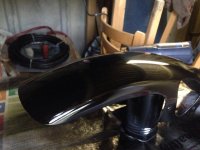
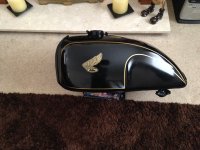
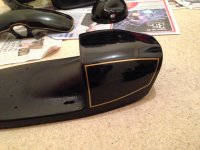
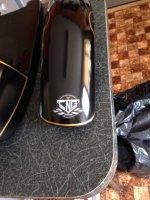
Added the pinstripe to the front mudguard and the seat. Just the tank left to spray. I missed out the high build primer on the seat which was a bit of a mistake as its left quite a few scratch marks in the paint on the top surface. Once I lay a few coats of clear I will be putting a decal over them anyway so they will be hidden but I should have corrected it earlier.
I also created a quick design for a decal in photoshop to replace the original Bike Shed decals I had on the seat and mudguard. Made one of my own design for my 'own' made up company. Tacky I know, but atleast it will be different haha.
I also created a quick design for a decal in photoshop to replace the original Bike Shed decals I had on the seat and mudguard. Made one of my own design for my 'own' made up company. Tacky I know, but atleast it will be different haha.
Attachments
Looks good. Is that pinstripe vinyl?
japstar said:Well for a made up company, it's a killer logo 8)
Cheers, I'm no graphic designer by any means though so its pretty rough around the edges!
adventurco said:Looks good. Is that pinstripe vinyl?
Yeah, its vinyl. Actually looks alright and went on nicely for being really cheap brand....just need a steady hand, which I don't really have as displayed by the photos! haha
Green199 said:Yeah, its vinyl. Actually looks alright and went on nicely for being really cheap brand....just need a steady hand, which I don't really have as displayed by the photos! haha
I thought it was paint at first glance so you coulda fooled me. I've got a vinyl cutter if you want your logo done up, send me a PM.
adventurco said:I thought it was paint at first glance so you coulda fooled me. I've got a vinyl cutter if you want your logo done up, send me a PM.
Thanks for the offer mate, I'm UK based though so I would imagine the cost would be a bit out of my price range at the minute!
i thought fag was what you guys called cigarettes, fizzy is one i never heardGreen199 said:Ahh love a good fizzy!
Can't beat a more classic paint scheme than Black and Gold!
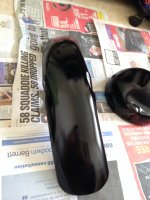
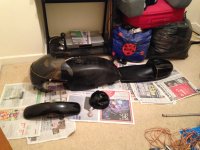
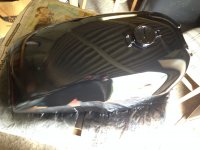
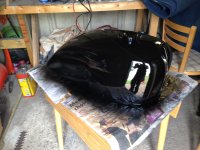
Tank has had its last coat of paint, pinstripe and decals on soon.
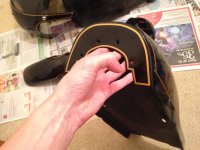
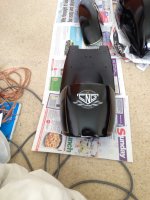
Also printed out the logo's on some waterslide decal paper, and applied them on the seat and mudguard. They don't look too bad, and the shoddy edges should be hidden a bit more when I clear over them.
Also printed out the logo's on some waterslide decal paper, and applied them on the seat and mudguard. They don't look too bad, and the shoddy edges should be hidden a bit more when I clear over them.
Attachments
Bootsey said:The new paint job is looking rad, that fairing is going to be sweet. What brand of vinyl stripes are you using?
Thanks mate. Umm they're called Styling stripes from Castle Promotions, cheap eBay jobby!
Just got lacquer to go!