Follow along with the video below to see how to install our site as a web app on your home screen.
Note: This feature currently requires accessing the site using the built-in Safari browser.
We noticed you are blocking ads. DO THE TON only works with community supporters. Most are active members of the site with small businesses. Please consider disabling your ad blocking tool and checking out the businesses that help keep our site up and free.
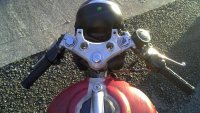
What size are those clip ons and do you have any idea where they originated? The reason I ask is that they look like early TZ250 34mm clipons. I don't know of any others with that overlap or the solid ends.
I'm not sure. They came with the bike when I bought it. That being said, there were a lot of yamaha parts on it like the headlight bucket and such and they are 34mm, so they could be....they definitely look exactly like them.
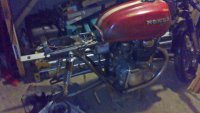
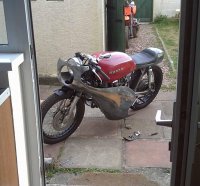
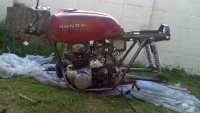
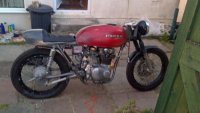
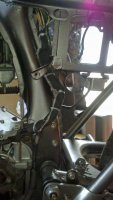
Well, after a pretty long struggle....the motor is back in.
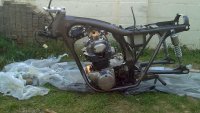
Took the front end off and the rear wheel to make it easier to place the frame over the motor. Was a little worried about cracking the clutch case when I laid the motor over but it all turned out OK in the end. Still have to torque everything down but we're getting there haha.
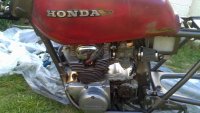
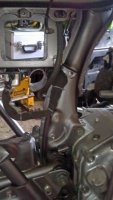
..and then whacked everything I removed to put the motor in back on. So this is how its sits at the moment.
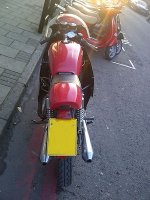
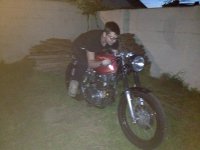
Ignore the flat rear tyre...need to get that sorted soon. Also, the rear brake shoes had a crack in so I've ordered a replacement pair and they should be here in the next few days.
The original loom still had a full protective/waterproof cover on it, but it looked a bit scruffy. I didn't want to replace the whole cover so I just cable tied bits of a pair of old jeans around it to tidy it up a bit. It also managed to hide the connectors so they didn't stand out.
Thanks man...although there's not much left to finish on 'phase one' of this bike.
Haven't spent a lot of time working on her recently. Been spending a few days fixing up an old pitbike while it was sunny!
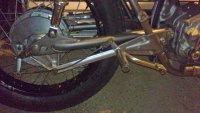
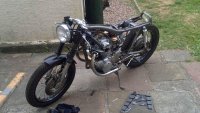
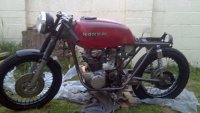
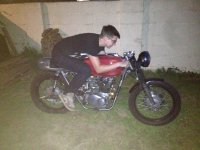
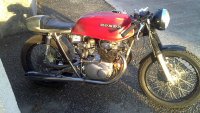
Right...onto the CB...Got all of the hand controls and the throttle cable installed. Also just loosely placed the mufflers back on until I can sort out the rear sets.
Only thing left for me to sort is the puncture, new rear brake shoes, front caliper, install the rear sets and then finish shaping and attach the rear mud guard....oh, and the speedo and side covers...
Once I sort the rear sets I can put them on properly with the brackets which support and angle the pipes better, was just hanging them on there to 'get them out of the way' hahaa
I have no spark now and after checking most things I can't seem to work out why! So gonna spend tomorrow trouble shooting and going through the wiring to try and sort it.
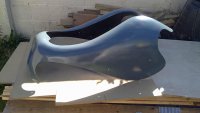
I didn't feel like doing that today but wanted to achieve something. Even though I'm not certain if it's going to permanently stay, I started playing around with idea's for the fairing. I need to add some fibreglass supports on for the 'bubble' screen, but I just gave it a few coats of the the same grey as I painted the seat. I'm planning on 'imitating' the fairing of the RC166, but instead the 'flash' being yellow, it's going to be the same gold as the started motor and carb tops. (As the Photo-shopped picture shows). Then age it up like the rest of the bodywork.
I also stripped and put a coat of primer on the mounts for the fairing. I'm going to spray them the same colour as the frame.
F$%£ sake....torn a ligament in my 'already bad' shoulder whilst out on my motocross bike, so I couldn't even bring myself to look at a bike for a few days let alone work on one.
With the help of a beer or two, that feeling soon surpassed ;D
Still couldn't figure out why I have no spark...beginning to monumentally piss me off to be honest. I did however finally manage to pick up an innertube for the rear wheel, so I whacked that off the bike. Whilst it was off I put in new brake shoes too.
Began working on reinstalling the rear brake. The brake arm is pretty bent at the moment and doesn't look the best or in fact safest option. I'm sure it would be ok, but I'm going to try and straigten it out a bit tomorrow.
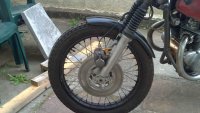
Finished spraying and then remounting the caliper.
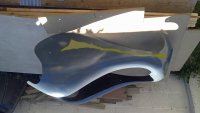
Ignore how the fairing looks like it was painted by a partially sighted toddler!
I also, in about 5 minutes so extremely quickly, sprayed a design and slightly aged the fairing just because I couldn't picture it. If I like it I'll re do it all ....well, I was going to say neater but I'm trying to age it...so lets say 'better'.
I loosely mounted it just to picture it which is why it isn't sat right and to be honest, I'm not really feeling it. I go back to Uni in 2 days time so I have 2 days to 'finish' phase one of the bike, which with a dodgy shoulder, isn't really going to go much further than this.
I definitely need to redo the 'fairing flash' because it looks horse bollocks at the moment. hahah
Something doesn't look right there. For some reason in that picture the fairing is way too low and the front and it also looks too wide around the engine.
Pull the front up so that the headlamp and hole are together again and see what's pushing the sides out so far. I invariably end up with a pipe or engine case sticking out of the side in order to get a fairing to fit where it needs to go. Sometimes that cut out has to be covered and other times I leave the cover or pipe sticking out in the breeze.
Yeah I just put it on really loosely to try and picture what it would look like.
The hole for the headlight is meant to be level with the current headlight, but 5-6 inches further forward with the headlight mounted to the fairing itself.
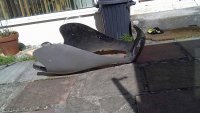
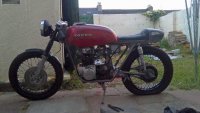
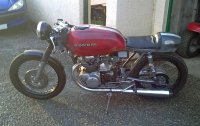
In regards to the width of the fairing, it always stuck out quite a bit, which is part of the reason I wasn't reluctant to remove it. Its the width of the actual brackets which will need shortening so that it sits much closer to the bike. The picture below shows what it was like width wise when I got it.
I'll try and mount the fairing properly today and get a few pictures...aswell as getting rid of the awful paintjob on it! ahaha
ok, given up on the fairing for today seeing as I have 2 days to get it sorted.
I recharged the battery for a while and then re connected it to see if any of the electronics/lights etc were working to try and diagnose the lack of spark. Nope...nilch...nada...nothing.
I've checked multiple times and the loom is installed exactly as it came out and as per the wiring diagram. Thought it could be a dodgy earth wiping out the entire system, cleaned up the earthing points, and still nothing.
So until I can get a multimeter possibly later tonight or tomorrow, this is how she sits....incomplete...in pain...so close.
Well, I go back to university tomorrow so will be away from the bike until Christmas. So as much as it pains me to say, even though there is a wiring issue stopping it run, i'm calling phase one done for now.
I will be taking a spare motor back to Uni with me, and rebuilding it, hopefully with oversize pistons and other engine work. I will also be making a new loom for it using my friends CB as a template so when I come back I can quickly swap it out, cut to length, and connect.
I will be making a thread for the engine on here for advice from all you amazing people out there, but for now, this one is done.
This site uses cookies to help personalise content, tailor your experience and to keep you logged in if you register.
By continuing to use this site, you are consenting to our use of cookies.


")