74 CB750 USD and Mono build

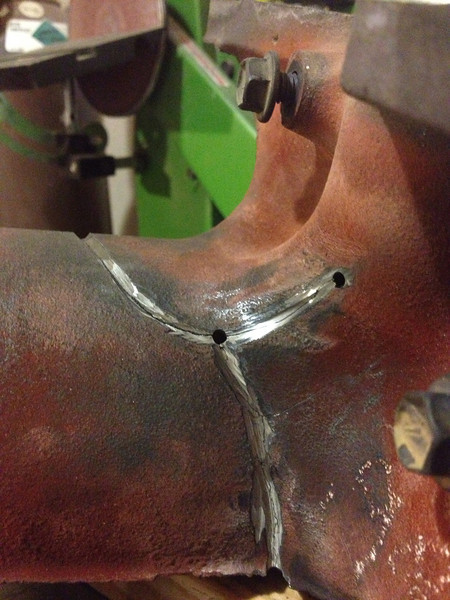
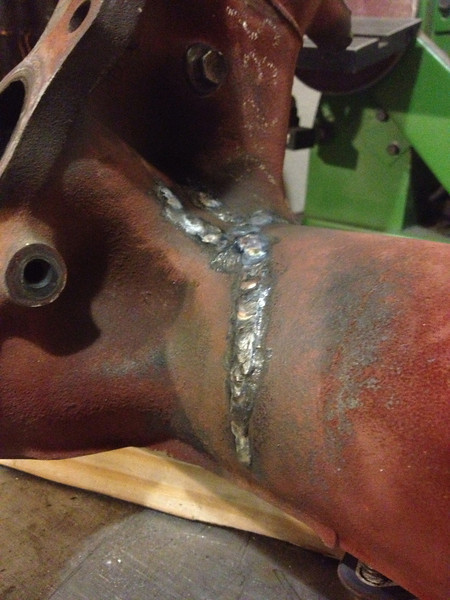
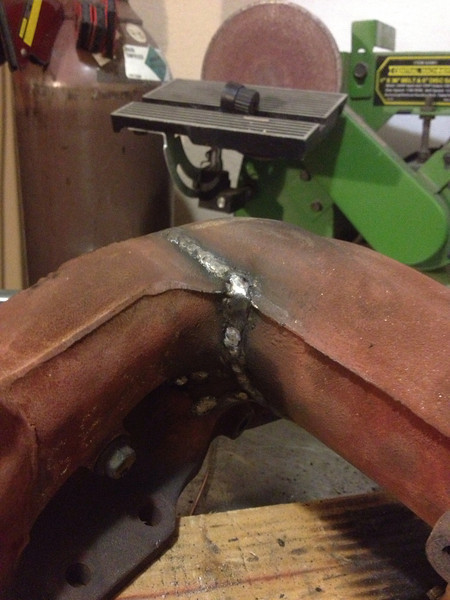
Do you have the "Pulse" feature? I do not, mine is older, I bought it new and it's in perfect condition. It is amazing the low draw on the inverter rigs. I fear having to buy a new one, prices have gone way up like everything else. I did a couple of cast iron jobs today, cast iron can be tricky.
Cheers, 50gary
 
Yes the 221 has a pulse feature. But l've never used it just kinda got use to using my foot to pulse.

On a non-750 topic:

Speaking of cast, I just did my first cast recently. My cousin brought over his manifold with a crack that ran almost all the way around. He needed it to pass smog and would be swapping back his headers after the test. Man cast is a pain, I looked up a few YouTube videos and got welding. It was weld 1/4inch beat the crap out of it with a hammer, cool off completely and repeat... Not that easy at all.


Anywho here are a few pictures.

Drilled out all the crack holes
image-L.jpg


Welded and peened:
image-L.jpg

image-L.jpg
 
Another way of "ending a crack" is to find the ends of the crack and run a bead perpendicular to the crack direction on all ends. Then start welding in the center of the crack and run to the end, go back to the middle and run to the other end.
I use Crown 11-10 for TIG or Crown 295 for stick. Looks Good.
Cheers, 50gary
 
50gary said:
Another way of "ending a crack" is to find the ends of the crack and run a bead perpendicular to the crack direction on all ends. The start welding in the center of the crack and run to the end, go back to the middle and run to the other end.
I use Crown 11-10 for TIG or Crown 295 for stick. Looks Good.
Cheers, 50gary

Thanks dude, I will give that a try with the next cast project I get (which I hope is never.. stuff takes a long time and isn't all that fun.. good to learn though!)

Quick update:

Been a bit busy to post up updates but here is a small one. Worked on the upper suspension arm for the mono shock

Needed mounts so cut the old ones off the original shocks:
photo%20%286%29-L.jpg

photo-L.jpg

image-L.jpg


Machined a nut round to fit into the tube for the arm
image%20%282%29-L.jpg


Took some time to turn the bracket on the left to the 2 brackets on the right.
photo%20%285%29-L.jpg


Without a pipe bender this took a while to get this DOM in the right shape:
image%20%281%29-L.jpg

photo%20%284%29-L.jpg


So much for now.. Merry Christmas all
 
what kind of baffle is in the oil tank? or is the hot oil return just right next to the fresh oil intake? also... how is the overflow bung set up? Looks like it's just welded to the side?
 
Roc City Cafe said:
what kind of baffle is in the oil tank? or is the hot oil return just right next to the fresh oil intake? also... how is the overflow bung set up? Looks like it's just welded to the side?

Here's how the internals look.. (note the overflow and the cool oil return tube) btw your tanks look fantastic, do you anneal before you shape?
IMG_3281-L.jpg
 
good, all I saw was the bungs, thought it might be trouble. I'd rubber isolate the hell out of the tank too, those long unsupported tubes are going to pick up vibration like antennae and will fatigue crack at the base, rubber isolation should keep that from happening for a long time
 
Roc City Cafe said:
good, all I saw was the bungs, thought it might be trouble. I'd rubber isolate the hell out of the tank too, those long unsupported tubes are going to pick up vibration like antennae and will fatigue crack at the base, rubber isolation should keep that from happening for a long time

will do, adding a few rubber grommets, going to try and make a few house line mounts to keep things tidy and prevent rattling.

few progress pics. I tacked on the parts for the mock up. Will replace the threaded piece with a solid one once all the lengths are correct
image-L.jpg


dat ass
image-L.jpg


Starting to look like a bike
image-L.jpg
 
yea, you do you need it? its got a little dent in it though.

Iwas thinking of making some knee cut outs on it and slapping it on, but if you need it let me know.. I like how its shorter than the benji tank.
 
That's not what I imagined for your mono-shock? Question, why are all the linked connections adjustable?
Cheers, 50gary
 
50gary said:
That's not what I imagined for your mono-shock? Question, why are all the linked connections adjustable?
Cheers, 50gary

Because I don't have the final rise rate as XB has stated below. I'm close but I'll have to put the mockup strut back on to finalize it. Once its set it won't be adjustable unless the arm support is removed and replaced with a different support... Should I ever decide to slam the bike, run a different shock or anything like that.

Currently I get 2" of travel with this setup.
 
Okay, so you get two inches of travel at the axle for one inch of travel at the shock? I have a low mount linked mono that is 2.5" axle to 1" of shock just mentioning for the info/comparison.
Cheers, 50gary
 
Back
Top Bottom