
jchek779
Leave the gun. Take the cannoli.
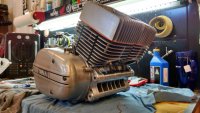
Re: 74 RD250...is now a 350 - Anything more than 2 strokes is a waste
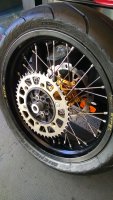
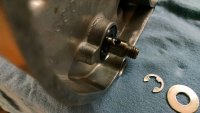
In order to get my drive sprockets to line up with the supermoto rear wheel, some modification were in order. My initial measurements called for 15mm of offset to be corrected through an offset front sprocket and modifications to the sprocket carrier ring of the Excel hubs. I was able to knock out 9.5ish millimeters with a 3/8" offset sprocket from PBI. It's a 530 width that will be cut down to 520.
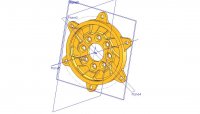
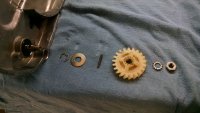
For the rear carrier ring modifications, I drew the stock geometry into Solidworks to have a model to work with. From there, I devised that I could buzz about 4mm from the width of the sprocket mounting flanges and 1mm from the back mating face. I did some crude FEA work to make sure things were still in the realm of safe.
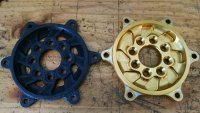
I had a coworker print the modified carrier ring for me. There was a bit of warp in the printed part, but fortunately the business side of things was still usable. I got that mounted onto the wheel and did a final measurement with the straight edge to make sure I didn't miss with my measurements. Once the front sprocket is turned down the 1/8" (from the back face) things should be in alignment. I'm comfortable turning things over to a machinist for modification.
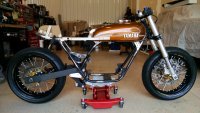
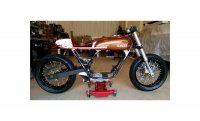
In order to get my drive sprockets to line up with the supermoto rear wheel, some modification were in order. My initial measurements called for 15mm of offset to be corrected through an offset front sprocket and modifications to the sprocket carrier ring of the Excel hubs. I was able to knock out 9.5ish millimeters with a 3/8" offset sprocket from PBI. It's a 530 width that will be cut down to 520.
For the rear carrier ring modifications, I drew the stock geometry into Solidworks to have a model to work with. From there, I devised that I could buzz about 4mm from the width of the sprocket mounting flanges and 1mm from the back mating face. I did some crude FEA work to make sure things were still in the realm of safe.
I had a coworker print the modified carrier ring for me. There was a bit of warp in the printed part, but fortunately the business side of things was still usable. I got that mounted onto the wheel and did a final measurement with the straight edge to make sure I didn't miss with my measurements. Once the front sprocket is turned down the 1/8" (from the back face) things should be in alignment. I'm comfortable turning things over to a machinist for modification.
![IMG_20150114_183842518[1].jpg](/data/attachments/56/56809-b20abb11b167c34947e0541bbd67522b.jpg)
![IMG_20150114_202426274[1].jpg](/data/attachments/56/56810-27c1569eb73e5ca862e1ab8f5bcb71c7.jpg)
![PhotoGrid_1422233460804[1].jpg](/data/attachments/57/57309-bcb9d7f508a06a98959a46b3f3bfb870.jpg)


