'81 Suzuki GS 450 - Cafe/ Custom

Minicafe said:
Looks good. It's a lot of work huh. I can see your fingers in the chrome cover. Dirty work too. I wish mine looked that good. Mine were painted by the previous owner. I like the polished look.
was seriously going to paint them, took a month to make up my mind, I have a theory that if I think of something to do to the bike and a month later my plan deviated then wait another month with the new plan. Don't want to do something I will have a hard time reversing. It's how I have approached all my tattoos


Sent from my iPhone using Tapatalk
 
Minicafe said:
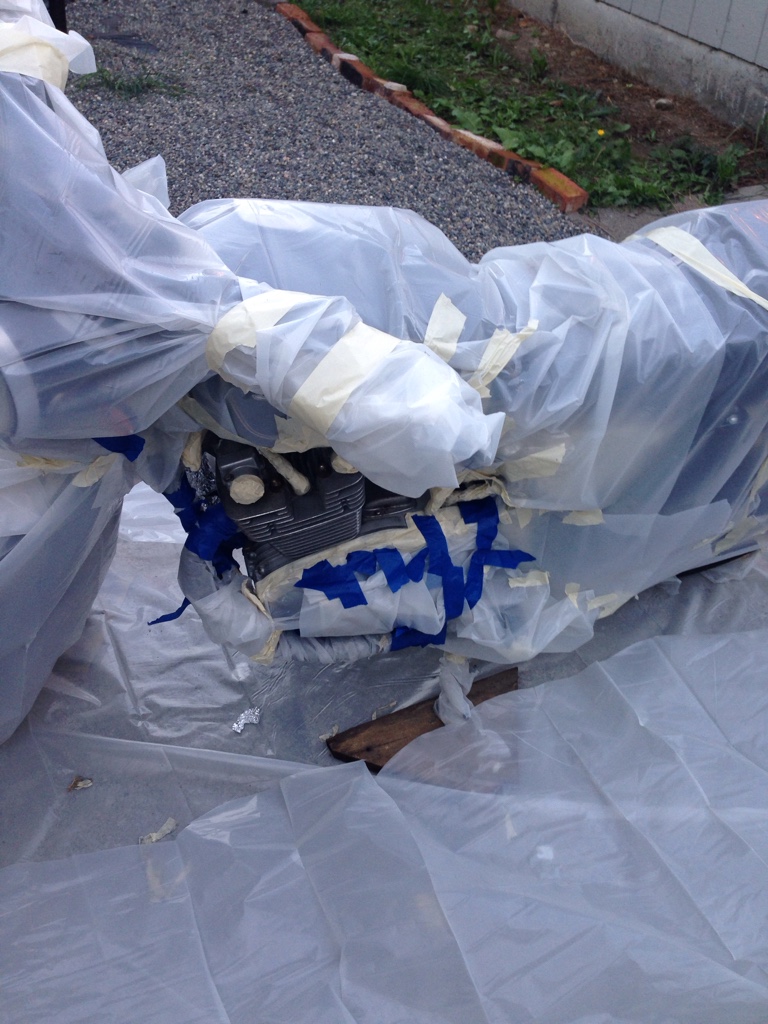
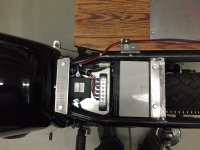
Sorry Biellabound that Dohcbike ranted on your thread about me. We have history. Like an ole married couple. Let me say one last thing about Dohc so he will calm down, he is right about 98% of what he says he just doesnt have any manners. Other post on here that have been removed have been removed by me because i dont think people want to start reading a post to learn something only to read two ole ladies bickering. And he will like me saying this.... He is right, my rear tire does rub if i have the springs on soft setting but hasnt ribbed since i tightened it up. The good news is I own a welder and can change anything. And as far as the "pantry door" seat. Ha. Good one. I like it over most seat designs ive seen. Easy access to the electrical and once covered it wount look ant different than 95% of the other Brat seats. But most importantly I Like It. Dohc never understands what that means.

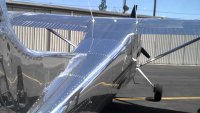
Back to your build, Nice work on the polishing! I understand your issue with getting it done while your familys away. Those are some good times in the garage for me as well. If you PM me sometime id be glad to get you more detailed pics of my bike. I shouldnt post to many of my bike on your thread, people will want to see your bike not mine. Have fun.

Love ya Dohc....
no worrie bro, for sure I will PM you sometime, super interested in your electric set up.

For your rear tire/ seat issue, what if you used 14" rear shocks over the stock, I think it's 12". I live in a congested city with a ton of steep hills, wouldn't want to run the tire going up one, couldn't imagine what would happen to me and the bike.

Thanks for any advice and comments, much appreciated.


Sent from my iPhone using Tapatalk
 
Minicafe said:
The shock idea is a good one. What r u using for polish compound?
bro I am literally hand sanding with 320 grit then after the coat of what ever was there before, I got a 3 coarse steel wool variety pack. I used the coarse with some windex to somewhat wet sand and I used a circular motion, then the medium with medium pressure to pulling back to light pressure, also using windex and wiping every min or so with a terry and windex then to the lightest grade and be just steady pressured slowly until it started smoothing out enough for this amateur to be happy and used a terry and mothers polishing cream


Sent from my iPhone using Tapatalk
 
We use Flitz in avaition. It works great on aluminum to ploish it to a mirror like finish. Tip- use flour as in baking flour on a dry paper towel to wipe off the flitz after polishing. That really takes away the swirl.
 

Attachments

  • image.jpg
    image.jpg
    36.2 KB · Views: 313
  • image.jpg
    image.jpg
    146.6 KB · Views: 421
Original wire diagram for the 1981 GS450 vs. a simple diagram i used a basic guide.
 

Attachments

  • image.jpg
    image.jpg
    1.8 MB · Views: 548
  • image.jpg
    image.jpg
    87.3 KB · Views: 591
Masked
9bd93900b5d6d004163f2f6b4abe9464.jpg
b91824feeab5748ebe189e247ea7465f.jpg
d44f3e6897422d8547b554219205ebda.jpg
and primed
c8ff96c847173c9b5307ce7b399593ed.jpg
d20efe1167747f700c5c1d65bce0fe2c.jpg

Basically I am going against every purist ideal, no spray booth, engine on bike, didn't sandblast the engine first (just a 3 hour cleaning), but without any of the tools necessary pull the engine and find a place to make a spray booth....


Sent from my iPhone using Tapatalk
 
Minicafe said:
We use Flitz in avaition. It works great on aluminum to ploish it to a mirror like finish. Tip- use flour as in baking flour on a dry paper towel to wipe off the flitz after polishing. That really takes away the swirl.
thanks for the tip the flour sounds exactly like what I need when I take all the masking off and cure the paint


Sent from my iPhone using Tapatalk
 
Ok it's painted, the brake pedal is cured
df167e052b49d89e047371e161f6ad52.jpg
looks pretty good, it's night but I had a bright lamp and there is one place I taped off with a little smudge
34697ee83f8a228ef3328db68b5c7448.jpg
94d4482d762e4246459c1cf77a93bb84.jpg
taking "yet to be named" out for a ride to cure the engine and have a little fun m


Sent from my iPhone using Tapatalk
 
Minicafe said:
Original wire diagram for the 1981 GS450 vs. a simple diagram i used a basic guide.
thanks bro, I am going to need to run more wires since I want turn signals and indicators. That's a project to tackle in the winter. Electric is not my strong point.

I can't tell but did you relocate your if ignition? I want to but the wires seem to short to put them in the front right under the gas tank


Sent from my iPhone using Tapatalk
 
I used the original switch. But replaced 98% of the wiring. The switch powers up the bus bar under the seat. Everything gets power from the bus bar, lights, ignition, blinkers, starter relay, ect. The one thing to remember is the regulator has to be tied into the positve wire between the battery and the switch and after the fuse. If you put it to the bus you wont be able to stop the engine once its running. Its a magneto. I found my bus bar and wiring on amazon. Like Dohc said any indicator lights like nuetral, oil press warning, ect are grounding switches. Light gets the power and the sending unit is the path to ground. You can tie all your backlight for the gauges and the indicators to the same power wire if you want. What i did was pulled the whole harness off the bike and laid it on a table, took the wire diagram and studied it. Its actually kind of fun but than sad to see how goofy Suzuki made the wiring. It is so easy to simplify this bikes wiring. If a guy wanted to take a little extra time you could give each system its own fuse, like a car, so incase something did short out it wouldnt blow the fuse for the whole bike. I plan on carrying a screw driver and extra fuses. Worst case i disconnect each wire from the bus bar, put in new fuse and reconnect one wire at a time to see which system is shorted. You couldnt do that with the factory harness. Wiring this bike took one day. Its easy.
 
The reason i used "White" tywraps is because they are free for one and the kind with metal tabs, but mostly because its temporary. I plan on taking the whole bike apart son to get the frame re powdercoated and detail the engine and stuff. Im still tweaking a few things here and there now. When im done i want the bike to be as functional as my Hondas Shadow which means i can feel like i could jump on and ride anywhere without worries and i want it to look nice. I would like to get new handle bar switches and gips so i take away the 30 yr old bike look. I plan on finishing this bike. For a while i wasnt sure with the engine issues i had but now that is cured. It should be a nice bike. Well at least to me. Maybe not everyone.
 

Attachments

  • image.jpg
    image.jpg
    1.5 MB · Views: 397
  • image.jpg
    image.jpg
    1.1 MB · Views: 366
  • image.jpg
    image.jpg
    1.8 MB · Views: 348
  • image.jpg
    image.jpg
    1.1 MB · Views: 359
  • image.jpg
    image.jpg
    1.6 MB · Views: 361
Meier up to this and a misty day....hopefully clears up so I can do the warning lights

afa35356be887d9901e197b366ff3681.jpg


6d7f1a951c1ce521f28b7c94bd3dee15.jpg


Overall it's not bad, I can definitely see areas where I missed paint around the right Spark plug, (I will touch these spots up in a week or so and change my plugs)

I am a little disappointed but also feel good about the project and it's an easy touch up, looks worse in the picture
f2eea67e82e744c329514937b9c3a0de.jpg


Sent from my iPhone using Tapatalk
 
I have a disc brake rear wheel with the entire brake setup here that would be a very nice upgrade for someone with a drum rear GS. The rear master and caliper are available. There are minor grooves in the existing rear rotor. It has been drilled to match the pattern of a semi-floating EBC front rotor. The brand new never used front rotor and 19" wheel are also for sale. Also pictured for sale are a pair of small diameter slotted gs front rotors. Just thought i would throw that out there for you and any other GS guys watching this thread. I am willing to sell all or any individual part of the set.

The wheel is 18" and has some dings from tire removal but is overall in great shape. Bike had 25k miles.

The bike looks really good. PM me for a sketchy solution to the dent in that tank. Those pipes are killing me.
 

Attachments

  • extra 128.jpg
    extra 128.jpg
    841.2 KB · Views: 368
Idiot lights replaced with small .3" Diameter from Drag Specialties
Didn't know there was that Center mounting bracket piece from the old idiot cluster was a perfect place to mount the lights until I have a custom bracket fabricated, it's hard for me with the electric I don't have any of the proper tools other than a wire cutter and electrical tape.
I think it came out pretty decent just got back from a ride they work perfect. And the bike looks pretty good also haven't filed down the fins and I need to re-polish the side covers to a mirror finish but overall I'm very very satisfied my weekend
215ece16f6b260ca5561dd4f0031a27d.jpg
43af7199e691064a03b041b596d1e930.jpg
049666455fa9a555194197d9798535ba.jpg
2ecbf106a192f525041f3fa407c58b07.jpg
94b23b2a8135ed2e01d89d8488dcd029.jpg
e191138def6e55990af2c985ad83e6c2.jpg
fb9c23bdc1efcaea07bcaae2b933b721.jpg


Sent from my iPhone using Tapatalk
 
DohcBikes said:
I have a disc brake rear wheel with the entire brake setup here that would be a very nice upgrade for someone with a drum rear GS. The rear master and caliper are available. There are minor grooves in the existing rear rotor. It has been drilled to match the pattern of a semi-floating EBC front rotor. The brand new never used front rotor and 19" wheel are also for sale. Also pictured for sale are a pair of small diameter slotted gs front rotors. Just thought i would throw that out there for you and any other GS guys watching this thread. I am willing to sell all or any individual part of the set.

The wheel is 18" and has some dings from tire removal but is overall in great shape. Bike had 25k miles.

The bike looks really good. PM me for a sketchy solution to the dent in that tank. Those pipes are killing me.
will do, yeah the wrap and turn outs drive me nuts, but I think I am going to hold off until I can spring for the 2-1


Sent from my iPhone using Tapatalk
 
Back
Top Bottom