'87 Honda NSR250 'ELF Special'

Re: NSR250 revival

The two pics are different angles, so not accurate at all, but I think it's safe to say the angles are different on a 16 and a 21...

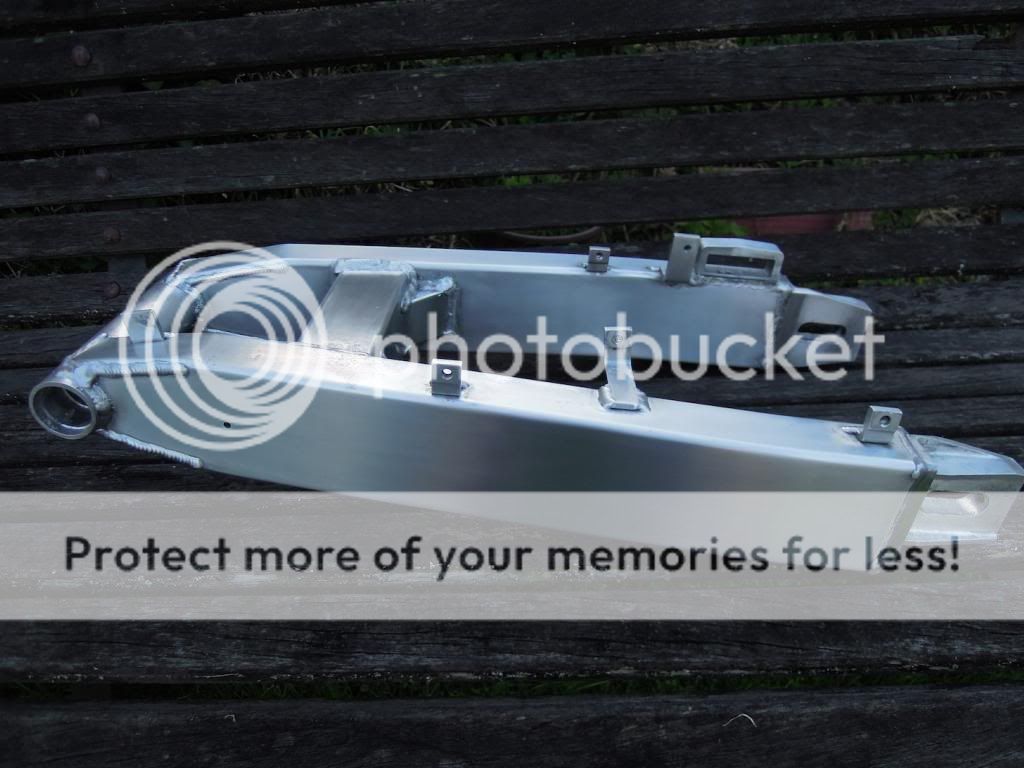
As Teaser says, if you're handy with a welder, making up a new sub frame, or modifying the existing one is a fairly straight forward possibility. Personally, if I were to go to that length, I would go with your design, and make it truly unique.
And if not, maybe a Tyga set works out cheap enough as a one-stop solution anyway?

Teaser that Yamaha in general is a good looker for sure!
Cool discussion guys! :-D
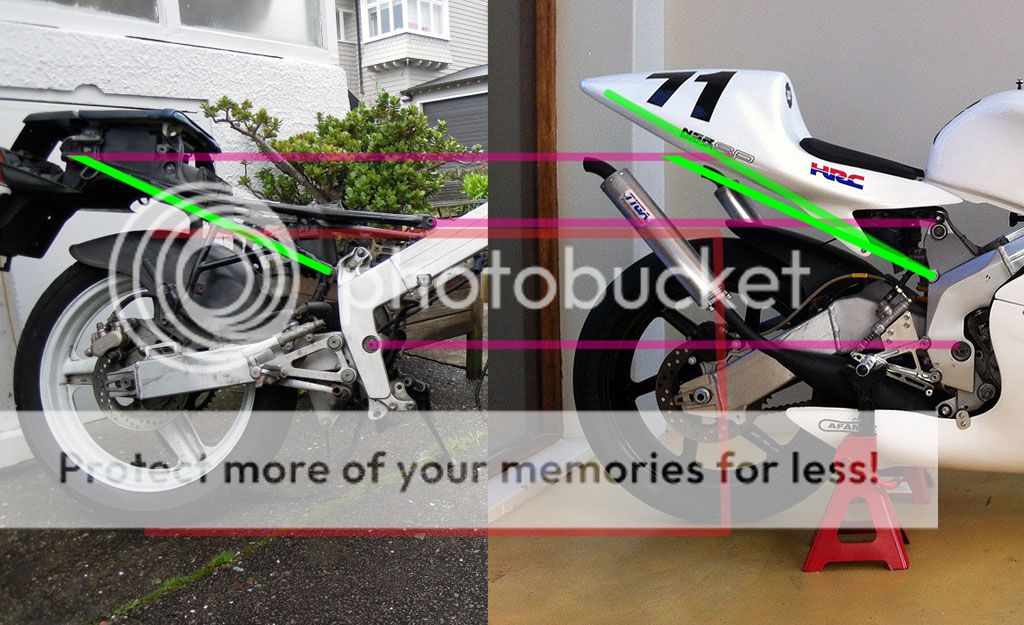
DSCN1123-1_angle_zpsa63c72ba.jpg
 
Re: NSR250 revival

I think the Tyga kit is out of the question now, purely because of the high cost. I'm not handy with a welder, but know someone who is. I'll probably just modify the existing frame (for now), as it has the old VIN plate on it needed for re-registration. A fully custom alloy one is a nice thought though.

What about a Honda RS125 tail, there are some nice looking ones. Do you know anything about these? I hear they're really small bikes, I'm wondering if it could work?

BTW: This thread is being moved to 'Specials', since it's now moving away from just a simple rebuild.
 
Any 96 on Honda RS125 seat would probably work. They are tiny bikes for sure. I'm glad we sold our because there's no way I can tie myself into a tiny bundle to fit the thing any more. Amazing performance and handling though. Try a late model (2000) RS125R seat if you can borrow one. If not, wait for the next race meeting near you and take a tape measure and lots of photographs.

Actually an Aprilia RS125R seat might also work.
 
Well there's plenty of time to think about seat options. In the mean time I've got parts coming from all over the place. Here's the first big haul, always a good feeling seeing that package on your doorstep!

DSCN1355_zps73d00f85.jpg
 
Caliper rebuild complete.

Here's a reminder of what they looked like when they came off the bike. Seized, worn pads, and covered in 25 years of brake dust.
DSCN1133.jpg


Calipers were stripped, cleaned, and painted. Ready to be reassembled with new parts.
DSCN1364.jpg


Done!
DSCN1367.jpg

DSCN1373.jpg
 
Nice! Great feeling making something that was totally busted and worthless into a functional part!
 
Yep, it does feel good getting the first part of the re-build done.

An update on my crank: I was just ready to place my order for the re-built crank with Mario, as he has all the parts in. Unfortunately, he just informed me that after pulling apart his spare MC18 cranks, he couldn't find enough usable rods and pins to complete a re-build. At the moment he is working on a prototype modified crank, with larger pins and big end bearings, which should make finding replacement parts easier. This should be in one of his bikes soon for testing, but it could be awhile before he feels it's up to scratch as a replacement for the OEM parts. In the mean time, I'll have to put the engine rebuild on hold.
 
Right, so now that the engine rebuild is on hold, I'm now going to start by getting the bike up to a rolling frame.

Sprocket carrier cleaned, and I painted the outside facing area with the spare caliper paint. New sprocket, bearings, and seals are on order.
DSCN1397.jpg


Front axle components cleaned up. New bearings and seals on order.
DSCN1400.jpg


Front brake components stripped and cleaned up. New reservoir came in earlier parts haul, I have braided lines, and master cylinder rebuild kit on order.
DSCN1401.jpg


Rear brake components also stripped and cleaned. Master cylinder piston is good on this one, so just some braided lines on order.
DSCN1402.jpg


Swingarm bearings and some misc parts also on order.
 
Was going to restore my old rearsets, but they're in pretty rough shape. I discovered they had been repaired also. So I'm thinking a better option would be a set of CNC machined TYGA rearsets made for the MC18, which have the same mounting dimensions as the MC16 so should be a straight bolt on.

DSCN1406.jpg

DSCN1405.jpg
 
Parts parts parts!

New sprocket:
DSCN1419.jpg


Braided lines:
DSCN1427.jpg


Master cylinder rebuild kit:
DSCN1424.jpg


and various seals and bearings...

Wheels:
DSCN1421.jpg

Steering stem:
DSCN1423.jpg

Forks:
DSCN1425.jpg

Swingarm:
DSCN1426.jpg


Just about everything needed for a rolling frame/brake rebuild. All that's needed is a swingarm needle roller bearing (in the post), and some front brake disks.
 
Forks painted!

Primed:
DSCN1430_zps3acd933d.jpg


Painted: very happy how these turned out, just the satin aluminium look I was after.
DSCN1431_zps8b3a7ee9.jpg
 
Swingarm polishing done. I went the satin route in the end, progressively sanding down to 2000 grit. Very happy with the finish, it has a nice effect where it looks flat when looking straight on and reflective when viewing from an angle.

DSCN1438_zpsbe710518.jpg

DSCN1437_zpsf7ff24d4.jpg

DSCN1436_zps80c8b168.jpg
 
You've been busy! Looking very nice Moa. Looks like you're going to have nice roller soon!

My only crit, (and its because everything else is looking to a very high standard) is your finishing on the calipers. Not sure of its just the photos, but perhaps they could do with another once over wrt paint. They're already assembled, so stuffing roller wipe paper into the insides so that its all 'masked" and giving it a light spray will give it a more uniform color.

Then I wouldn't be afraid to file the NISSIN logos down a touch more, just so that the full lettering has all the paint removed. Its a delicate job I know, but with a little care and patience, it works. You've demonstrated this throughout this build anyway.

Finish off with a light clear coat, just to protect the bare aluminum.

If tools (spray gun, compressor etc) are an issue wrt to paint, I've found some "hi heat enamel" rattle can brands that really hold up in scenarios like this. I did a set of calipers a good couple of years ago using the stuff and they still look good, after road use.

Great build so far, and this one is going to be a beauty for sure.
 
Hi Dale, yeah I've been busy, but mostly with other commitments, I've just done a few things here and there when I found some time. Just wait for another month when I have some real free time, and this build will really take off.

Those calipers do look better in real life, but they're far from perfect. The front calipers were a bit scratched and dinged up, and this shows up through the paint. The paint does have a good even coverage, but under the light the imperfections underneath really show up (I also made a few scuffs when sanding the logos). I've also scratched away some of the excess paint on the logos. I actually rushed the paint job on these, and it shows, I should have filled the dings and scratches first. I'll leave them as is for now though.

What sort of coating would you recommend for the aluminium? i.e what is going to stick to the bare metal and able to be buffed to a high gloss.
 
Forks rebuilt. Bit of pitting on the upper tubes, but not much I can do about that. FYI Dale, the MC16 actually has 39mm forks and air assisted damping, so they're quite different to other NSR's.

DSCN1439_zpsab2655c7.jpg
 
Glad you like it. I've grown very fond of the NSR since buying this one, fantastic little bikes. It's a shame we'll probably never see something like it again.
 
A lick of paint for the steering stem:
DSCN1440_zpsb4a5305b.jpg


On another note, I managed to get the right side crank bearing free with a bit of brute force and WD-40. Although the crank is stuffed, and not suitable for rebuiding. I just cleaned it up, and I may try turn it into some sort of functional art piece.
DSCN1443_zps079da9d2.jpg

DSCN1442_zpsb6803bce.jpg
 
Finished the triple clamp. Stripped the old paint off, sanded down the sand casting marks, then finished with tedious hand polishing up to 2000 grit. It will later be clearcoated along with the frame and swingarm.

DSCN1444_zpsdbe06e8d.jpg

DSCN1448_zps7d183345.jpg
 
Back
Top Bottom