Follow along with the video below to see how to install our site as a web app on your home screen.
Note: This feature currently requires accessing the site using the built-in Safari browser.
We noticed you are blocking ads. DO THE TON only works with community supporters. Most are active members of the site with small businesses. Please consider disabling your ad blocking tool and checking out the businesses that help keep our site up and free.
yeah i been slacking on the updates
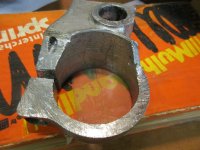
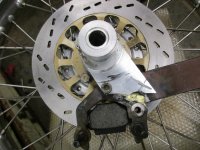
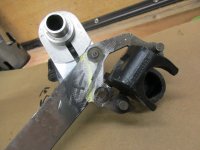
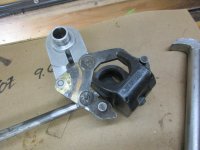
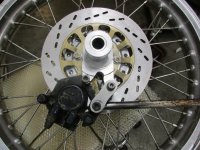
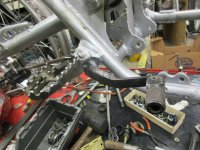
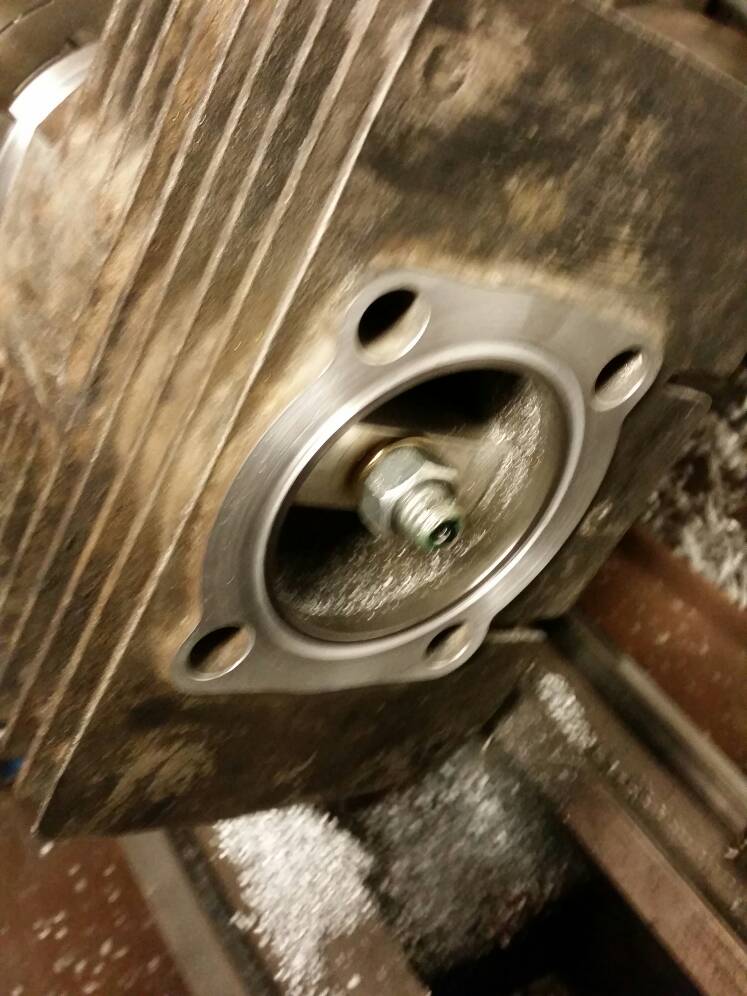
just now finalized the rear caliper hanger and rotor
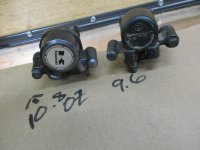
i chose this brembo caliper because it uses kawasaki caiipler pads and seals which i have plenty of and it is 1 oz lighter than the kaw and it says brembo on it like the front
and it is as good as you can get for a floating single piston clapiter in my opinion(the kawasakli design)
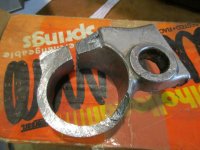
using parts that were already made the basis for the hangar is a part that i have multiples of off a chopper fork that was so bad a design i could not even bare to sell it,i didnt want murder on my record
what i ended up with is a very busy looking hangar lash 8) busy just like the front as i felt it necesary to add one final bracklet to the front bracketry to pretty much eliminate flex
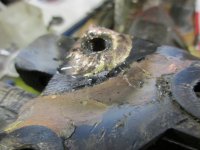
the stay rod is swedish chromoly off a 1977 360 auto i wil cut the other ernd to length
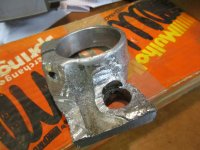
i had to add metal to the steel part of the klapiterd brackety because i just could not bolt it on the the other part nothing lined up
i used brazing not welding and also brazed in a nut fro treads
the brazing is booku strong because of the long purchase it has at the joint and it did not distort
the piston holding part of the caliper slides right on the slider pins after the braze work no distort
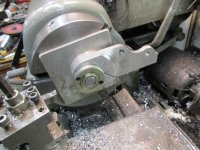
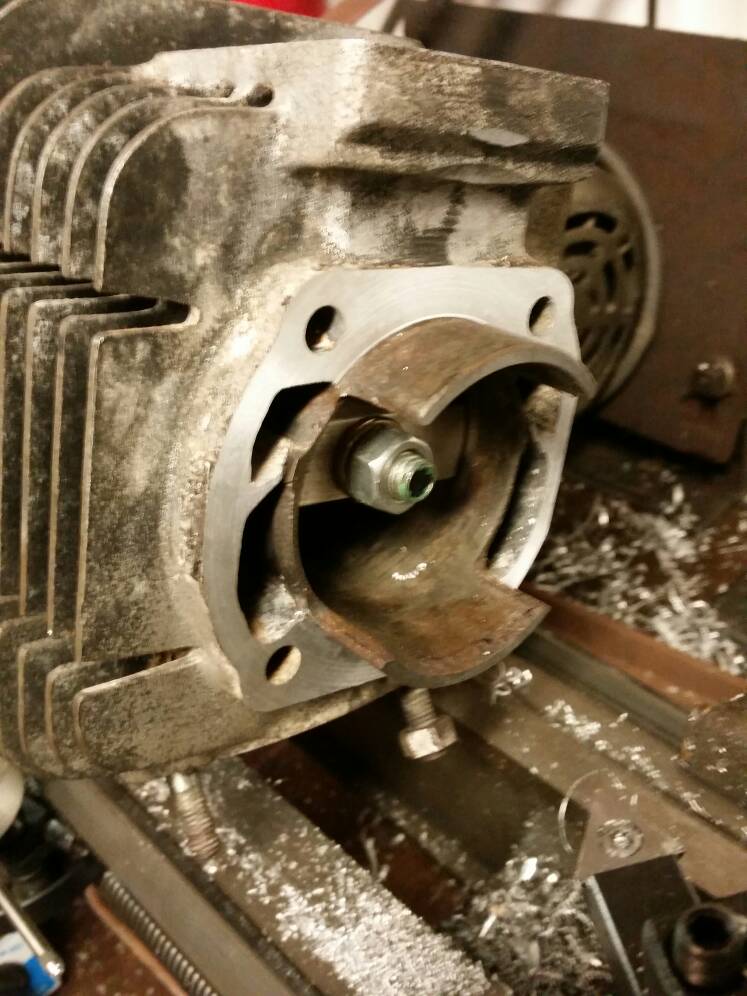
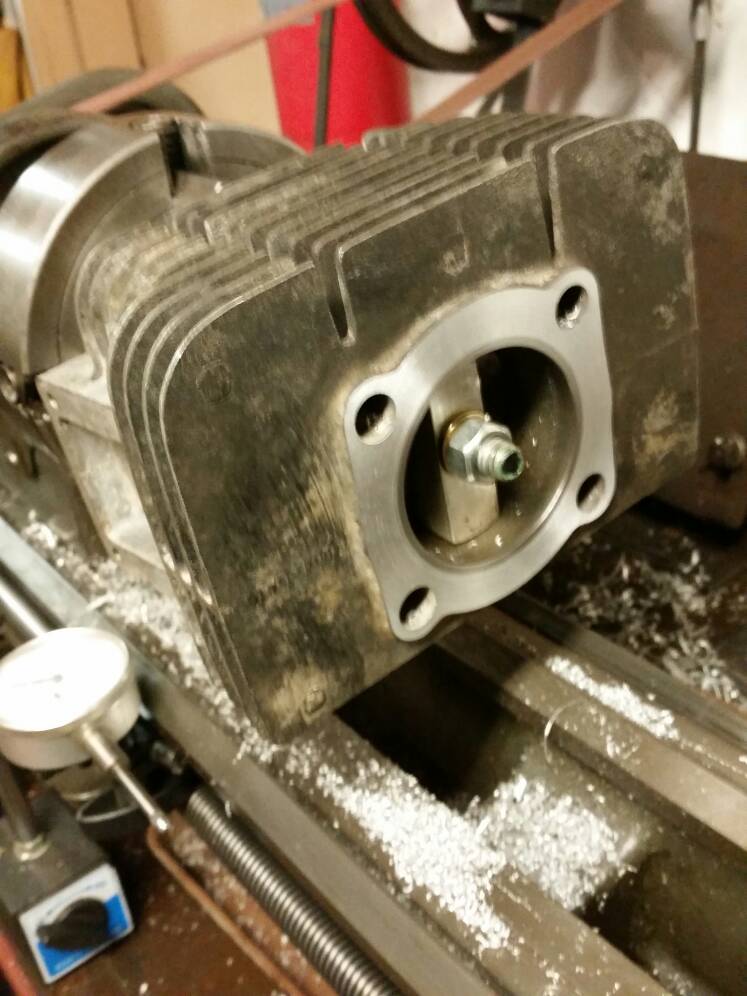
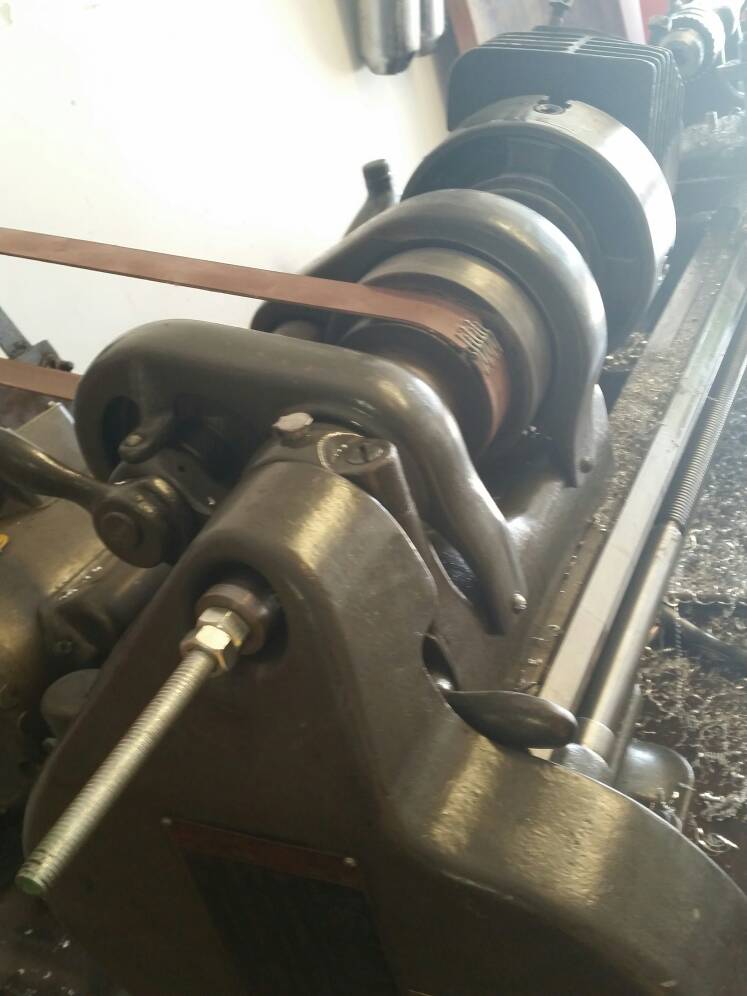
here i am turning some stock off of one of the failed iteration
what i am doing is just using a stout as fuck 5/8 drawbar to suck the part up to the chuck sans jaws in a sickenely off center fashion
but the part is secure and it wont slap you in the face done thusly
hope you can use the method some day
you can see i have a plate behind the part it is in order to give the part some surface area to plant on, near center of the chuick where its hollowed out a bit,.my part would be cocked badly
a pin into one of the jaw slots can be utililized to take a lot of the load from just relying on friction
but with my little homeshop lathe i dont dig taking really agressive interupted cuts anyway
i stuck with .030-.050" depth of cut fed by hand very gently ,carriage locked down depth lateral depth of cuts dialed at the compound set inline with carriage travel
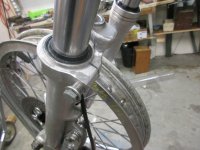
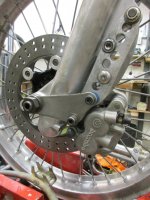
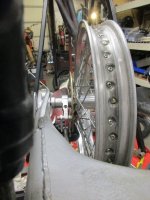
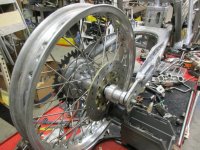
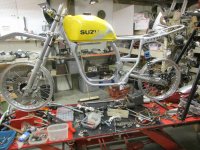
here is a few shots of the project as it is now next like today ill mount up tires i shopuld havre done it already,to verify my inmitial design on steer tube angle and see where my trail is
the works performance shocks are getting the nod ,they look bitchen and ive always wanted to try some
those air shocks i show early on may come someday but after tearing them down i find shit is wrong or missing internally and besides that i cannot figure out just how the 2 chambers are supposed to be charged,in order for the airspring effect to work ,aint got the manual
here i am turning some stock off of one of the failed iteration
what i am doing is just using a stout as fuck 5/8 drawbar to suck the part up to the chuck sans jaws in a sickenely off center fashion
but the part is secure and it wont slap you in the face done thusly
did something similar on my rd barrels when cutting the jugs and putting in an o ring groove. all thread through the draw bar for just a little extra insurance. worked out well. lathes can be far more capable machines than just turning the od on a piece of round stock.
I've done cylinders that way as well.
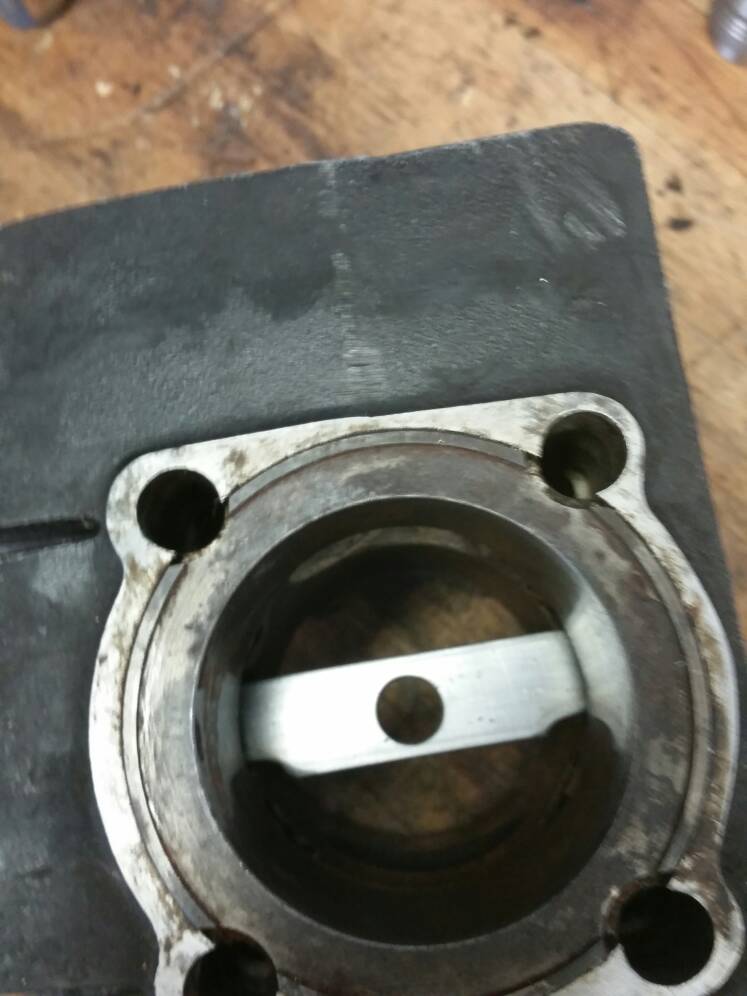
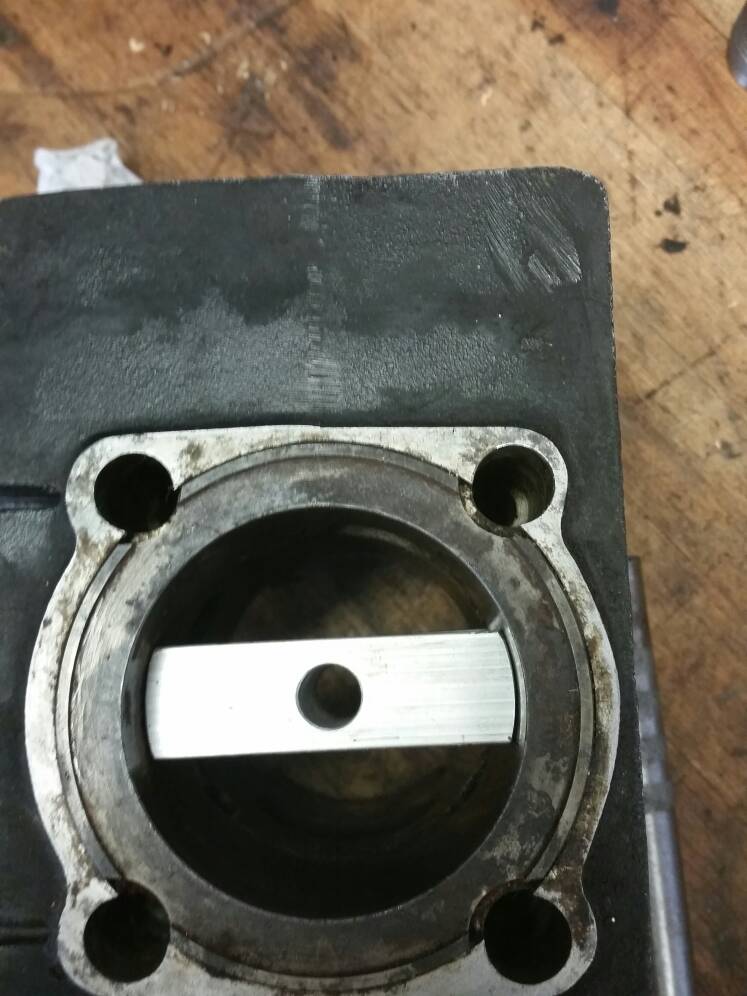
Shortening XV750 liners to fit into XS650 block (after fitting CR500 rods) is 'real interesting' without something supporting them
when i was helping a friend build racing chain saws we had figure out a way to chuck up a one piece cylinder and head unit ,and turn off material from the base
well we had some good oak wood ,i used one piece but no reason not to clue up a laminated block
anyway i used the 4 jaw with jaws reversed AND sucked it up with a draw bar then i simply cut the oak block round to slip fit the barrel with an ever so slight tighter fit after it was on a couple inches
this allowed me to go to the base of the barrel the gasket surface and make nice cuts to increase compresion
it would have been too risky without the security of the bar
i worked with some bigger lathes once in a while
one time i was turning steel rings 4ft in diameter 3/8'' cross section 1'' long
turning them from a big piece of pipe then parting them off
the old lathe did not have a brake and took forever to stop so it was nerve wracking thinking of the parted piece getting wadded up when it fell off
first thing i did was run a catcher up top then when i could hear it that it was almost done
i got smart shut the lathe off went to nuetral gear and rotated the whole lashup with a big bar stuffed into the barring holes in the chuck
took about 6 pulls per revolution but it sure was gentle when the parted piece fell off
did something similar on my rd barrels when cutting the jugs and putting in an o ring groove. all thread through the draw bar for just a little extra insurance. worked out well. lathes can be far more capable machines than just turning the od on a piece of round stock.
when i was helping a friend build racing chain saws we had figure out a way to chuck up a one piece cylinder and head unit ,and turn off material from the base
well we had some good oak wood ,i used one piece but no reason not to clue up a laminated block
anyway i used the 4 jaw with jaws reversed AND sucked it up with a draw bar then i simply cut the oak block round to slip fit the barrel with an ever so slight tighter fit after it was on a couple inches
this allowed me to go to the base of the barrel the gasket surface and make nice cuts to increase compresion
it would have been too risky without the security of the bar
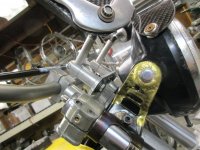
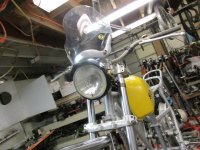
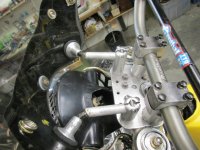
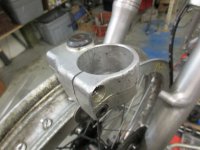
progress got my burly's mounted to the top yoke which is actually a bottom
the blue calfe-sky flyscreen may need to be whinched down ,i know standing on pegs it will be fine but sitting its,it may be up hard in the pilots vision strain, not a good enough optical clarenety to depend on
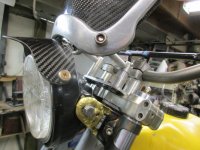
i dropped a hint early on about the oddball upsidowner to triple ,of the .065 folks reading this tread none figured out the plan all that needed done is .020 turned off fork slider top
the rest is 12tpi hacksaw blade in hacksaw an a sharp raspy fuk file 16'' long and course enough to turn stonehenge to gravel
this is the stuff i really like re0-uuse it and make it look bitchen
the placemet of your saw cuts on this shit has to be diligently precise on the blind side 'specially cause of the odd shapes and angle cuts in tersecting
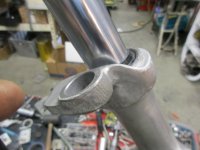
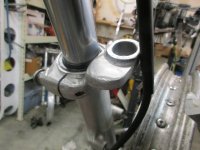
i haven't even given much thought yet on the brirge between the 2 clamps ,but its not going to be a piece of flatbar
two chunks stem pressed in and pinned alah roll pinner and a chunk of bar stock cussom shape with flat spot to bolt down on top maybe an ark shape in the bar stock :
ah thanks it will come in time the finder will be integral at the moment i'm leaning towards carving a manzaneta stump wood burl buck and then forming the part with an explosive charge or...3
ah thanks it will come in time the finder will be integral at the moment i'm leaning towards carving a manzaneta stump wood burl buck and then forming the part with an explosive charge or...3
That sounds cool. I've seen you can weld almost any metal to almost any other metal else using explosives (pretty sure it doesn't work with wood though ;D )
This site uses cookies to help personalise content, tailor your experience and to keep you logged in if you register.
By continuing to use this site, you are consenting to our use of cookies.


")