CB200T cafe racer build

wfo speedracer

Been Around the Block
When I was 16 my brother bought a CB200T , I had a 1979 XL185 and I probably rode the 200 more than he did, I always wanted to build a cafe racer so fast forward 44 years and here we are.

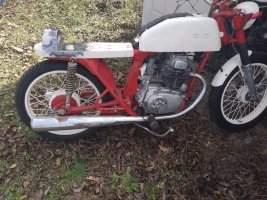
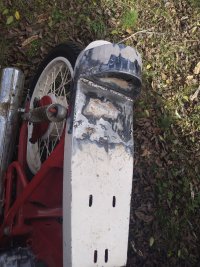
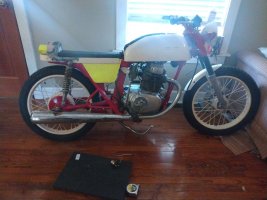
I snagged this off of Facebook last year for $500 , most of what you see was already done, the frame and front fender had been modded up and painted , the tank and tail section were painted as well, I am a big fan of loudly painted frames and white motorcycles so I bought it , apparently someone had never sprayed white before because it has massive runs in the tank.

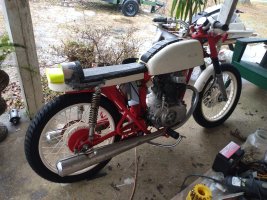
Also the thing must have been built for a midget because I had to lengthen the seat about 7 inches so I could fit on the bike. The good parts are new tires already installed , new fork seals were included, it came with extra paint, a shop manual and a few extra parts , the motor has good compression, not sure on the carbs and electrics yet as the bike was just a roller when I got it. I do have just about everything needed to reassemble it with.

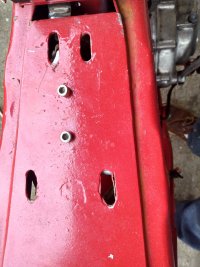
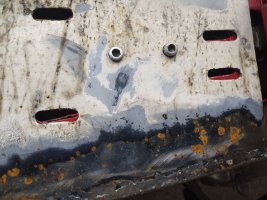
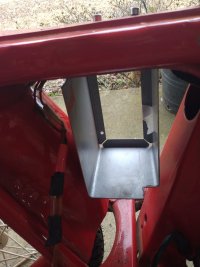
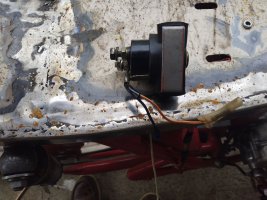
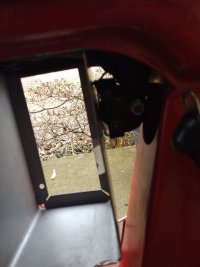
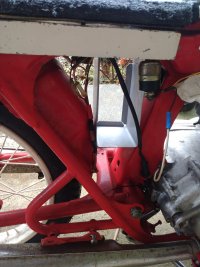
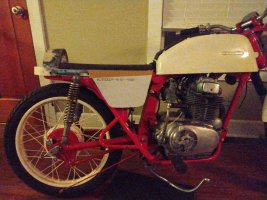
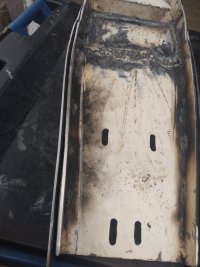
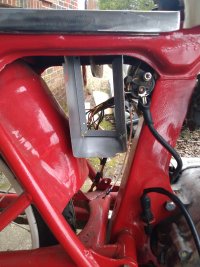
I have started putting the wiring harness back on and relocating electrical components so I will soon see if it has spark and go from there , the exhaust is kind of ratty but I can live with it for now. I made a battery box and a lot of the electrical components will attach to that, I am not a fan of the see through frame look so I will be making some sidecovers probably from polished Aluminum .

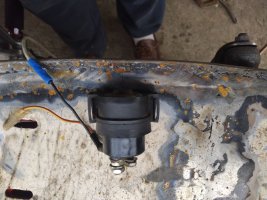
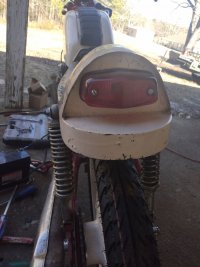
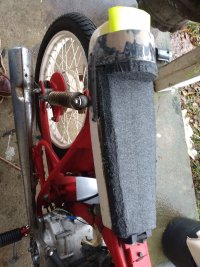
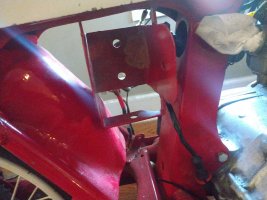
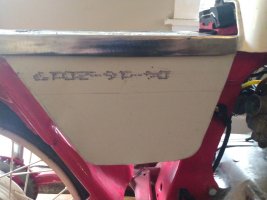
I haven't decided on the taillight situation just yet so what you see there is a paper mock up of one I found online, if anyone has suggestions of one that would fit there better please let me know , I also looked at a CX500 taillight but I would really like something with more of a semi circular domed design to fill that area in, still looking..
 

Attachments

  • image000000 (31).jpg
    image000000 (31).jpg
    422.2 KB · Views: 81
  • image000000 (32).jpg
    image000000 (32).jpg
    379.1 KB · Views: 69
  • image000000 (33).jpg
    image000000 (33).jpg
    379.7 KB · Views: 66
  • image000000 (34).jpg
    image000000 (34).jpg
    306.1 KB · Views: 67
  • image000000 (35).jpg
    image000000 (35).jpg
    230.3 KB · Views: 71
Last edited:
I had to ditch that battery box, at least it was already built, it looks like I am going to be able to use the battery box that came with the bike with a bit of cutting and grinding , I am looking at using a ytz7-s lithium battery here , it's about 150 CCA , very small and lightweight .

I am trying to get everything just fit into place for right now, I also made a posterboard pattern for the sidecovers and decided that instead of going outside to stare it I would just move it inside and stare at it in a heated space, the plus is I can stare at it much longer inside.

That may be more of a Tracker look but what can I say, I like sidecovers, it is what it is .
 

Attachments

  • image000000 (37).jpg
    image000000 (37).jpg
    203.3 KB · Views: 49
  • image000000 (38).jpg
    image000000 (38).jpg
    264.4 KB · Views: 51
I like side covers on my bikes also so I get it! Does the engine have good compression?
 
I haven't run a compression check on it yet but it feels like it does.

I am still trying to get everything where it goes, the guy that did all this work had a plan, but whjat he had planned would never have worked so I have to come up with a newer better plan.

I am trying to use the seat pan he designed but I am having to do a lot of work to fit it with sidecovers, it was fitted so tightly to the frame that there was no way to attach the sidecovers to it.

I trimmed it down today and it looks a lot better , I also got some more metal to add to it, this way I can sandwich the sidecover between the two metal pieces and put in a couple of pan head allen bolts to secure it to the seat pan. Lots and lots of welding going on here.

I also modded the first battery box I had in there and worked out the mounting on it as well as the starter solenoid location and figured out what battery will fit , I am welding a couple of 1/4"coupler nuts to the bottom of the box to secure the bottom of the side covers with.

I ordered angled air filters today , i need to get the air filters in and fitted before I can finalize the side covers but I did transfer the paper panel to sheet metal today for a better idea what I am dealing with, the actual sidecovers will be Aluminum 1/8" sheet. I am hoping they can just be straight pieces or maybe a slight bend at the top, nothing too drastic.

I have the taillight picked out also and have to get that ordered as well, there will be more padding going on that seat, I am not planning on riding far but I want to be reasonably comfortable when I do ride it.
 

Attachments

  • image000000 (39).jpg
    image000000 (39).jpg
    356.1 KB · Views: 48
Last edited:
Side covers are a great idea, but if you don't like them, the battery can be hidden under the seat hump and starter solenoid under the tank or between the frame rails below the seat..

You could also trim the lower edge of the seat to raise it in line with the tank if that makes the side covers easier to fit.

Or make a fiberglass tank cover with side covers and seat all in one piece, like this one I made out of carbon fiber. If I can do it anyone can.
 

Attachments

  • DSCN3720.JPG
    4.6 MB · Views: 40
Side covers are a great idea, but if you don't like them, the battery can be hidden under the seat hump and starter solenoid under the tank or between the frame rails below the seat..

You could also trim the lower edge of the seat to raise it in line with the tank if that makes the side covers easier to fit.

Or make a fiberglass tank cover with side covers and seat all in one piece, like this one I made out of carbon fiber. If I can do it anyone can.
This is what I did, I added two pieces to the seat base , I used 1/8" pieces wrapped with masking tape for spacers while welding it up , this creates an 1/8 " channel for the aluminum plate to slide into , then once I have everything situated I will weld two coupler nuts to the bottom of the battery box and screw into those to secure the bottom of the sidecover .

I will just drill through both steel places and the sidecover at the top then tap the back piece and drill the top piece bigger so the screws can go through the top piec and the sidecover and thread into the bottom pieces to hold the top of the sidecovers. Honestly this thing is fitted so tightly to frame there simply isn't room to do much else and make it look clean.
 

Attachments

  • image000000 (40).jpg
    image000000 (40).jpg
    226 KB · Views: 46
Last edited:
So now the sidecover slides into the seat base like this, since this sidecover is just sheet metal I added a few layers of masking tape to build up the thickness, but you get the idea. As you can see I did cut the seat base down to match up to the tank.
 

Attachments

  • image000000 (42).jpg
    image000000 (42).jpg
    159.4 KB · Views: 48
Last edited:
So this is the best setup I have come up with so far , It looks like I need to add an inch to the sidecovers and I will probably have to use a Yamaha rubber solenoid mount bracket , the regulator will bolt to the bottom of the box and I have to cut the top of the battery box so the wire can have a place to go.

I also have to push the starter solenoid back and run the starter wire through the frame, it's starting to click slowly.
 

Attachments

  • image000000 (43).jpg
    image000000 (43).jpg
    241.1 KB · Views: 43
So this is the best setup I have come up with so far , It looks like I need to add an inch to the sidecovers and I will probably have to use a Yamaha rubber solenoid mount bracket , the regulator will bolt to the bottom of the box and I have to cut the top of the battery box so the wire can have a place to go.

I also have to push the starter solenoid back and run the starter wire through the frame, it's starting to click slowly.
It's cleaning up nicely man
 
Side covers are a great idea, but if you don't like them, the battery can be hidden under the seat hump and starter solenoid under the tank or between the frame rails below the seat..

You could also trim the lower edge of the seat to raise it in line with the tank if that makes the side covers easier to fit.

Or make a fiberglass tank cover with side covers and seat all in one piece, like this one I made out of carbon fiber. If I can do it anyone can.
Damn, Teazer, that fiberglass piece is pretty sexy man! The Jedi Master strikes again haha
 
It's cleaning up nicely man
The guy I got it from must have been a bodyman because he painted damn everything , wheels, hubs , brake backing plate , brake rod, some of the metal work on this bike is excellent , the paint not so much , one thing is for sure is that he wasn't a mechanic, he had a bunch of really good ideas that just were not going to work, I am trying to slowly straighten this mess out using what I have available and buying as little as possible , it might take me a minute .

I have to say the paint is a little much, I am stuck with the rims , the tank has to be repainted and it came with extra paint , I will probably do a red inset on the tank with stockish looking blue pinstripes , the red brake backing plate that has to go, the rear brake rod was red , I removed the paint on it today, I like the frame color and I am leaving it as is and touching it up where needed , I can live with the wheels because the tires and tubes are brand new.
Some of the stuff like the sidestand may get painted black as well as anything else I want to kind of make disappear.

I want to have mix of a painted frame, silver motor with maybe a black cylinder head , wrapped header pipes and probably black megaphones , It came with another brake backing plate so I will probably clean that up and polish it or paint it Honda silver , then add some shiny bits here and there to dress it up, air filters are on the way here now as is the taillight , as soon as those are mounted I will tackle the sidecovers and wrap that up .

Somewhere around here I have a set of black superbike bars I am going to try on here , I do remember that the stock bars always sucked .
 
Keep your colors simple and try to avoid mixing colors. For example, do teh headers and megaphones all in a satin black. Forget wrapping pipes. That's so 1999 and it causes the pipes to rust. Use BBQ paint. It's cheap, the right gloss level (low) and it's easy to re-spray if/when it gets scratched.

Not too much you can do easily with those rims until you decide to re-lace the wheels with alloy rims.

I really like red frames, so keep things like side stand or center stand red to make them just disappear. If they are a contrasting color, they have no place to hide. Motors look fine all silver or natural aluminum color. Adding black to barrels or heads is fine with a back frame but will probably look fussy with that nice red frame.

You don't want it to look like a tart's handbag. Ask TJ or PJ for a translation if you are not familiar with that expression. :)
 
Damn, Teazer, that fiberglass piece is pretty sexy man! The Jedi Master strikes again haha
Thanks. I have to keep pushing myself to try new things and develop new skills. Keeps me thinking I'm still young - Until I try to get out of bed that is...:confused::eek::D:D
 
Keep your colors simple and try to avoid mixing colors. For example, do teh headers and megaphones all in a satin black. Forget wrapping pipes. That's so 1999 and it causes the pipes to rust. Use BBQ paint. It's cheap, the right gloss level (low) and it's easy to re-spray if/when it gets scratched.

Not too much you can do easily with those rims until you decide to re-lace the wheels with alloy rims.

I really like red frames, so keep things like side stand or center stand red to make them just disappear. If they are a contrasting color, they have no place to hide. Motors look fine all silver or natural aluminum color. Adding black to barrels or heads is fine with a back frame but will probably look fussy with that nice red frame.

You don't want it to look like a tart's handbag. Ask TJ or PJ for a translation if you are not familiar with that expression. :)
Thanks for the feedback , I will keep it in mind , regrettably my header pipes look pretty rough and I may have to wrap them to cover up the ugly , I am not sure I can get the dents out and make them look good enough to just paint them , just saying .
 
Last edited:
I finalized the battery box location and mounted it, I clamped it to the frame with a welding clamp and drilled the holes, then I removed it , marked the holes on the seat pan then drilled them.

I also finalized the starter solenoid location and made a bracket that will weld to the battery box , I will just do two plug welds on that.

I used a Yamaha watercraft solenoid mounting rubber , this gets it as close as possible to the battery box, now the starter cable can run through the frame and easily hook up to the solenoid plus It will be a very short Battery positive wire.

Voltage regulator mounts to the bottom of the battery box so it can cool off. There is just enough room left under there to get the nuts that hold the seat on and off, I won't build anything that's a PITA to work on.

Next I need to drill a hole on the other side of the frame so the wires will have a straight run, I cut out the top left section of the battery box to give the wires a place to go, I will either put some rubber stripping on the battery box or run the wires through a plastic sleeve so they won't chafe., I hate chafing it just chaps my ass.
 

Attachments

  • image000000 (44).jpg
    image000000 (44).jpg
    332.6 KB · Views: 37
  • image000000 (46).jpg
    image000000 (46).jpg
    293.5 KB · Views: 37
  • image000000 (45).jpg
    image000000 (45).jpg
    181 KB · Views: 35
  • image000000 (48).jpg
    image000000 (48).jpg
    281.2 KB · Views: 33
  • image000000 (49).jpg
    image000000 (49).jpg
    293 KB · Views: 35
  • image000000 (47).jpg
    image000000 (47).jpg
    170.3 KB · Views: 41
Last edited:
No the wiring harness is pretty much staying intact , I will find out soon if it all works or not .

I have all the OEM terminals and terminal blocks here if I have to do any repairs to the harness.
 
I took a look at the starter today, I just ran a + and - wire and touched it to a battery , as I predicted the starter spun over but the engine didn't , I was pretty sure someone had removed the starter before and as you know you can remove the starter by itself but since it's a chain driven starter you can't put it back in without taking the stator cover off the bike, even then it is a little tricky.

Starter chain was just hanging there with the sprocket still on it so I put it back on the starter, the chain is still in good shape and pretty tight.

I replaced the stator cover temporarily., I do still have to buy a new cover gasket , I removed the plugs and touched the wires to battery and it spun over, then I put the plugs back in and tried it again, starter works perfectly now.

I know an electric starter is not a necessity on a bike so small but it sure is a nice thing to have.

This will make it a lot easier to do a compression check and see if I have spark once all the electrics are back on the bike the motor is just loosely mounted up in case it has to come back out for some reason, I hope it doesn't.

I did remove two of the tappet covers and both of those valves were loose, no tight valves here so far, I will check the other two in a bit.

So on to next item on the giant laundry list of things to do before I can crank this beast up for the first time..

The taillight came in today also , I tried to use the existing holes but I think it is mounted too high, I like the style but not where it is mounted so I will most likely weld the holes up and redrill it to mount it lower.
 

Attachments

  • image000000 (50).jpg
    image000000 (50).jpg
    177.9 KB · Views: 35
Last edited:
Back
Top Bottom