Follow along with the video below to see how to install our site as a web app on your home screen.
Note: This feature currently requires accessing the site using the built-in Safari browser.
We noticed you are blocking ads. DO THE TON only works with community supporters. Most are active members of the site with small businesses. Please consider disabling your ad blocking tool and checking out the businesses that help keep our site up and free.
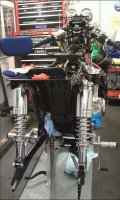
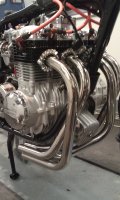
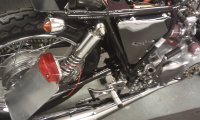
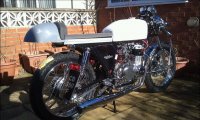
Got lucky with the exhaust brand new motad 4-1 third of the price, best result of the build £££ ;D so far got the wheels fitted new drive chain put new stearing head bearings in wow thats gotta been the hardest job to date wouldnt have bothered if i knew it was that hard using old wire harness in good shape everything connected so far works did put new batt on, gel type so it don't need a breathe r pipe dripping acid everywhere polished & rebuilt rear shocks came up a treat ,damn !!lost some pics in the system
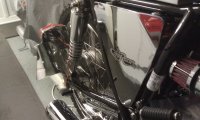
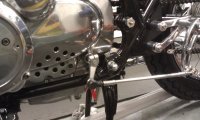
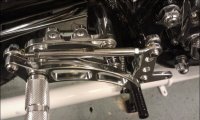
Bought a couple of bits so i could make up the rear sets had already welded a plate to frame to take the rear set fixings followed an earlier build thread for the actuator arm for the rear brake
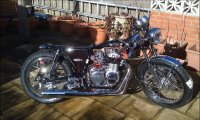
Heh guys well been doin bits n pieces cos the weather has been arctic ( by English standards ) haha put the gear linkage on and front sprocket cover drilled few extra holes for a little extra venting and the usual polish 8)
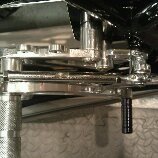
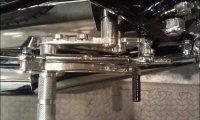
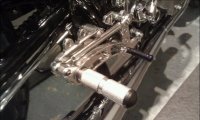
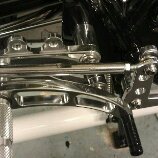
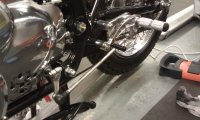
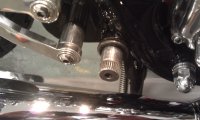
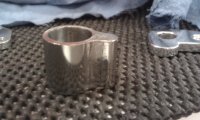
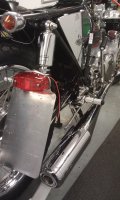
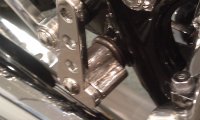
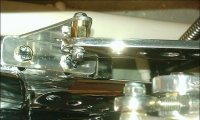
Ok the theory behind my rear brake is ok but under pressure the front arm has a little independent movement don't want to weld it like ive seen in other threads in DTT so i came up with this solution the front arm is fixed thru centre to original actuator arm to stop it moving on its own put a stainless tube with fixed lug onto actuator arm and drill n tap two holes for grub screw to hold secure then am gonna do same thru face of front arm so as to have two face fixings to secure and then it can always be stripped for maintenance wot do you guys think ?
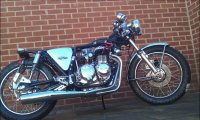
Also been playing with my seat options hoping to use my seat as a flip open tool tray its put a bit more height on it and cos ime using pods gonna use the airbox as extra storage too ive used full length piano hinge to secure top of seat to base panel all aluminium parts plus put a small frame inside seat unit for strengh seat cowl been primed ready for top coat
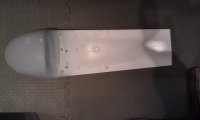
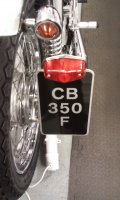
Finally for now got to put the rear number plate together still needs a bit more polish wasn't sure where it was gonna fit doe's it have to go on offside of bike (right side here in UK) ? gotta secure cable yet gonna put in heat shrink sleeve maybe cable tie to swing arm ? put the battery cover on see how it looks nice touch all home made slowly getting hang of this sort of stuff haha
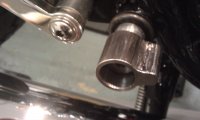
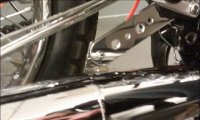
Hi fella's managed to get my exhaust hanger n bracket made n drilled off just gotta polish n fit yeeha tick another box off the list ;D not sure wether to put fine mesh behind breather holes in cover :-\ what do ya think ?
This build is just so damn beatiful! I'd say you certainly have gotten the hang of it!
Trying to wrap my head around your rear brake actuator set-up.... but I think it is making sense now, It was the original pedal you cut down to make the splined sacre but a little confused on the purpose of the lump towards the front...
...unless it is drilled from the back and a threaded hole in the lever to attach both bits together?
Also, pobably just the camera angle... but is your kick starter level going to clear the footpeg?
Hi H' yeah when i first put it together i found the arm thats fitted to the original brake arm by a single screw in the centre allowed the arm to stay forward when the brake pedal returned :-[ but didn't want to weld it together i like the idea of been able to remove for maintenance etc so i welded a lug to a piece of tube snug fit over original brake spline ime gonna drill and tap thru the front actuator arm into lug so it will be fixed in two places then gonna drill n tap thru tube into original arm to secure it so it rotates with original brake arm n rod when pedal is depressed these should stop all unwanted movement going to add a spring to top of actuator arm to help with return of pedal i think the theory is ok seems a bit over engineered might have to put a spacer in so the foot pedal don't catch arm good spot ther mate cheers
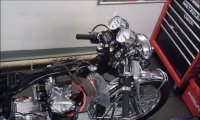
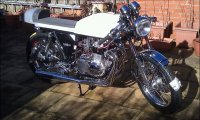
Hi hopefully got my pics for my exhaust bracket loaded and a couple of my made-up number plate haha polished my last pieces of bling (i hope) this weekend so tank n seat and i could be starting her up for real yea-ha
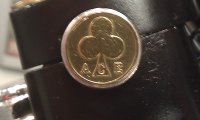
Not sure if i gonna need it mite even be a bit late in the day but thought ide add a lucky token (charm) to the project gonna give it a rub before i fire her up save's crossin my fingers ;D haha anyone else have a charm / superstition ?? :
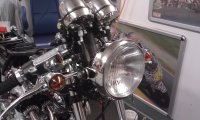
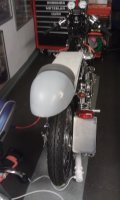
Hi fella's yeeha sunshine at last 8) & dry too, shame the 350f aint finished but i roled her out at last . First time ive seen her from more than 2ft away trouble having a small workshop haha . I wanted the tank and seat mock up and i managed to get the straight line along base of seat & tank gonna have to make a bracketty thing to raise rear of tank wot ya think heading in the right direction guys :-\ :-\
Gonna get her painted up in black gloss tank & seat hump with triple silver stripe down centre line of them guess thats the theme thru the build haha chrome / black :-\ not very adventurous guys but next build mite throw some colour about oooh next build listen to me gotta finish this one first
Now i managed to mock it up i can see its rather long so will cut it down so it brings the hump closer in also need a little space at front between seat n tank cos the seat unit opens to a tool n spares tray by using a piano hinge full length of seat
This site uses cookies to help personalise content, tailor your experience and to keep you logged in if you register.
By continuing to use this site, you are consenting to our use of cookies.

") got the wheels fitted new drive chain put new stearing head bearings in wow thats gotta been the hardest job to date wouldnt have bothered if i knew it was that hard using old wire harness in good shape everything connected so far works did put new batt on, gel type so it don't need a breathe r pipe dripping acid everywhere polished & rebuilt rear shocks came up a treat ,damn !!lost some pics in the system
got the wheels fitted new drive chain put new stearing head bearings in wow thats gotta been the hardest job to date wouldnt have bothered if i knew it was that hard using old wire harness in good shape everything connected so far works did put new batt on, gel type so it don't need a breathe r pipe dripping acid everywhere polished & rebuilt rear shocks came up a treat ,damn !!lost some pics in the system