CB360 - working on it on the weekends

No, when I turn my killswitch on, the low beam headlight comes on and there's no dedicated lightswitch, so the lights are on while the bike tries to start. I forget what exactly from the picture, but the wire hanging down isn't going to the starter; when I took the picture I hadn't finished with the wiring so there are a few things hanging around, as you can see from the headlight. Starter wire (from motor to solenoid) is the big heavy duty one, but this happened

tumblr_mkb67jmfgf1s02ub3o1_500.jpg


so I'll be replacing that and relocating it today
 
YEP! I would definitley say your headed in the right direction...that might have caused the short your lookin for.
 
Starter cable after solenoid cant blow fuse.
It wont allow starter to work though
 
crazypj said:
Starter cable after solenoid cant blow fuse.
It wont allow starter to work though

No fuses blown, the solenoid won't turn over the starter motor so we figured power was being lost somewhere. Turns out that was the problem, mounted the starter wire from the other motor (being careful to route it away from the chain) and it turned the motor over! ;D ;D ;D

Okay so to continue the fun...
Bike is turning over, but after taking a plug out to check it, not getting spark. Opened the points cover and filed/cleaned/checked the points with a feeler gauge and cleaner, and the right side would get spark but the left wouldn't. Looking at it closely with a flashlight, it looks like the left side point surfaces are kind of curved; i.e. the surface isn't flat it's somewhat bent upward. Again, luckily, I have the other motor from which to take parts, I'll unscrew the points assembly from the other motor tomorrow and take it to the shop and go from there. Thinking back on it, even when this motor ran, it never ran well, and I would have to rev it at stoplights to keep it from dying. My old motor never had a problem with running, aside from the metal in the oil and the imminent top end explosion. Hopefully I'll be able to run it tomorrow! (but I don't really mean that because it'll jinx me)
 
Starter cable should run down back of crankcase then underneath to starter motor (runs behind starter motor at front)
There should be clips on crankcase bolts to hold it in place
Check connection on points, it can short out on cover, Trek 97 has posted about it several times
 
I ran the starter cable from the starter motor (with the clip behind), under the bike then instead of through the crankcase, down the middle of the bike so it stays away from the chain, then back up behind the swingarm up to the starter solenoid. Less slack hanging off compared to before anyways.

Didn't get much work today because I wanted to get coffee with a friend and browse records and stuff, but while I was pulling the points out of the old motor box I remembered that the PO had upgraded the stator (this thing: http://www.dimecitycycles.com/vintage-cafe-racer-caferacer-bobber-brat-chopper-custom-motorcycle-electronic-parts-ricks-electric-hot-shot-honda-cb350-cl350-cb360-cl360-charging-kit-99-101.html) so I grabbed the side cover, took it to the shop and swapped out the stator and wired it up to the regulator/rectifier, which explains the unconnected two yellows I saw before. Depending on when I have time to get back to the shop, change up the points, will check if they're shorting out, and hopefully she'll fire up :eek:
 
Changed the points today, it took me longer than I would like to admit to realize that the old points plate was warped :eek:
Unscrewed everything and moved it to the other plate, again, it's great to have parts from two motors to play with. Spent some more time with a 14mm and a screwdriver trying to line up the opening and closing with the stator, then with a feeler gauge. Started getting tired and cranky so I took a break and went and got a burrito haha.

Finished that up, and turned the bike on, still no spark on the left. Hmm. Looked at a wiring diagram, started feeling around the wires to make sure everything was plugged in - wait, the left coil isn't grounded. Oh hey, spark! Excited, put everything back together, topped off the oil, tank and seat back on, and wheeled it out. Just for shits and giggles, tried to start it with the kickstarter, but this motor's kickstarter is way harder than the old one (although that might just be me being weak and lightweight). Played with the choke, adjusted the idle screw a little, made sure carbs were getting gas, and after a while, bike came to life! Sounds so much better than I remember, since it's been at least two months since I've heard her run. No problems staying on, old motor would die when I pulled the clutch in, but nothing like that this time. Took it around the block a few times, but stayed away from the public streets since it was night time and my taillight still doesn't work properly. Sweet! 8)

8605362984_34376372e7_c.jpg


One thing I am wondering is my neutral light doesn't come on anymore, and I have to pull the clutch in to start the bike. The old stator had a neutral (green and red) wire, but the upgraded stator doesn't have that, just two yellows to the R/R/. There is an unused male 4 pin connector that has the same wire, but I have nowhere to connect that. It's not a huge problem, but being able to start in neutral and having the light would be nice.
 
Wait a minute I just had a thought; if I can't start the bike with the electric starter unless the clutch is pulled in, since the bike doesn't know it's in neutral, would that mean I can't use the kickstarter to start it? Basically, is it possible to start it "in gear", since I can't kickstart it if the clutch is pulled in?
 
Isn't possible to start in gear with kickstart if clutch is working.
Neutral light doesn't need to be on to kickstart though
 
So if the bike is in neutral, the electric start won't do anything because it thinks the bike is in gear (because of the wire issue); the kickstart won't have this problem as long as the bike is actually in neutral and can roll?
 
if you want the neutral sw to work w electric start. run the red/green from starter solenoid down to engine sprocket cover, (the switch is under the sprocket cover, not under the stator cover) pull back the little spring deal poke the wire in the hole and let the spring go. the spring simply pinches the wire onto the switch...so it dont fall off. and if your in neutral the switch simply "makes up" the ground so solenoid w work. if you want the light to work...your on your own. just trace it out on the drawing.
 
Made it back into the shop today, and after some fiddling with the wiring for the tail light/blinkers, got it ready to take her out for a ride 8) Also drilled holes in the metal plate under the seat cowl so I could run the tail light/blinker wires out of the way of the tire. Little things...

She fired up pretty quick, didn't have to play with the choke or stress or anything, but it was a nice sunny day here in California. Wait...right turn signal stays on and turn signal indicator also stays on...oops. I couldn't resist though, so I rode down the block to the gas station and filled up. Almost dropped the bike after filling up because my neutral light, so after parking it in gear I tried to start it, pulling the clutch in but letting it out after starting it lurched it forward and I just caught in time. Hopefully I don't make that mistake again...

Had to clear out the cobwebs (in a manner of speaking), so I rode towards the canyons on the outskirts of town. Nice mellow cruise through the canyon roads, nothing too twisty or technical, just a steady cruising speed getting used to body positioning and all that again (I'm rusty). I still don't know if it's just me or if the bike has to be tuned, but I'm still paranoid she'll cut out at a light with the clutch pulled in which happened before all this work. Gladly it didn't happen, but there was some smoke coming off the exhausts (I believe it's burning dust and all the crap I didn't clean) at stop lights. Cars gave me a wide berth, but I'm not complaining. I don't know if it's just due to me not having ridden in a while, or if my speedo is messed up, but my bike feels way faster and more powerful. The only real adjustment I can think of is carbs and pods thanks to crazypj, but maybe that could be it since my carbs weren't synced and the bike was possibly firing on one cylinder only before. Rode back to the shop, checked for oil leaks, a few drips but it looks residual. Got back on and got a bite to eat, came back and no oil drips. I do want to get some zipties and clean up the wiring a little better, as well as taking a rag to the shiny bits and dusting her off a bit. Will take a closer look at the tuning and idling next time, as well as troubleshooting the wiring. I dropped off pleated vinyl and spray adhesive at the shop so I can do that next time, I had planned to do it today but I was too busy having fun ;D

Also, I think I will need rearsets, I'm about 6'1" with boots and I feel too cramped and balled up with the stock footpegs and clipons. Might adjust the clipons a bit to see if I can get more comfortable, but rearsets may be necessary in the near future

8625781561_a166b45eb3_c.jpg


When I'm not doing anything at the shop, I'm usually taking pictures of my bike
 
Cool,glad it's working out OK.
You'll probably have to do some fine tuning and a plug chop but otherwise shouldn't need much
You may have the indicators wired into running light circuit? (light blue/white & orange/white)
You'll probably find rear-sets lot more comfortable, I can't use stock footrests with clip-on's and I'm only 5'10" (about 1-1/4" shorter than I was since my back F***ed up :( :mad: )
 
Couldn't sleep so I went on the computer and started looking at bikes and rearsets, wondering how I would be able to fit rearsets. The passenger peg brackets on my bike are holding the exhaust, I'm sure I could figure out a way to mount rearsets but I don't know if I would have room to shift, etc. I suppose I could make them stick out to the sides a little, but the way I see it that's not ideal. The more and more I think about it though I don't think there's a way around changing my foot position, with the stock pegs I keep getting cramps and I have to stretch out my leg and stops and shake it out, even on short rides. Also doesn't help I have back problems myself (part of the reason I can't sleep), and I'm pretty young!

Anyways, revisiting this old picture of my bike
xt5U9ug.jpg


to clear the exhaust, I'd have to mount the rearsets higher up than the stock, albeit farther back. I'm guessing I'd have to angle them down more to compensate, which would then make it harder to shift and brake? I don't really want to have to change the exhaust or anything, I would rather be uncomfortable with the stock pegs than change out the exhaust to be honest. I wonder if I could use the little plate holding the pipe to the passenger peg bracket to move it down a little, but again that's not ideal.
 
Ah, finally something I can assist with!

Most rearsets (especially Old School Speed) come with a bracket that mounts to the passenger peg location. Your exhaust hanger will still fit on the bolt that threads through that location no sweat. The issue you will have is the shift side rearset is likely to hit, or come very close to hitting, the top of your muffler. I ran into this exact problem and now have a CL360 exhaust sitting in my garage.

Check this pic:
IMAG1039_zps9b7e77ee.jpg


See the mounting plate that is where the pass. peg goes? Note how I can't use the lowest mounting location for the rearset peg due to muffler clearance. It's unfortunate, but not really a design flaw, IMO. Just something you have to be ok with. Honestly, with you just being 6'1, you likely will be plenty comfortable using the middle mount (assuming you went with OSS or similar design). Im 6'4 with a 34" inseam, so I totally get your pain!

I also made a DIY post on installing rearsets on the CB360 if you want to reference it for more information on mounting.

http://www.dotheton.com/forum/index.php?topic=47213.0

Let me know if you have any other questions.

-Matt
 
@Matt, I noticed in your writeup you have to chop the stock shifter? I don't like the idea of that, but maybe I can just find another rearset kit that has the shifter connection. In the picture you posted above, how's shifting, would you be able to get a boot under there and click it up while clearing the exhaust? I was reading some other threads about rearsets and most recommend welding a bracket rather than a bolt on or something, so this is what I was thinking:

xDZuKcR.jpg


Instead of using the passenger peg mount, (even with the different mounting locations like on the Old School Speed rearsets) I was thinking about welding a plate to the inside of that hoop on the other side of the bracket, so the rearsets would be a little higher and more forward, but give me more room to clear the exhaust. I don't know how the linkage to the shifter would work with the angles, also don't know how that would feel positioning wise, but I'm just brainstorming here
 
Weld a plate to the outside of hoop then you won't have to space levers out as much, plus you could drill alternative location holes
The shifter is a 'stock' spline, you can use Honda, Kawasaki or Yamaha, Suzuki is the only odd one (much coarser)
Some brake operating arms are also the same spline as gearchange
 
edukaycheon said:
@Matt, I noticed in your writeup you have to chop the stock shifter? I don't like the idea of that, but maybe I can just find another rearset kit that has the shifter connection. In the picture you posted above, how's shifting, would you be able to get a boot under there and click it up while clearing the exhaust? I was reading some other threads about rearsets and most recommend welding a bracket rather than a bolt on or something, so this is what I was thinking:

I modded it, but I chose to. The OSS kits don't come with a replacement shifter arm, so I made mine work, and it does, very well. The shifting is just fine! I still want to get a CL exhaust so I can have even more space, but that'll have to wait for now. Im comfortable riding my bike, which is saying something considering how small it is and how big I am.

-Matt
 
Back in the shop today, once I can take her out I think I'll mess around with some clamps or something and see where my feet feel comfortable, then go from there. Either way, I think I'll have to fabricate/buy rearsets then go from their in terms of positioning and whatnot.

Anyways, not much going on today, got my blinkers working properly, one of the ground wires in the headlight bucket was disconnected so I made some new connectors for that and got the turn signal wired up. All good in that department. I'm working on wrapping the seat with vinyl, which is kind of tough but for a first try I could be doing worse. Kind of a caveman approach, no sewing or actual upholstering, just got some 3M spray, cut out a piece of vinyl, and stretched it around the seat and sprayed it on. There's some stretch in the fabric because I didn't pull it tight enough, but it's not too bad. Bought a staple gun from Home Depot and stapled the front part of the fabric on itself.

zzTmqU4.jpg


qeEgXVn.jpg


Since I didn't sew anything, I'm having trouble with the curved part, but what I'm thinking right now is glue down the flaps onto the seat with Gorilla Glue instead of spray, then take a straight strip of vinyl and wrap it over that around the seat.

Pleated looks good on the bike in my opinion

xNs1S6m.jpg


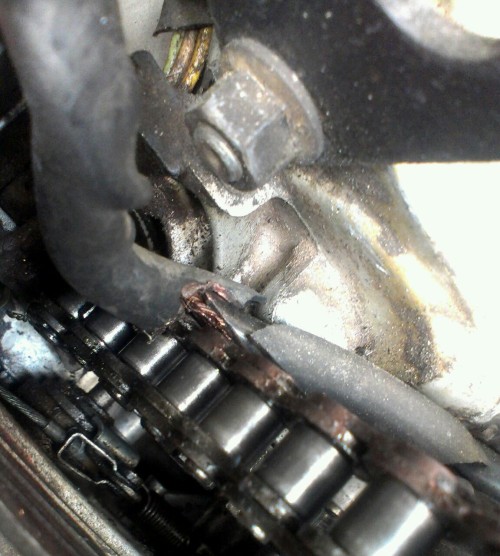
I also picked up some new spark plugs on the way to the shop today, thought I might as well with everything else done on the bike. After pulling the current plugs, they looked like this

cepPDbp.jpg


So rich on the bottom, lean on the top, which isn't good, but to be honest I can't remember what these plugs have seen, they may be the ones from the first motor/carbs, first motor/cleaned carbs, second motor/unsynced carbs, etc. Crazypj, did you say the carbs should be good to go from the box? I adjusted the idle screw a bit and the bike seems to idle decently last time I took it for a ride with these plugs, no running issues as far as I could tell so I'm curious to see how they'll play with new plugs or if I need to adjust some things
 
Back
Top Bottom