GS1100g Cafe Racer - Project Romesy

Check my post on GSResources.... I believe the hose should extend all the way to a bracket at the axle pinchbolt then back around and up to the caliper... I think.... maybe... but then mines not a shafty... so what the hell do I know! :eek:
 
This mod serves no purpose other than to look cool and provide me with some useful statistics on my oil pressure...


214.jpg

Its as easy as this.
Remove this bolt..


213.jpg


Install this


215.jpg


Then adjust to your desired angle...


220.jpg


219.jpg


Lets hope there is oilpressure when it fires up again... :O
 
Last night, installed new Carb intake boots, with new Orings for that fresh, no leak goodness.
Swapped out the bolts with some hex bolts too (for ease of removal!)
Havn't got pics of them installed, its really not that exciting, but I got them still in in the OEM packet. Oh yeah..


221.jpg


Also started with the wiring so I can get this puppy running this week :)
Drilled and mounted the electrics in the electric tray that I made last minute before going off to powder coaters. All seems to fit fairly well.
Thats a new R/R there, needs to be modified to accept the connections from my stator, and sense wire etc...more on that later.


Anyone able to suggest what i can wrap my wires with, I didn't want to just black tape it coz its pretty rat. I wanted something that provided good heat shielding and still looked ok...suggestions plzzzz.


222.jpg
.jpg


Cheers. Sam.
 
HondaCBGuy said:
Just got me one of these today...'83 model. Loving your direction. I may steal your seat idea yet.

YEA! Another Honda guy jerked over to Zooks! Now you are going to have to change your username. ;)
 
Hey guys,
Yes I've been very quiet lately. Sorry bout that.
It's been very very busy for me the past month. I promised the mrs this year that I'd get her a pergola for the outdoor area. So I've been building that. I've also been trying to get my car on the road. 1978 ZH Fairlane. Which should be ready this weekend! woot! Pics to follow.
However, I have been working on the bike ever so slowly.

I got my 100 or so missing bolts, nuts, washers from america and I did all that fitting. Nothing exciting to report, just things that needed to be done.

I've been finishing up lose ends on the wiring, coz I did leave some things. Brakes, rear indicators, and the new R/R had to be modified.
Cleaned up and painted the dash mount and fitted the dash, and im about 99% done with the wiring just gotta add the head light and run those cables.

Im going to start the bike this week so I'll put a vid up when that gets done.
I'm back on the project 100% and hope to have it finished and ready for roadworthy in 2 weeks.

The Mount :

223.jpg


The Dash...

224.jpg


The modified Honda R/R :)

225.jpg


-----------------------------------------------------------------------

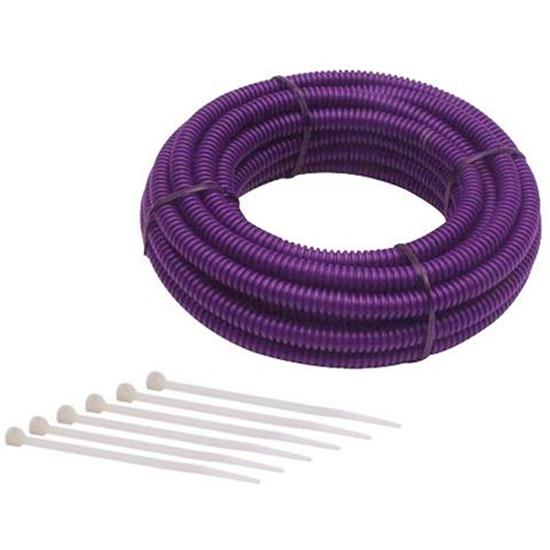
Worked on the bike till 2am last night, just didn't realise what the time was. I bought conduit to run the cable in from Supercheap. Glad I did actually. Looks very neat.

232.jpg


I forgot to wire up the front brake line....and I also forgot to run a cable for the headlight. SO I had to pull the harness out of the conduit and add 3 cables...fun!
I mounted the headlight, and indicators...

The brake line runs behind the light and sort of does an S bend, is that ok? or should the brake cable and the clutch cable both run infront of the headlight, never had a naked bike so Im unsure how it goes...pics anyone?

226.jpg


228.jpg


I bought a new switch, as I hated the stock factory one, looked ugly. I didnt realise that the old switch is setup to "always on" and the kill turns it "all off"....was playing with my multimeter for 30 mins scratching my head, as the new switch is "always off", and another cable activates the KILL. I had to pull it apart and resolder the switch to how I wanted it....got it going so all is good. Just spent alot of time on it! Took me 1 hour!
Looks nice.

227.jpg


Headlight mounted, and indicators. Tested all the switches and headlight and it works lovley. Very happy.
Now I just have to cable tie the conduit to my frame, and fit the rear end (rear fender, rear light and indicators) and then I will give it a turn over :O
I've been delaying the starting of the bike, My wife, friends and family always ask me when they see me "have you started it yet", to my same reply "No"...and then i get a funny look or a "Far out man, just start the damn thing". lol...bit of fear in there somewhere that i'll push the button and nothing will happen :)

Oh and as promised, I go the ZH back on saturday with a brand new 351 dropped in.
Runs and sounds beautiful, however, my feul consumption has gone through the roof. Its very very veyr very thirsty! :O
Running the engine in still so I have to take it easy, then after 1000kms i'll see how it runs....

351.jpg


351_2.png


351_3.png


351_4.png
 
GS1100g Cafe Racer - Is RUNNING...

Wow..no replies? peepz must'nt be interested in my build! No love from DTT...


Hello my good friends.
I have some great news. Finally got off my ass and started the GS and boy is it sweet.

I started on saturday night to get it ready for the first kick over. I put in some oil (thin stuff for its startup) and got the carbs in order. I havn't rebuilt the carbs yet, as I wanted to have a benchmark with the bike running so I knew where to go with the rebuild, but they were fine before teardown so thats cool.

My mate came over as he loves helping with the bike or anything mechanical. I got everything in order and went and bought some fresh fuel. I had to assemble my tank as I bought a new Fuel tap. The tank has not been repainted since I changed the colour scheme, but thats no biggie.

Anyway First problem i had was that I am now running a dynacoil pack and I had no idea which spark plug coil was 1 and 3 and which was for 2 and 4. Since I re wired the bike also, the colours didnt match up (obviously) so I had to do some trial and error. I think we got it worked out after a while.
Bike would crank but wouldnt start for about 2 hours, while we tried various things....just as we were bout to call it a night i removed the fuel tank, hooked up a funnel to the fuel hose and poured fuel in. I saw fuel dripping from the bottom of the carbs and i was like "thats not normal". SO i had a closer look and the fuel hose that goes to the T piece was leaking. I couldnt see it before when the tank was on because the tank on "prime" doesnt send as much fuel through as I was sending so who knows.
Anyway, took it off inspected and put a metal clamp on it and tightned it. Tried again, and it wasnt leaking. Pressed the button and BANG> Running.
It was running a little rough so i had to play with the idle.

Went to bed at 2 am (wife was not impressed being woken up at 1 am with, what she describes as a T-rex giving birth). But she's used to my antics so its ok. lol.
There is no muffler on the bike yet so its hella loud.

Woke up the next morning and tinkered for a bit, and got it running pretty smooth...Please let me know if you think my cylinders are firing in the wrong order, I'm sure they are or else it would not start or be very obvious....The manual says 1,2,4 and 3 which means If I had 1 and 4 mixed up it or 2 and 3 mixed up it should still run fine (based on my logic of it catching up...not sure bout that!)...

Anyway, here is the VID as promised. Not long to go before I can take her out (still waiting on my bolt for the rear axle as there is no bolt on it yet!!

PS. If you're wondering, I am using jumper leads from my car to the bike positive and negative cables...LoL my battery is dead and was on the charger, hey its dodge but it works!
Also I took off the pods so I could see whats going on in there. Also had to give it some "start ya bastard" to help it start...it idles much nicer with the pods on now.

http://www.youtube.com/watch?v=dRid_MJzStw
 
...and I'm still taggin along over here as well!
I think you'll find she runs better and better each time you do more to it. Sometimes it takes a while to coax them out of hybernation.
 
thanks guys!
Yes, the more I'm starting it up the more its running smoother.
Im going to do an oil flush and put in some good stuff tonight, and tighten all the bits and bobs up and maybe take it out on the street!
 
Bike booked in for RWC Saturday.

They told me the tires dont have to come off (this is for a car only)..phew!

Here is a video of my Cafe Racer!


http://www.youtube.com/watch?v=lpKcKyfkqeI

http://www.youtube.com/watch?v=7Yh_mDqe5BM
 
Totally jealous right now. I'm thinking of shelving my CB350 build (as parts are hard to find here in Aus) and starting on the GS. Nice work man! Sounds AWESOME!
 
HondaCBGuy said:
Totally jealous right now. I'm thinking of shelving my CB350 build (as parts are hard to find here in Aus) and starting on the GS. Nice work man! Sounds AWESOME!

Sounds like a plan ;) Go the GS! (my GS450 should be on the road soon pending saftey certificate)

Oh... and of course as I said over on the GSR... awesome ;D
 
Ok. Finally time to update this thing.

I've been working on various parts of the bike over the last month (yes its been a month since I updated!)
But mainly spent all my time on the carbs.

Rebuilt my carbs and been spending all my time tuning the bike for right size jets, right needle position, mixtures, vacum etc etc etc.
This was a short vid i made about using a colour tune.

http://www.youtube.com/watch?v=RbU67WGHR1A


anyway seems all done now (other than being a little hard to start when cold -- takes a few tries but it eventually cranks over...want to get that fixed up)
But the bike runs fine, probably a bit rich so I'll look into that but it rides beautifully and Im quite happy with it all.

Today I worked on the seat.
I had always wanted a seat like my couch at home but was scared to do it.
After much research, I found what I wanted to do, is called Tufting...

This is how it started.

239.jpg


And this is how it ended
If I had my time to do it over i'd do it a bit different (as with everything). But I have plenty of spare material to make 3-4 more of these seats.

The horseshoe had to be cut out coz i have hump in my seat base.
There was no way around that. Not sure why its there and why its required but it sure did make stapling the material down hard.
Anyway, overall i think it came out ok. Thoughts?

240.jpg


241.jpg


242.jpg


Basically what you do is mark out on ur foam where you want the buttons,
Drill the holes (fairly large), drill tiny holes in the wooden pan.
Get some fishing wire, and a washer. thread the button through and pull the wire out on the timber side.
Use the washer to do a funky knot to tie it down.
Thats pretty much it.

Cheers
 
So, I thought the seat needed some more work, so I made a backrest. I think it looks much better now. Was sceptical about making a separate piece however I think it came up well.
There are Bolts in the back of it already so I can just put a nut on the otherside, and presto! stays in place :)

Let me know what u think (try and imagine the tank is black with a red pinstripe in the knee dents....
!

244.jpg


245.jpg


246.jpg
 
Back
Top Bottom