compoundcycles
Been Around the Block
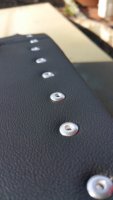
LED strips sounds cool. Do you guys have any links to build where someone is using them? Would love to see how they set them up.
JustinLonghorn said:I can dig it.
Thanks Anmic! Soon, very soon.Anmic said:Cant wait to see the finished product mate!
compoundcycles said:LED strips sounds cool. Do you guys have any links to build where someone is using them? Would love to see how they set them up.