
We noticed you are blocking ads. DO THE TON only works with community supporters. Most are active members of the site with small businesses. Please consider disabling your ad blocking tool and checking out the businesses that help keep our site up and free.
You are using an out of date browser. It may not display this or other websites correctly.
You should upgrade or use an alternative browser.
You should upgrade or use an alternative browser.
My first ever project: GS450T
- Thread starter dukeninja
- Start date
Spending more money that I haven't got...
After my ride back from Bristol at the weekend, I realised that:
a) Not having any mirrors is very disconcerting, not to mention potentially lethal and
b) The headlamp is pretty much poo in terms of visibility.
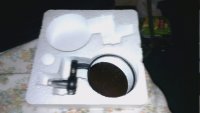
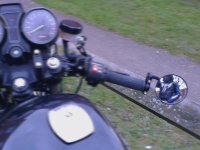
So off to fleabag I go and I bagged myself some more goodies: some lovely bar end mirrors and headlamp brackets. Push rod seal is in the post in the meanwhile. After an hour of filing the mirror inner sleeve to fit I've got a RH mirror! Will ride it to London this weekend and see whether I need the other side too.
After my ride back from Bristol at the weekend, I realised that:
a) Not having any mirrors is very disconcerting, not to mention potentially lethal and
b) The headlamp is pretty much poo in terms of visibility.
So off to fleabag I go and I bagged myself some more goodies: some lovely bar end mirrors and headlamp brackets. Push rod seal is in the post in the meanwhile. After an hour of filing the mirror inner sleeve to fit I've got a RH mirror! Will ride it to London this weekend and see whether I need the other side too.
Attachments
Rear visibility
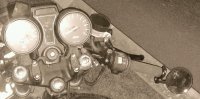
I had heard plenty of nay saying about bar end mirrors and was initially apprehensive about getting some, but now that I've repositioned it above the clip on I can see plenty enough to be able to pull out safely. Didn't notice much vibration and hence mirror Wobblies, but then again I didn't do more than 60mph.
I had heard plenty of nay saying about bar end mirrors and was initially apprehensive about getting some, but now that I've repositioned it above the clip on I can see plenty enough to be able to pull out safely. Didn't notice much vibration and hence mirror Wobblies, but then again I didn't do more than 60mph.
Attachments
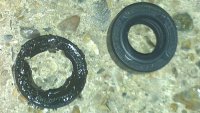
Pushrods seal replacement
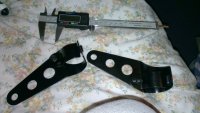
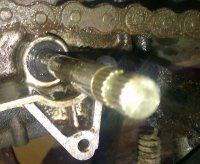
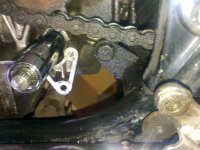
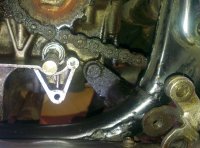
So I thought I'd attempt changing the seal since as far I am aware it may not have been replaced since its birth. Got some engine degreaser and cleaned the inside of the cover and around the pushrod/seal. It was a real b*****d to get the old seal off. It took me a good hour of drilling, needle nose plying and screw driving to get it out, so I celebrated with a victory shout and fist pump... Lubricated the new one with engine oil before driving it in with a few sockets and a rubber mallet.
Other job I did today was to finally replace the old fuse holder with a modern one.
Attachments
SeanGSUK
Strength is measured in tolerance, not mass
I hope the new seal has done the trick? Good thinking with the socket to drift it back in. Standard shifter looks great! Glad it is working out well for you, you're making good progress. I couldn't get on with bar end mirrors, I have a standard one now, never used the left hand side one, I always look over my shoulder, so I ditched it.
Looking good bud.
Looking good bud.
Thanks for the support Sean. Got the headlight brackets replaced today and will get pics of that at some point. It's too early to say whether the oil leak remains-I should've checked before closing the cover but now it's a matter of waiting for any leak to filter to the bottom.
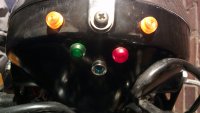
On another note, I want to eliminate the tach and stock idiot lights. I drilled into the headlight bucket and installed some LEDs. Haven't wired them up yet as I dunno whether I need some sort of resistor for each LED as well. Plus I need to figure out the wiring.
On another note, I want to eliminate the tach and stock idiot lights. I drilled into the headlight bucket and installed some LEDs. Haven't wired them up yet as I dunno whether I need some sort of resistor for each LED as well. Plus I need to figure out the wiring.
Attachments
Spring time? Someone tell Mother Nature that!
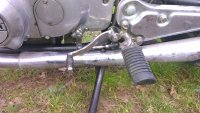
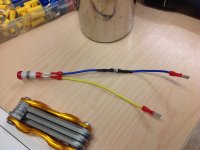
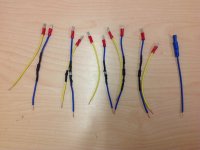
It's been bitterly cold in England, and there hasn't been a chance of working outside without losing your fingers to gangrene yet. Having just finished a 9 day stretch at work, I braved the 1 degree temperature to readjust the gear shifter angle and attempt to figure out the idiot lights wiring system and how that would transpose to my new LED plan. I've prepared a couple of wiring pairs with resistors, ready to transplant into my LEDs once the puzzle is cracked.
It's been bitterly cold in England, and there hasn't been a chance of working outside without losing your fingers to gangrene yet. Having just finished a 9 day stretch at work, I braved the 1 degree temperature to readjust the gear shifter angle and attempt to figure out the idiot lights wiring system and how that would transpose to my new LED plan. I've prepared a couple of wiring pairs with resistors, ready to transplant into my LEDs once the puzzle is cracked.
Attachments

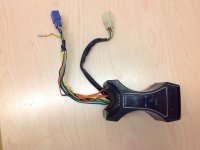
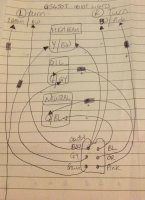
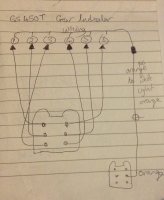
Idiot lights wiring
Deciphered! And whilst I was at it I thought I'd do the gear indicator wiring too just in case. Also made up the new wiring 90%, just need some male connectors and I'll put them on next time it gets warmer.
Deciphered! And whilst I was at it I thought I'd do the gear indicator wiring too just in case. Also made up the new wiring 90%, just need some male connectors and I'll put them on next time it gets warmer.
Attachments

foebux said:What ohm resistors did you use for the led lights? Also how did you figure out the gear positioning?
I used these: "http://www.ebay.co.uk/itm/290694911000?ssPageName=STRK:MEWNX:IT&_trksid=p3984.m1439.l2649"
With the gear position wiring, there was a connector box in my headlamp housing. So I followed this to the individual bulbs in the instrument console. There was a single orange wire going across all of them, which I assumed was the positive from the idiot light connector block (turns out it is the positive that also goes to the oil lamp and neutral light)
I tested its polarity using a cheap multimeter: "http://www.maplin.co.uk/pocket-autoranging-multimeter-626112" and is was indeed the positive. I had a spare 12v battery that I was charging, so I connected the yellow from the removed instrument console and connected each gear indicator bulb to the negative in turn to see which one lit up.
Hope this helps.
DukeN


