Follow along with the video below to see how to install our site as a web app on your home screen.
Note: This feature currently requires accessing the site using the built-in Safari browser.
We noticed you are blocking ads. DO THE TON only works with community supporters. Most are active members of the site with small businesses. Please consider disabling your ad blocking tool and checking out the businesses that help keep our site up and free.
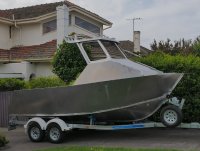
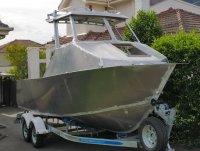
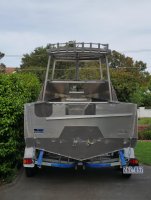
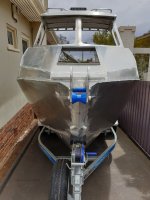
The cabin went on today. It lifted on easily, but did need a bit of manipulation with ratchet straps and G clamps to pull it down onto the hull shear line.
Very happy that when I stand under the cabin there is about 40mm between my head and the grab rails.
It is now filling the driveway.
I bought a second hand Evinrude 130hp Etec which has 301hrs on it. For an Etec that is its first service.
I have an 60hp Etec on my first boat and it has been faultless, with the economy of a 4 stroke but 2 stroke getup and go.
Safety wise, they are the only modern outboard that I know you can rope start if your batteries are absolutely dead - I prefer to rely on the second house battery and if that fails a lithium jump starter. But the point is that once the motor is started it will run without a functioning battery. A lot of other outboards need a functional battery to run., let alone start.
I'd think a 130 should scoot that thing around just fine. What's the finished weight any idea?
Having a pull backup is a great feature, especially for an offshore boat. Several times I've killed a battery without noticing (stereo on, lines down, beer being consumed lol).
I once tried the rope start on a '69 115 horse Evinrude with a shattered bendix. Once. Then got a tow to a place where I could hitch a ride to our marina, call a repair guy on his way already to bring a bendix, and drive back to install the bendix. I was surprised that I got it to turn over at all with the rope, but with the old ignitions and fuel systems there was no chance to start it. Was so happy when we sold that boat and bought a 4.3l I/O.
I'd think a 130 should scoot that thing around just fine. What's the finished weight any idea?
Having a pull backup is a great feature, especially for an offshore boat. Several times I've killed a battery without noticing (stereo on, lines down, beer being consumed lol).
Definitely want to avoid the rope start option. Dedicated start battery isolated from the house battery and I always have a lithium jump starter as backup. I have rope started a 50hp Johnson but it is a big jump to 115hp or 130hp.
Boat should finish up around 1,100kg, so the 130hp is at the top end of the power range for the boat.
Did a fair bit considering the weather. I have to work outside now, and it was windy, which does not work well for keeping the weld pool covered with argon. I up the argon flow and held the torch closer to the weld. The trade off is more heat into the tip, so I burnt up 3 tips in the process.
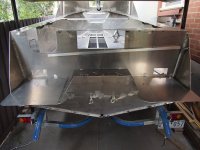
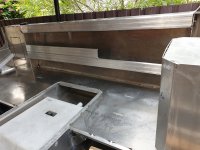
The cabin external seams to the hull are fully welded.
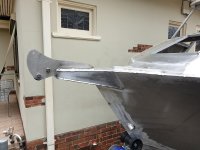
Completed the bowsprit.
My long suffering neighbours have been conditioned to expect these kind of projects. I do limit my work hour between 10am and 5pm so as to not push the limits. The whole neighbourhood is keeping tabs on the progress.
You can see in the background of this video, my wind turbine with a 2m rotor - that is the most controversial.
The project that really got them hopping was the Chinese Valveless Pulse Jet engine. The first time it fired up, the Rosey next door look at her husband and said "What the #uck has he made now!". But as I do all their handy work and repair his boat I do get away with it.
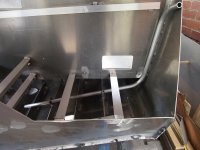
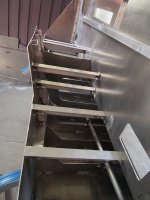
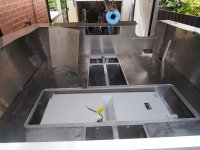
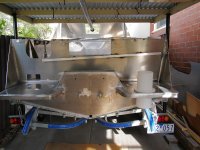
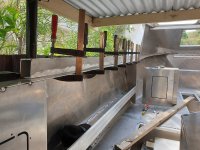
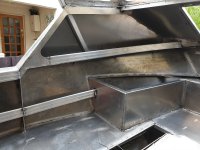
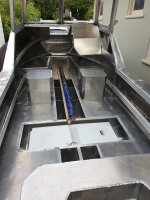
More work this weekend. Focus is now on the under deck, to get it ready to weld the sole in.
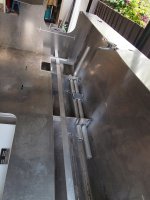
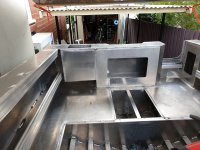
The fuel tank is just rear of mid ship, and the fuel filler is in the rear port side. The main fuel filler line is 38mm aluminium pipe, with flexible fuel line to interface with the fuel tank and filler. Sitting beside that is another 38mm pipe which is a conduit for the fuel tank breather, which also goes up to the fuel filler. The fuel line goes out the other side .
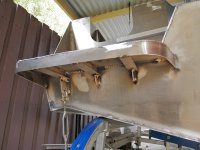
In the transom area, I first needed to make the bilge pump output line. As there is no way of getting back in there once the plates are all welded in, it is made of 25mm aluminium pipe. There is a soft right angle hose to interface from the pump to the output pipe. Finally, welded all the braces from the transom to the half panel, which locks the transom into the deck level. You can see in the last photo the cutouts for the scuppers, which shows the main deck is about 25mm higher than the rear deck to allow a self draining deck.
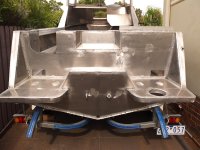
Finished off the transom today. Fiddly time consuming work. I had more gap between the transom and the half panel. I tacked in some strips so I could build the weld up and fill the gap without it all slumping into a molten puddle. Slow and stead and letting it cool between runs.
The rear swim deck needed some structure under it, to stop it bending. The perimeter strip started out straight. I used some heavy tacks on the outer edge, and when I got to the first bend, used a bit of grunt to bend it around the first half of the curve, plus belting it with a piece of 4" X 2" timber (timber does not bruise the alloy) Heavy tack, then some more pushing, hitting and tacking to get it all the way around. It was 4mm 5083 so it has a fair amount of resistance.
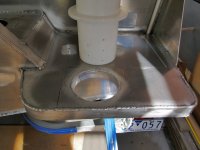
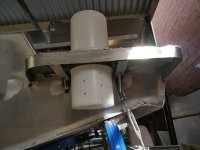
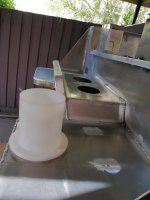
Cut out a mounting hole for the burly bucket, then made up a ring from 40 X 4 mm strip to weld in so that plastic bucket is not against the cut edge.
I also played with the double pulse function and am getting a much better looking weld, with the stacked coin look. The frequency was reduced to 0.8Hz, the low current was turned down to 50% of the peak current. Finally the balance between high current and low current was changed to 40% high and 60% low. Then it was down to technique, move during the low current and pause at the high current.
A wise man on this blog said, "better welding at 10C than 30C" we have had one 44C (112F) and Monday is going to be 42C. Did some work yesterday when it was only 28C and that was well and truly hot enough.
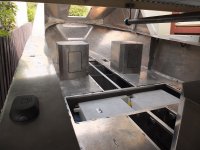
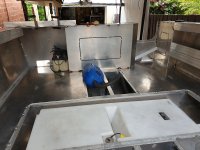
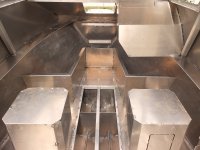
Mounted up the bilge pump, switch and siren (so I know if there is a problem as soon as the pump turns on). To avoid galvanic corrosion by using stainless bolts I am using plastic Christmas tree clips. I have mounted the components so the Christmas tree clips are not under load, they are just keeping the components in place.
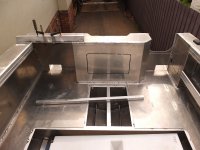
The floor plates have been welded in. The outer perimeter and plug welds onto the bearers are fully welded and the inner edge is just tacked at this point. It was just too hot and I ran out of argon.
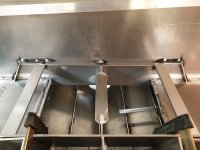
Seat towers are just sitting there to give me a perspective of how it is all going to fit.
We have been very lucky so far. The bush fires are about 30km east of the farm. With luck they are unlikely to move in a westerly direction.
We were burnt out in 2012 and needed to replace 32km of fencing and a couple of hay sheds. There is a volunteer group in Australia called "Blaze Aide" who were a huge help to get the fencing done. It took 5 months to complete the fencing and every day we had volunteers helping in what every way they could. Without them it would have been impossible to get it done. It is now time to pay back the favour and I am going to spend whatever week end I can helping people effected by this years bush fires, replacing fencing.
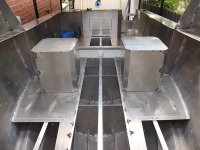
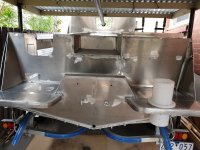
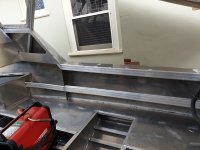
I did get some boat building done this weekend as the authorities are not yet allowing people into the effected fire area. On the transom half panel I finished the recess that provides clearance when the out board is tilted up. On the inside of that panel the cabinet has been tacked in to house the batteries and house electrical systems. Then I welded in the port side pocket. Initially it has one length of extrusion, but that appears too shallow to me. In the photo you can see what it would look like with a second strip of extrusion, that height appears far more functional to me.
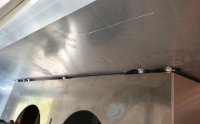
To get the same extrusion onto the gunnel meant that I had to have it absolutely straight. It was not straight due to all the stresses induced from the side panels. In the photo you can see the 70mm X 50mm box section (strong back) that I have clamped onto the gunnel to get it straight, then tack it in place and remove the clamps so I can get the extrusion on and weld it in place. Then cut the tacks and remove the strong back. All went very well.
Not sure when I will have the next update.
Bloody hot fixing fences last weekend, high 30's but it felt more like 40.
The fire area is getting good rain this weekend which will be great in helping the regrowth and peoples moral.
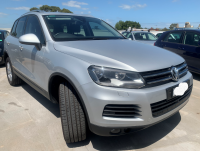
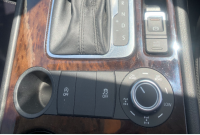
Back in Melbourne this weekend, went shopping on Saturday morning and bought a 2012 VW Touareg that is a very rare model. It has the "Offroad Option" that has 2 speed transfer case plus locking centre and rear diffs. It will pull the boat easily.
Saturday afternoon was spent finishing all the welding on the exterior and interior of the stern.
Sunday afternoon was tacking in the dash and bunks.
Spent the weekend welding, almost used an E size bottle of Argon.
Stitched the inside on cabin seams.
Starboard shelf, the intermediate shelves on both sides.
Fixed the combing to the gunnel inside the cabin to create another shelf.
Welded the bait tank into the stern, and stitched the internal seams of the battery compartment.
Finally welded the floor plate internal edges in. As you can see there are large open panels in the floor. The underfloor needs to be filled with certified marine buoyancy foam. Once the foam is in place and the fuel tank plumbed and wired, access plates are sealed with Sikaflex and fastened in with blind alloy rivets.
I think I am safe in saying that all the structural welding is now complete. Yes the are rails, rod holders, cabin access hatch,etc to finish, but structurally the boat is complete.
This site uses cookies to help personalise content, tailor your experience and to keep you logged in if you register.
By continuing to use this site, you are consenting to our use of cookies.