Follow along with the video below to see how to install our site as a web app on your home screen.
Note: This feature currently requires accessing the site using the built-in Safari browser.
We noticed you are blocking ads. DO THE TON only works with community supporters. Most are active members of the site with small businesses. Please consider disabling your ad blocking tool and checking out the businesses that help keep our site up and free.
Another 3 weeks - maybe , before I can go round to Brian's and get back into the project. A mutual friend collected the header from Brian's garage and dropped it off today, so I can parcel it up and get it sent to Titan Engineering for build up weld and polishing.
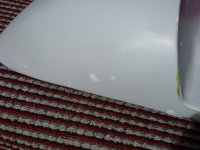
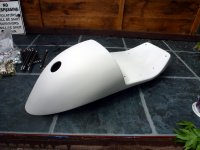
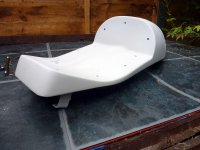
In the meantime I started the final surfacing of the seat base - nearly there now. Then it's primer and a coat of the Metallic Silver to see if we like the colour or not.
Two more days of flatting / filling and I was satisfied that it was very close. It's had two coats of primer filler and I'll give it a matt Black guide coat tomorrow and final surfacing. By C.O.P. tomorrow I should have a final coat of primer on ready for knifing putty for the mini defects and then the Silver.
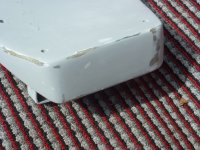
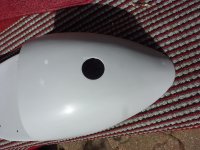
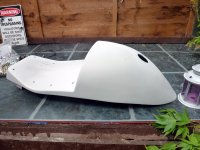
Seat has had final coat of primer and is in Satin Black guide coat now. That will be surfaced tomorrow and apart from a few knifing stopper nicks - I think it's there. I'll be tackling the Manx tank cover next - there's two nasty flats in the side at the bottom front. Oh well, got plenty of time !!!
Knifing stopper all flatted off and I'm finally satisfied it's GTG. 1 heavy coat of primer filler flatted and a a light flow coat of primer filler and I think I'm ready for the final flat and ready for topcoat.
Probably more attention to detail than normal - but this will be stuck out in the breeze for all to see / critique.
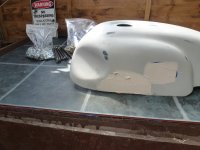
I put a second wipe of filler on the tank sides, I prefer to layer rather than slap a huge lump on in one go. PLENTY of work on this required to get it straight / prepped.
I don't even want to think about the belly pan !! Actually I'm contemplating cladding the sides and bottom with some 1.5mm alloy sheet ..... if I go down that route I'm thinking of adding some diagonal louvres.
The spare head is off to the machine shop tomorrow for twin plugging, I'm going for 10mm or 12mm plugs. The original conversion used 14mm centre plugs and although a similar head has been in use on another bike for many 1000's of miles, I'm not sure about the proximity of the valve seats when the NOS gets squirted.
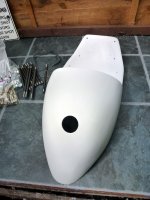
Seat now had final coat of primer, time to break the 600 wet and dry out and final prep for top coat.
The head went off to the machine shop this morning for the twin plug conversion and he is going to make up a threaded retaining ring to secure the fuel filler neck to the seat, and will then have to turn down the depth of the actual cap so that it still seals. Slow but sure !!!
That's it - final primer finish. I'll leave it for a few days then flat it with 600 ready for the Silver metallic. Need to wait for the temp to rise .... it's dropped to 10 degrees today !
Originally I was contemplating Red suede - as with my old Le Mans "Simply Red.
Suede ? Yes the bike will NEVER see rain with me on it !
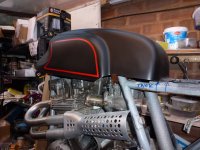
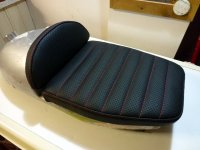
I have Red and Black Jag Connolly hides, both perforated and plain. In the end I went for Black perf. with Red stitching to match the frame colour. When I went in my loft for a bit of a clear out I found 4 half hides of Perf and 2 plain full hides. ! That's from my old car manufacturing years [ Porsche seats ] they've been up there for 20 years. That's around £400's worth of hides just sat up there !
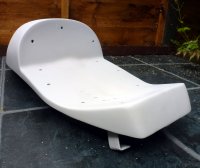
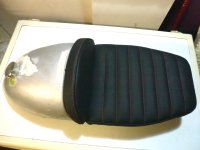
I was VERY tempted to try the seat on when the primer was completed - but once fitted the little "fir trees" have to be snapped off to remove the upholstery from the F/G seat base.
In the pix the upholstery is just loosely placed on the base, when all the fir trees are snapped into place everything is a snug fit. I was going down the route of an alloy base for the upholstery, but my guy used trimmer's millboard which once wetted and heated it retains a shape.
I sprayed the final flow coat of primer on yesterday and should be ready for a trial squirt of the Metallic Silver next week.
I'm still debating with myself if I should spray a front to back Red "Cobra" stripe in the same frame colour I'll use for the "Manx" pinstripes on the tank.
I'm thinking a broad centre stripe that is the same width as the dummy filler cap [ easy way out ! ] with two thin stripes either side. Running through the seat. tank and fairing. Then as the stripe comes over the fairing nose, broaden it out to encompass the "racing number plate".
Damn - I wish I could do those Photoshoppie things !!! The Red masking stripe tape gives the idea
The tank will have Manx style graffix - Red pinstripe - with maybe a second thinner one in Black.
I want to run my old playing # 55 as a race number, but it has to be an old 50's / 60's US Flat Tracker style font. Again all in my mind !
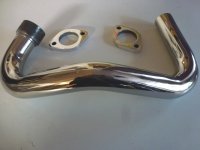
The front crossover exhaust arrived back today thanx to Titan and their band of artisans .......... speechless at what they have been able to do - silk purse and sow's ear springs to mind.
Paul wasn't happy with my rusty MS exhaust flanges - I had asked for stainless when it was originally made. Back came two superb highly polished flanges similar to the one's they use on their Suzuki Cafe Racers.
After being let down so many times in the past year [ yes - year ] trying to get this part right ... it was well worth the wait to have it done to such a high standard. Thanx Titan.
This site uses cookies to help personalise content, tailor your experience and to keep you logged in if you register.
By continuing to use this site, you are consenting to our use of cookies.


") As for the stripe...you'll know when it's in silver...personally it could look cool.
As for the stripe...you'll know when it's in silver...personally it could look cool.