
We noticed you are blocking ads. DO THE TON only works with community supporters. Most are active members of the site with small businesses. Please consider disabling your ad blocking tool and checking out the businesses that help keep our site up and free.
You are using an out of date browser. It may not display this or other websites correctly.
You should upgrade or use an alternative browser.
You should upgrade or use an alternative browser.
The Poor Boy - A Tale Of A CB550- New Electrical
- Thread starter sxecafe
- Start date
sxecafe
You think the Carpet Pissers did this?
Re: The Poor Boy - A Tale Of A CB550- Tank Sealed, Starting Wiring and Exhaust
That's what I thought. I think I might either get a sleeve for it, like the shifter side, or bend a 1/4" rod. Either way they will be powdered black. It just looks pansy.
That's what I thought. I think I might either get a sleeve for it, like the shifter side, or bend a 1/4" rod. Either way they will be powdered black. It just looks pansy.
Re: The Poor Boy - A Tale Of A CB550- Tank Sealed, Starting Wiring and Exhaust
ya it is just cause it is up on the lift and right in your face... i got though that shit all the time makeing a big deal of of something that isnt when itis on the ground. one thing i would sugest is roll the bike off the table on the ground every now and then... whenever i want to get a profile i always make sure to drop the lift to the floor. really helps. also really good when you are doing decals/badging lines... so it is level and looks good. keep at it man the linkage looks awesome ont he shifter. watch yourself if you coat those heim joints...s ome have plastic inserts some do not... if they do they melt out and are a mess... but then again you may get lucky... i ruined mine on my snowmobile and had to buy new ones when i coated them... you can always paint them as well... but on most sport bikes we caot them with no issues... so it is kind of hit or miss
ya it is just cause it is up on the lift and right in your face... i got though that shit all the time makeing a big deal of of something that isnt when itis on the ground. one thing i would sugest is roll the bike off the table on the ground every now and then... whenever i want to get a profile i always make sure to drop the lift to the floor. really helps. also really good when you are doing decals/badging lines... so it is level and looks good. keep at it man the linkage looks awesome ont he shifter. watch yourself if you coat those heim joints...s ome have plastic inserts some do not... if they do they melt out and are a mess... but then again you may get lucky... i ruined mine on my snowmobile and had to buy new ones when i coated them... you can always paint them as well... but on most sport bikes we caot them with no issues... so it is kind of hit or miss
sxecafe
You think the Carpet Pissers did this?
Re: The Poor Boy - A Tale Of A CB550- Tank Sealed, Starting Wiring and Exhaust
Right on man. Thanks!
I wasn't going to coat the joints, just the sleeves. I wanted to ask you if you had any advice on blasting things that are small and round like the sleeve or spokes and/or that brake arm. I feel like I miss a bunch of area but....
Right on man. Thanks!
I wasn't going to coat the joints, just the sleeves. I wanted to ask you if you had any advice on blasting things that are small and round like the sleeve or spokes and/or that brake arm. I feel like I miss a bunch of area but....
Re: The Poor Boy - A Tale Of A CB550- Tank Sealed, Starting Wiring and Exhaust
for spokes i made a rack like i showed you before... but for parts like that. i start on one end and do 1 inch sections all the way around... i always blast with gun in right part in left so the left glove is always clean... this way i do not have to worry about getting the part dirty as i rotate it. hope that helps!
for spokes i made a rack like i showed you before... but for parts like that. i start on one end and do 1 inch sections all the way around... i always blast with gun in right part in left so the left glove is always clean... this way i do not have to worry about getting the part dirty as i rotate it. hope that helps!


sxecafe
You think the Carpet Pissers did this?
Re: The Poor Boy - A Tale Of A CB550- Tank Sealed, Starting Wiring and Exhaust
some more stuff, although small. I had to take the bike off the table to get the shoes on the rear brakes so i could finish mocking up the rearsets.


New Cotters:

Then a shot of how it sits now. I need to drop the front a little. Also, the kick needs about two inches.

some more stuff, although small. I had to take the bike off the table to get the shoes on the rear brakes so i could finish mocking up the rearsets.
New Cotters:
Then a shot of how it sits now. I need to drop the front a little. Also, the kick needs about two inches.
sxecafe
You think the Carpet Pissers did this?
Re: The Poor Boy - A Tale Of A CB550- Wiring Loom Labeled
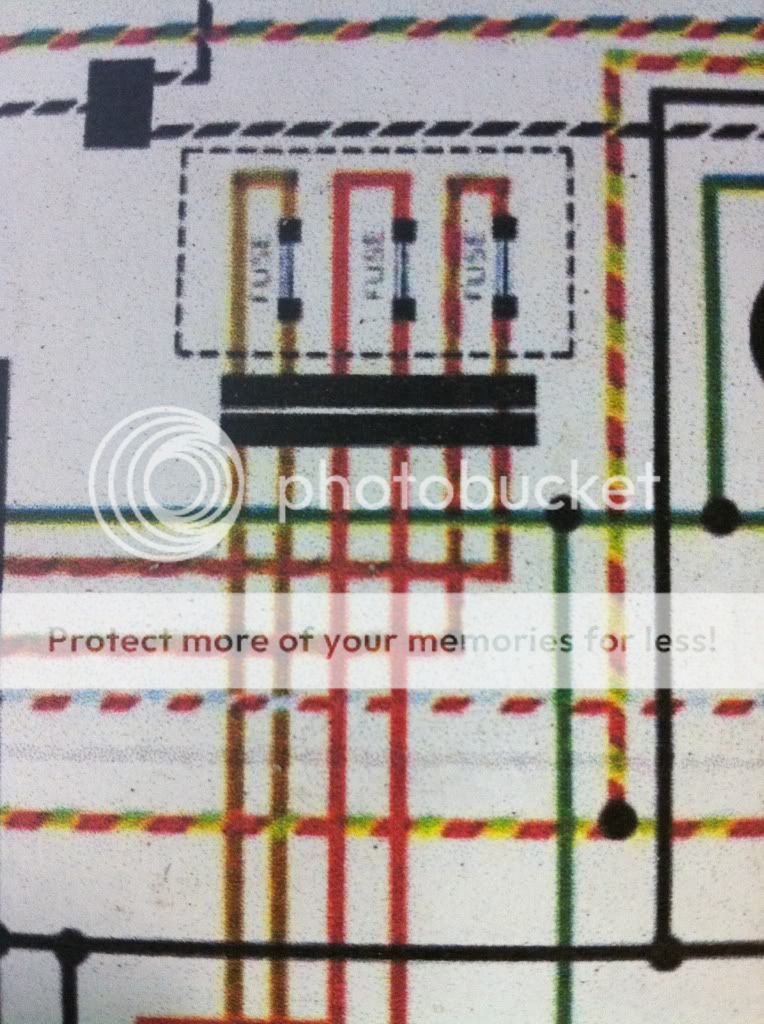
Dudes... the wire loom is a gnarly thing. I spent last night deciphering the diagram and figuring out what is what. Labeled the loom as much as I could but I left about 3 mystery wires. Hoping to get the new connectors in tonight.
Dudes... the wire loom is a gnarly thing. I spent last night deciphering the diagram and figuring out what is what. Labeled the loom as much as I could but I left about 3 mystery wires. Hoping to get the new connectors in tonight.
schaubster
Been Around the Block
Re: The Poor Boy - A Tale Of A CB550- Wiring Loom Labeled
Is that the stock splined shifter arm? Curious if you just modded it or bought a new one.
Is that the stock splined shifter arm? Curious if you just modded it or bought a new one.
sxecafe
You think the Carpet Pissers did this?
The Poor Boy - A Tale Of A CB550- Wiring Loom Labeled
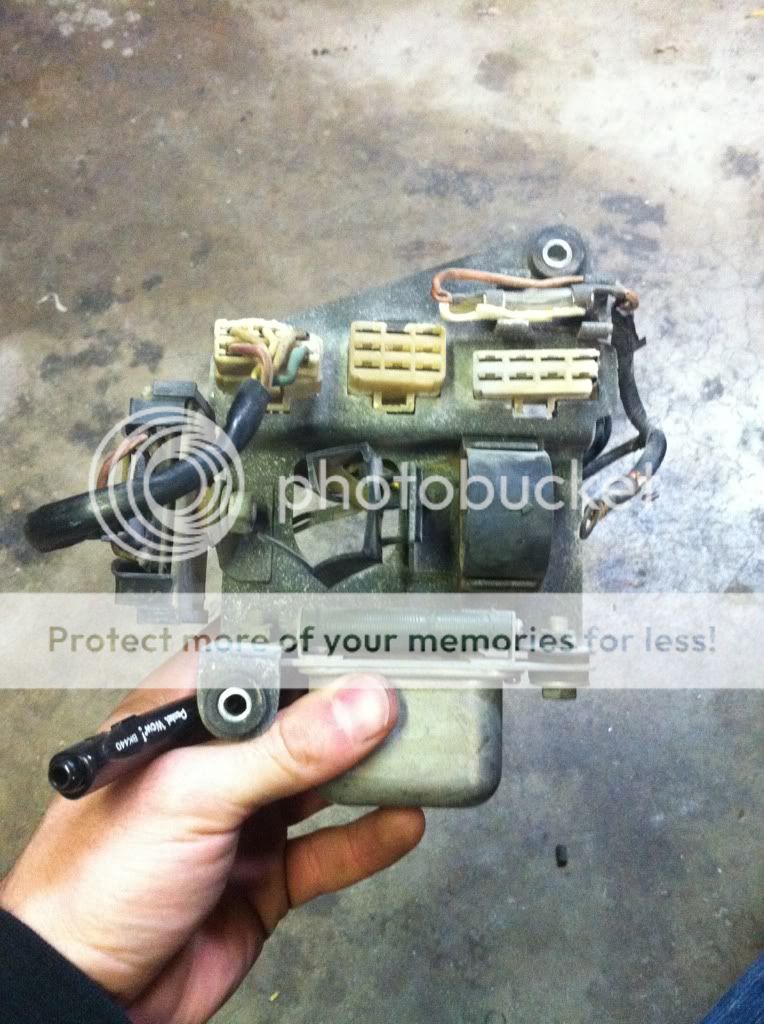
Dug in to the harness more. Seems like I got most of it figured out but I do have some questions, if anyone is so inclined:
The brown running light attaches in the back of the loom to the rear break but the front has no connection... Anyone know?
What are these wires?
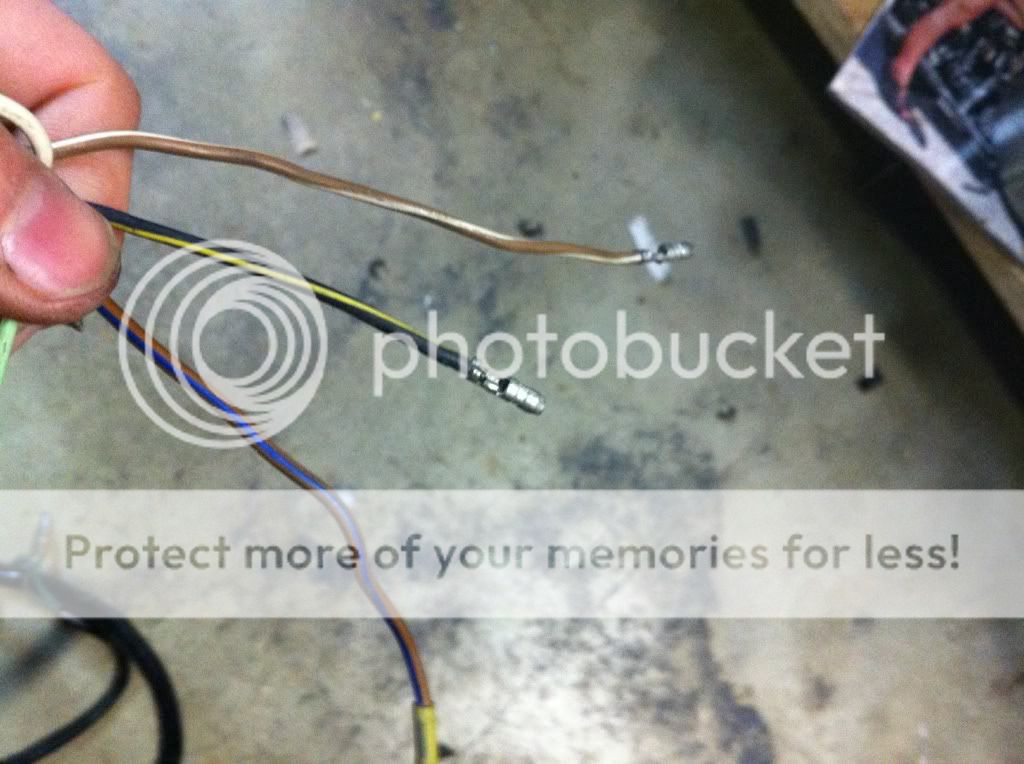
Black and yellow?
Brown and Blue?
Brown and White: high beam?
I have this for the fuse...
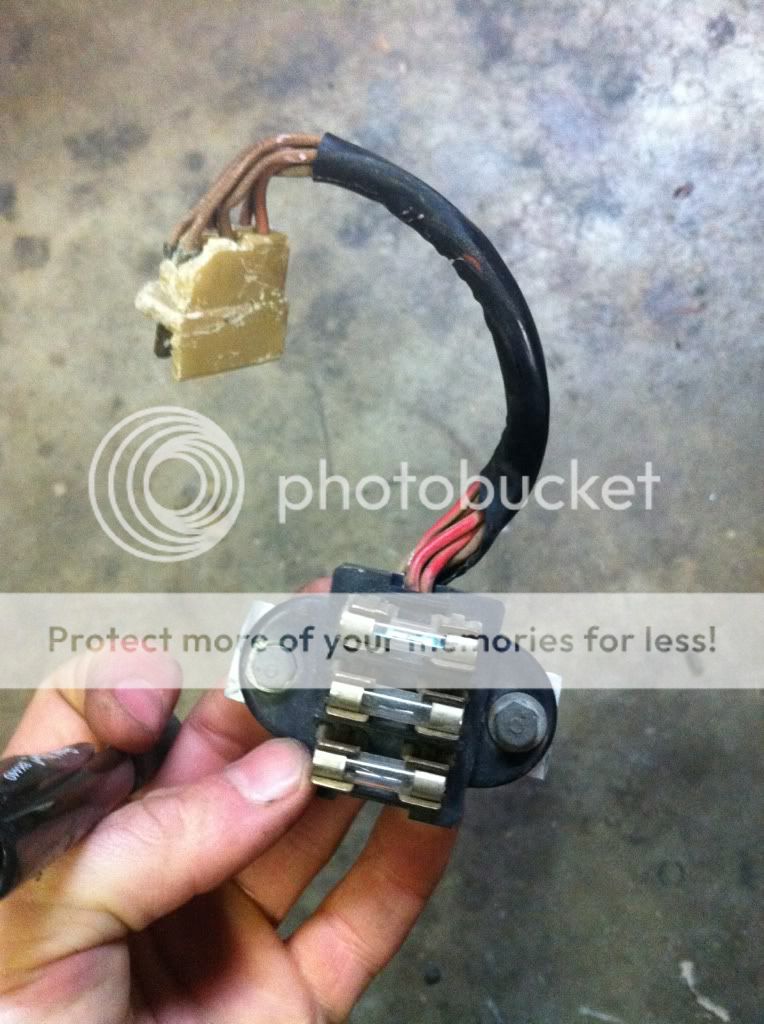
but no female connection anywhere:
Where is this other side?
Any insight would be awesome.
Dug in to the harness more. Seems like I got most of it figured out but I do have some questions, if anyone is so inclined:
The brown running light attaches in the back of the loom to the rear break but the front has no connection... Anyone know?
What are these wires?
Black and yellow?
Brown and Blue?
Brown and White: high beam?
I have this for the fuse...
but no female connection anywhere:
Where is this other side?
Any insight would be awesome.
sxecafe
You think the Carpet Pissers did this?
Re: The Poor Boy - A Tale Of A CB550- Wiring Loom Labeled
Wow! Thanks, man! I really appreciate that. Hopefully soon!
Anyone know about these wires?
friggs said:Just read from pg1 and looking forward to seeing the end product! Really like all the detail and the little extras, will be keeping an eye on this thread")
Wow! Thanks, man! I really appreciate that. Hopefully soon!
Anyone know about these wires?
Maritime
Over 10,000 Posts
Re: The Poor Boy - A Tale Of A CB550- Wiring Loom Labeled
The solid brown tail is the same as I think the baby blue in the headlight bucket for the running lights. The brown blue stripe may go to oil pressure switch?? Black and yellow may go to your starter solenoid and brown and white may be signal? Those are guesses but one also may be to condensor or to points? There are a few single wires that come out different colour from where they start on hondas. If I wasn't 200 miles from my bikes I could guess better. Sorry to be not much help but maybe look those components up on the diagram and see what colour they are. Your fuse box should go into a plug that comes from your RR and stator or battery, can't remember ugghhh been to long since I have had my hands on a bike. Sorry most of what I said is probably gibberish.
Mike

jimid
Active Member
Re: The Poor Boy - A Tale Of A CB550- Wiring Loom Labeled
hope this helps:
The female connection for the fuse loop is floating in the harness. It is not mounting on the "circuit board" you have taken a picture of.
If you need any more specific help i have a 550 in boxes with the electrical separated. Could take a few pics or something.
hope this helps:
The female connection for the fuse loop is floating in the harness. It is not mounting on the "circuit board" you have taken a picture of.
If you need any more specific help i have a 550 in boxes with the electrical separated. Could take a few pics or something.


