vintage race CB350 - last 10% is the hardest

Re: vintage race CB350 - wheels done

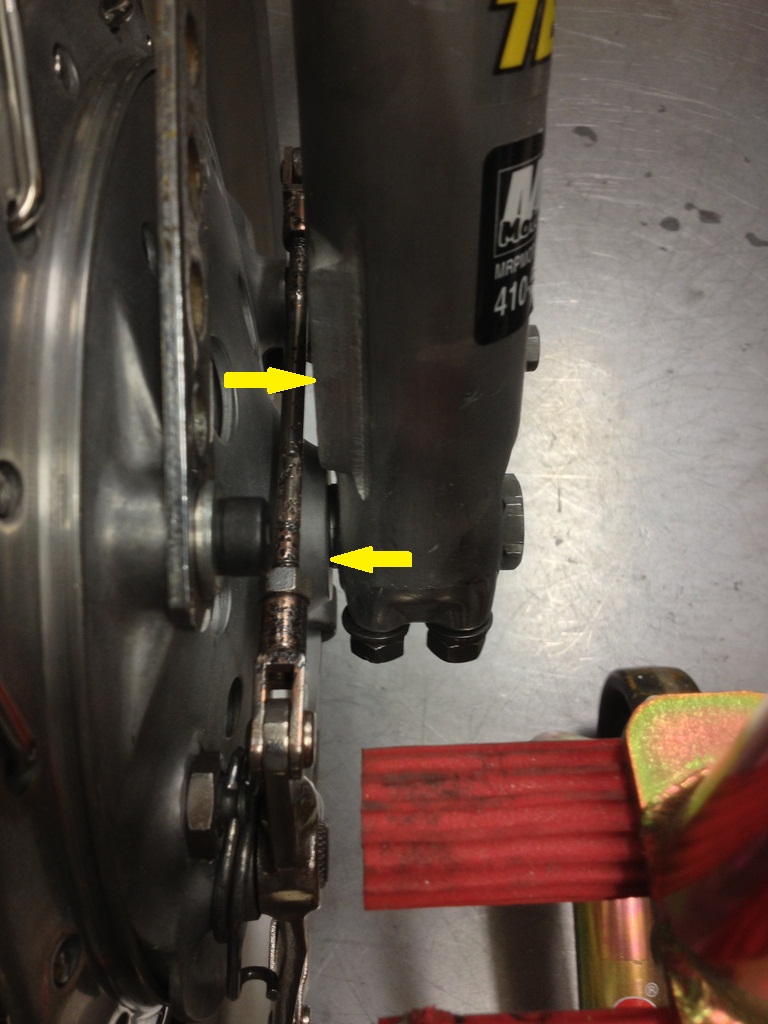
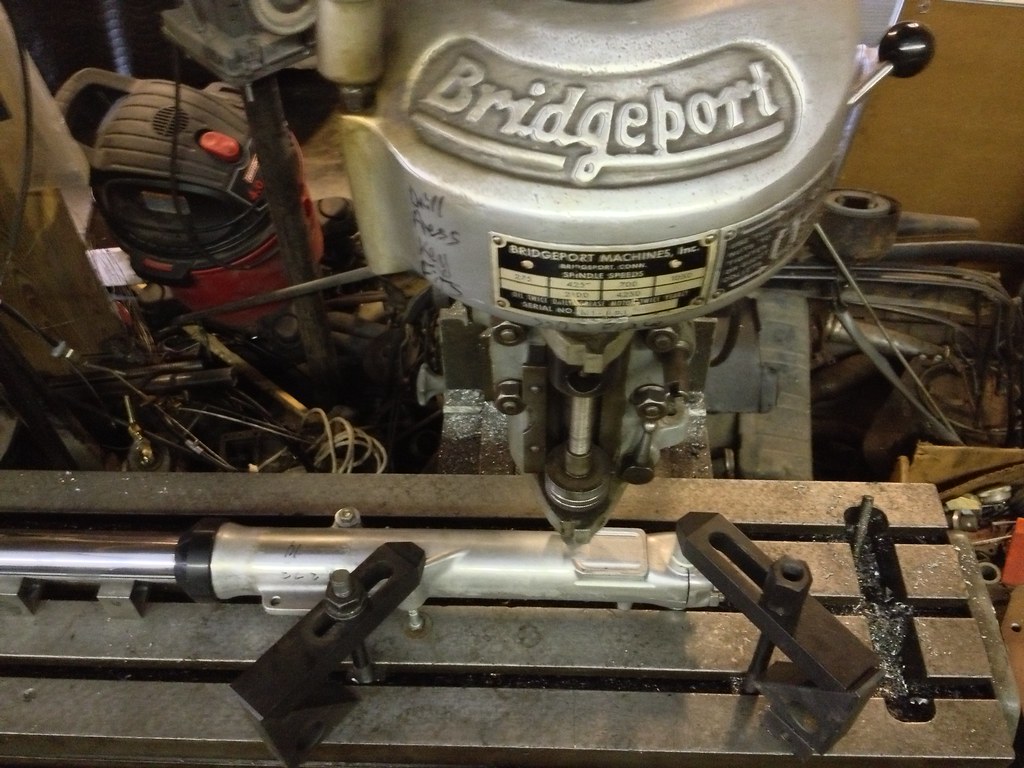
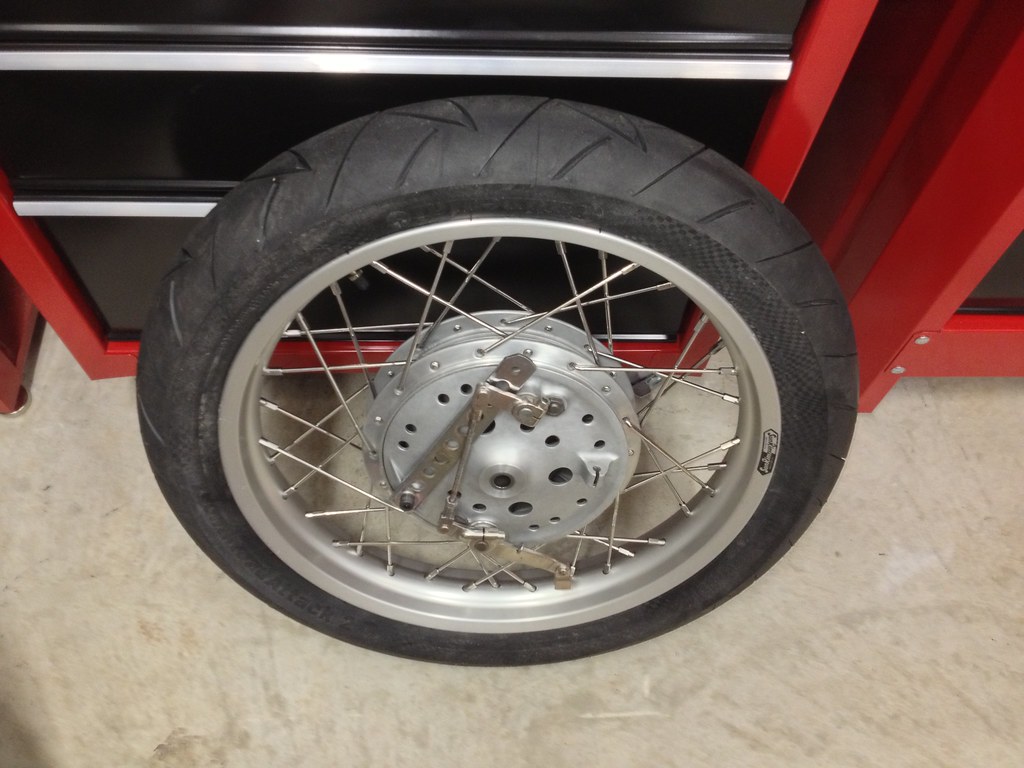
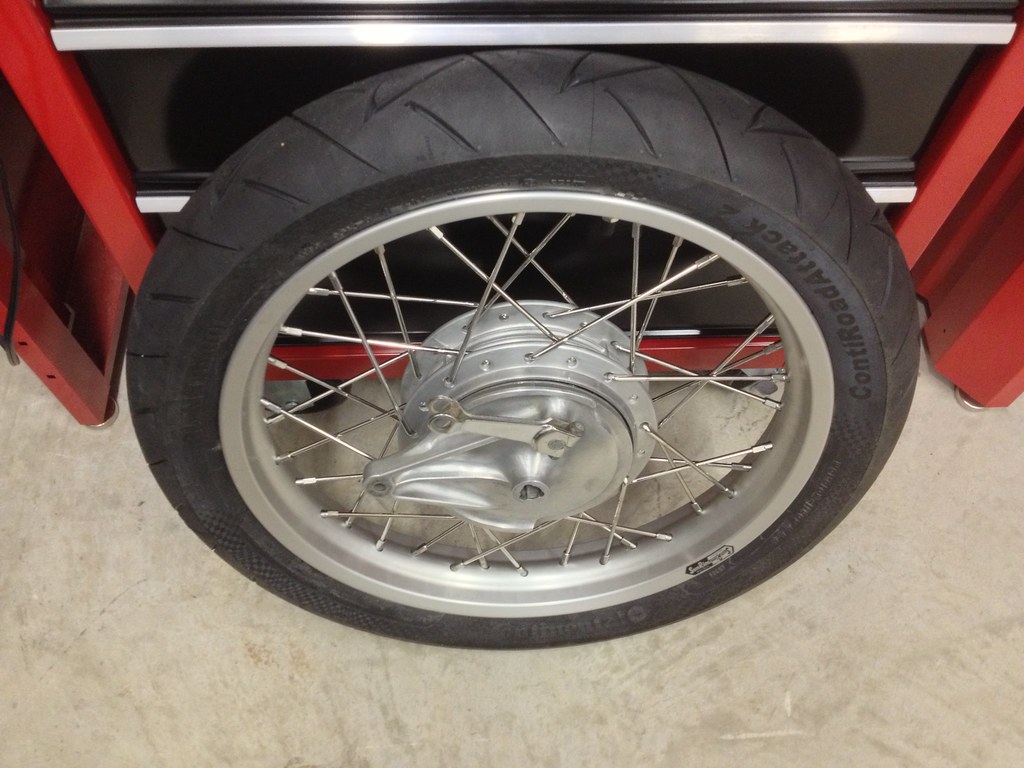
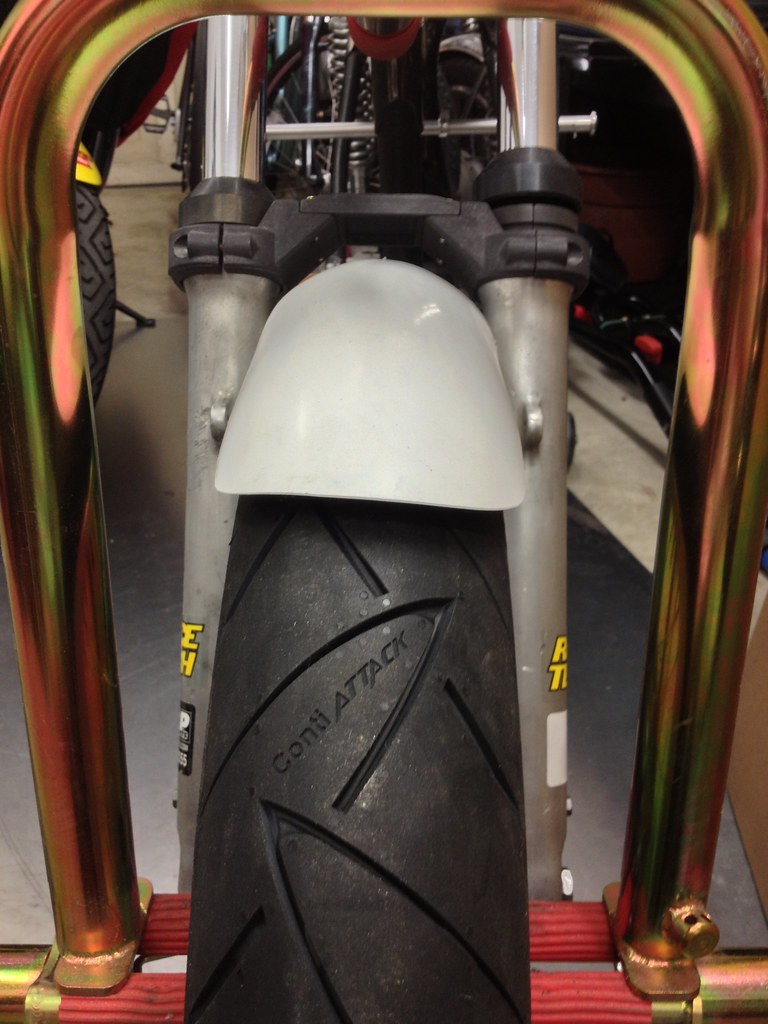
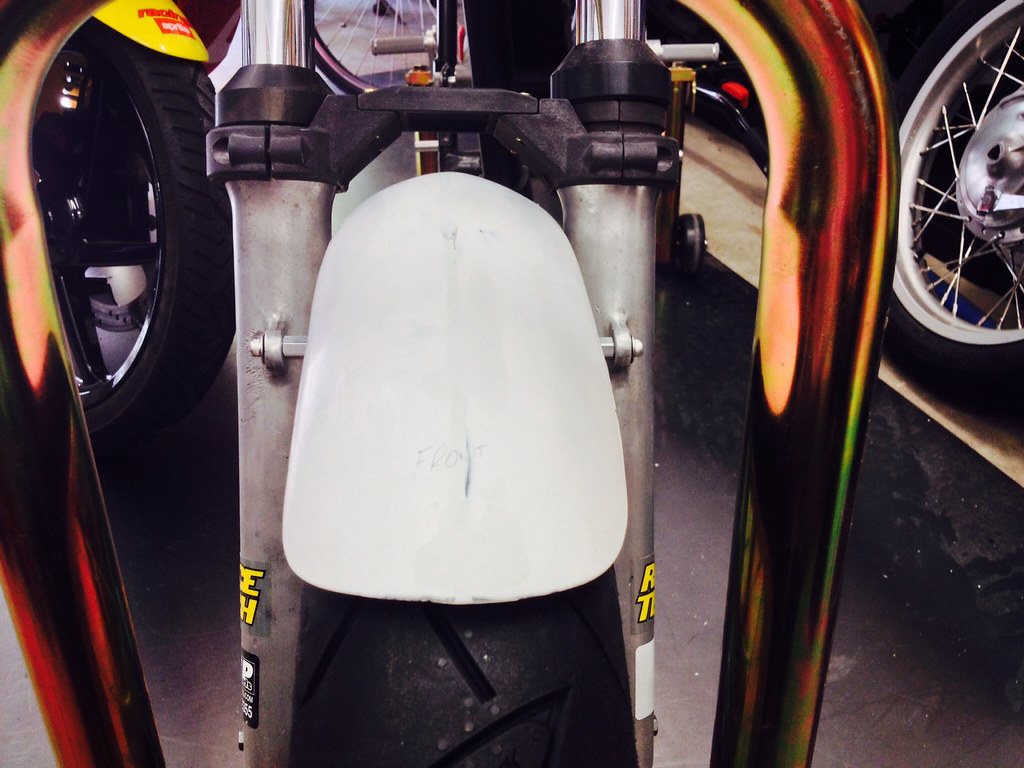
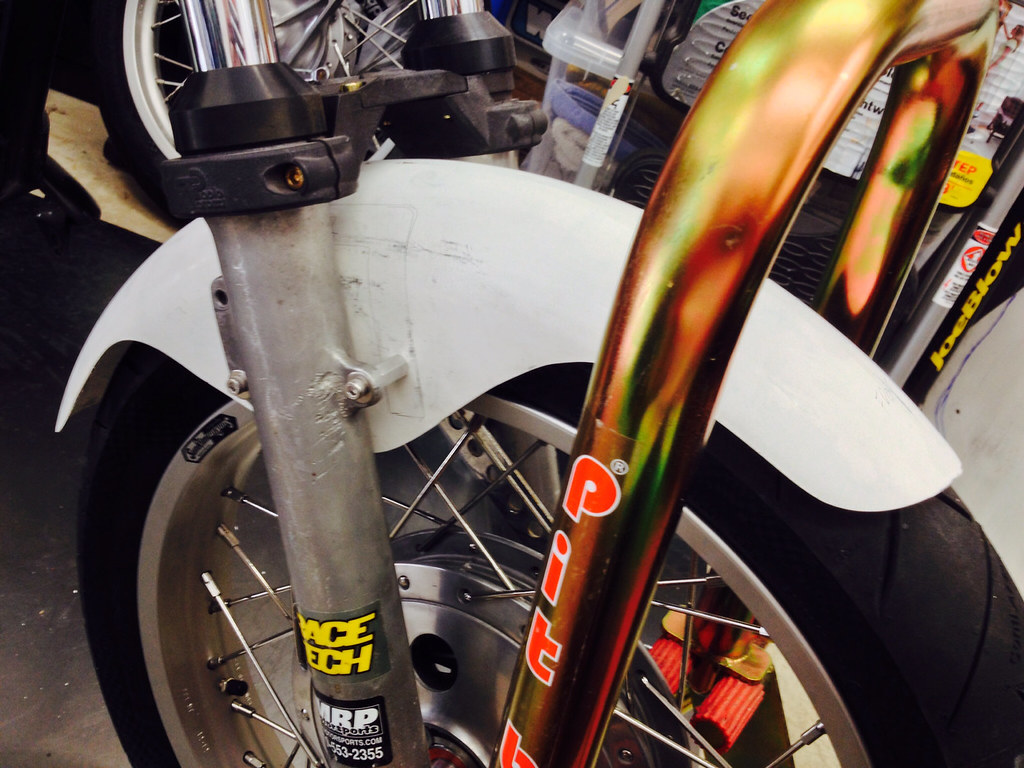
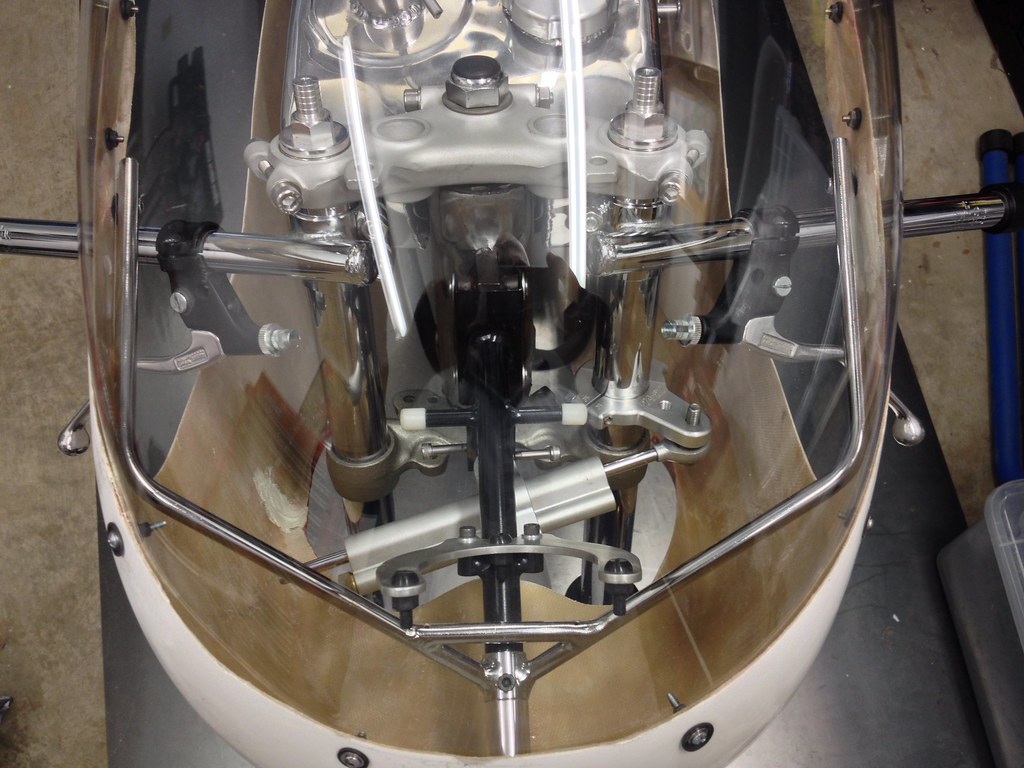
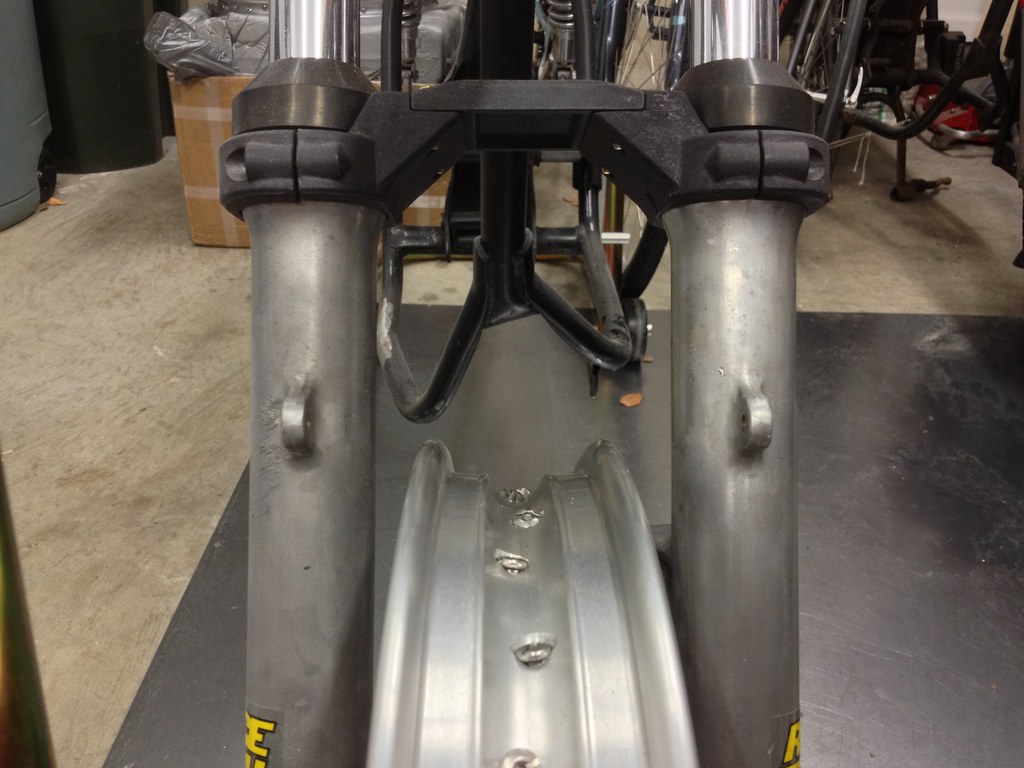
Now that I've got most all the parts I need it's time to make things fit. Here I'm trying to get wheel centered between forks.


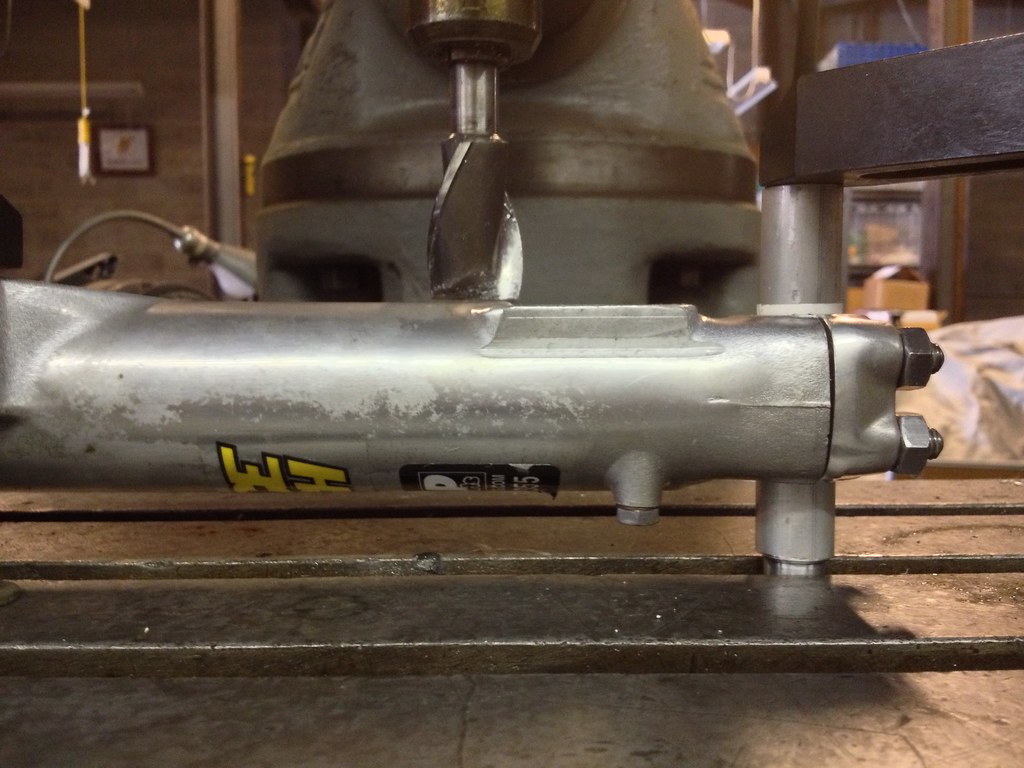
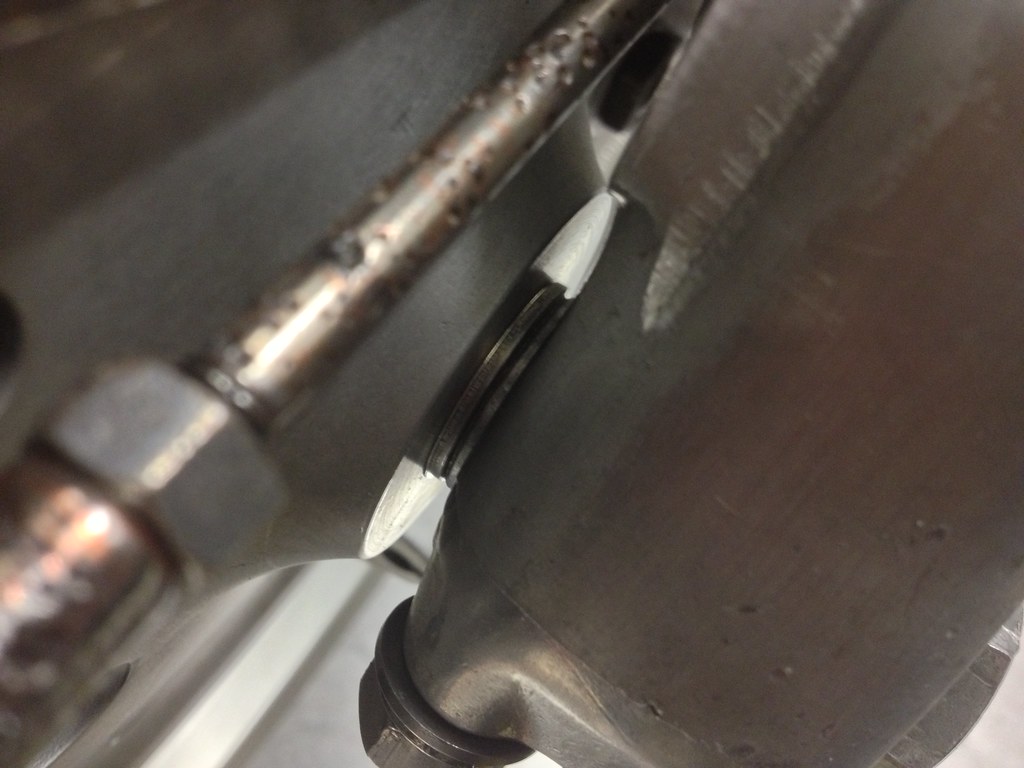
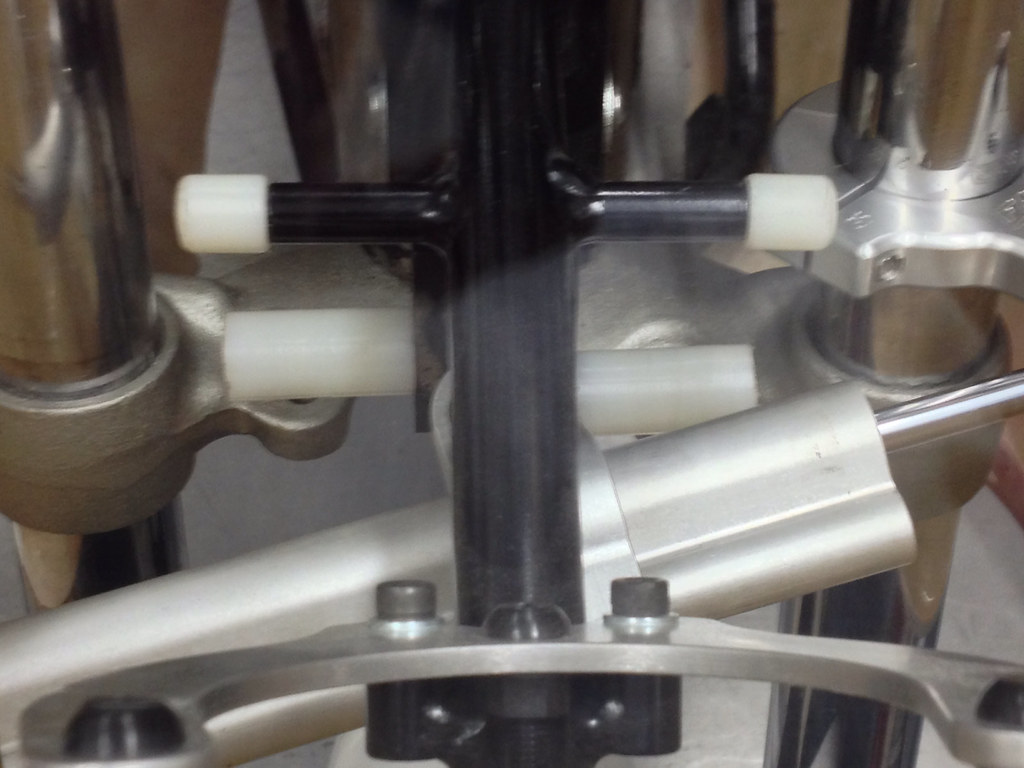
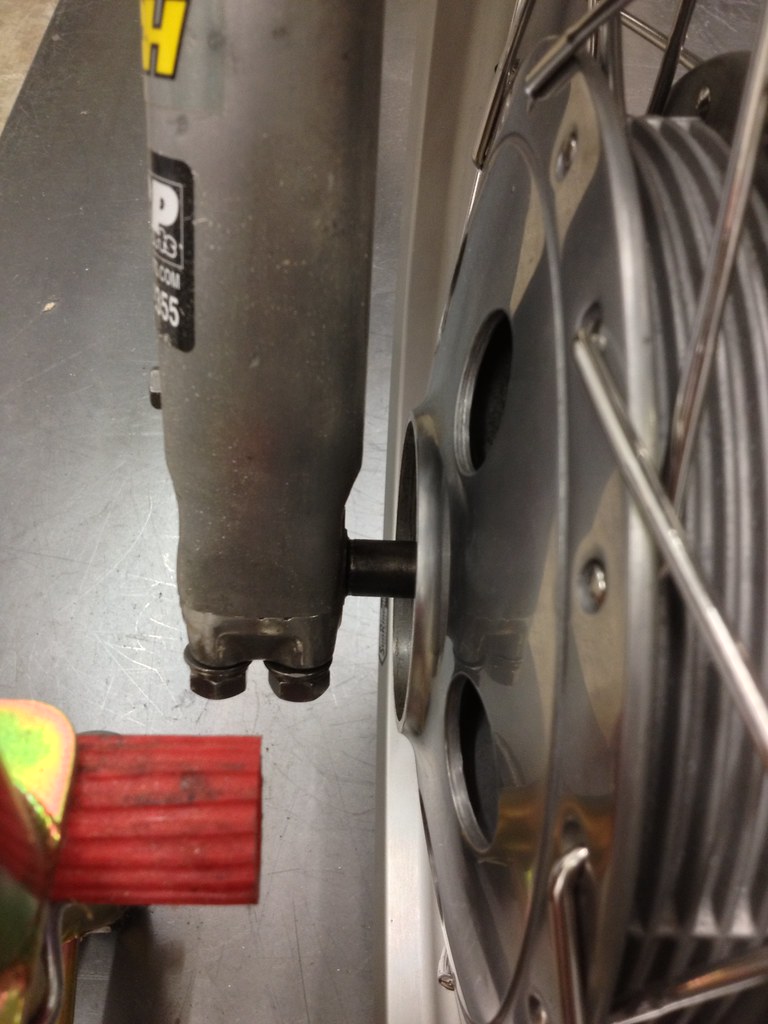
Right side axle clearance


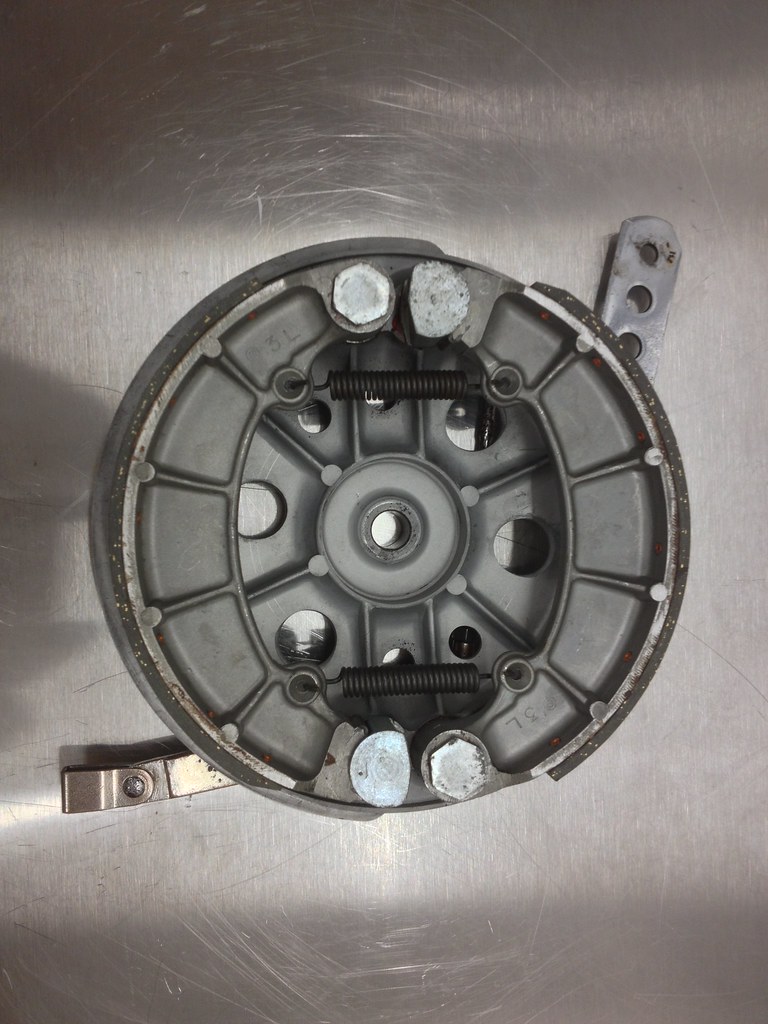
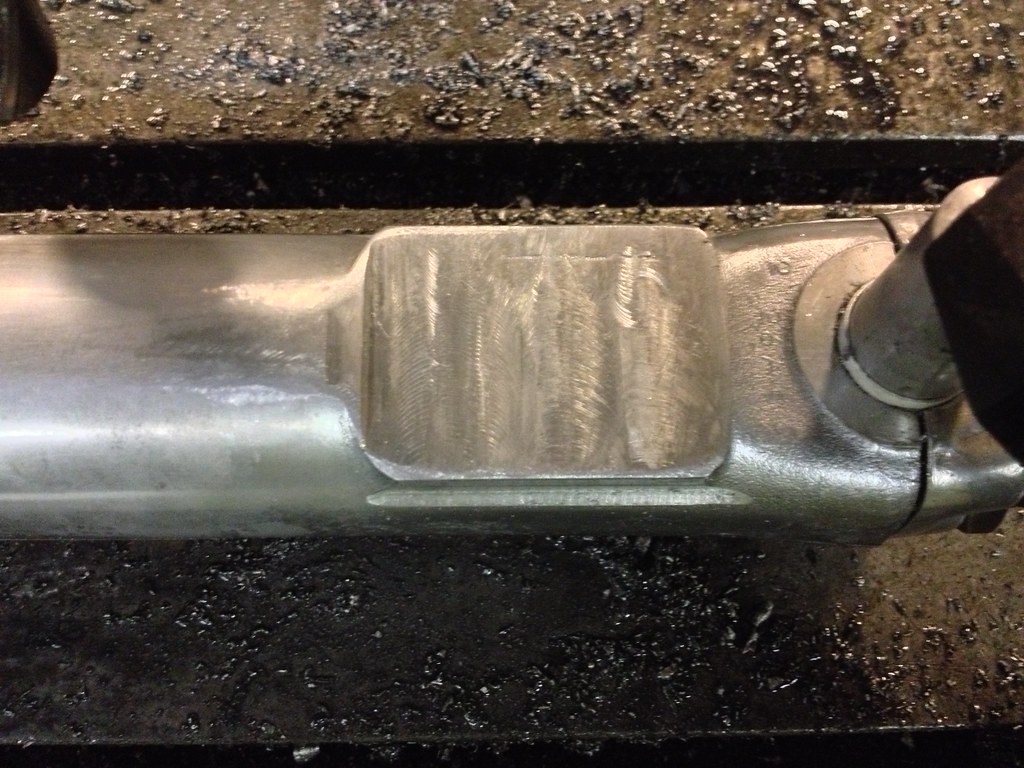
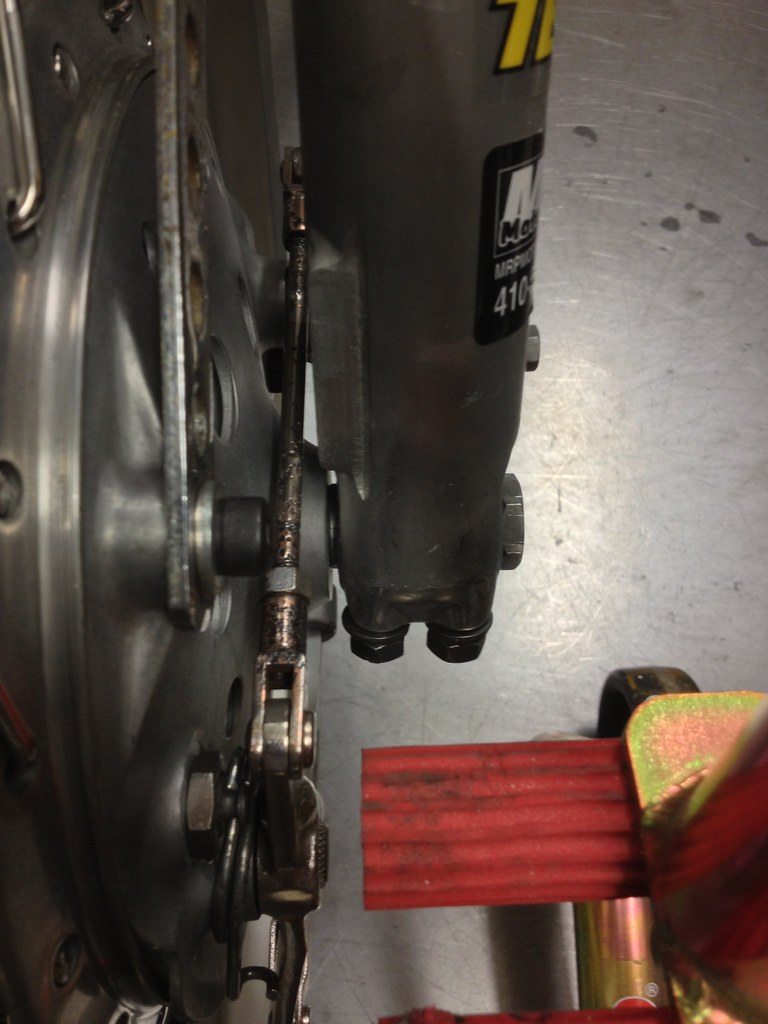
Left (brake) side clearance


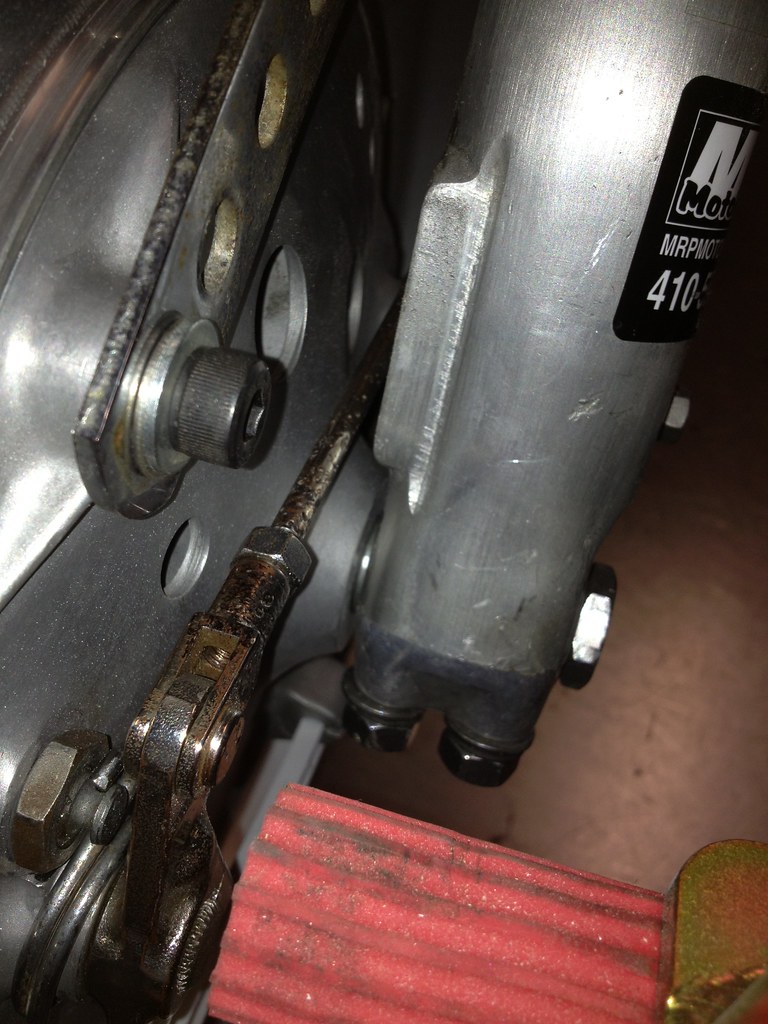
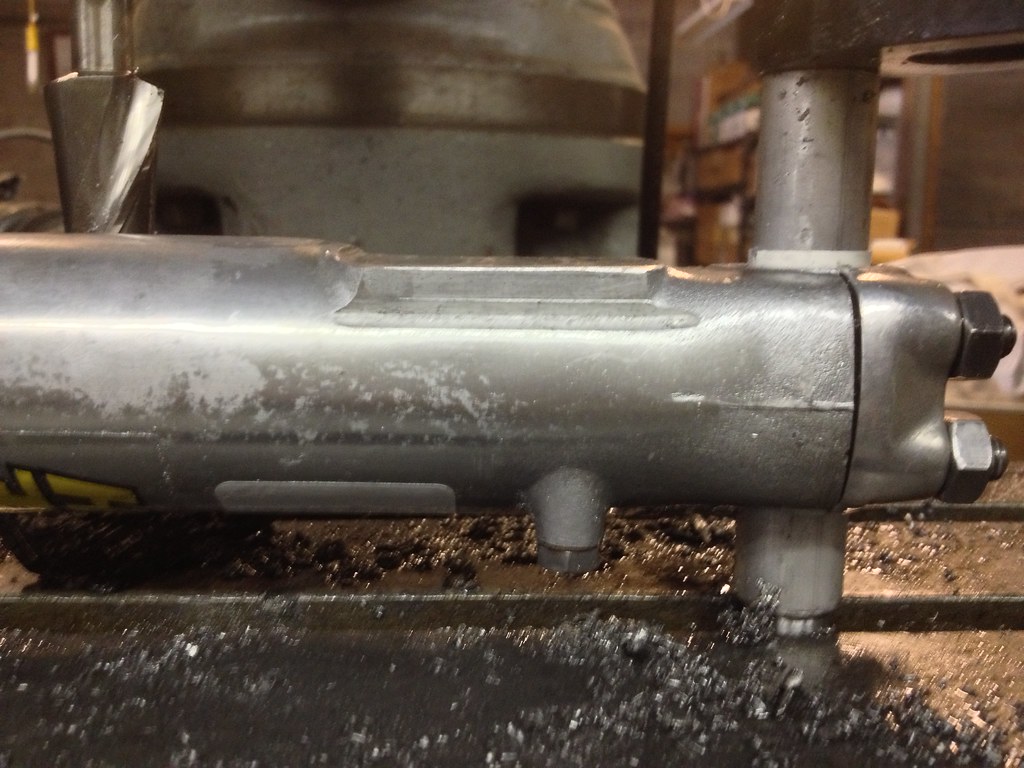
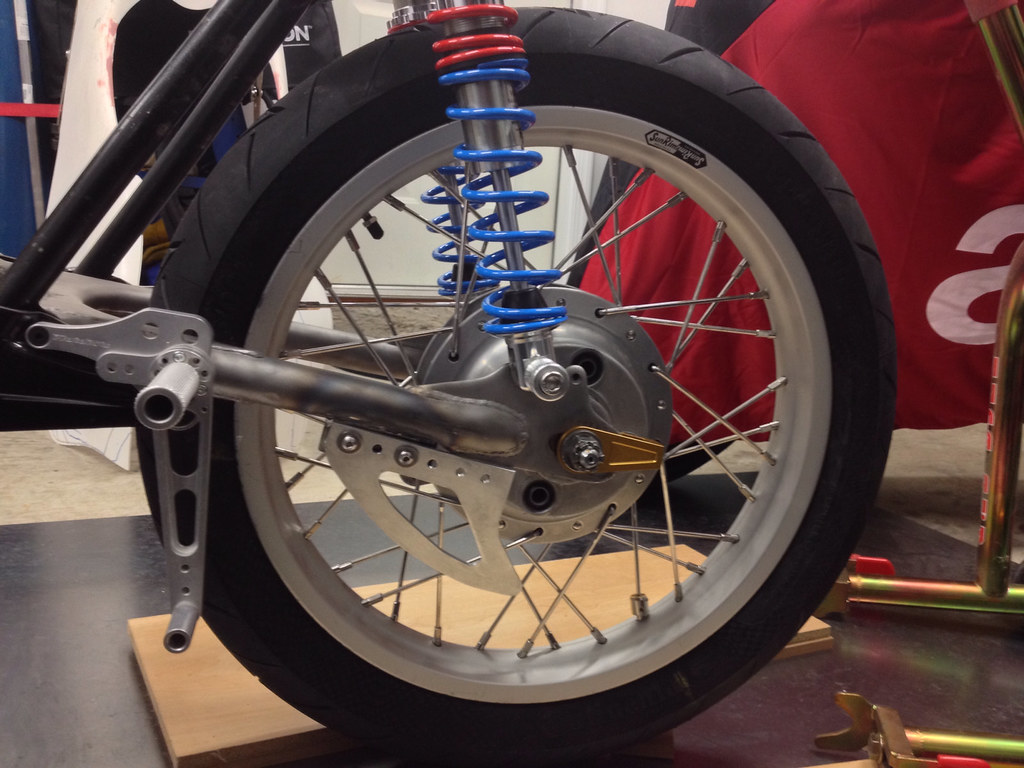
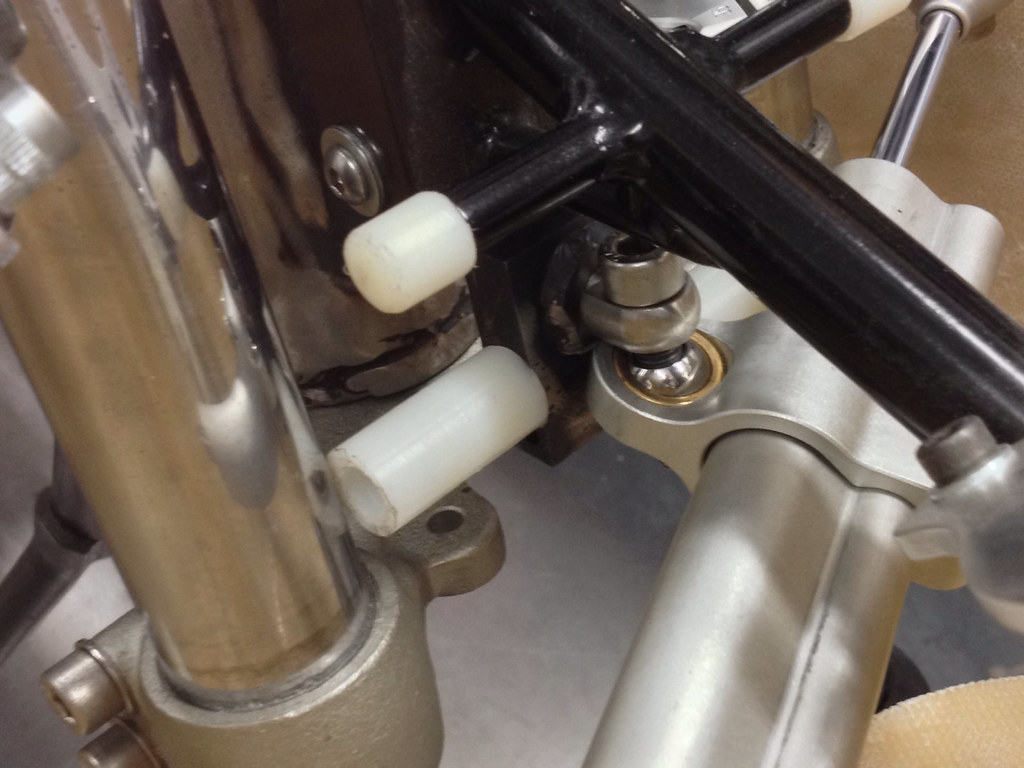
Brake torque arm offset. I may need a small standoff spacer for the brake torque arm so that it remains straight.


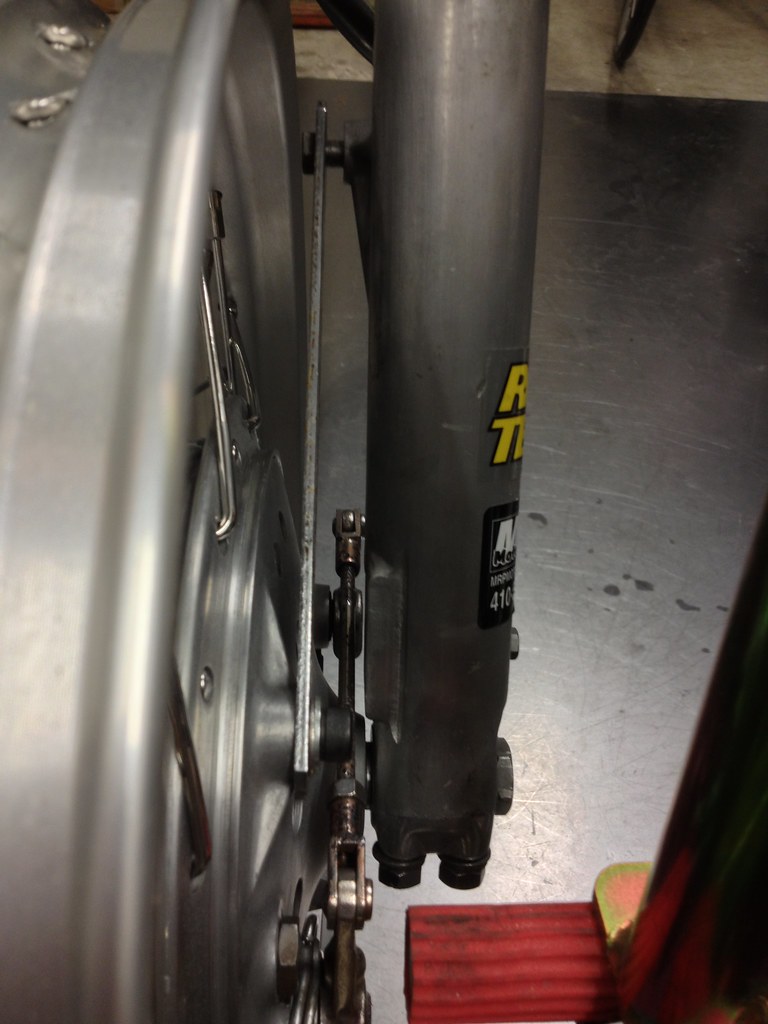
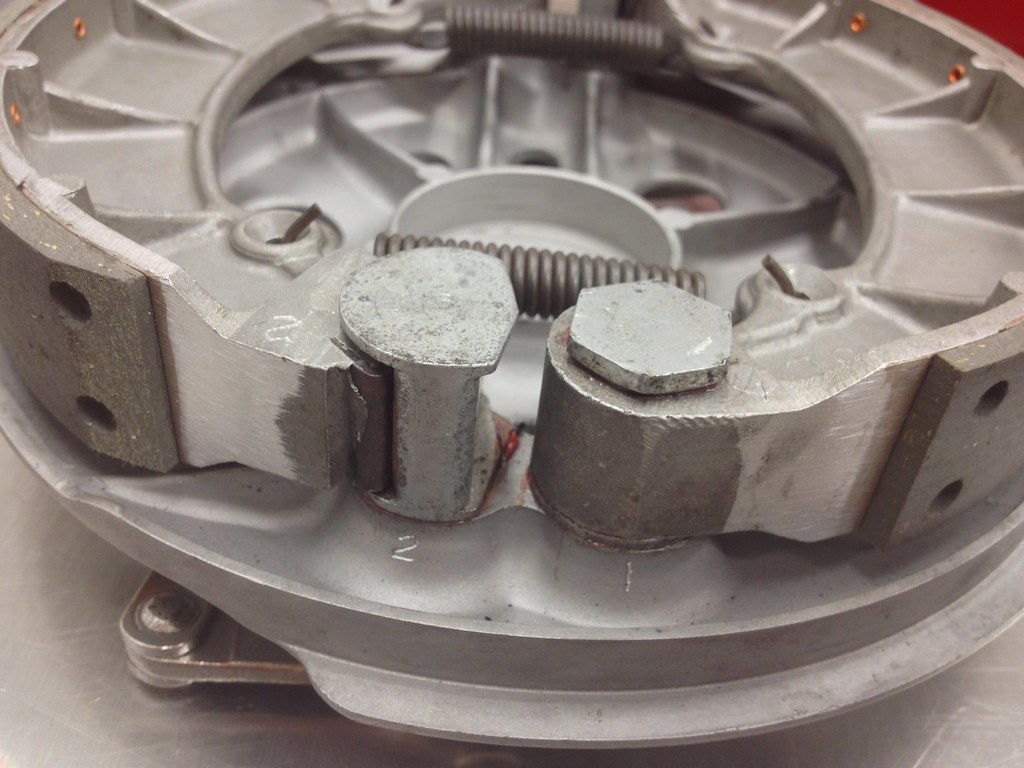
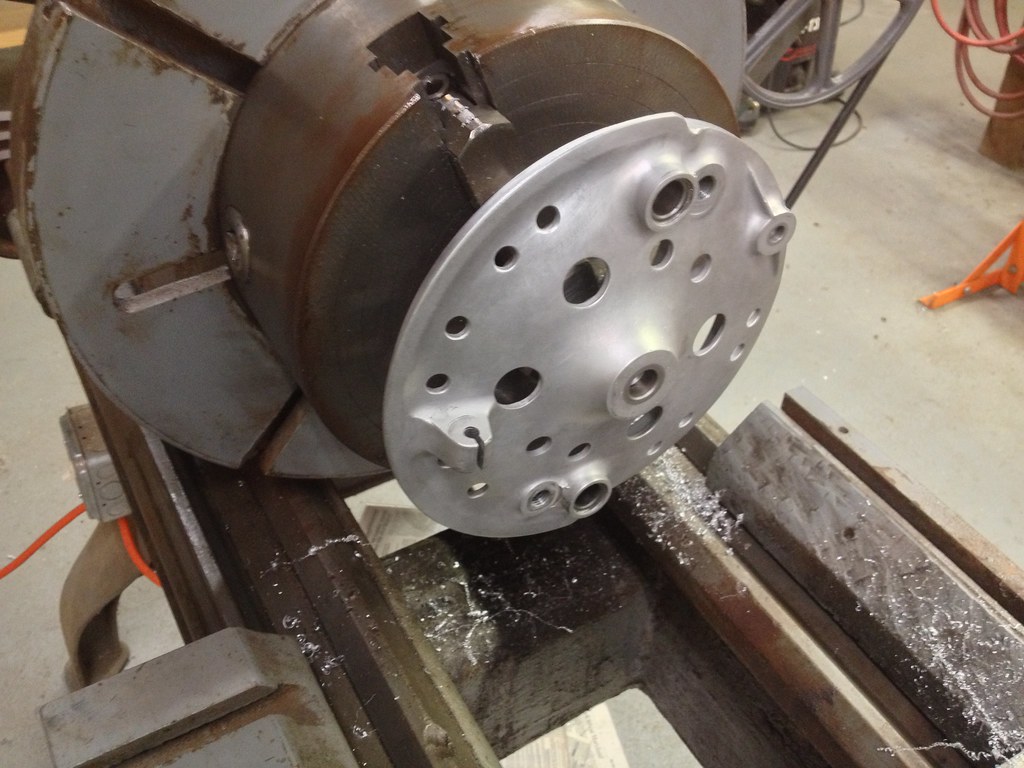
I took numerous measurements and I've learned the wheel needs to move to the left (brake side) approximately 2.9mm for the wheel to be centered in the forks. To accomplish this, I'll need to shave the brake plate 2.9mm and also the inside of the fork leg about 1.5mm for the linkage to clear. I'm wondering if it's worth keeping the SL350K2 triple trees or if I should go for something wider so I don't have to machine the brake plate and for leg?
 
Re: Re: vintage race CB350 - wheels done

freedomgli said:
I'm wondering if it's worth keeping the SL350K2 triple trees or if I should go for something wider so I don't have to machine the brake plate and for leg?

What's the benefit of keeping the triple? Extra work? :)
 
Re: vintage race CB350 - wheels done

The benefit of these triple trees is they bolt directly onto a CB350 with no mods and allow 35mm forks. Keeping them would be saving time and money and effort. The triple trees have already been refurbished, fitted with new hardware and tapered bearings pressed on. Plus I have a spare set in the event of a crash.

Talking with some other people and it seems ok to machine a few mm on the brake plate and fork leg to make it fit. Time to visit the machinist.
 
Re: vintage race CB350 - wheels done

What I meant was to question whether those benefits outweigh the machining cost.
 
Re: vintage race CB350 - wheels done

I called in a favor and a buddy is letting me use his Bridgeport to machine the brake plate and fork leg. Only tricky bit is figuring out how to best fixture them to the table.

Arrows indicate area to be machined

To center the wheel between the forks, I need to move the hub to the left approximately 3mm. To do so I must remove approximately 3mm from the center portion of the brake plate where the axle passes through. To provide sufficient clearance for the brake linkage, I've also got to remove approximately 1.5mm from the inside of the left fork leg. The XL250 has a brake stay lug cast into the left fork leg. This area is rather thick, so I should be safe to remove some material here.
 
Re: vintage race CB350 - wheels done

Outstanding build amigo. I too plan on vintage racing a cb350 with wera. Seems they've added a Njmp date to their calendar too. Great crew those vintage dudes. My modern racing days are over as I just feel silly spending 400 on tires alone each weekend. I'll be using your build for reference and inspiration after I complete my current 72 cb450 build. Thanks for sharing your progress in such detail.

I would have gone racing with the 450, but there really aren't many classes available for that size twin motor.

Question: you are running 18s front and rear? Is this a standard for the 350 class?

And the cb77 drum, you feel will have enough stopping power? I know a lot of guys like to run those big old Grimecas that came on the guzzis and laverdas.
 
Re: vintage race CB350 - wheels done

Thanks for the compliments. Good luck with your build Arc! I do what I can to encourage more people to take their CB350 to the track and help fill the grid.

I'm running WM3 (2.15) x 18 in rims front and rear because these were the proper rims for the tires I chose. Some people go with WM2 front and WM3 rear. It all depends on what tires you run and how you want your bike to feel. Pretty much every CB350 is setup with 18s. They came with 18s from the factory, racing rules often times dictate 18" wheels, good race rubber is widely available in 18" and it's what everybody else is running so monkey see, monkey do. There may be one or two bikes AHRMA novice production class bikes running 19" front rims from the CL350 but that would be exceptionally rare. A 19" front wheel would most certainly be a performance disadvantage on the track. You can't run 17" rims in most vintage race classes so don't bother.

I think I'll have plenty of stopping power with the CB77 drum. While it may lack the ultimate confidence of a 4LS drum, it is pretty light in comparison and is powerful enough provided you use proper race compound shoes. If I had an unlimited budget I'd probably run GCB Ceriani GP35R forks with magnesium triple clamps, Fontana 210mm 4LS magnesium drum brake, etc. But since I don't I'm just happy saving that money and putting it towards travel to more race tracks and ice cold beer.

I've heard great things about the NJMP event. I look forward to racing there one day soon.
 
Re: vintage race CB350 - wheels done

Nice work! I just bought a cl350 for a future project. Still finishing my little 125. Anyway, for your screen solution, check out this:

https://ventmastersstore.com/shop/open-screen-vents-c-23_34.html

The only size close to your holes is 1.5. Not sure if you can open them back up now that they are laced.

A couple questions.

What mods did you do to the forks?
Where did you get the tank?
 
Re: vintage race CB350 - wheels done

freedomgli said:
Thanks for the compliments. Good luck with your build Arc!...

...I think I'll have plenty of stopping power with the CB77 drum...

...I've heard great things about the NJMP event. I look forward to racing there one day soon.

For sure man. A 350 will be my next build, a budget racer for sure. Just like you, I'd like to spend the money on track time. The Summit Wera round is great for the Vintage guys. They run on saterdays and drink beer for the rest of the night. I ran the 600 class a couple years ago and met some salty dogs. You can camp and have fires at night. Sometimes the run supermoto night races on the little track at night as well.

I didn't realize the 350 came with an 18. The 450s came with a 19 for some reason.

So the CB77 will do huh? I'll apply the knowledge you've bestowed upon me to the next build. I'll wait on the Grimecca for when I have a bigger budget and little more experience with these bikes.

Keep going man, we want some more progress.
 
Re: vintage race CB350 - wheels done

Here is the latest progress I've made:

1. Stripped the brake plate down again, paying careful attention to where everything goes, photo-documenting details along the way. Vintage Brake did me a favor by engraving the shoes and the backing plate (1-1, 2-2).


2. Made arbor to fixture the brake plate. Making chips with Lodge, Davis & Co. lathe circa 1885. It only holds accuracy to ~ 5 thousandths of an inch and I'm trying to make an arbor to hold my brake plate with a 0.001" interference fit. My machinist friend Bill says do all the cuts with one setup and polish by hand to get the last few thousandths. If only I'd known that beforehand.... Good thing aluminum is soft and my brake plate has a steel bushing.


3. Brake plate mounted on arbor. Three jaw chuck mounted on a faceplate.


4. Another piece of the puzzle. Machining the left fork leg for brake linkage clearance on ye olde Bridgeport.


5. Fork leg de-lugged.


6. Crappy axle spacer. This is what happens when you don't have the right size drill bit and try to hog out 30 thousandths with crappy Harbor Freight adjustable reamers. Wrong tool and wrong method for the wrong job. But sometimes you've got to do what you've got to do. Fortunately, the ID of the hole isn't super critical so long as the spacer is square with the bearing and axle. The perfectionist in me might redo this spacer at some point.


I put it all back together and wouldn't you know it I over shot it by a little bit! C'est la vie. I'm no machinist. Just a hack trying to build an old bike. I'll have to study my drawings carefully to see where I went wrong. I'm thinking I doubled the amount I was supposed to remove in order to center things up. Fortunately, it's an easy problem to fix. I just need a very small shim on the brake plate side and I should be all set. So close yet so far....
 
Re: vintage race CB350 - wheels done

eyhonda said:
What mods did you do to the forks?
Where did you get the tank?
Front Suspension
Type: 35 mm Showa telescopic forks from 1972 Honda XL250 Motorsport
Fork Internals: Damping rod deactivated by brazing orifices shut, fit RaceTech Gold Valve Cartridge Emulator (FEGV3301) and Emulator Adapter (FPEVAD3003)
Fork Springs: RaceTech 23.5 x 410 mm, 0.75 kg/mm (FRSP S2341075)
Fork Oil: 20W (may use 10W or 15W depending on how it all feels)
Fork Seals: 35 x 48 x 11 mm
Compression Damping: Varies depending on RaceTech Gold Valve Cartridge Emulator valve spring preload adjusting bolt position
Rebound Damping: Varies depending on fork oil weight
Preload: TTR400 billet aluminum preload adjusters, varies from 0-20mm
Brace: Tarozzi 22-048 Tube Diameter 35mm Mounting Diameter 56mm Center Distance 165mm

Fuel Delivery
Tank: Roc City Cafe Racers Honda CR110 Style, aluminum alloy, 3.1 gal (12 L) capacity
Cap: Coyote Gear Scalloped Steel Vented Cap
Petcock: Pingel Power-Flo, 1/4 in NPT, OFF-RES-ON (6111-AH) modified for no reserve
Filter: Pingel 1 In 2 Out, stainless steel
Fuel Lines: Tygon F-4040-A
 
Re: vintage race CB350 - wheels done

Thanks for all that info! Very cool that all those parts retrofit into those forks. Interesting tha the TTR400 caps fit too. All those parts may fit a number of other 35mm forks if the measurements are similar (cb550, etc).
 
vintage race CB350 - wheels done

0.010" shim & 0.060" shim needed to center wheel between forks. Well, I say centered but its about 0.004" off center. Then again I'm using crude tools and measuremt method. But should be close enough, right?

 
Re: vintage race CB350 - wheels done

Tires mounted. No pinched tubes nor pinched fingers. They make it look so easy on YouTube. This Conti was a tight fit due to stiff radial construction. But I got it mounted with a pair of 8" tire irons and a bead breaker clamp (to keep the opposite end pinched and in the valley) and lots of soapy water and perseverance.


Everyone has their own preference when it comes to rim strip to keep the tube off the spoke nipples: original rubber strip, duct tape, gaffer tape, self-fusing electrical tape. I tried this new Motion Pro Armor Rim Strip Tape. I like it pretty good so far. Easy to fit and stays in place. You must push the tape down into the rim valley so that when you're mounting the tire you can push the opposite side of the tire into this valley.


Once the tires were fitted I used a static spin balancer (made by Marc Parnes) to make sure they run smooth. It's basically a high-precision axle made of hardened tool steel, two bearing blocks and some conical tapered blocks. The wheel bearing inner race rides on the conical tapered blocks. The whole thing spins so effortlessly. The universal tapered cone just barely fit my rear wheel sprocket side but it all worked out fine.


Used these reusable brass spoke weights I got off eBay. Filed a little bit off the 1/2 oz weight to get the perfect balance on the front wheel. It's at about 3/8 oz. I used blue Loctite on the set screw that acts against the spoke nipple flat. I also drilled it for safety wire and then siliconed it for an extra measure of security. Did the same thing on the rear but it needed about 5/8 oz. weight so I filed down the 3/4oz. weight that came in the kit.


Now that the tires are fitted I can move onto making a bracket to mount the front fender. Here I am checking it for clearance. I'm not sure how much clearance I need but this looks close. It could maybe come down a bit in the rear.


Re: vintage race CB350 - wheels done

Really enjoying your build, great attention to detail and great pics. Wheels and tires look great.
 
vintage race CB350 - wheels done

Thanks for the positive feedback. Today I sectioned the front fender on the CB350 to narrow it a bit and glued it back together with Marine-Tex. Once it cures I can sand it smooth and do the finish bodywork in preparation for paint.


Re: vintage race CB350 - front fender sectioned

Front fender mounted using aluminum standoff spacers, button head screws on the inside, socket head cap screws on the outside. It was tricky to get the alignment perfect but it's totally spot on.


Mocking up the rear sharkfin sprocket guard


I didn't like it so I decided to move the mounting tab on the swingarm to a new position. I also shaved the stock chain guard brackets. Now I've got two swingarms: one painted and read to go as a spare and this one that's now ready for paint and will be my primary.


New nylon steering stops. You can see the fairing probe had integrated steering stops but it was designed for a front end with a lot more offset than mine so they don't engage properly. So I made my fairing probe frame tab with an extra piece that accepts two M6 bolts so I can adjust the length of the steering stops. The nylon gives a nice cushion. The bolt head is recessed about 5mm inside the nylon so there is no metal on metal contact yet it is still easily adjusted. I'll probably tweak these a little bit to incorporate a jam nut and to give me a little bit more travel. Other than that I think they're pretty close.


I also did some horse trading and ended up with a different Ohlins steering damper. This one has 68mm stroke (versus 63mm before), a slightly longer body and a standard Ohlins adjustable mount. Together this gives me more usable steering travel and it's easier to setup.


My bike hasn't looked this good in years! It's very nearly ready for paint. I filled a bunch of holes on the seat and sanded it smooth. I also trimmed the fairing a little bit more to give my legs and feet a little more clearance.


Re: vintage race CB350 - front fender sectioned

Great project, can't wait to see final product.

The next time you have to mount tires, try Motion Pro Rim Savers. I just mounted Dunlop K81s on alloy rims and these saved the alloy for sure.
 
Re: vintage race CB350 - front fender sectioned

I tried the Motion Pro Rim Protectors and they caused me more grief than they're worth. As I was levering the last section of tire bead onto the rim it sucked the plastic rim saver into the tire. "No problem," I said to myself. "It has a pull chord for just this reason." I slipped my tire iron under the bead to provide some relief and pulled on the chord and the damn plastic broke leaving the string in my hand and a giant piece of plastic inside my tire. It took me another 30 minutes to fish that piece of plastic out. If I try anything again it'll be the Motion Pro RimShield II or some plastic milk jug cut into strips.
 
Back
Top Bottom