
We noticed you are blocking ads. DO THE TON only works with community supporters. Most are active members of the site with small businesses. Please consider disabling your ad blocking tool and checking out the businesses that help keep our site up and free.
You are using an out of date browser. It may not display this or other websites correctly.
You should upgrade or use an alternative browser.
You should upgrade or use an alternative browser.
XS650 Cafe - Build #4
- Thread starter ncologerojr
- Start date
jpmobius said:Bars, seat, and footpegs. Where they should be is up to the individual, and opinions vary wildly of course. I'd guess I have scratch - built somewhere between 20 and 30 "rear sets" and hopefully have learned a bit about making them.
For me, the most important thing is to not lose sight of how critical all three things are determine all at once - the bars, seat and pegs are all one project for me - building one element without having at least a mock up of the others in place does not make sense to me. The driver is the other critical component since everyone is a different size and has different preferences.
I suggest that you mock up your expected seat height and then try out your peg location. Then keep adjusting until you get everything just right. The seat height usually seems to turn out to be the hardest to adjust, so make your best guess at that and mock it up so you can sit on it. Adjust your chassis so it is at the expected ride height with your best guess at suspension sag. Once you get a set of pegs tacked up (or clamped up , or even held up by wood blocks!), you can sit on it and get an idea of where you want the bars and pegs to go. For me, I spend a lot of time fooling around with the bars and then the pegs going back and forth changing them until I home in on exactly the right thing. The last guy I built a bike for definitely got impatient by the third visit to my shop getting his new bike "fitted" to him, but it paid in the end as he tells me practically every time I see him how comfortable and easy to ride his new bike is.
I don't have much in the way of "rules of thumb", but I will say that for rideability, pegs should be lower and farther forward and the bars should be higher than on a road race bike. Clip-ons are cool and fun but a lot of work on the street (I have them on one of my own bikes), and likewise with race location pegs (also on the same bike). Clip on bars vary quite a bit depending on the bike as to how high they are. The seat height is critical - bars at (like my bike) or below seat height are race bike territory, but on many bikes they can be a bit above seat height and be vastly more practical. The pegs on that bike are even with the swingarm pivot bolt and about 6" back. They are plenty high, at least from a scrape in cornering perspective (that includes the foot brake arm when depressed and my boot). I have long legs - an important factor. I love this bike and it is a blast to ride - for about 20 minutes - after that I start thinking about how far away from the barn I am.
Mock up the seat, bars, and pegs, and then sit on your bike, put your feet on the pegs, and grip the bars. Remain that way for 15 minutes - that would be a VERY short ride. After that, if you are confident you think it is perfect, start welding! Otherwise, adjust and repeat. I urge you to spend some time doing this, you likely can't make a good judgement hopping on your mock up for 2 minutes and thinking "that feels ok". See if you still say that after 15 minutes. 1" on the position of anything can make ALL the difference! Next year when you are riding it around, you will think it time well spent!
Going to be a beautiful bike - it should be as great to drive as it is to look at!
Thanks!
Good advice here. This is basically how I went about positioning the pegs. The bike is very stable where it is so I've spent a lot of time up there. (I sometimes just sit up there like a weirdo for motivation...). I actually like use jack stands that I can raise and lower next to the bike to get a feel for the location.
I am only 5'6" tall so I usually find a spot that is comfortable for me and then try to leave a little more room in case I eventually sell it to a taller rider. That's how I came about the first location.
I actually ended up moving the pegs from my first location because of how low the brake lever would hang when depressed. The lever would be below the lower frame rail, and if the brakes were depressed while riding over a tall speed bump there could have been an issue.
I also couldn't put the pegs directly in line with the swingarm, because you wouldn't be able get the mounting bolt out without removing the swingarm. So I decided on the current location, which is fine for a short guy like me as-is without any seat padding. I folded up a towel to sit on to mimic a seat and it feels nice.
Now I need to find a good spot for the brake master, which will be a bit of a challenge....
Hey everyone,
Sorry for the recent lack of updates. If you have followed my builds, you can probably tell that I am more of a fabricator/welder than mechanic. I love working with metal, and constantly work on developing my skills. I enjoy creating all sorts of things.
So, I have been working recently to get a part-time welding and fabrication business up and running. I've been doing a lot of different jobs recently, and trying to show that I do much more than just motorcycles.
I've also been investing in some much-needed shop tools including a new Hypertherm plasma cutter and 48" finger brake.
I'll have some updates on the xs650 soon. In the meantime check out my website and contact me with any of your metal needs!
www.CatskillMtnCustoms.com

Rear master mounted up.


Erskine said:Good luck with your business!")
Thanks!
Hey guys, I'm back at it. Now that my little business is up and running I've been able to start carving out some time for the xs project again.
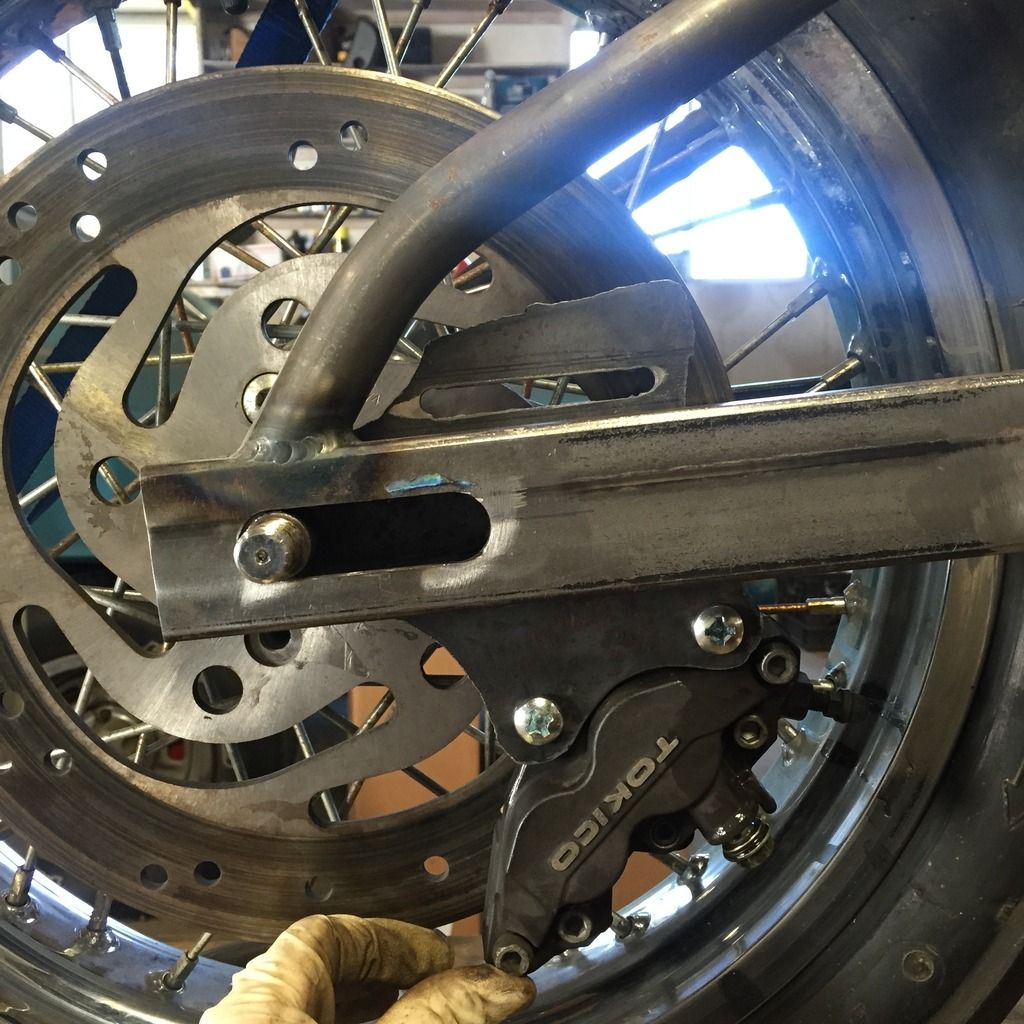
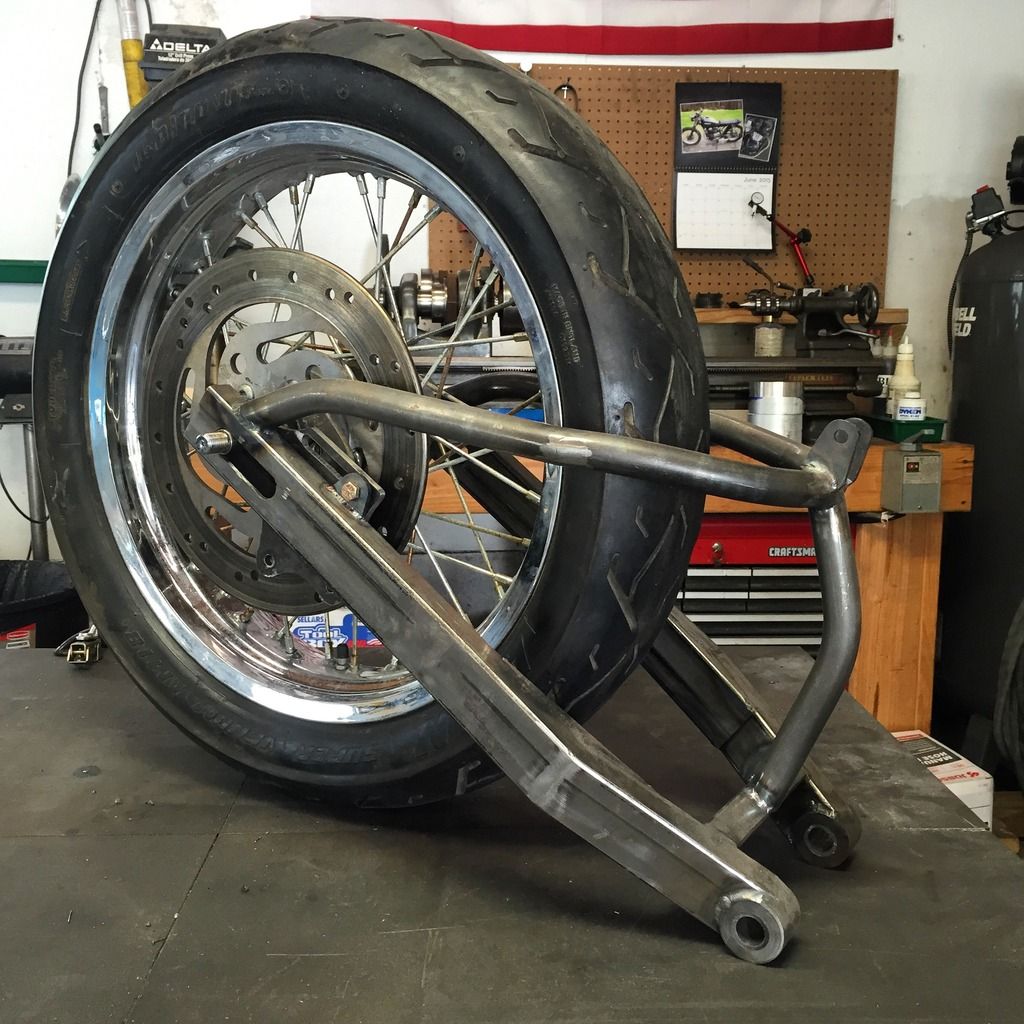
I decided to run a front Tokico caliper from a gsxr on my rear wheel. It's a common caliper upgrade among harley guys, and fits the sportster rotor well. I just needed to make up a mounting bracket.
I wanted the fitment to be perfect so I made some transfer screws on the lathe to locate the holes. I also made a 3/4" one for the axle location.
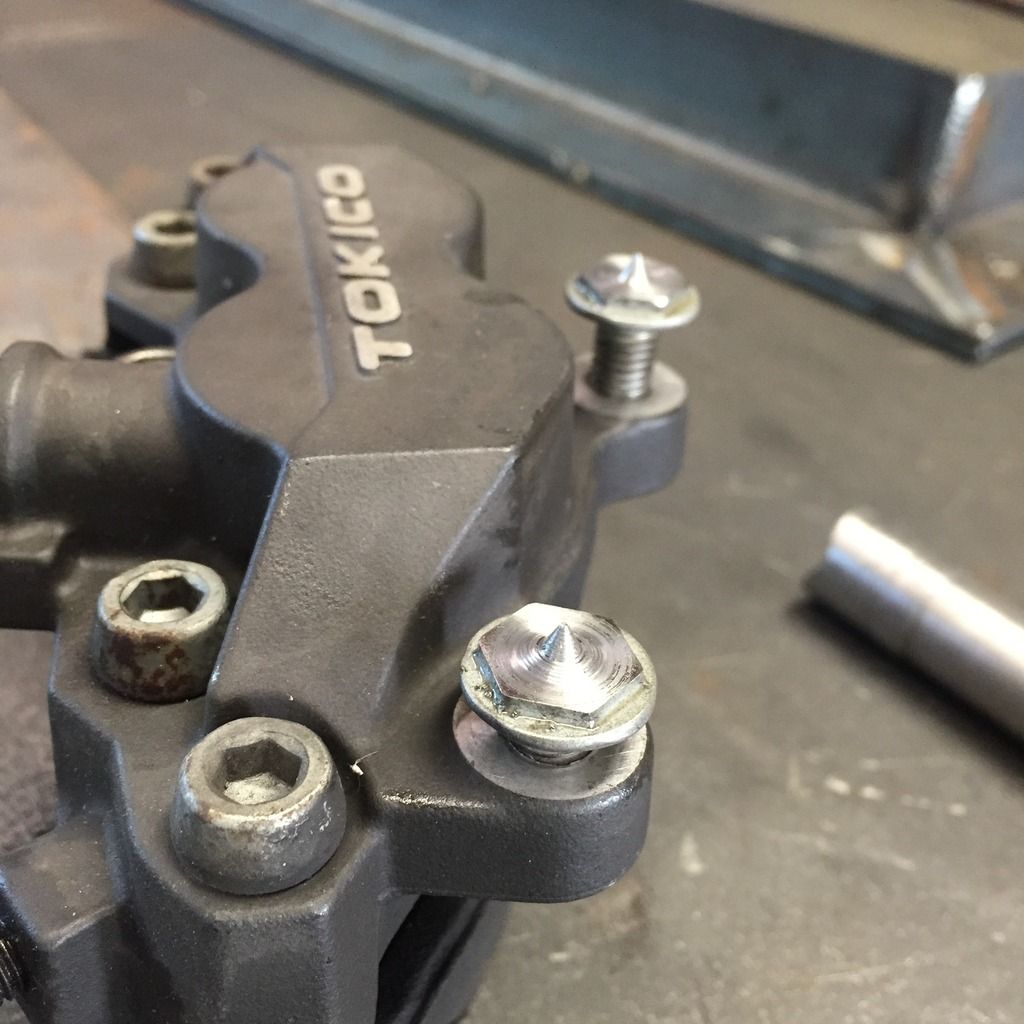

Rough cut the bracket, and made sure the holes aligned perfectly.

After some cleaning up.

Then I made a tab on the swingarm and bolted everything up.
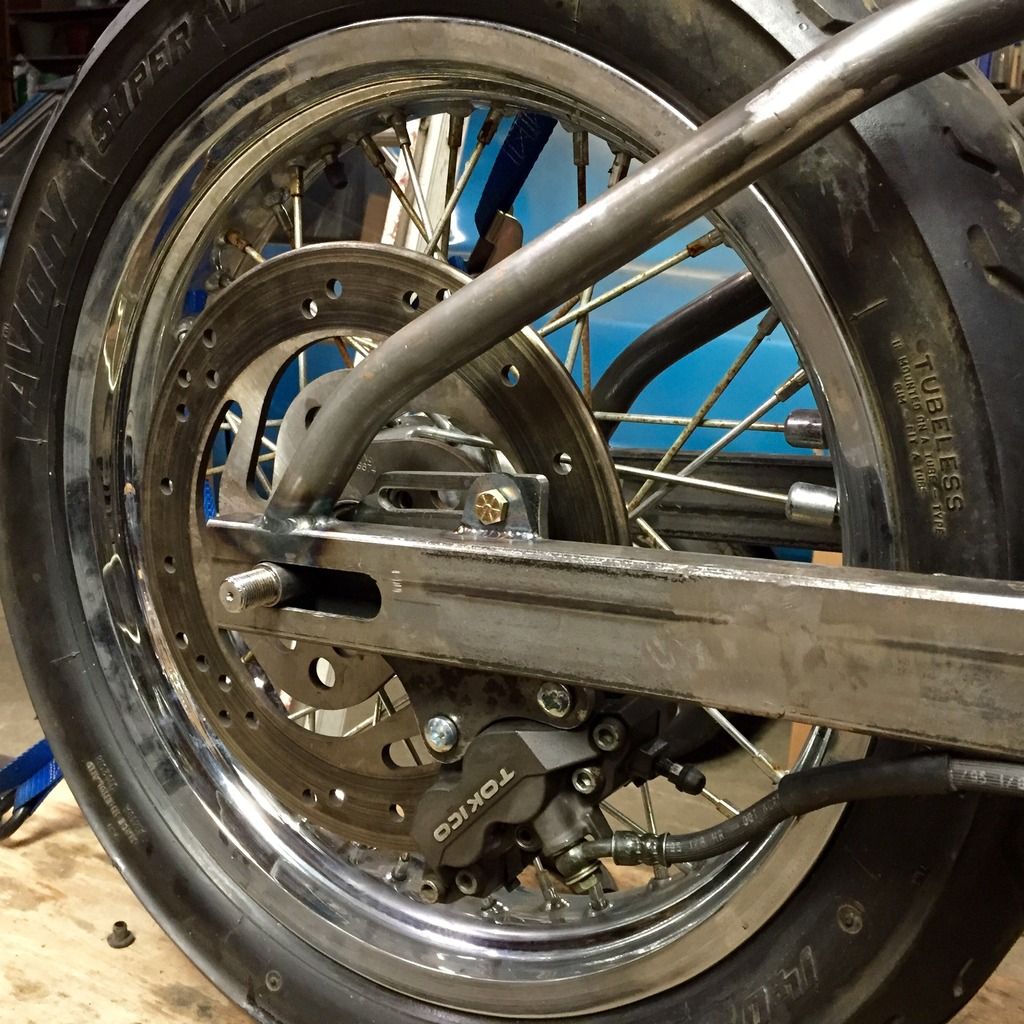


I filled the system with fluid, and now I'll apply the brake and allow the caliper to center itself on the rotor. Then I'll make the appropriate axle spacers.
I decided to run a front Tokico caliper from a gsxr on my rear wheel. It's a common caliper upgrade among harley guys, and fits the sportster rotor well. I just needed to make up a mounting bracket.
I wanted the fitment to be perfect so I made some transfer screws on the lathe to locate the holes. I also made a 3/4" one for the axle location.


Rough cut the bracket, and made sure the holes aligned perfectly.


After some cleaning up.

Then I made a tab on the swingarm and bolted everything up.


I filled the system with fluid, and now I'll apply the brake and allow the caliper to center itself on the rotor. Then I'll make the appropriate axle spacers.
dannywrx88
Been Around the Block
Coming along
Sent from my iPhone using Tapatalk
Sent from my iPhone using Tapatalk
dannywrx88 said:Coming along
Sent from my iPhone using Tapatalk
Thanks. It's rewarding making most everything yourself, but it is damn time consuming...
ncologerojr said:I filled the system with fluid, and now I'll apply the brake and allow the caliper to center itself on the rotor. Then I'll make the appropriate axle spacers.
Seems like you would want to manually center the caliper and make axle spacers to create that alignment. The caliper self centers not on its own, but but it will adjust to wherever it's placed. With new pads I reckon it will not be far off though as there is probably not much piston travel available to begin with. I guess you have not got the chain and sprockets sorted out yet. are you making a carrier for the rear sprocket? Nice work so far!
jpmobius said:Seems like you would want to manually center the caliper and make axle spacers to create that alignment. The caliper self centers not on its own, but but it will adjust to wherever it's placed. With new pads I reckon it will not be far off though as there is probably not much piston travel available to begin with. I guess you have not got the chain and sprockets sorted out yet. are you making a carrier for the rear sprocket? Nice work so far!
We're basically on the same page. With new pads in there I use the caliper to get itself close to centered, and it also holds itself in place for measurements. Then I make the axle spacers to set everything center.
I haven't tackled the chain and sprockets yet, but I'm not anticipating much trouble. I'll use a Harley rear sprocket or there are a couple companies that cut xs650 rear sprocket sizes with Harley bolt patterns.
Just eyeballing, the sprocket alignment should be very close. Ill have to space out the front sprocket just a hair, but that's about it.
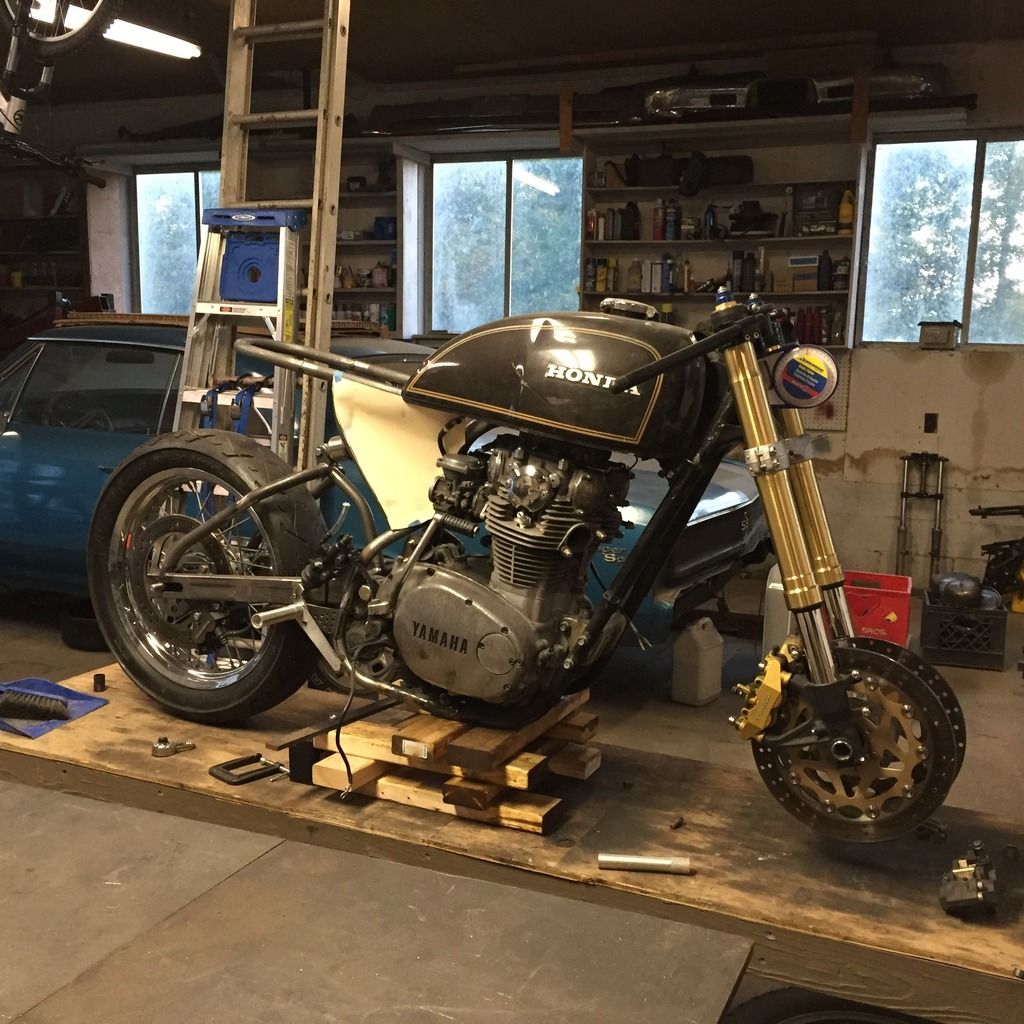
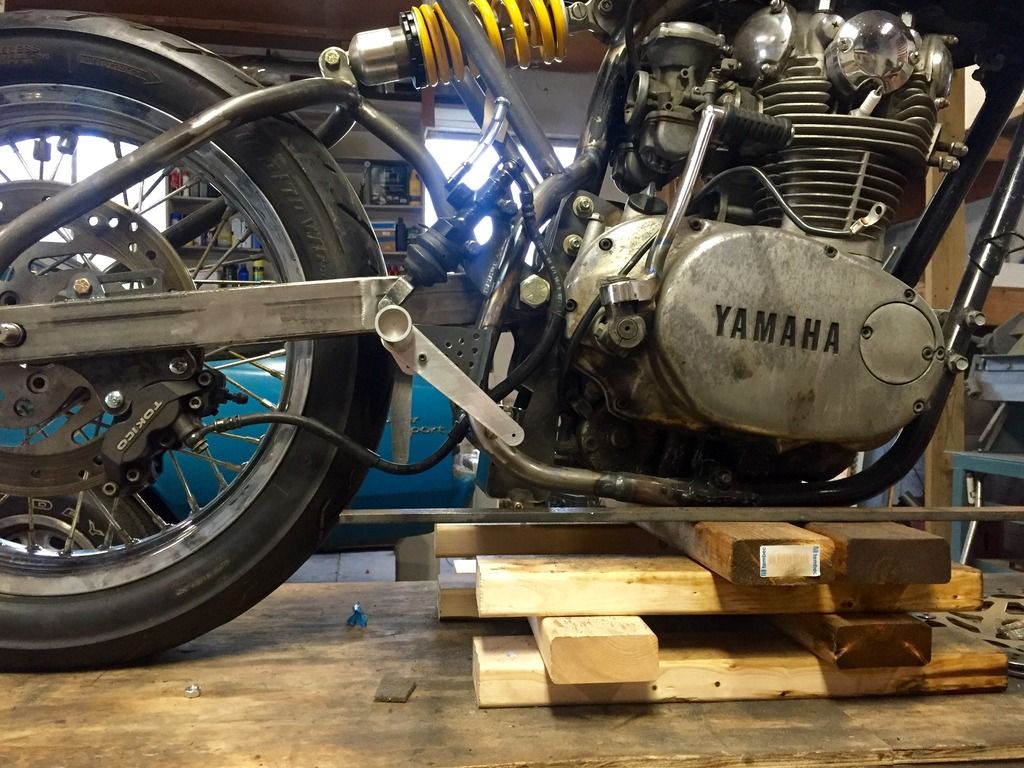
I started working on the front brakes. After some research fzr 1000 rotors seem to be the best for the application. However, it will still take some work. I'll have to first space the calipers out about a 1/4" or so because the rotors are just a little larger in diameter than the gsxr. Then I'll make some hub to rotor spacers to match the distance between to calipers. All pretty simple, just time consuming as always.


I know I'm a nerd, because I was super excited to get these nice chunks of 6061. I'll be turning down one of these to make my front disc spacers.

I also have a cool idea for some aluminum side panels to protect my carbs from wheel spray.

I also have a cool idea for some aluminum side panels to protect my carbs from wheel spray.

Green199 said:Can we get another shot of those side cover mock ups?
Are they directing the flow to the centre and between the carbs? Neat.
I'll try to get a better pic up. The plan is to have them help funnel some air, and protect the carbs from wheel spray.
Just a quic shot of the rear end while I have it off.

I decided to ditch the under seat battery box, I just wasn't happy with it. I decided to relocate the battery down under the swingarm pivot. I think it's a better use of space.


Got the battery box finished up. It hangs down a bit, but it is not as low as the front section of the frame. I don't foresee it causing any real issues.


You're going to find that the spokes MIGHT contact the edges of the calipers. Look at how narrow this gap is between the calipers-
I found out the hard way, on this one...

I think you could have used lighter gauge steel on the battery box, and you need to chop off all 4 bottom corners for drainage.
Looking sharp!
I found out the hard way, on this one...
I think you could have used lighter gauge steel on the battery box, and you need to chop off all 4 bottom corners for drainage.
Looking sharp!


