1971 Honda CB175 Cafe

NoahAngel11

New Member
Hello. new to the group. I love to spend time in the garage tinkering on bikes. I am a noob to doing modifications, but I have restored 1 bike prior to this one. It was a '86 Yamaha YX600 Radian. My skills are primarily mechanical and electrical. Fabrication not so much, but I am trying to learn.
I also own a 2004 BMW K1200LT and a 1970 CL100. I recently did a project where I replaced the stock stereo on my BMW but kept the hand controls for the stereo functional. The CL100 is waiting on a coil from Indonesia so I can see if it is runner before I decide to restore it. My previous ride was a 2011 Triumph Thruxton. I traded it for the BMW so I could ride 2-up with the wife. I sure do miss that bike though.

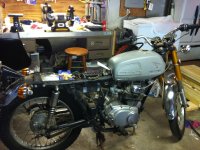
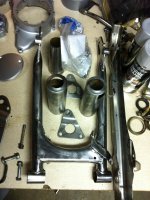
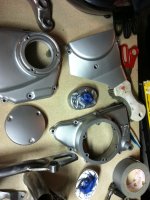
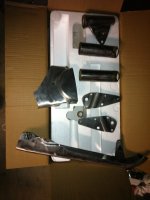
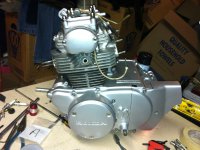
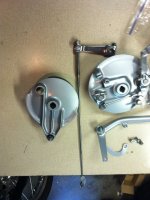
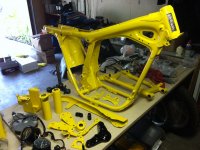
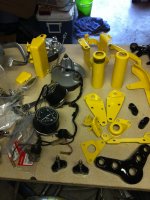
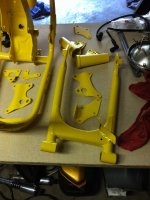
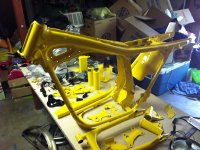
for my CB175 I wanted to do a few things that I like, and that I see on other bikes. I wanted a cafe seat, club style bars, bar end mirrors, a rearset of controls, led signals, etc. I wanted to start with completely stripping it down and restoring as many pieces as I could.

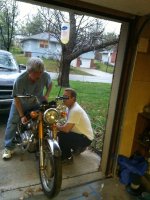
I have been working on this bike slowly for 3 years. I bought the bike shortly after my Son passed as a means of therapy, to keep me focused on something I love doing. As $$ permit, I do a little here and there, so this is not one of those fast builds at all. At first I will post a lot of pics to get everyone up to speed on where I am at and what I have done to get this far.

Here is what you can expect in this thread:
1. mistakes. Like I said I am a noob.
2. I change my mind a lot. So don't be surprised if a part is one color and then the next day different. I do have a general plan in mind, but I am always open to trying something new if I like it better.
3. My cafe has a theme. This is not popular with most Cafe folks, and I am ok with that. I am building this bike into something I think I will like. And in the end, if I hate it, well, I will then have learned what I hate and what I like.
4. I am not afraid to ask questions and I value all opinions and advice.
5. I like to have dialog that is respectful. I do not expect that in return, but I would love it nonetheless.

So anyways, on with my project.
 
Here is my bike as I bought it. A barn find with some rust and a tank that was shot. Typical dry rot, frozen cables, carbs left undrained, etc..
 

Attachments

  • 1970 Honda CB175 11.jpg
    1970 Honda CB175 11.jpg
    7.2 MB · Views: 809
  • 1970 Honda CB175 13.jpg
    1970 Honda CB175 13.jpg
    7.6 MB · Views: 780
The bike had 6773 miles on it, and I wanted to see if she was a runner. So my first task was to rebuild the carbs and try to start the bike. I used chem-dip and a lot of cleaning to get the carbs clean and put a kit in them. The tank was shot so I decided to purchase a gravity feed test tank to hook up. The bike had good compression, and after cleaning and setting the points, new battery, she fired right up. Thats me on the bike tweaking the carbs.
 

Attachments

  • IMG_1878.jpg
    IMG_1878.jpg
    3.8 MB · Views: 295
I always liked the looks of knee grips on a tank. I knew the '69 had those so I set out to find a new tank and found a '69 with only a minor dent in the top and no rust. It had the brackets for the knee pads, but no knee pads. I figured I could get those later. Boy was it hard to find a set of those, but I did. It took half a year of waiting for a set to show up on Ebay. The '69 tank is shorter than the '71 and a new tank mount was going to be needed. My first bit of fabrication, yay!

I regret it now, but I used Kreem on the tank without even thinking about repairing the dent. Oops. Anyways I think the Kreem liner will come out with some Acetone if I am not mistaken. That being said, what is the best treatment for a tank to restore it? No rust in the tank, just want to protect it.
 

Attachments

  • IMG_1891.jpg
    IMG_1891.jpg
    3.8 MB · Views: 312
I stripped down the bike, cataloging everything and taking lots of pictures. Here are some of the bits as I have cleaned them and as I started to pain the engine parts. I originally thought the engine parts should be metallic in color, but after getting it all painted I changed my mind and made them black. The bike them has yellow and black in it, so the silver color just didn't go with what I was after. So these bits will change color in later posts.
 

Attachments

  • IMG_2158.jpg
    IMG_2158.jpg
    4 MB · Views: 275
  • IMG_2157.jpg
    IMG_2157.jpg
    3.7 MB · Views: 279
  • IMG_2139.jpg
    IMG_2139.jpg
    2.6 MB · Views: 301
I bought a gasket set for the engine so I could pull it apart and paint it easier. Besides, some of the gaskets were rotten and leaky. Here is the engine after I assembled it and painted it the wrong color, I just didn't know it yet. I also painted the wheel hub and brake bits.
 

Attachments

  • IMG_2212.jpg
    IMG_2212.jpg
    3.3 MB · Views: 295
  • IMG_2300.jpg
    IMG_2300.jpg
    3.9 MB · Views: 246
I sent the bike parts I was gonna powder coat off to a local shop. They were not a custom bike powder coating shop, primarily they dealt in farm utensils and furniture, whatnot. Hey, I live in Kansas City.

Custom colors are expensive, as the shop has a minimum buy on quantity of paint. Using colors in stock was a lot cheaper and my colors were yellow and black, so I managed to get it done at a low cost.
 

Attachments

  • IMG_2476.jpg
    IMG_2476.jpg
    3.6 MB · Views: 268
  • IMG_2477.jpg
    IMG_2477.jpg
    3.7 MB · Views: 273
  • IMG_2478.jpg
    IMG_2478.jpg
    3.4 MB · Views: 259
  • IMG_2479.jpg
    IMG_2479.jpg
    711.5 KB · Views: 283
Welcome. That yellow is really striking. Unfortunately my experience with light colored chassis parts (silver and white) have not been good because they are hard to keep clean and dust and oil mist and chain lube seems to get into the smallest spaces.

So you will have to be on your toes to keep it clean, but if you like, it's a small price to pay.

What are your plans for the motor and suspension or are they future upgrades?
 
I quickly changed my mind on the silver parts after I put the engine in the frame. I took it out and made the silver parts black. You will see the color change when I get a chance to post more pics. I agree, very difficult to keep clean. Plus it didn't go with my overall scheme of yellow and black, so I changed it.

The suspension is open for suggestions, as I have not completed it yet. I saw a set of rear adjustable oil filled shocks that were yellow and black and I was leaning towards those. They claim to be for racing setup but I do not know anything about suspension. I will post a link later and maybe you all can tell me if they would be good for this bike or not. I weigh in about 194 so they need to be good for that anyways.

What can I do to the front suspension to improve it?

One idea I had was to fit the forks and caliper from a Honda Rebel on there, to give me disk brakes for stopping. Not sure if the tube diameter is the same, or the spacing for the triple tree.
 
Welcome aboard, I dig the yellow and it looks like the coater did a pretty good job. I often use a powder coater near me that almost exclusively does boat trailers, but the price is $50 when I bring 5 parts or an entire bike. Can't beat that. I'm sure the engine parts look a lot better black, even breaking up the silver with a few black items like points cover and side covers will make all the difference and give that contrast you need. Will be watching.
 
So here is the engine silver. Didn't like it at all. So I pulled it out and changed a few things.


b7587fb8ba178b86e814521eb6a235da.jpg


Sent from my iPhone using Tapatalk
 
I painted stuff black instead.

Which made sense anyways because my theme is Based on Yellow and Black colors.
75cfaf72b87a88fcbd5e2c6d1ad5ab52.jpg
71b309e115a42d53618ed46d19edbf70.jpg
8ec92ee19f1ddfdc5d30e25e1610c6ff.jpg


Sent from my iPhone using Tapatalk
 
The coater did an okay job. There are a few spots where sand from blasting was still in the neck, he didn't mask too well. The sand came out while he was spraying and there were a few spots that were affected. I was gonna have him redo it, but the spots were not on visible areas of the frame and the paint flaw was minimal .


Sent from my iPhone using Tapatalk
 
I found a rear set of controls on EBay and set out to get those mounted. The original shift lever was used for linkage, after I cut off the end and drilled a hole in it. I may need to play with this setup later, as I am concerned about the length of the levers and whether or not my foot action will be too sensitive to get in gear spots correctly. I will wait until the bike is running to fine tune that. I also have not tried the brake linkage yet as my rear wheels are in pieces.

a3318cb871aa9c3b5d5ddd2ca2acf8cb.jpg
2439738d432344998fc0adf3633c95ff.jpg
81a6aee8f3e52fc7df47a63e2ace89a5.jpg


Sent from my iPhone using Tapatalk
 
You'll never know how it works until you try it, but you do want to be aware of the length of your pieces that are connected by the shifter linkage. One looks a little longer than the other, which may mean that your shift lever has to travel a lot farther to shift gears. A shorter piece connected to the actual shifter shaft means the shift lever can travel less distance to shift gears.
 
+1. Shorten both and make them the same length - unless you want more - or less- lever travel and in that case make one longer that the other.
 
Thanks guys. I would like to shorten the shifter lever so I can minimize interference. I had to bend the lever out a little to clear the side cover of the engine and the grease nipple. I will just have to try it and see.


Sent from my iPhone using Tapatalk
 
Here are some bars I found that were turned down. Also some bar end mirrors that I haven't quite got positioned yet, will probably point them down under the bars. Depends on visibility.


e1e572608995e804cfeb6521d928cf89.jpg
a7fc31c9f3fd7afb407595091bde6118.jpg
568620f2a31234daa3ddf8d09aaef2fa.jpg


Sent from my iPhone using Tapatalk
 
Back
Top Bottom