Hello One and all.
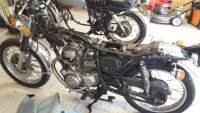
Since I was 15 I have always had a fascination with vintage bikes. I have always had a nagging thought in the back of my mind that I wanted to restore an old ride. I am not very mechanically inclined and definitely would be considered a noob on this site. I recently moved to Burlington, Ontario, Canada; into a modest little house with a sweet shop out back. I needed my first ever project to fill that shop. In July, I came across a 1975 Honda cb360 and I decided to take a leap of faith for $500. The bike is actually in pretty decent shape. The PO drove the bike regularly without much issue. Upon receiving the bike I got it running with the help of a new battery, new rectifier and an oil change. The bike ran, however it did struggle. The idle was poor and there was some bluish smoke (only a light amount) coming out the exhaust.
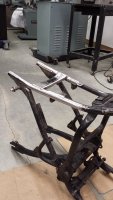
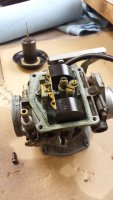
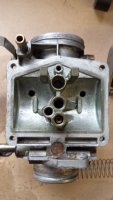
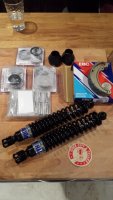
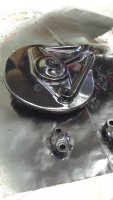
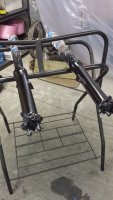
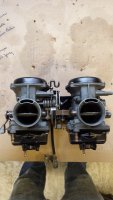
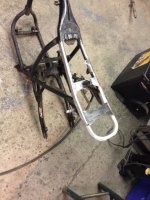
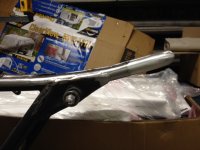
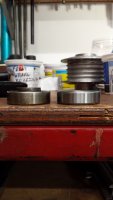
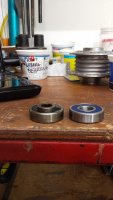
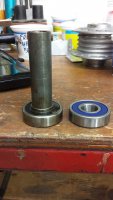
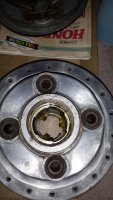
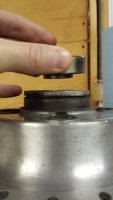
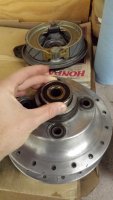
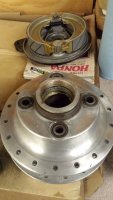
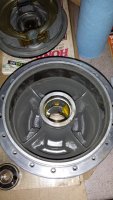
I haven't had a chance to start on the bike until recently and I decided to do the newbie thing; tear it down to the frame. I have designed/drawn out my idea for a brat style bike with the help of a neighbor (who turns out to be a wealth of knowledge as the guy has been restoring Harleys for 20 years). I have already chopped down the rear end of the frame as well as the rear seat brace. A friend of mine is welding in a new seat hoop and stability bracket (I am not welding inclined). While waiting for the frame I decided to tear into the carbs. They are actually fairly clean. The diaphragms are both intact and their is only a slight hint of any gummage. I do have one question....I have removed the jets and the idle needle and spring, however I am unable to get the Main nozzle out (see picture). There is no place to screw the nozzle from? Is it press fit into the carb or does it need to be tapped out? Any advice would be great. As for cleaning the carbs, I intend on doing the lemon juice boil. 6 to 1 ratio with water seems to be the most common way of doing it. I have read that the best way is to immediately put it into a hot water bath followed by a spray down of WD-40. Once again, please correct me if I am wrong.
This will be a major undertaking for me. I am really new to most wrenching and small engines. I ask that you bear with me and give me all of your patience. I do have the Service manual so I will be following as best I can. One thing at a time, slow and steady. I am going to enjoy this project and learn everything I can along the way. I like to look at in a way of my growth as a man. I know that may sound cheesy, but I feel that this is a coming of age tale for myself. I want to test myself. To start something and see it all the way through to the end.
Since I was 15 I have always had a fascination with vintage bikes. I have always had a nagging thought in the back of my mind that I wanted to restore an old ride. I am not very mechanically inclined and definitely would be considered a noob on this site. I recently moved to Burlington, Ontario, Canada; into a modest little house with a sweet shop out back. I needed my first ever project to fill that shop. In July, I came across a 1975 Honda cb360 and I decided to take a leap of faith for $500. The bike is actually in pretty decent shape. The PO drove the bike regularly without much issue. Upon receiving the bike I got it running with the help of a new battery, new rectifier and an oil change. The bike ran, however it did struggle. The idle was poor and there was some bluish smoke (only a light amount) coming out the exhaust.
I haven't had a chance to start on the bike until recently and I decided to do the newbie thing; tear it down to the frame. I have designed/drawn out my idea for a brat style bike with the help of a neighbor (who turns out to be a wealth of knowledge as the guy has been restoring Harleys for 20 years). I have already chopped down the rear end of the frame as well as the rear seat brace. A friend of mine is welding in a new seat hoop and stability bracket (I am not welding inclined). While waiting for the frame I decided to tear into the carbs. They are actually fairly clean. The diaphragms are both intact and their is only a slight hint of any gummage. I do have one question....I have removed the jets and the idle needle and spring, however I am unable to get the Main nozzle out (see picture). There is no place to screw the nozzle from? Is it press fit into the carb or does it need to be tapped out? Any advice would be great. As for cleaning the carbs, I intend on doing the lemon juice boil. 6 to 1 ratio with water seems to be the most common way of doing it. I have read that the best way is to immediately put it into a hot water bath followed by a spray down of WD-40. Once again, please correct me if I am wrong.
This will be a major undertaking for me. I am really new to most wrenching and small engines. I ask that you bear with me and give me all of your patience. I do have the Service manual so I will be following as best I can. One thing at a time, slow and steady. I am going to enjoy this project and learn everything I can along the way. I like to look at in a way of my growth as a man. I know that may sound cheesy, but I feel that this is a coming of age tale for myself. I want to test myself. To start something and see it all the way through to the end.