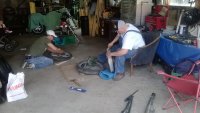
To the people that document their builds religiously in photos, my hats off to you. The entire time we were working on it, I rarely recalled to pick up my phone and take pictures.
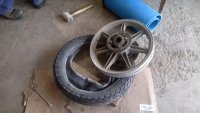
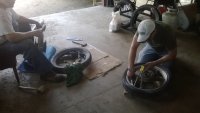
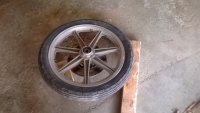
So, rims off and cleaned inner surface, installed new tubes and tires . The correct tools really help here. When installing the tube but before making the final bead, we inflated tubes to 5 psi ish or there abouts, to remove any wrinkles. Opened up valve stem and made the tire on the rim. A bit more on this later.
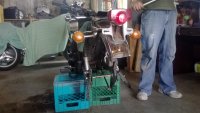
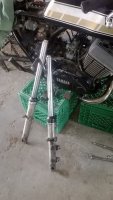
Fork removal fairly trouble free, its the taking the forks apart that can be a giant pain in the ass. After foolin about trying hand tools like a chump, using an air impact to remove the lower cap screw really did the trick. Left the springs in to keep tension on all the hardware for that step, then removed those after.
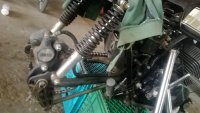
Popped out the circlip and washer that holds the fork seal in place, and attempted a gentle pry on the seals themselves. Not much good. Tried a low flame on your average propane torch, applied to just one spot on the fork lower outside the seal area while steady prying pressure applied ( with the wheel wrench by the way, smooth no sharp edges here ) and that worked well. Install was a done delicately , with a impact socket as a seal pusher, and hammer for power.
Just a quick note on changing fork seals: When removing the lower fork cap screw that holds all the guts in, we were using a 8mm allen wrench, but didn't have the correct long reach driver for the impact gun. Used a cutting wheel on grinder to cut the "L" off the wrench and taped that into a 8mm socket, voila a driver!
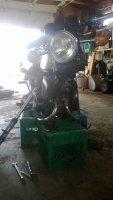
Some attention given here to the disc brakes front and rear. If I'd really been planning well, I would have had new pads/shims ready to go. As it is, some wear left to go on the pads we had, so a light buffing with a dremel and sanding drum where the pistons ride in the caliper, much cleaning and scrubbing, then back on with the rims. New fluid and bleeding followed, finding at this time the front caliper bleed screw is pretty well chewed. We bled that out thru the banjo bolt ( not great but ok for now ) .
All above installed on the bike, I moved to chopping up some high temp reinforced hose ( similar to rad hose but better quality) for exhaust couplers. Installed , looks decent, pics to follow. Will update on this one , I'm watching for it to blow out, melt down, burst into flames etc. Approx 1/2 hour of running time, so far , so good.
Installed the spare carbs I'd cleaned, with the Unifoam pod filters I'd picked up, complete with a better throttle cable than what was on the bike. New plugs ( ngk br9es), new gas, and decided we could fit in a short test ride up the street.
Running still pretty lame. Starts easily enough, just really poor pickup out of the hole, yet easily revs when not loaded. Shows signs of opening up on the pipe, then bogs , coughs etc. Decided thats mostly likely due to stock needles, no airbox, and those cheesy pod filters letting in too much air without compensating on the fuel end of things.
The mikuni's on this have a "choke" that is actually more of a fuel enrichening circuit in the carbs. After some back and forth with my brother, I sent him up the road with the choke on , and when he came back he said it seemed better. I'm taking this as confirmation on my "not enough fuel for air" theory.
It was around this time I noticed on MY return the front tire had gone flat. Sure as shit we've knicked the inner tube on the install, and figure its just the new tire holding air in on the non-existant bead on the rims. We'd been at it all day and decided to call it there.
Lots of stuff still to do, with a good handful of things to RE do. Still very encouraged by the progress made, and hope to sort this sucker out soon. Thanks for reading.