Follow along with the video below to see how to install our site as a web app on your home screen.
Note: This feature currently requires accessing the site using the built-in Safari browser.
We noticed you are blocking ads. DO THE TON only works with community supporters. Most are active members of the site with small businesses. Please consider disabling your ad blocking tool and checking out the businesses that help keep our site up and free.
I have been lurking on the site for a while picking up info and tips around. I finally decided to join and start a build thread.
look forward to being part of the site. ;D
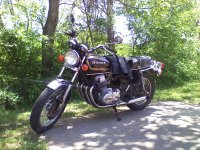
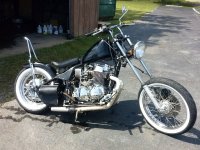
I got a stock 1978 honda cb750k. 8) rode for a season and then tore it apart and started having fun.
the inspiration behind this bike are the old WW2 bombers and WLA Harleys. seeing as i cant afford one and I like cafe racers this turned out to be a perfect match and I fell in love with the cb!!
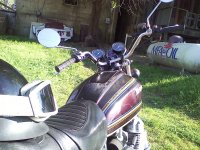
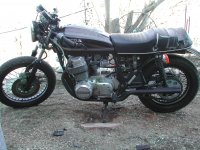
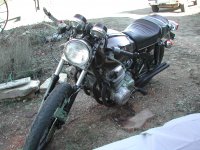
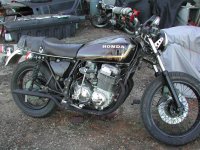
Here are some mid stage pictures of the bike. this was during the winter so i rode some on nice days but mostly i worked on it. at this point new handlebars, got rid of the stock exhaust it was all plugged up and would not run right so i put these pipes on ( do not look good but did the job). I also rebuilt the carbs moved the rear turn signals to play with location and did some painting i sprayed the rims with rustoleum to stop pre-existing rust returning after cleaning :-\ . also sprayed the forks and the brake drum and brake caliper. and levers. purchased new clubman low bars, drive chain and wheel sprocket, replaced chain tensioners on swingarm.
here winter is in full swing and i decided to finally start working on the tank and designing a fender.
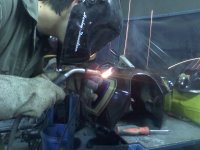
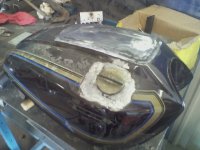
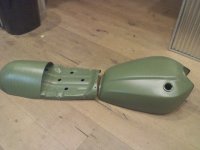
I plasma torched the filler hole and the side of the tank to move it (as you can see) then we welded the old door shut, smoothed it all out and sprayed it. I got the idea from the mustang tanks. I had a good tank and I love the look of the stock tank so I modified it.
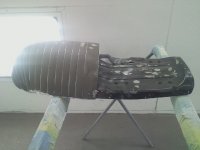
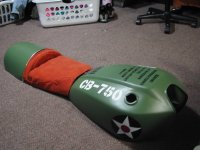
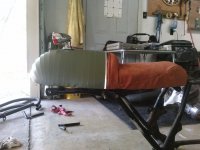
Wish i had not accidentally deleted the pictures of the fender being built . it was a fun . So, I took the stock seat pan and used it as a platform for my fender. I shaped pieces of two inch metal strapping. Also here is the tank in sealer. Ready to be smoothed out and primed, finished and ready to be painted.
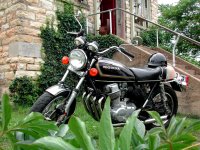
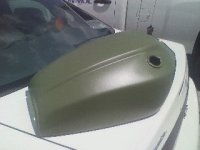
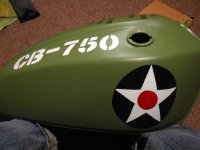
BOOM!!! 8) not to shabby if I say so myself. Fun fact: first time doing body work of any sort and actually painting something the correct way But i would be a liar if i said i did not have some guidance of a dear friend. who has been in the business for a few years.
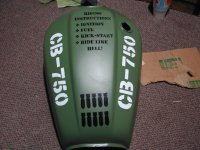
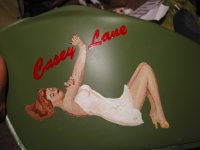
This is where the Bombers come into play and their lovely nose art. My sister is a heck of an artist I could have done graphics but nose art was hand painted and when i have access to such an amazing artist why not have it hand painted. After all the work I dont think she will do another one for free again hahah ;D. I did take her to dinner though. I went to my local body shop supply and got some aircraft paint in 8 oz. touch up bottles. and away she went. once again no during photos I ran my phone over before I could upload them.
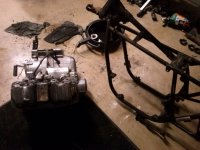
Guess what day it is!... It`s Today I bought another cb750 last week this one a 75. I could not pass it up. It has been just over a year at this point on the build. I am just about finished with tear down and prepping for powder coating next week.
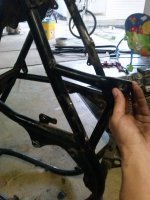
okay here is where the tear down is. the frame is about ready for powder coating. I cut off spare tabs that are not needed anymore and fixed some rust spots also the passenger foot peg brackets/exhaust bracket are now gone.
Almost finished with the metal work on the frame. pics later but I went to remove the wheel bearings for powder coating and the retainers are unbelievable! they where stuck like none other. the tool and drilling the punch marks did nothing finally just chiseled them out carefully. this is the front wheel same story with the rear.
now i followed all the same steps with the final drive bearing retainer but even grinding and chiseling i can not seem to get it to let go of the threads. does anyone have any ideas?? I am not above getting another final drive flange but prefer not to. all parts are supposed to be powder coated next week.
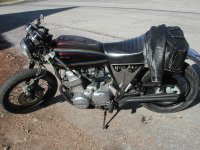
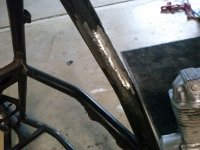
I was not fond of the frame sticking out underneath the fender. so i grabbed the plasma and welder. I moved the rails up to flow more with the lines of rest of the bike. I cut out the bridge and just put a flat piece of metal across. the bridge was to high after moving the rails up. everything but the rims are ready for powder coating now.
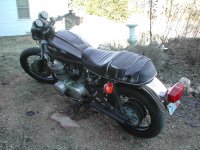
Okay I lost the gas cap somewhere along the way this summer. I have been searching for a replacement on the internet and all over over with no success. i found all other sorts of gas caps for the cb but not the style this had. finally came across one in a motorcycle junkyard when i was out riding the bobber. I was going to repaint it but the yellow fits I might just repaint it to the yellow. seeing as its has a few chips.
what do you think about the yellow?
edit: the yellow is a very bright caution yellow. bad pic I know.
This site uses cookies to help personalise content, tailor your experience and to keep you logged in if you register.
By continuing to use this site, you are consenting to our use of cookies.

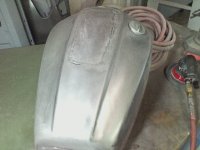
 . it was a fun . So, I took the stock seat pan and used it as a platform for my fender. I shaped pieces of two inch metal strapping. Also here is the tank in sealer. Ready to be smoothed out and primed, finished and ready to be painted.
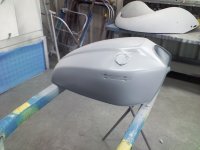

![CAM00150[1].jpg](/data/attachments/52/52276-413396e1e303df90c1c076844833a0d5.jpg)
![CAM00192[1].jpg](/data/attachments/52/52310-a1a455037ed8912a1af6ad69bd9dcb84.jpg)
![CAM00198[1].jpg](/data/attachments/52/52371-c3326a1c904b7788f46cf0ea4af807b6.jpg)


