Follow along with the video below to see how to install our site as a web app on your home screen.
Note: This feature currently requires accessing the site using the built-in Safari browser.
We noticed you are blocking ads. DO THE TON only works with community supporters. Most are active members of the site with small businesses. Please consider disabling your ad blocking tool and checking out the businesses that help keep our site up and free.
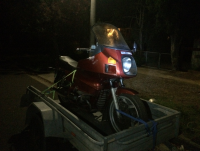
I've decided after some deliberation to start a thread of my own here to cover my 1986 BMW R80 Bobber/Tracker build. I know there's a distinct section for "Trackers" and this section is for "Bobbers", but I feel like perhaps my build will fit into both somewhat. That said, I also feel that it will be a little more "bobber" looking than "tracker", hence my posting it here.
Anyway, without ranting too much - I've made a fair bit of progress already and keep a blog of my own to cover the entire build. I'll throw links to each stage into this thread to bring anyone who is interested/reading up to speed. To begin with, here is the donor: http://findyourexit.com/zi-germans-are-coming/
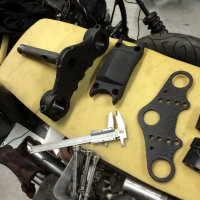
While waiting for my order to arrive from MotorWorks, I spent a bit of time tidying up other parts of the bike:
http://findyourexit.com/tidied-triple-clamps/
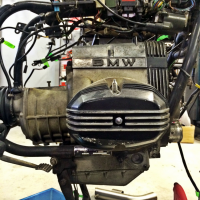
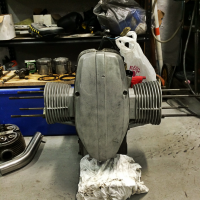
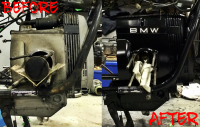
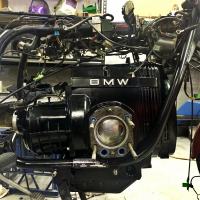
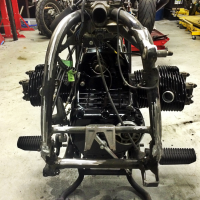
While I continued to await the arrival of the MotorWorks order, I got to preparing the motor for paint. The first stage of this was to get the motor ready for removal from the frame. More info and photos in my blog post:
http://findyourexit.com/off-with-your-head/
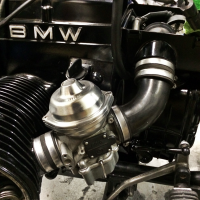
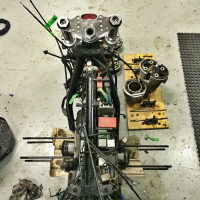
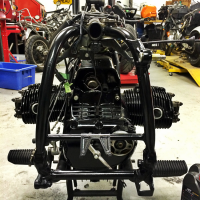
A bunch more work done to prepare the motor for paint. A load of pics and extra info in the related blog post:
http://findyourexit.com/motor-paint-preparation/
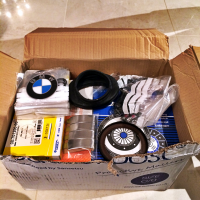
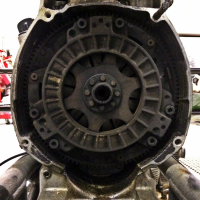
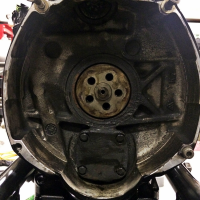
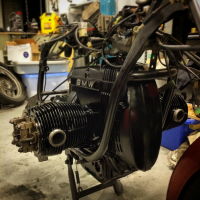
With the parts necessary for the motor rebuild available (thanks to the arrival of my MotorWorks order), I got to rebuilding the clutch and top-end. My process is documented in this blog post:
http://findyourexit.com/airhead-clutch-rebuild/
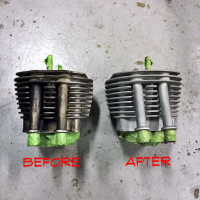
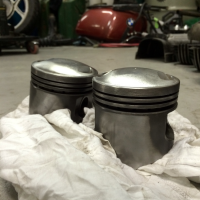
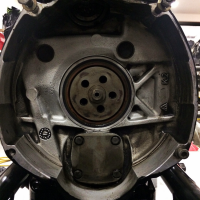
The clutch rebuild was out of the way, so the next port of call was the top-end. Here's a rough outline of the process with pics:
http://findyourexit.com/on-with-your-head/
Clutch sorted and top-end sorted (mostly) - I now had the perfect opportunity to prepare the rear section of the frame. It was easy to chop the necessary tabs and brackets with the drive-shaft out. A better idea of what was chopped can be seen in the pics in this blog post:
http://findyourexit.com/one-up/
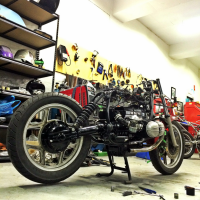
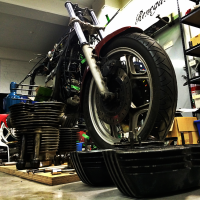
With the rear frame section sorted, I was able to proceed with refitting the drive-shaft, suspension and rear wheel. A quick overview and some pictures that I just posted on my blog:
http://findyourexit.com/unicycle-no-more/
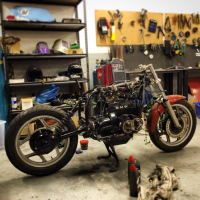
A crazy weekend meant I didn't get much time to write up multiple updates, however I did get around to writing up this one. The build is now notoriously close to its first test run since the rebuild! A better idea of where things are up to and more pics on my new post:
http://findyourexit.com/arm-the-torpedoes/
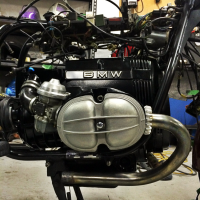
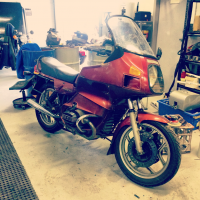
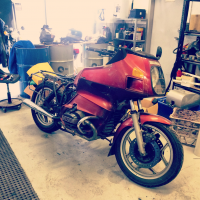
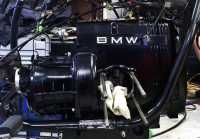
SHE LIVES!
A complete run-down and more pictures (and video) of the R80 firing up for the first time following the motor top-end and clutch rebuild:
http://findyourexit.com/she-lives/
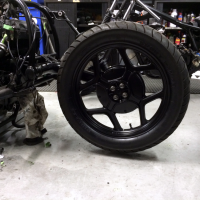
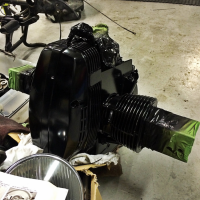
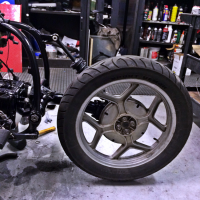
Paint, paint, paint and more paint. I spent the weekend we've just passed painting the wheels and the entire front-end. More pictures and info on the paint/process in the post I just made on my blog:
http://findyourexit.com/paint-it-black/
On a related side note, I've been running a Facebook page for those social butterflies among us to follow the build also:
http://www.facebook.com/findyourexit
Thanks for following the build and loads more to come soon!
This site uses cookies to help personalise content, tailor your experience and to keep you logged in if you register.
By continuing to use this site, you are consenting to our use of cookies.


")