Follow along with the video below to see how to install our site as a web app on your home screen.
Note: This feature currently requires accessing the site using the built-in Safari browser.
We noticed you are blocking ads. DO THE TON only works with community supporters. Most are active members of the site with small businesses. Please consider disabling your ad blocking tool and checking out the businesses that help keep our site up and free.
I wasn't feeling it yesterday, so I took out my Scrambler and laid some miles outside of Asheville, NC. I wrote up a brief ride trip and posted a lot of pictures on my site at http://sevenninesystems.com/2015/05/shredding-the-brp-on-bias-ply/ if you want to check it out.
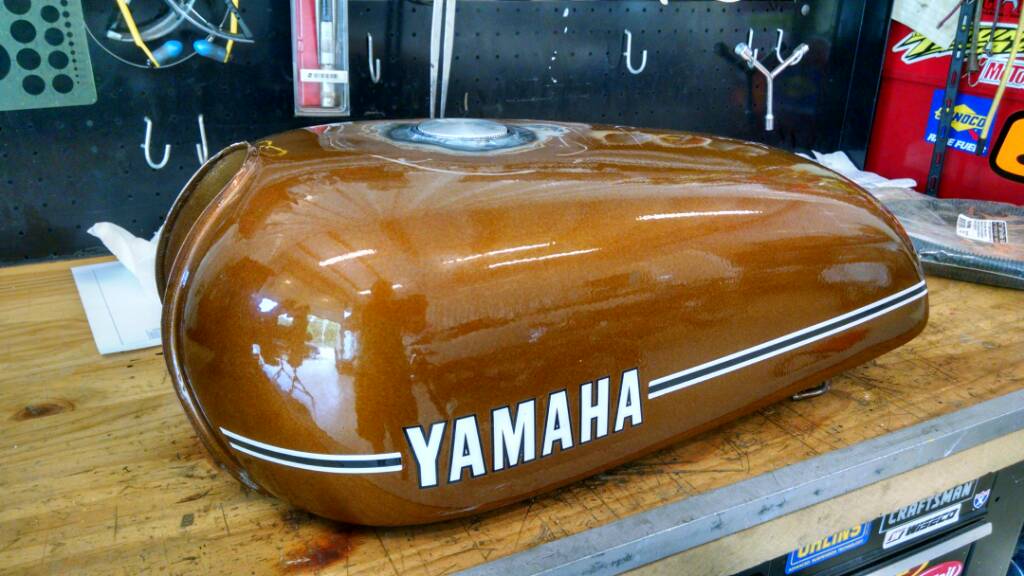
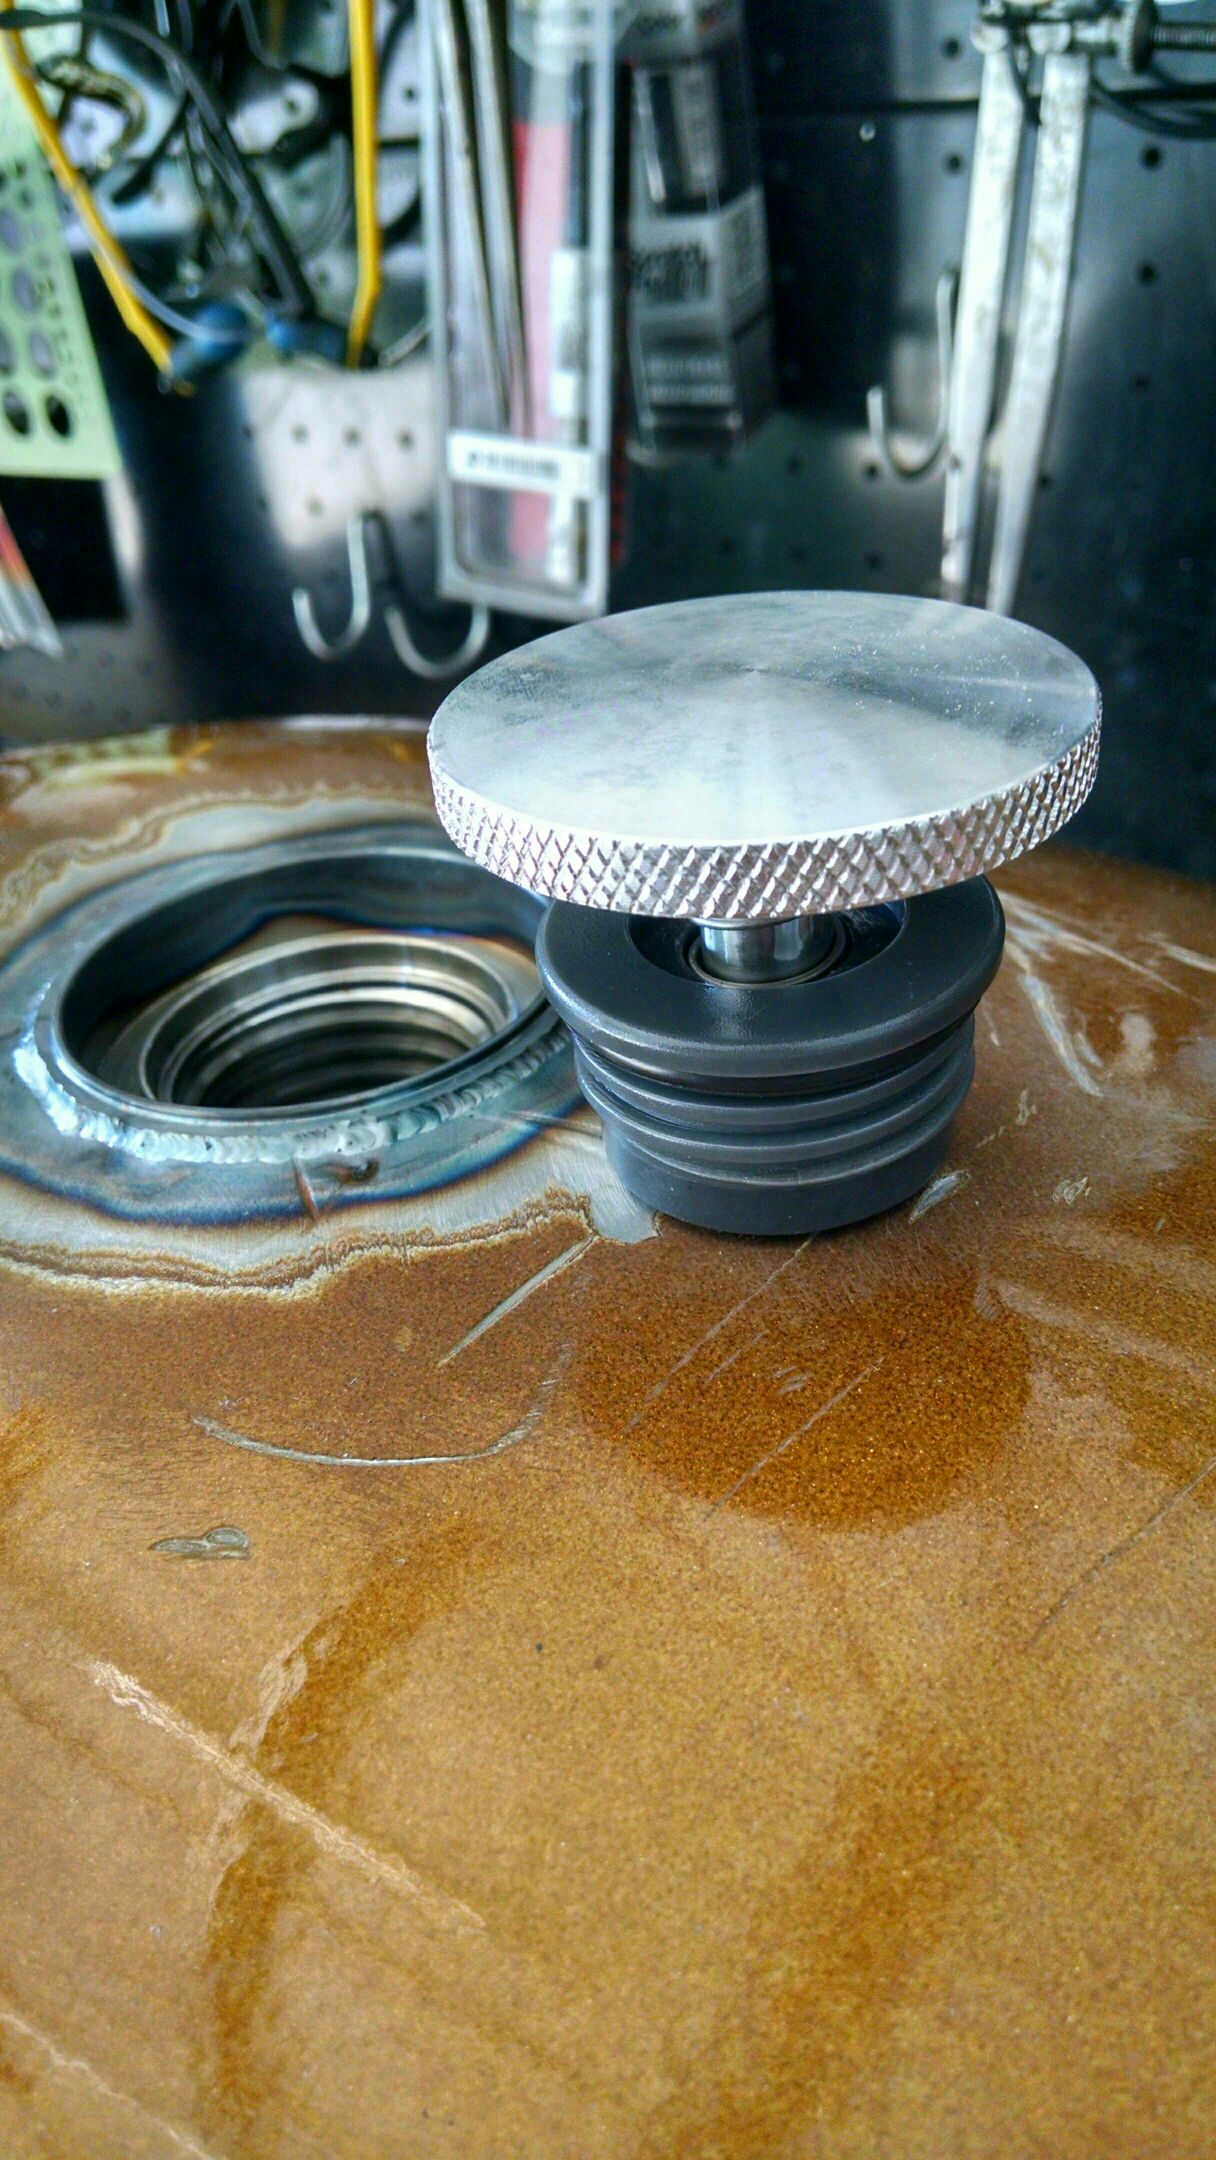
I got around to preparing the tank for the flush mount cap. I cut and ground out the old cap, did what I could to work the sheet metal to accept the flush mount cap bung, and got some help from a friend to TIG weld. I have no experience tig welding sheet metal, so I was fortunate to have him step in.
Now its time for some paint and body work. I think I'll grind that top lip flush and start working the bondo magic from there.
Long time no smell guys. I've been slammed kicking off a new business and haven't spent much time working on the bike.
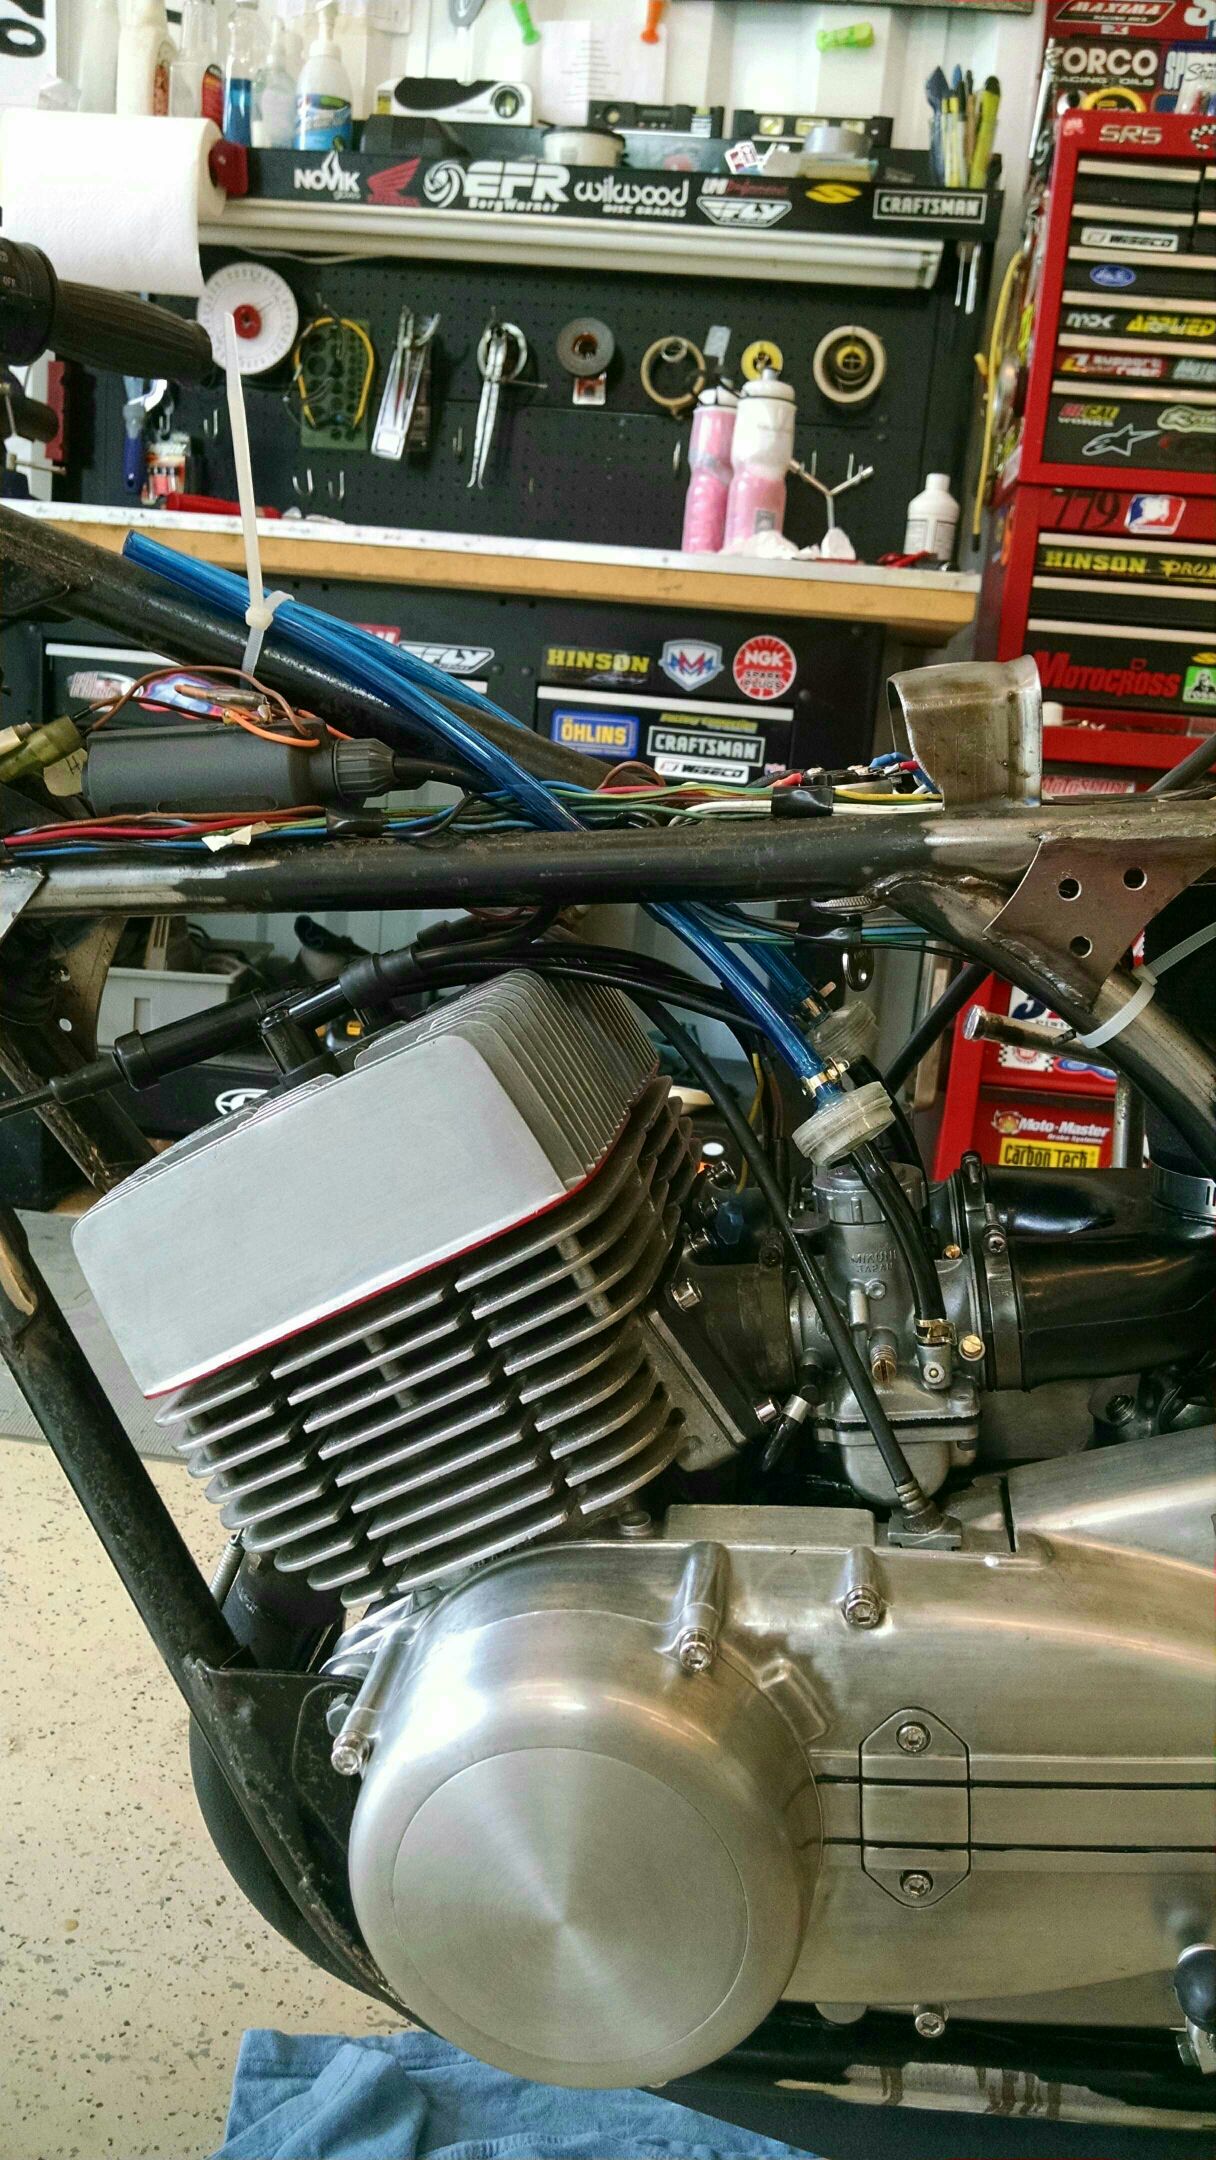
I was able to score a set of All Speed pipes on the cheap recently. I know I'm going to have to modify some stuff (flanges, mounting tabs) so I got a set that had seen some "use" - this way, if they end up not fitting or working very well, I don't have that much into them and I'm not hacking up a set of nice pipes.
I was trying to set my points/timing last night and kept running in circles. I got a points/condenser set from HVCycle last summer with a big order I placed. When I finally got around to installing, I noticed that one of the points cam sliders wasn't in the best of shape...and I had already threw out the stock one on the bike. Anyway - I'll set my points gap at 0.3mm, then attempt to time it at 1.8mm BTDC. Then I'll roll the engine over again and it gains 2mm of advance! Then I roll it over again and it changes again.
I've checked to make sure my dial indicator isn't moving. TDC repeats every time. The wonky point seems to ride flat on the cam sometimes and then rides on the inside edge of the slider at others, which is probably why I'm seeing so much advance.
I'm not sure what I'm asking here. I think I just needed to type it out to figure it out. The answer is to call HVCycle and have them send me a new set of points. This thing is close to being fired up!
HVC is in Lincoln Nebraska... used to walk in and buy shit there, but it's an online store with a big warehouse for the most part, good two smoke shop.
Sounds like some sort of mechanical problem. Is this issue for one set of points or both? If both, I would expect something is awry with the cam - not much there to cause this issue unless it is loose, or the left side crank bearing is super toasted - can't remember what you did with your crank. Possibly there could be some other weird problem like the stator housing being loose - most things like that you likely would have already noticed. If it is just the one cylinder, make a careful inspection of the pivot post and spring etc. If you can't see anything just poking around, I would take the point set off and carefully examine it. I had a set of points once that had the post come loose from the backing plate. Brand new set. No issues setting up the ignition. Engine started right up and ran perfectly for 5 seconds. Then would easily start again and run for 5 seconds. What was happening was the post would be in its proper place until the engine started causing it to hop out of its hole (where it was supposed to be pressed in permanently) and kill the engine. Once the cam wasn't bumping it anymore, it would hop right back in its hole like nothing happened! And it would start right back up and repeat. This took me HOURS to figure out! I had great spark, and correct timing when checked so it couldn't be the ignition! Eventually it quit with the points remaining in their dislodged position exposing the very obvious and the problem was solved in minutes with the old points. Not suggesting this is your problem, but a another close examination of the points off the bike might be useful.
FWIW, in my experience 0.3mm is a more dwell than needed. If memory serves, gap the points ANY smaller and you will have starting/running problems, so starting with such a small gap may give difficulties as soon as the rubbing blocks wear a bit and the point faces transfer material resulting in an even smaller gap. 0.35 mm (.014") seems to work best for me.
I dicked around with it again today for an hour or two and had to walk away again. I'm about 8 beers deep into frustration and just had this thought (I'm 20 mins away from my shop/garage so I can't check). I think I've been trying to time this bike in a stupor - meaning, I think the wiring diagram I was working from was calling the gray wire to the left coil and the orange wire to the right coil. I just found some info on 2SW saying it's the opposite.
Another thing I'm doing wrong - I'm running my test light directly from the batter and aligator clip wire jumpered to the pivoting side of the points. Rather than the light going on when the points just open, it's going on when the points just close. I think I started doing this because I'm trying to time the wrong cylinder based on the wrong wiring diagram.
I'm going to tackle this again tomorrow - damn that's fustrating.
Look at it this way - If it's operator error, at least there is not some wacky mystery problem to solve! Sounds like you will get it sorted out now. Rather than go by the wiring diagram for the respective points-coil right-left wire colors, you can simply observe that the cam will only be able to open one or the other sets of points, and that will be the cylinder that has the piston in the correct location. So if you set up the dial indicator for a cylinder and turn the crank to put the piston 1.85mm BTDC (or whatever timing you are using), only the one set of points will be close to the "just opening" spot. You can then just look at what color wire is going to that set, and then to which coil that color wire goes to, and then just make sure that that coil goes to the same cylinder you are working on.
As an alternative, you can wait until you start the bike and use a strobe light. The rotor has two somewhat hard to see notches on it that align to the top center of the alternator brush opening. It is best to check the alignment of the marks and make a mark on the stator housing with a degree wheel when you build the engine to check for accuracy, but the ones I have checked are close enough for a stock tune engine.
Connecting the dots on what set of points handles what cylinder made setting the points a whole lot easier. Damn that was dumb...
Now, I get to figure out all of the rest of these electrical gremlins I found I have. Like this sometimes ignition switch I got off eBay. Sometimes it's off in the off position, and sometimes it's switched 12V is always 12V.
So I've been fighting with some things on and off and finally made a little progress.
I picked up a set of pipes off eBay. Not in great shape, but they'll be fine to get the bike running. I need to move the rear mount tab and make sure there is clearance for the brake and shift levers.
Tore my bar mount kill switch apart and cleaned the contacts. Now it's a kill switch and not a 3 position on switch.
Figured out how to keep my oil injection pump cable from rubbing a hole through my oil supply hose.
I wired up the windmill rectifier and Delco voltage regulator following some instructions on 2SW. With those directions, the L being 12v switched and the D+ being 12v battery, I found they were actually connected internally making everything 12v switched to 12v battery at all times.
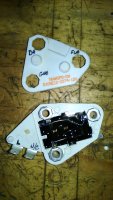
I guess I'm a little bit lost on the wiring. I'm running my rectifier output to battery. The instructions said that the D+ on the regulator should be battery as well. As you can see when I popped the hood on the regulator, the D+ and L are connected.
I've been reading about the internal regulators and have found that the L terminal is usually routed back to the alternator output, which it has internally as seen in the pic.
So why does that need to connect to 12v switched? I'm a little lost right now. If anyone has done this conversion, I'd appreciate any help you can provide
I got this beast buttoned up to the point of firing it up today. I added a few feet of fuel line to serve as reservoirs and added enough oil to the pump supply line to be safe. The rt carb float needs some adjusting as it would overflow pretty quick and wouldn't hold gas in the line. Left side was fine.
This thing barked on the first kick but wouldn't idle without some throttle input. Upped the idle screw and we were running. It idled for about 30 seconds and then would start revving to the moon. Hit the kill switch. Started it back up and it immediately revved to the moon. Added fuel to the lines. Started again and idled for 30-40 seconds, then started to rev to the moon again. Hit the kill switch. Started again and went straight to screaming. Hit the kill switch. Got on Do The Ton to consult counsel.
I'm guessing this thing is doing this because it's running out of fuel? There isn't much fuel in the lines, but I figured it'd putter out rather than scream when it's running low. Not sure what to make of it
+1. No sense in trying it anymore without fixing the fuel level. I rarely need to replace needles and seats on these carbs. 99% of the time the reason the carbs overflow is because of a mechanical issue with the floats and operating arm that controls the needle. The arm is brass and the little pins on the floats that engage the arm are steel and wear the brass. It only takes the most incredibly slight wear to cause trouble - barely discernible. Make a tiny sanding block with some #400 grit sandpaper and very carefully sand the arm where you see the pin is touching it. Sand it until perfectly uniform and then smooth it out to at least #600 grit. As the floats travel up and down the pin actually has to slide horizontally a minute distance across the arm. Since the whole mechanism hardly moves at all, it wears in exactly one place, and the tiniest bit can cause the needle to not really close completely. You can set the float height by holding the carb body upside down and adjusting the arm to be parallel with the bowl gasket surface. You RD will not rev substantially as it leans out and runs out of gas. When all is well you can leave it idling and turn off the petcock and let the bowls run dry. You will likely notice a very slight pick up in speed when the first bowl empties and starves that cylinder, but it is a pretty small effect.
Be very careful to not over tighten the bowl screws as the bodies are pretty soft and it's easy to bend down the corners where the screws are. It is a long span between the screws and the gasket will not compress in the middle once you bend the bodies and the carbs will weep fuel residue.
Thanks guys. I pulled the carbs and found the rt side float to be out of adjustment. I'm going to bench check them to ensure the needle seals before reinstalling.
I also found that my oil injection pump wasn't supplying oil.... I had primed it but now it seems like nothing is coming out when I spin the engine by hand. To be continued...
+1. No sense in trying it anymore without fixing the fuel level. I rarely need to replace needles and seats on these carbs. 99% of the time the reason the carbs overflow is because of a mechanical issue with the floats and operating arm that controls the needle. The arm is brass and the little pins on the floats that engage the arm are steel and wear the brass. It only takes the most incredibly slight wear to cause trouble - barely discernible. Make a tiny sanding block with some #400 grit sandpaper and very carefully sand the arm where you see the pin is touching it. Sand it until perfectly uniform and then smooth it out to at least #600 grit. As the floats travel up and down the pin actually has to slide horizontally a minute distance across the arm. Since the whole mechanism hardly moves at all, it wears in exactly one place, and the tiniest bit can cause the needle to not really close completely. You can set the float height by holding the carb body upside down and adjusting the arm to be parallel with the bowl gasket surface. You RD will not rev substantially as it leans out and runs out of gas. When all is well you can leave it idling and turn off the petcock and let the bowls run dry. You will likely notice a very slight pick up in speed when the first bowl empties and starves that cylinder, but it is a pretty small effect.
Be very careful to not over tighten the bowl screws as the bodies are pretty soft and it's easy to bend down the corners where the screws are. It is a long span between the screws and the gasket will not compress in the middle once you bend the bodies and the carbs will weep fuel residue.
This site uses cookies to help personalise content, tailor your experience and to keep you logged in if you register.
By continuing to use this site, you are consenting to our use of cookies.


![IMG_20150603_162127837_HDR[1].jpg](/data/attachments/62/62680-32e0b075fc89dfcc6e7943c95a716747.jpg)