
We noticed you are blocking ads. DO THE TON only works with community supporters. Most are active members of the site with small businesses. Please consider disabling your ad blocking tool and checking out the businesses that help keep our site up and free.
You are using an out of date browser. It may not display this or other websites correctly.
You should upgrade or use an alternative browser.
You should upgrade or use an alternative browser.
'76 cb360 cafe:ROUND 2...third times a charm!
- Thread starter checko
- Start date
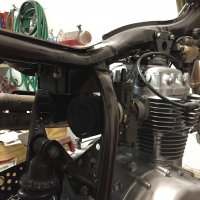
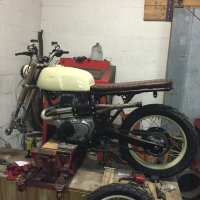
Whoa, just found this thread. This thing is insane! Loving the front end and the headers, the sub frame, the integrated tail light... shit the list is long. What are the flatslides you went with? Model and throat size? The colour is so nice as well 8)
crazypj
Split personality, I fake being smart
checko said:I figured it out by accident lol
8)
redwillissuperman
Keep it simple- engine, wheels, bars
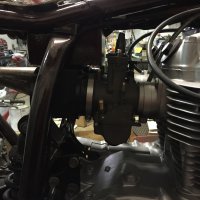
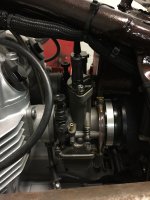
They look like OKO 32s. The only problem I've had is the slides can have some irregularities that keep them from seating well. Idle ends up at 1200rpm.
focusinprogress
City Limit Moto:Parts-Service-Apparel (716)8038606
I made up the upholstery yesterday afternoon, Checko and I should have it mounted to the pan permanently tonight or tomorrow.


Trevor May
Been Around the Block
Not bad work. Did you use the foam backing on the main panel? I like the backstitching too.
focusinprogress
City Limit Moto:Parts-Service-Apparel (716)8038606
Duchat said:Not bad work. Did you use the foam backing on the main panel? I like the backstitching too.
yeah there's light duty 1/4" green foam backing the top panel. I appreciate the kind words, this is only the third seat I've done with zero instruction so it's been a bit of a learning curve. It's been tough getting a budget machine to sew through the foam without jamming, and then to sew through three layers of vinyl for the backstitching....borrowed my buddy's mom's machine and its worked far better than the machine I've used the last two seats. Turns out this machine is a $300ish machine from target, SHARK brand....I'll have to see about getting one for myself for future seats.
Trevor May
Been Around the Block
I inherited a bernina unfortunately from my neighbor's wife, but it has a walking foot attachment that really helps pushing multi layers of vinyl with ease. Before that used a singer student model that could get a tractor out of the mud. I could sew hardwood with that thing if I wanted. I've made two seat covers now but can't really show my work because the seat pan isn't done.focusinprogress said:yeah there's light duty 1/4" green foam backing the top panel. I appreciate the kind words, this is only the third seat I've done with zero instruction so it's been a bit of a learning curve. It's been tough getting a budget machine to sew through the foam without jamming, and then to sew through three layers of vinyl for the backstitching....borrowed my buddy's mom's machine and its worked far better than the machine I've used the last two seats. Turns out this machine is a $300ish machine from target, SHARK brand....I'll have to see about getting one for myself for future seats.
crazypj
Split personality, I fake being smart
Duchat said:Before that used a singer student model that could get a tractor out of the mud. I could sew hardwood with that thing if I wanted. I've made two seat covers now but can't really show my work because the seat pan isn't done.
LOL
That's funny that is ;D
I keep coming back to look at various things
Is the tailight recessed into the tube you bent up? (I guess I could go back and read through everything
 )
)Really liking the bash guard, think I'm going to make a similar one for my 'Blue Bike' 8)
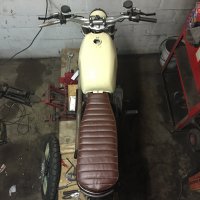
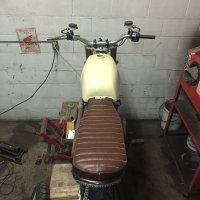
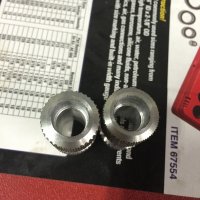
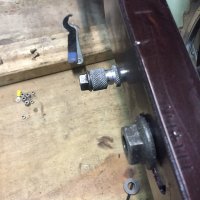
Got the seat cover riveted to the pan that @focusinprogress whipped up. Set the tank and seat on to snap some pics. Also made some exhaust clamps and pc'd them gloss black as well. SS torx hardware w/lock nuts from work
Attachments

crazypj
Split personality, I fake being smart
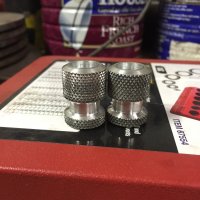
Make sure knurling rollers are dead square to material as well if your doing straight knurl and less than 1 degree if your 'traveling' across work (ie, 'high on direction of travel so 'trailing edge' does most of the work)
Having wheels dead square on a longer knurl often results in front edge digging in and can REALLY mess things up bad (been there, broke that )
Merry Christmas
PJ
Having wheels dead square on a longer knurl often results in front edge digging in and can REALLY mess things up bad (been there, broke that
)Merry Christmas
PJ


