'78 CB750K cafe-"ish" project - Ottawa

Buster

New Member
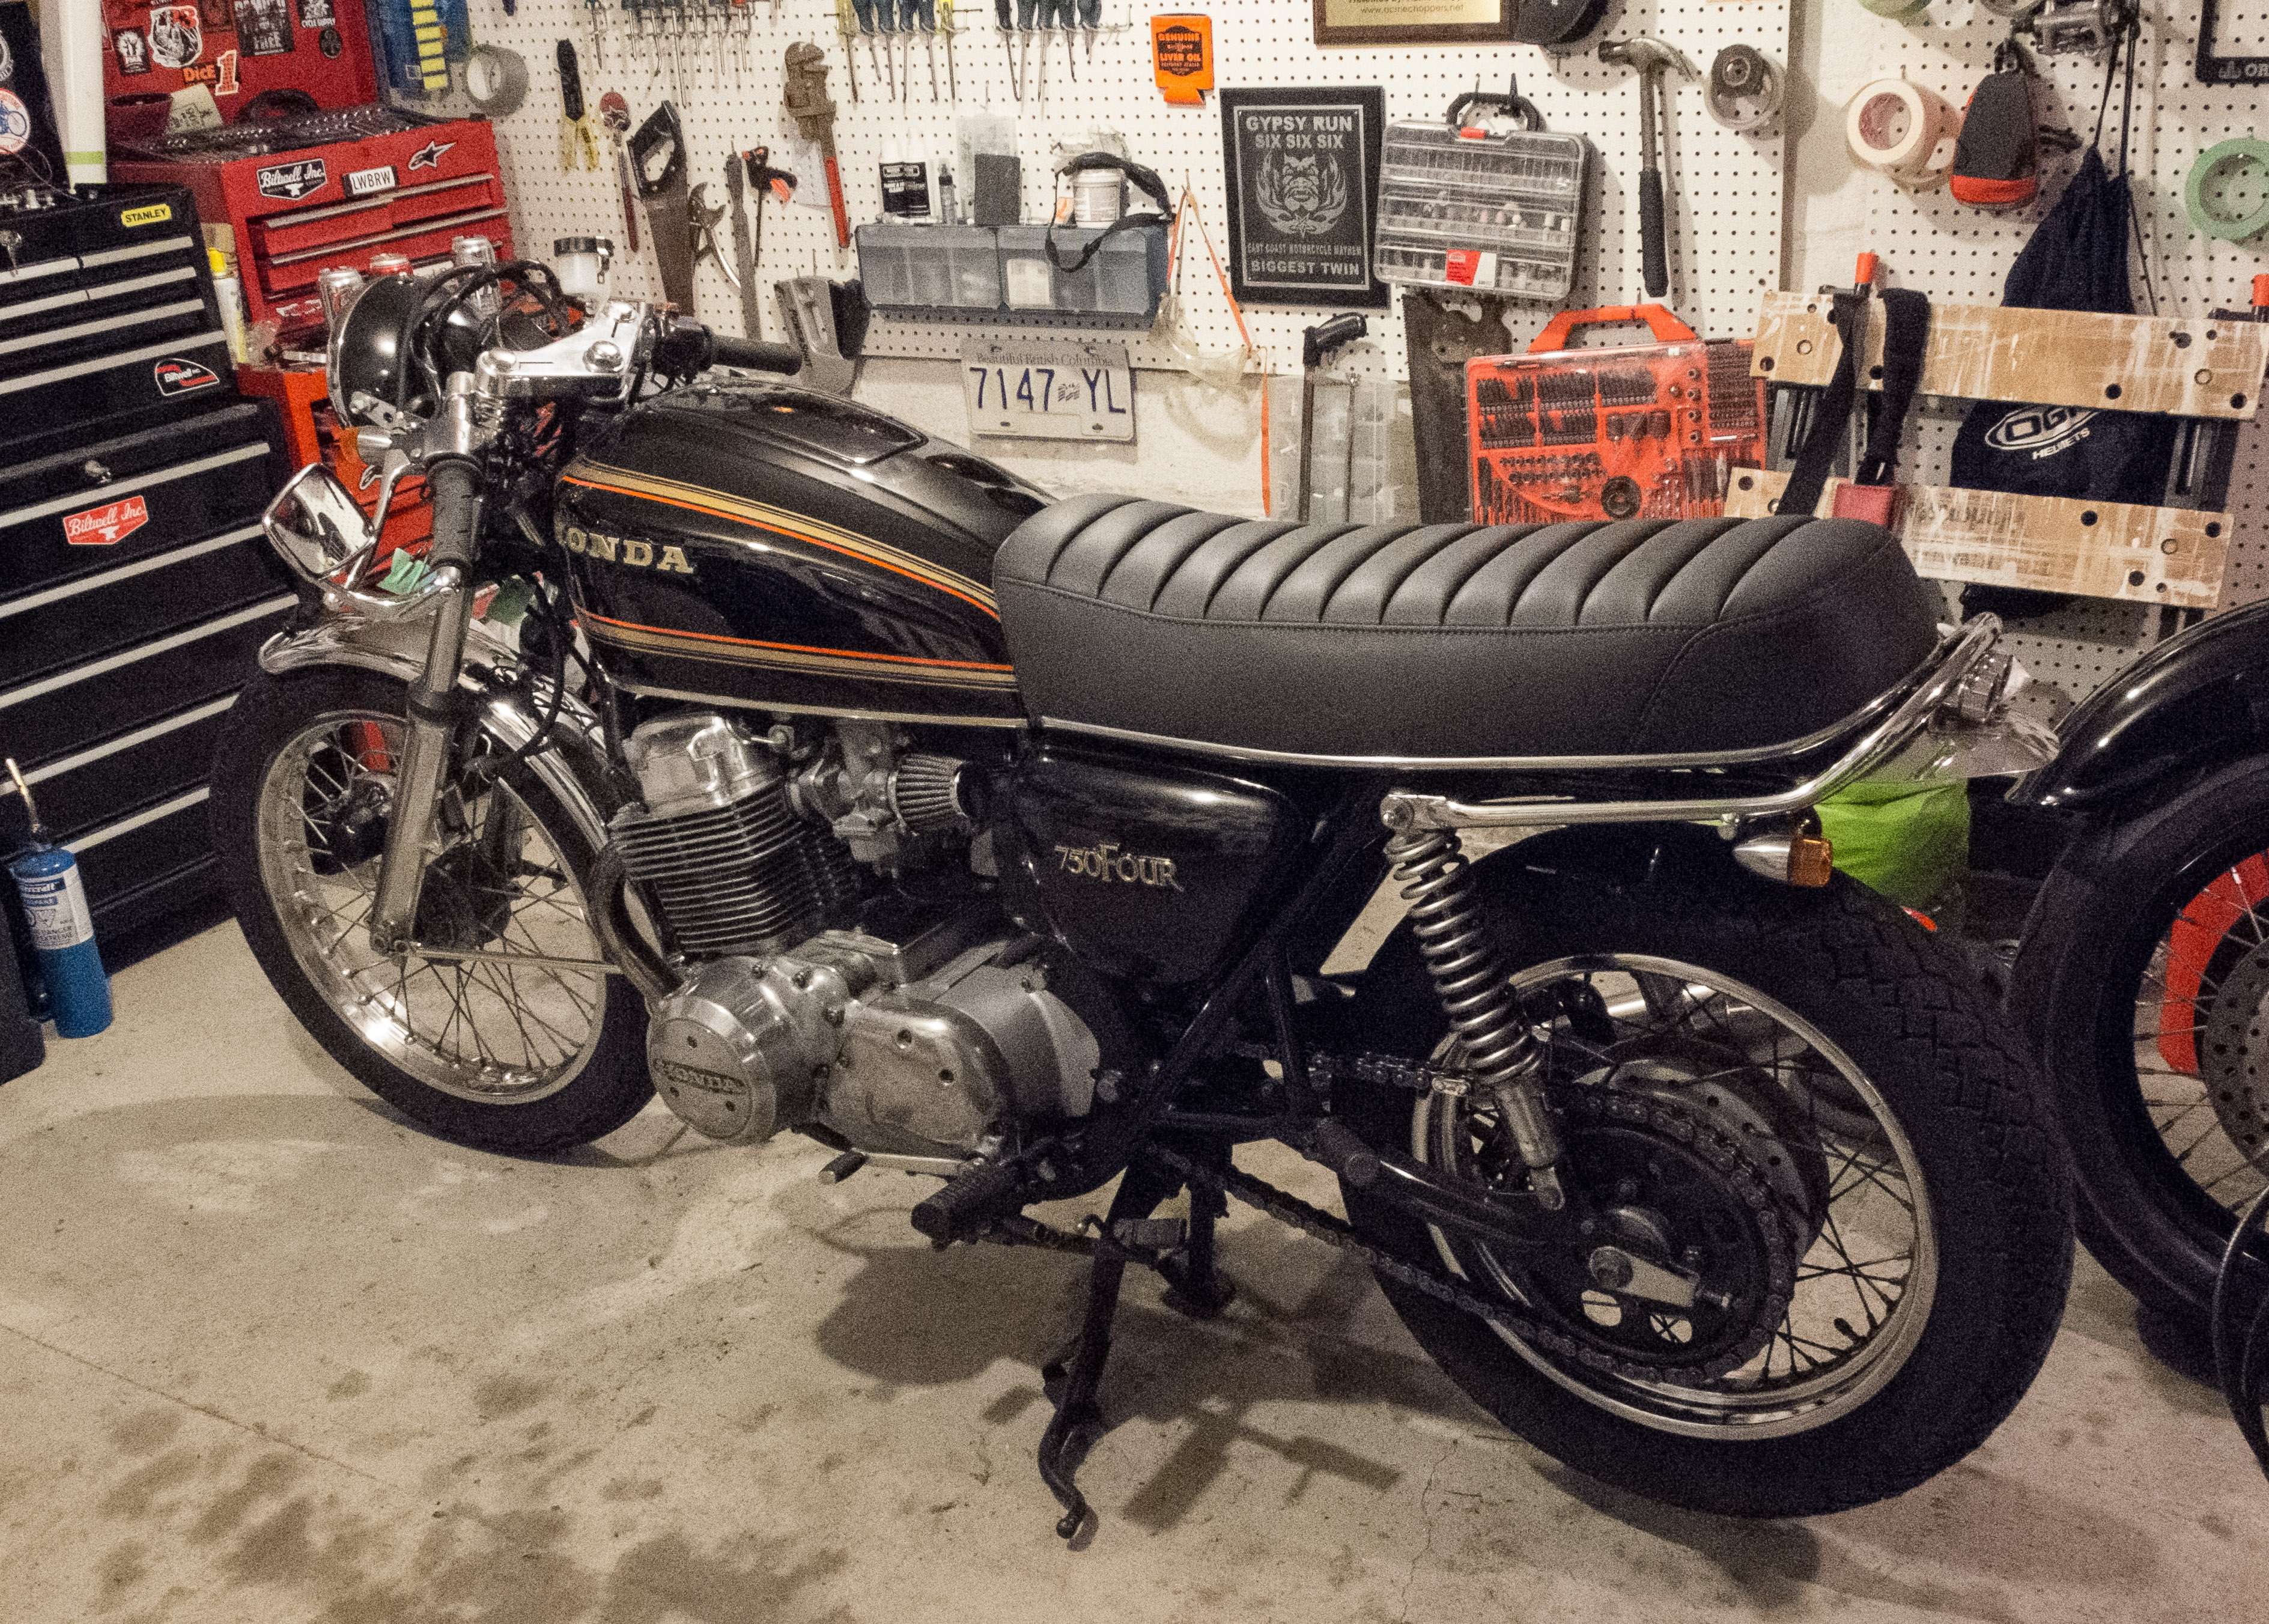
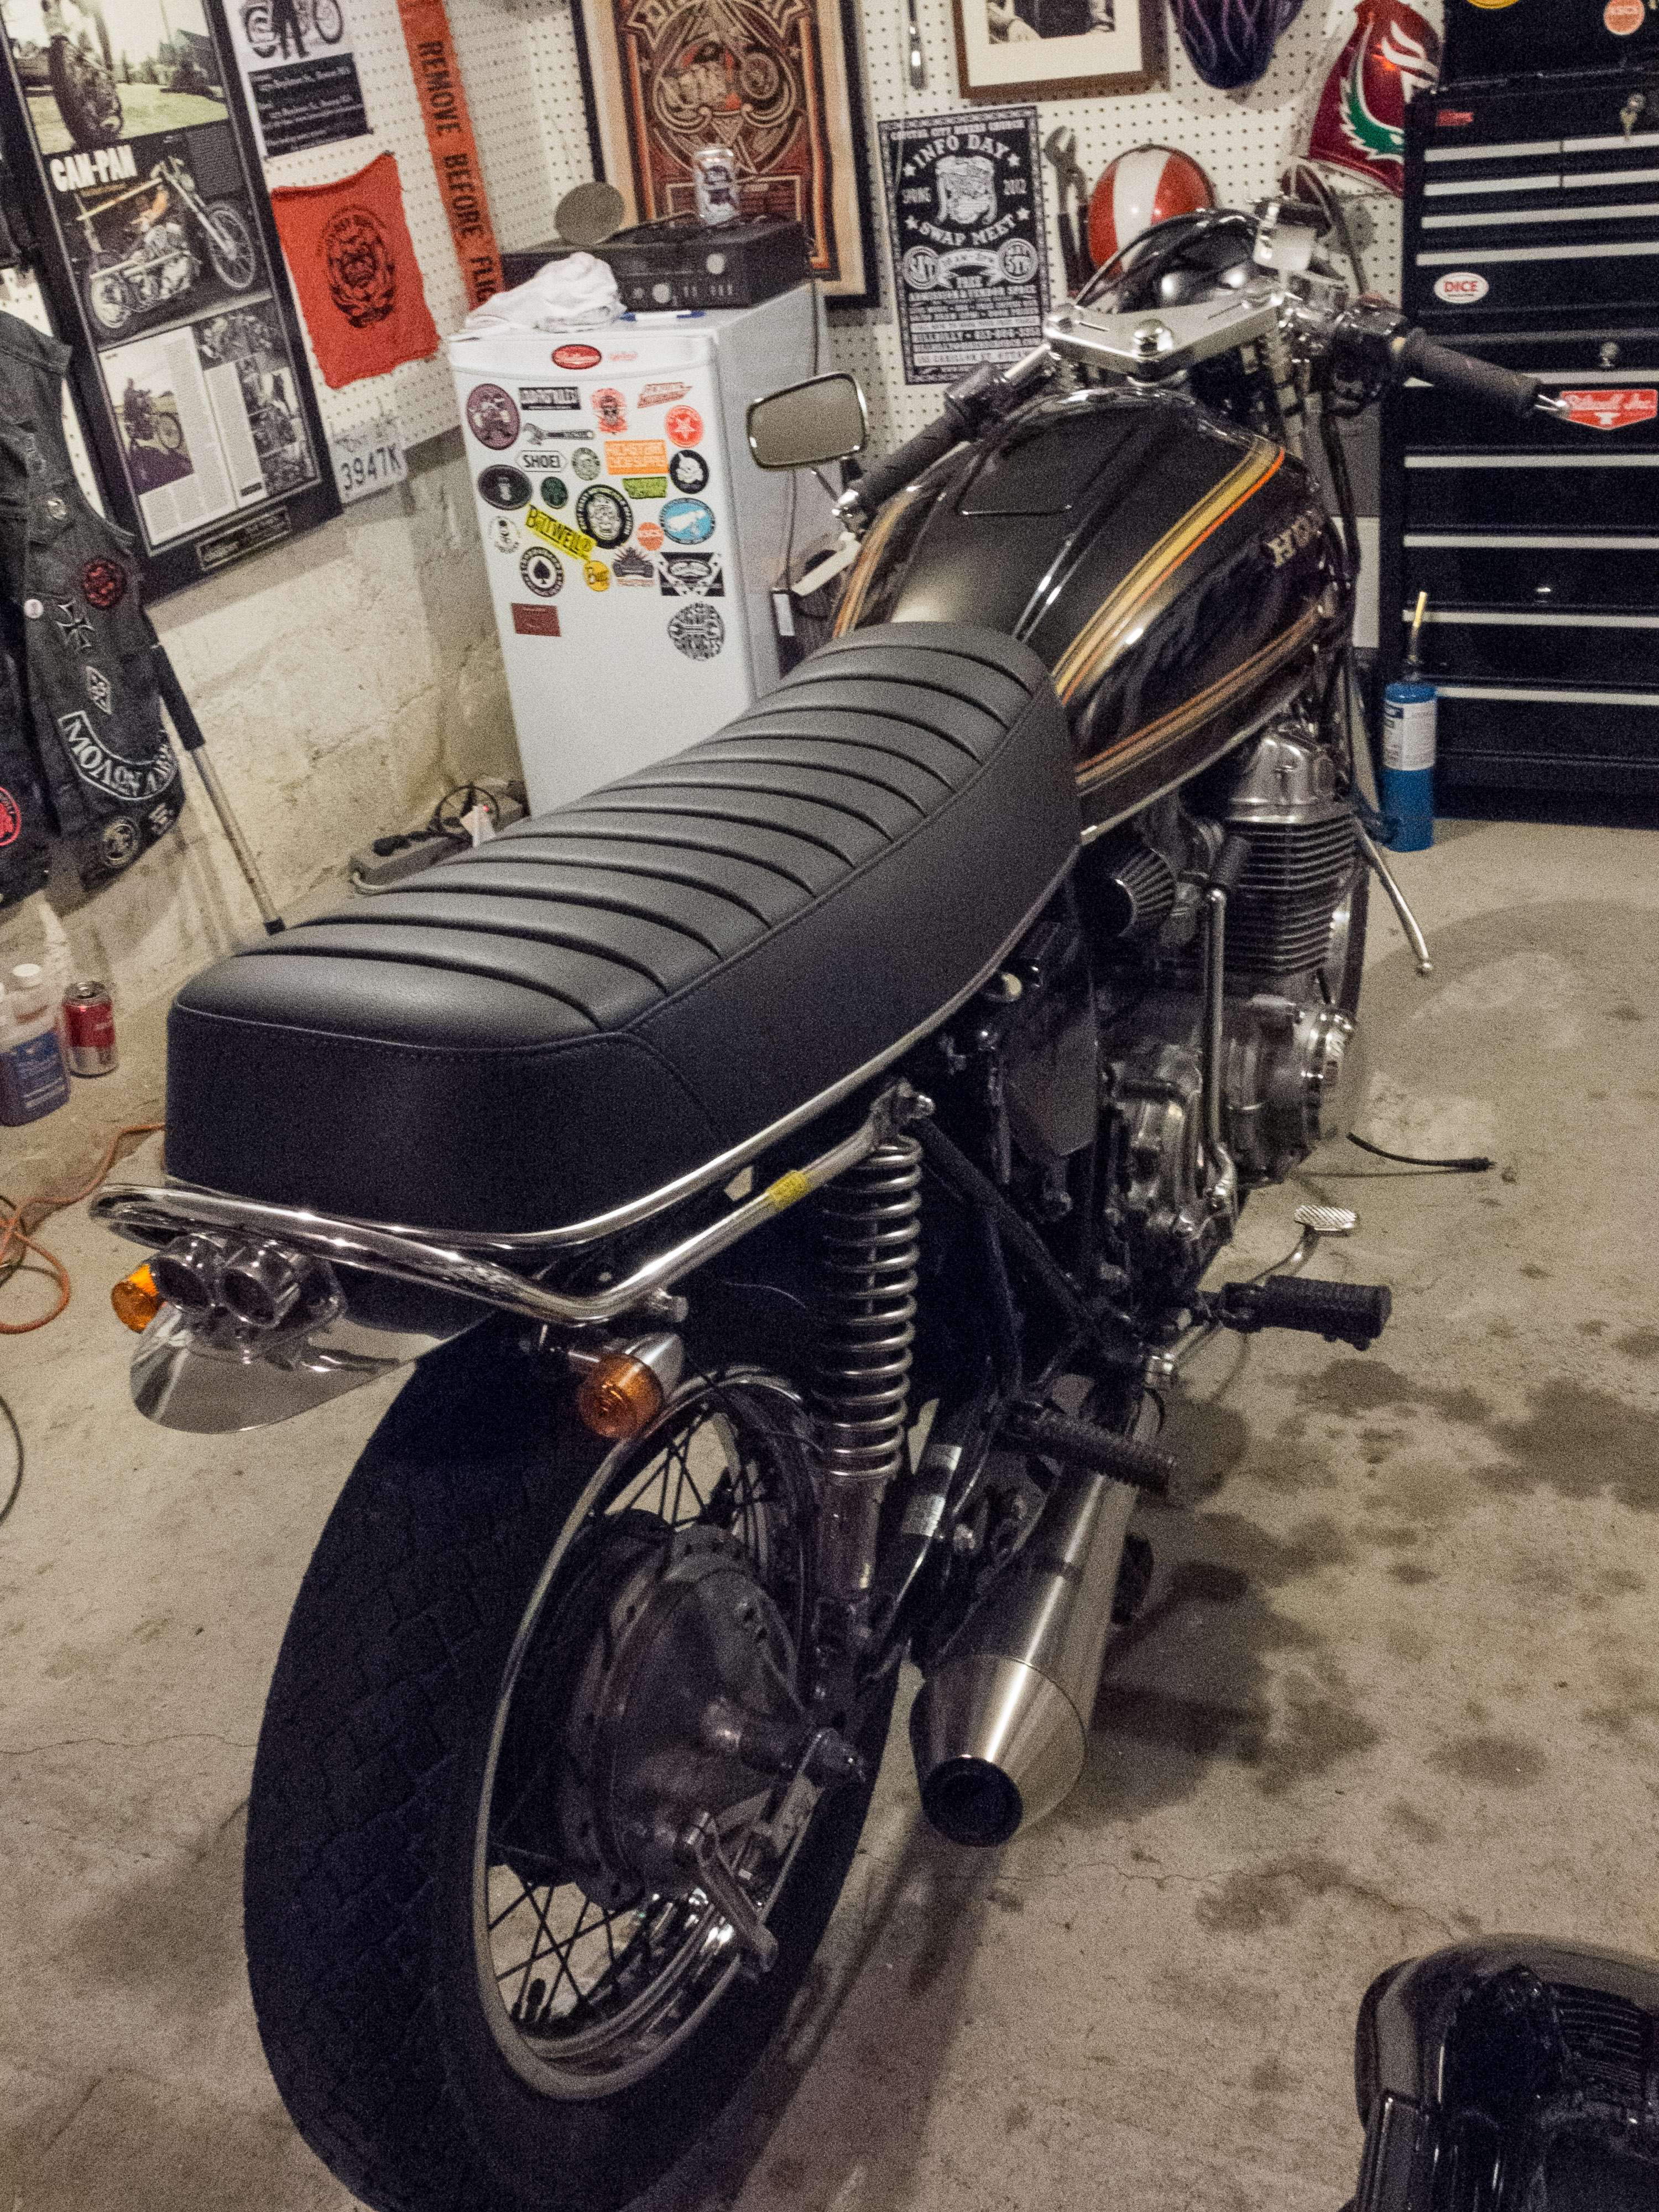
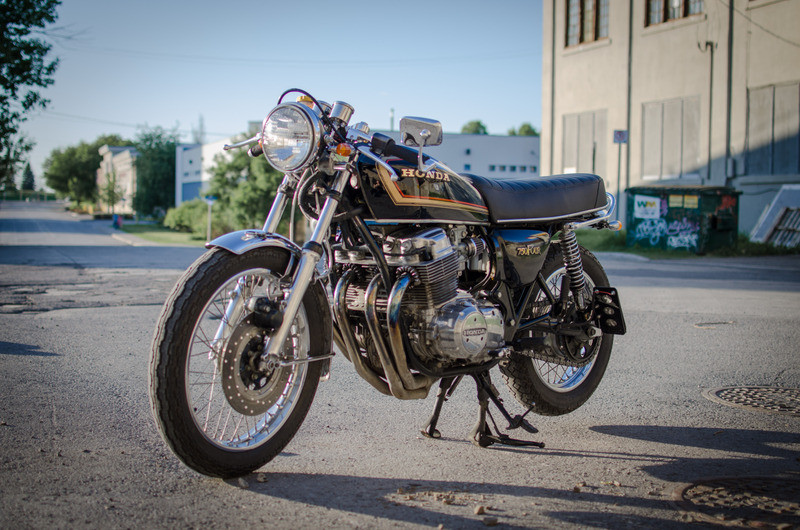
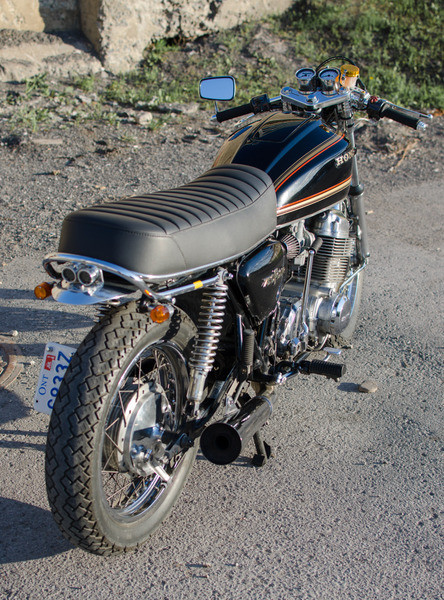
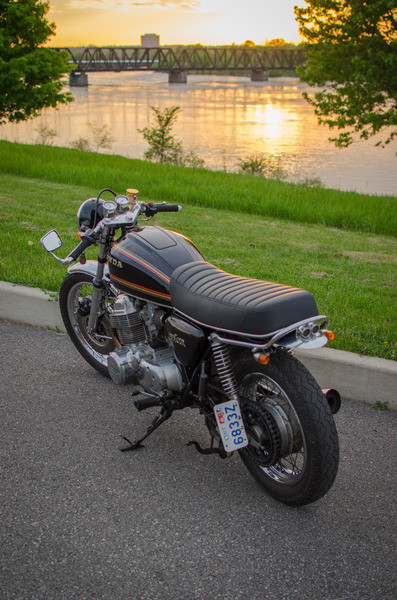
A couple of weeks ago I picked up a good condition '78 CB750K. A few years ago whenI lived in England I owned a cafe racer '77 CB750F2, and I have been kicking myself for selling it ever since. So I jumped at the chance to pick this one up, and figure I will tinker with it over the winter. Strangely enough, my buddy has a '78 K as well, so we will do some of the work on them together. The bike came in good running order, mostly stock other than the bars and exhaust, and came with a giant rack and back rest that hurt my eyes just to look at it (those came off right away...). Here's the bike, with the horrible rack, next to my buddy's '78.

3lv6.jpg


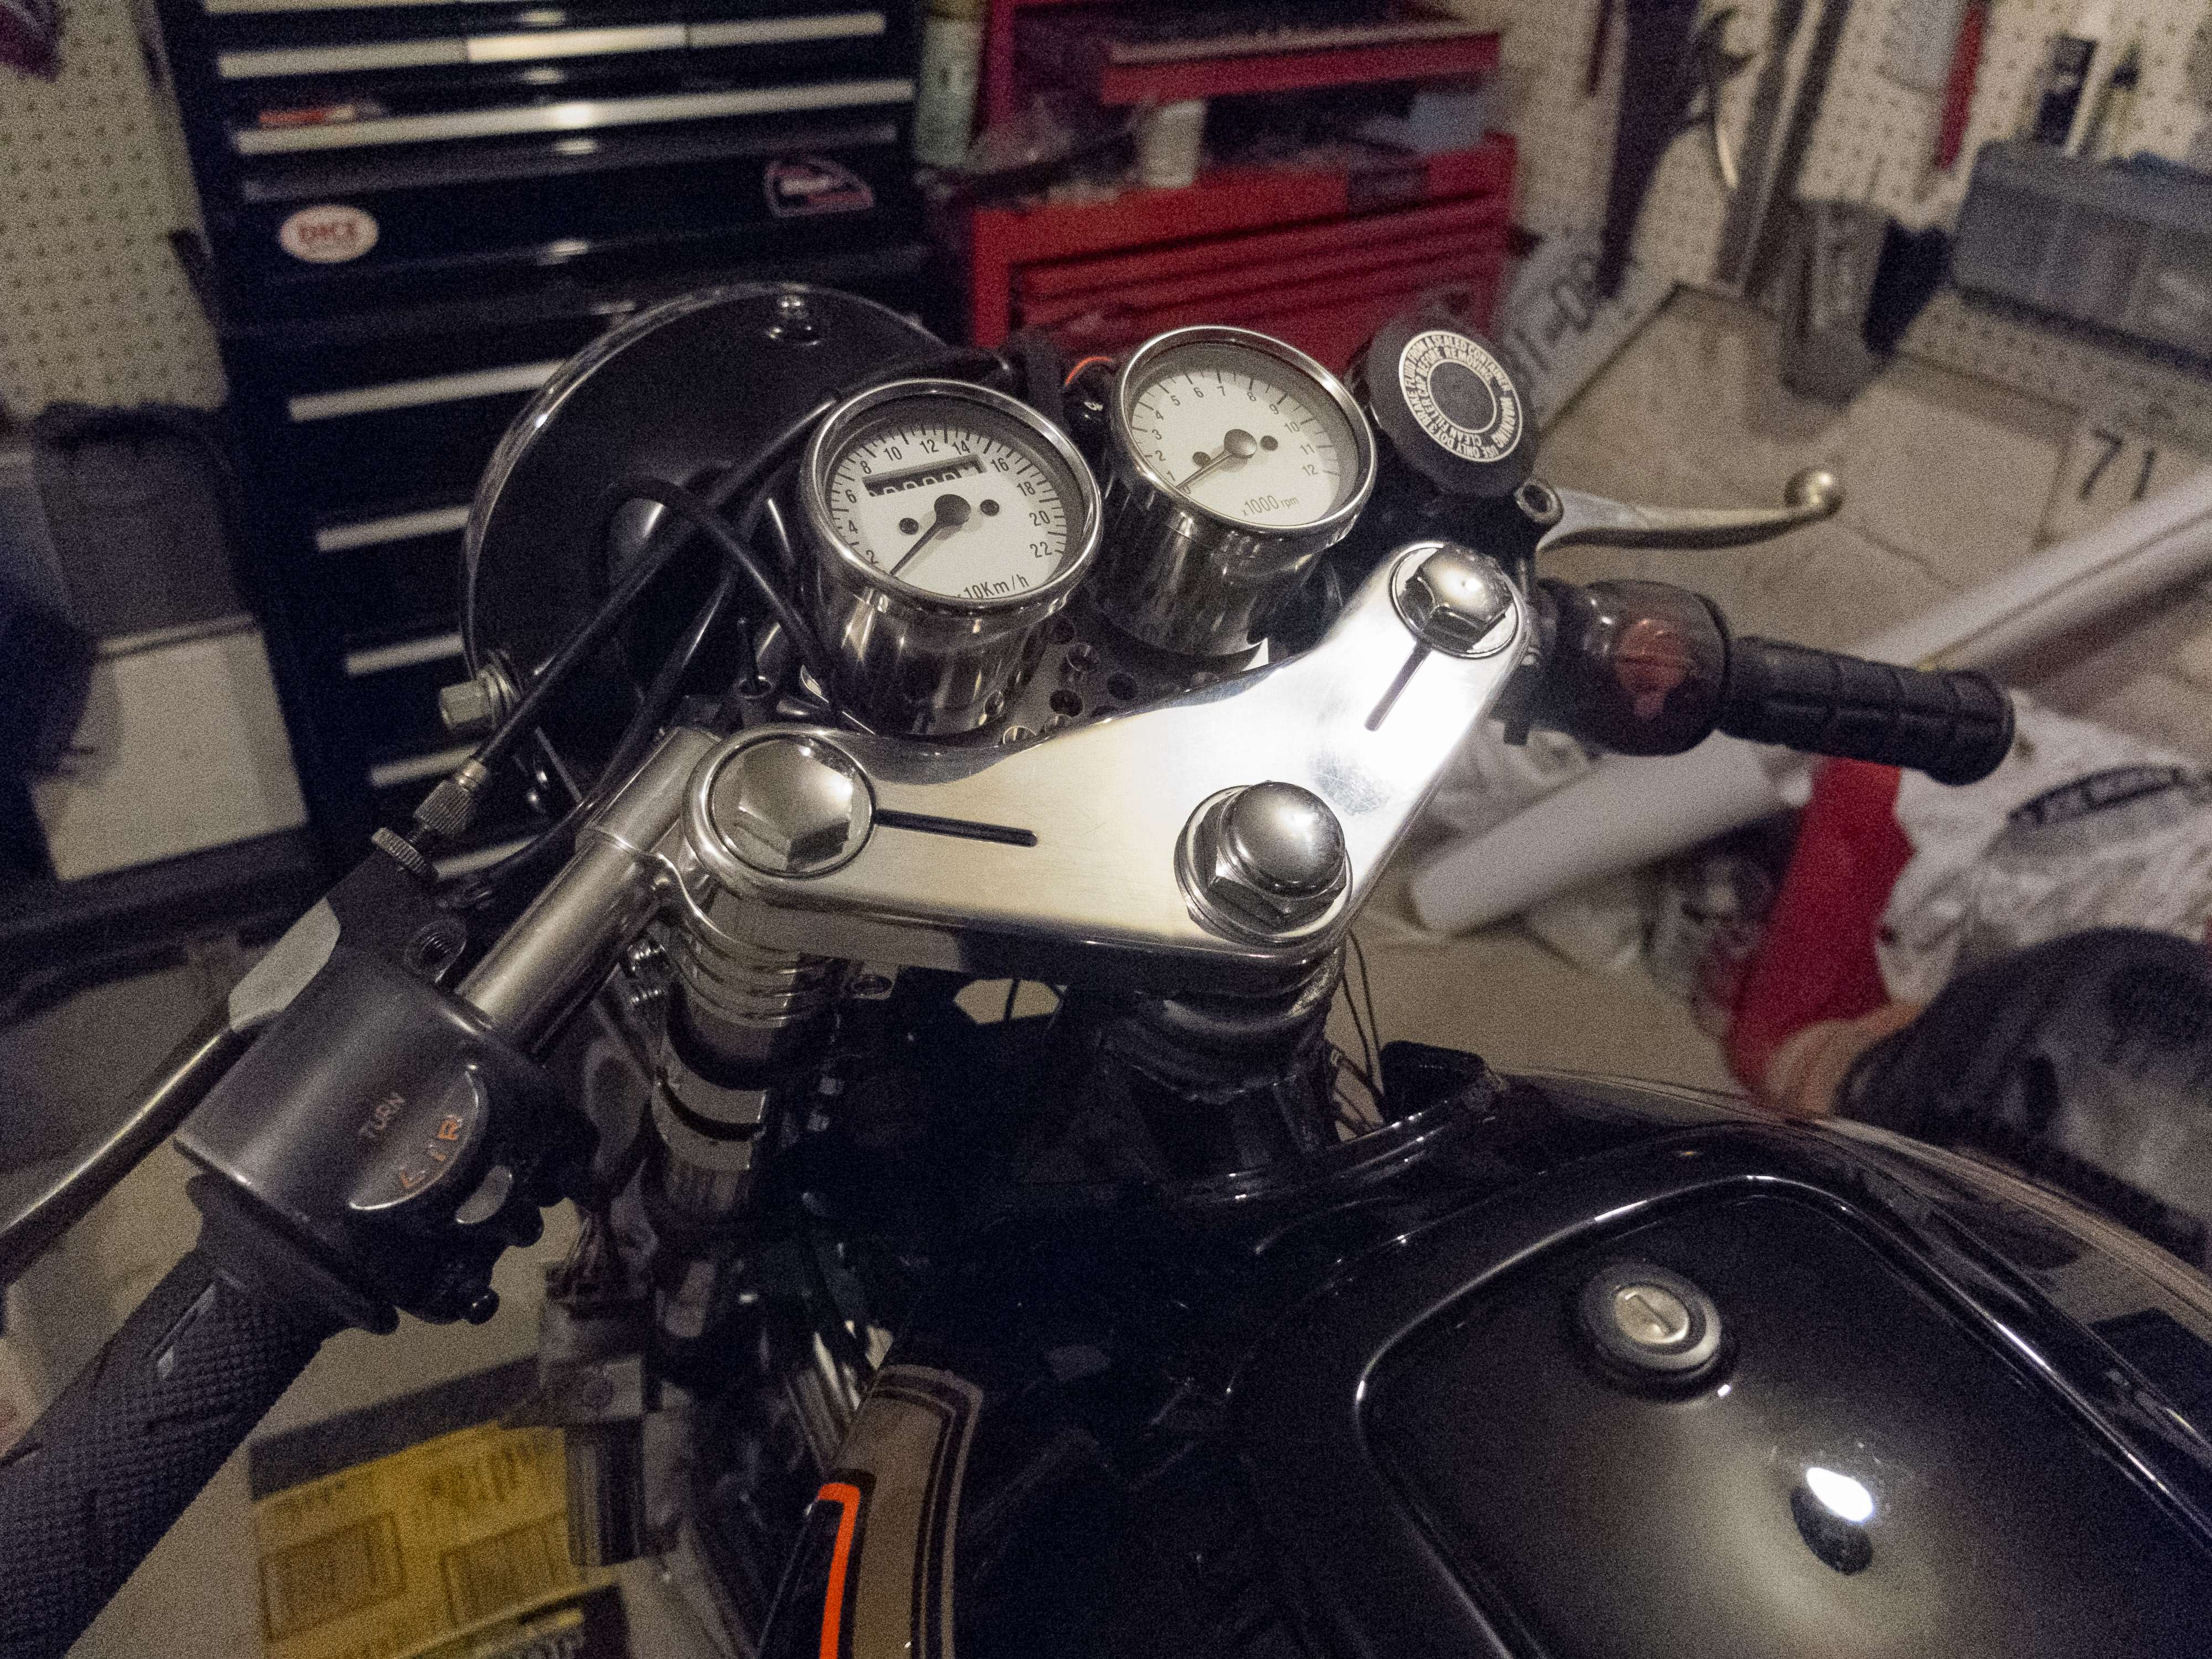
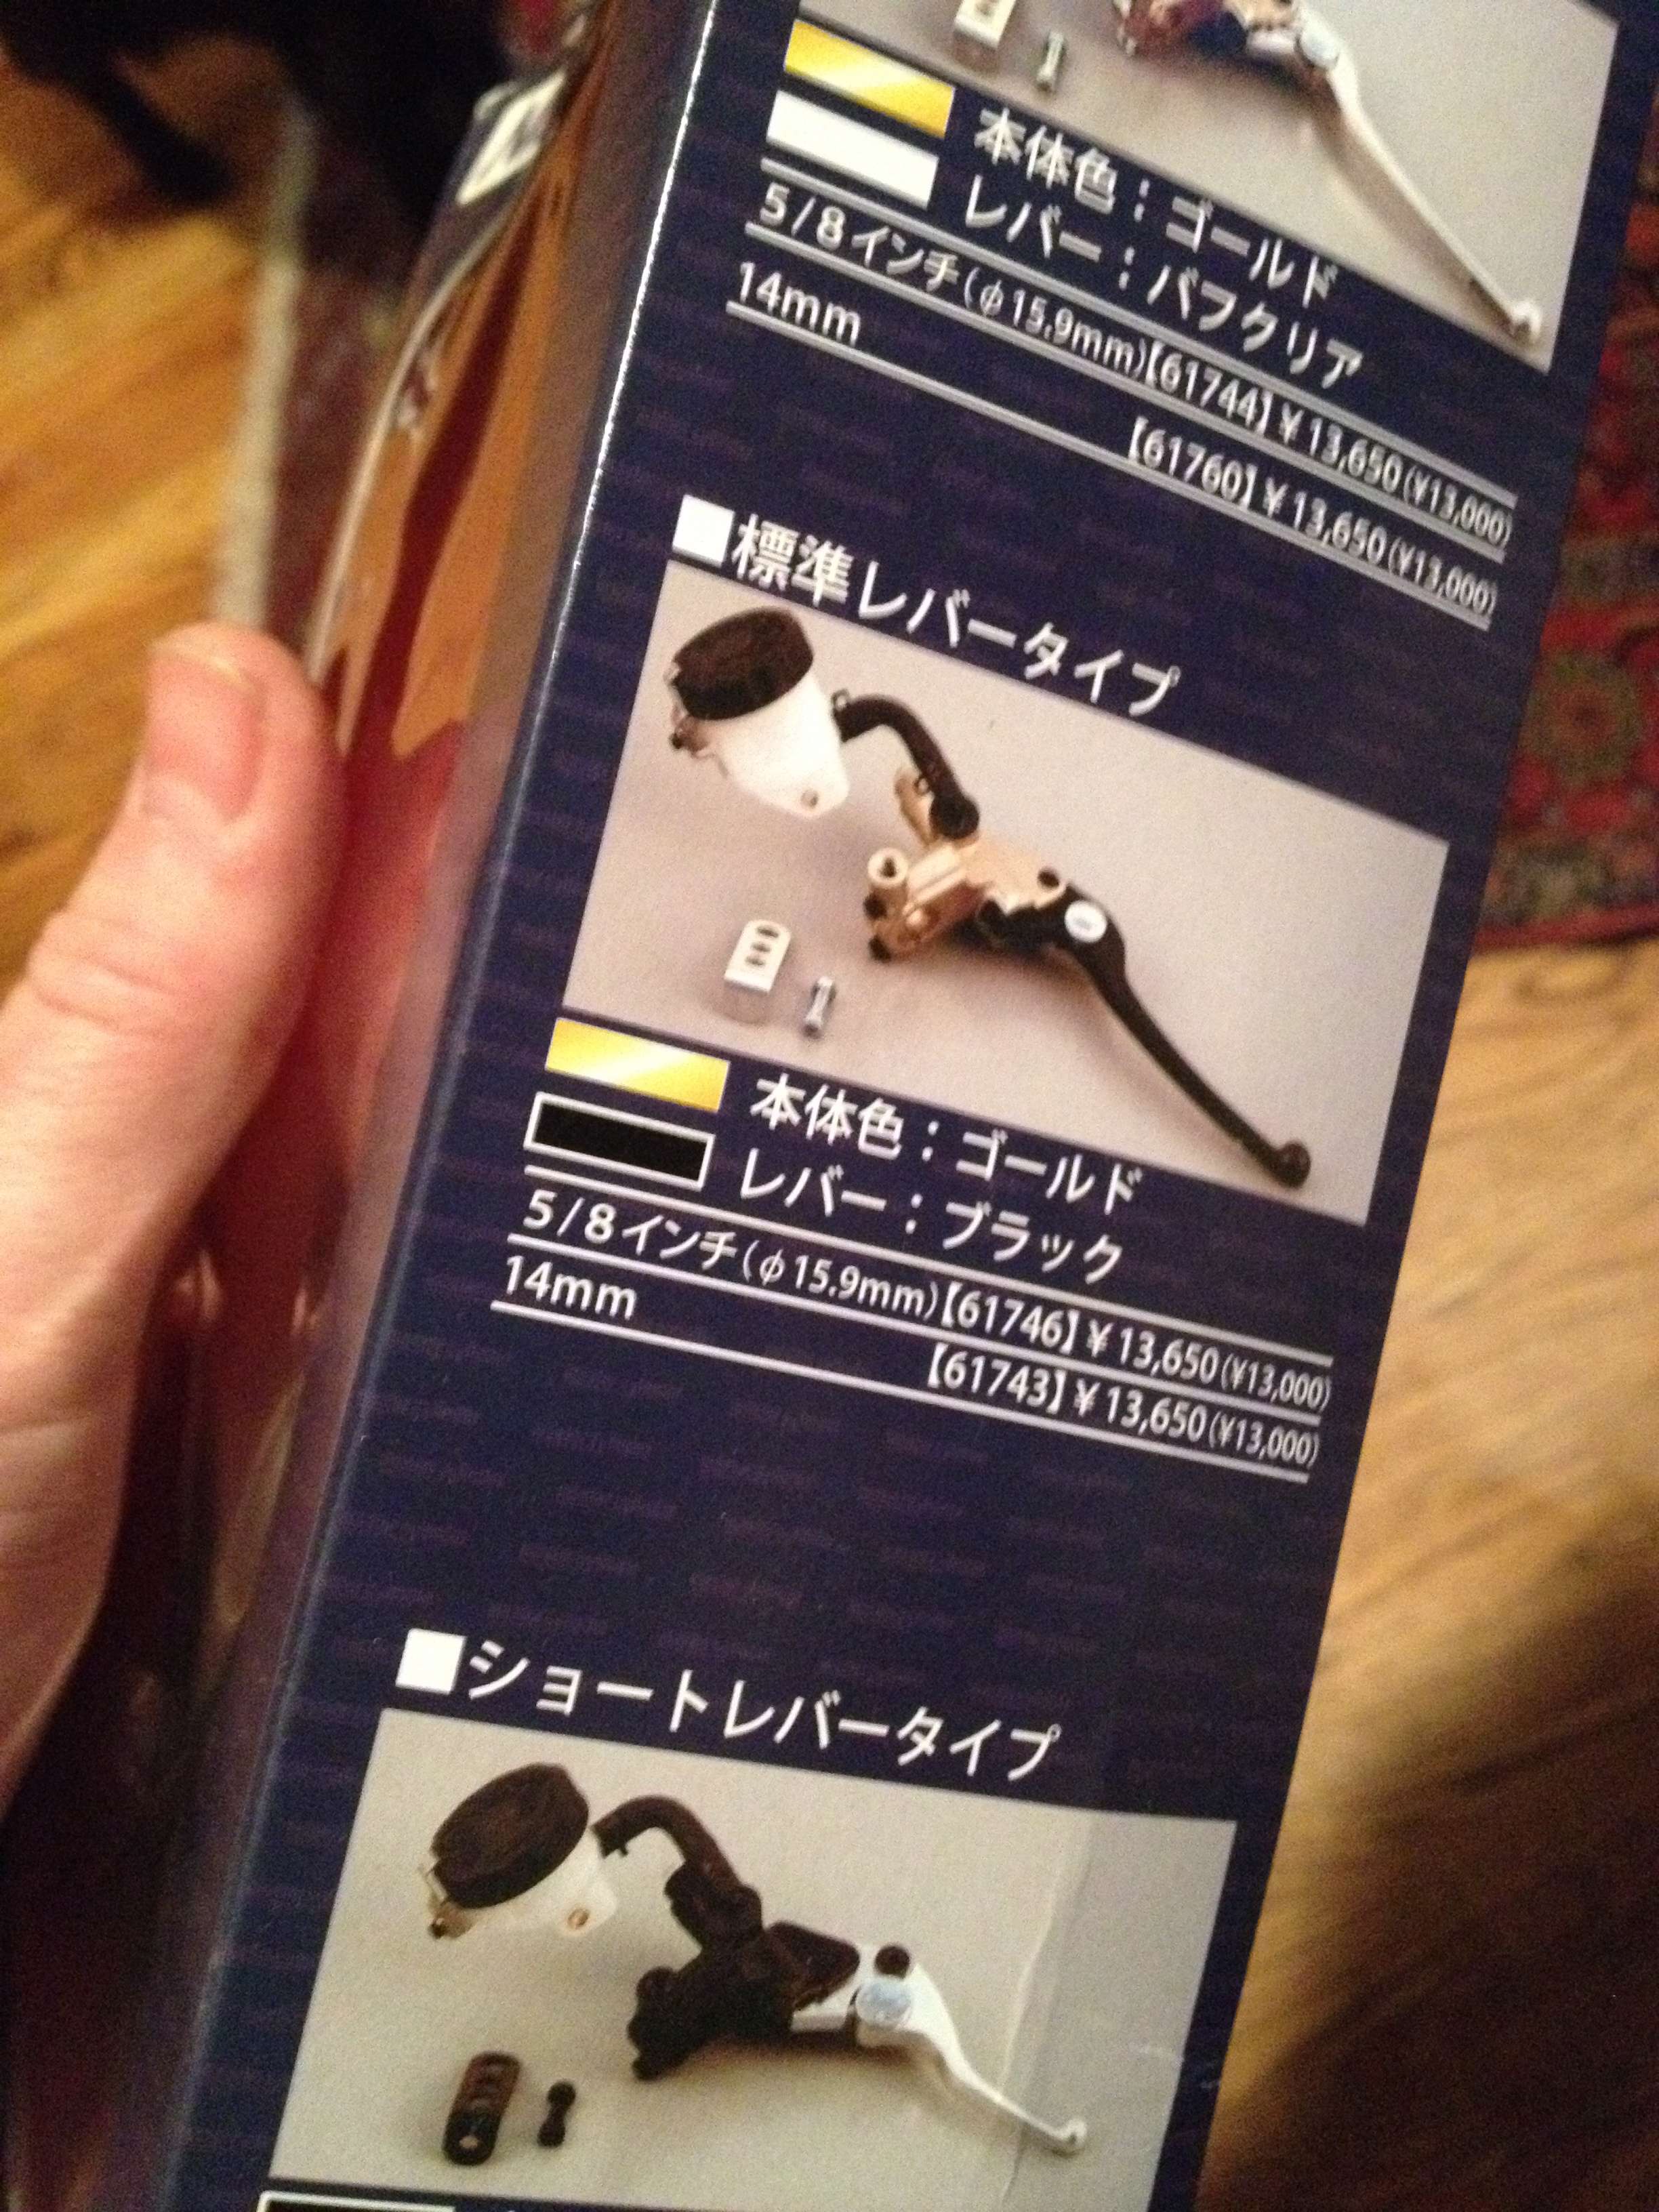
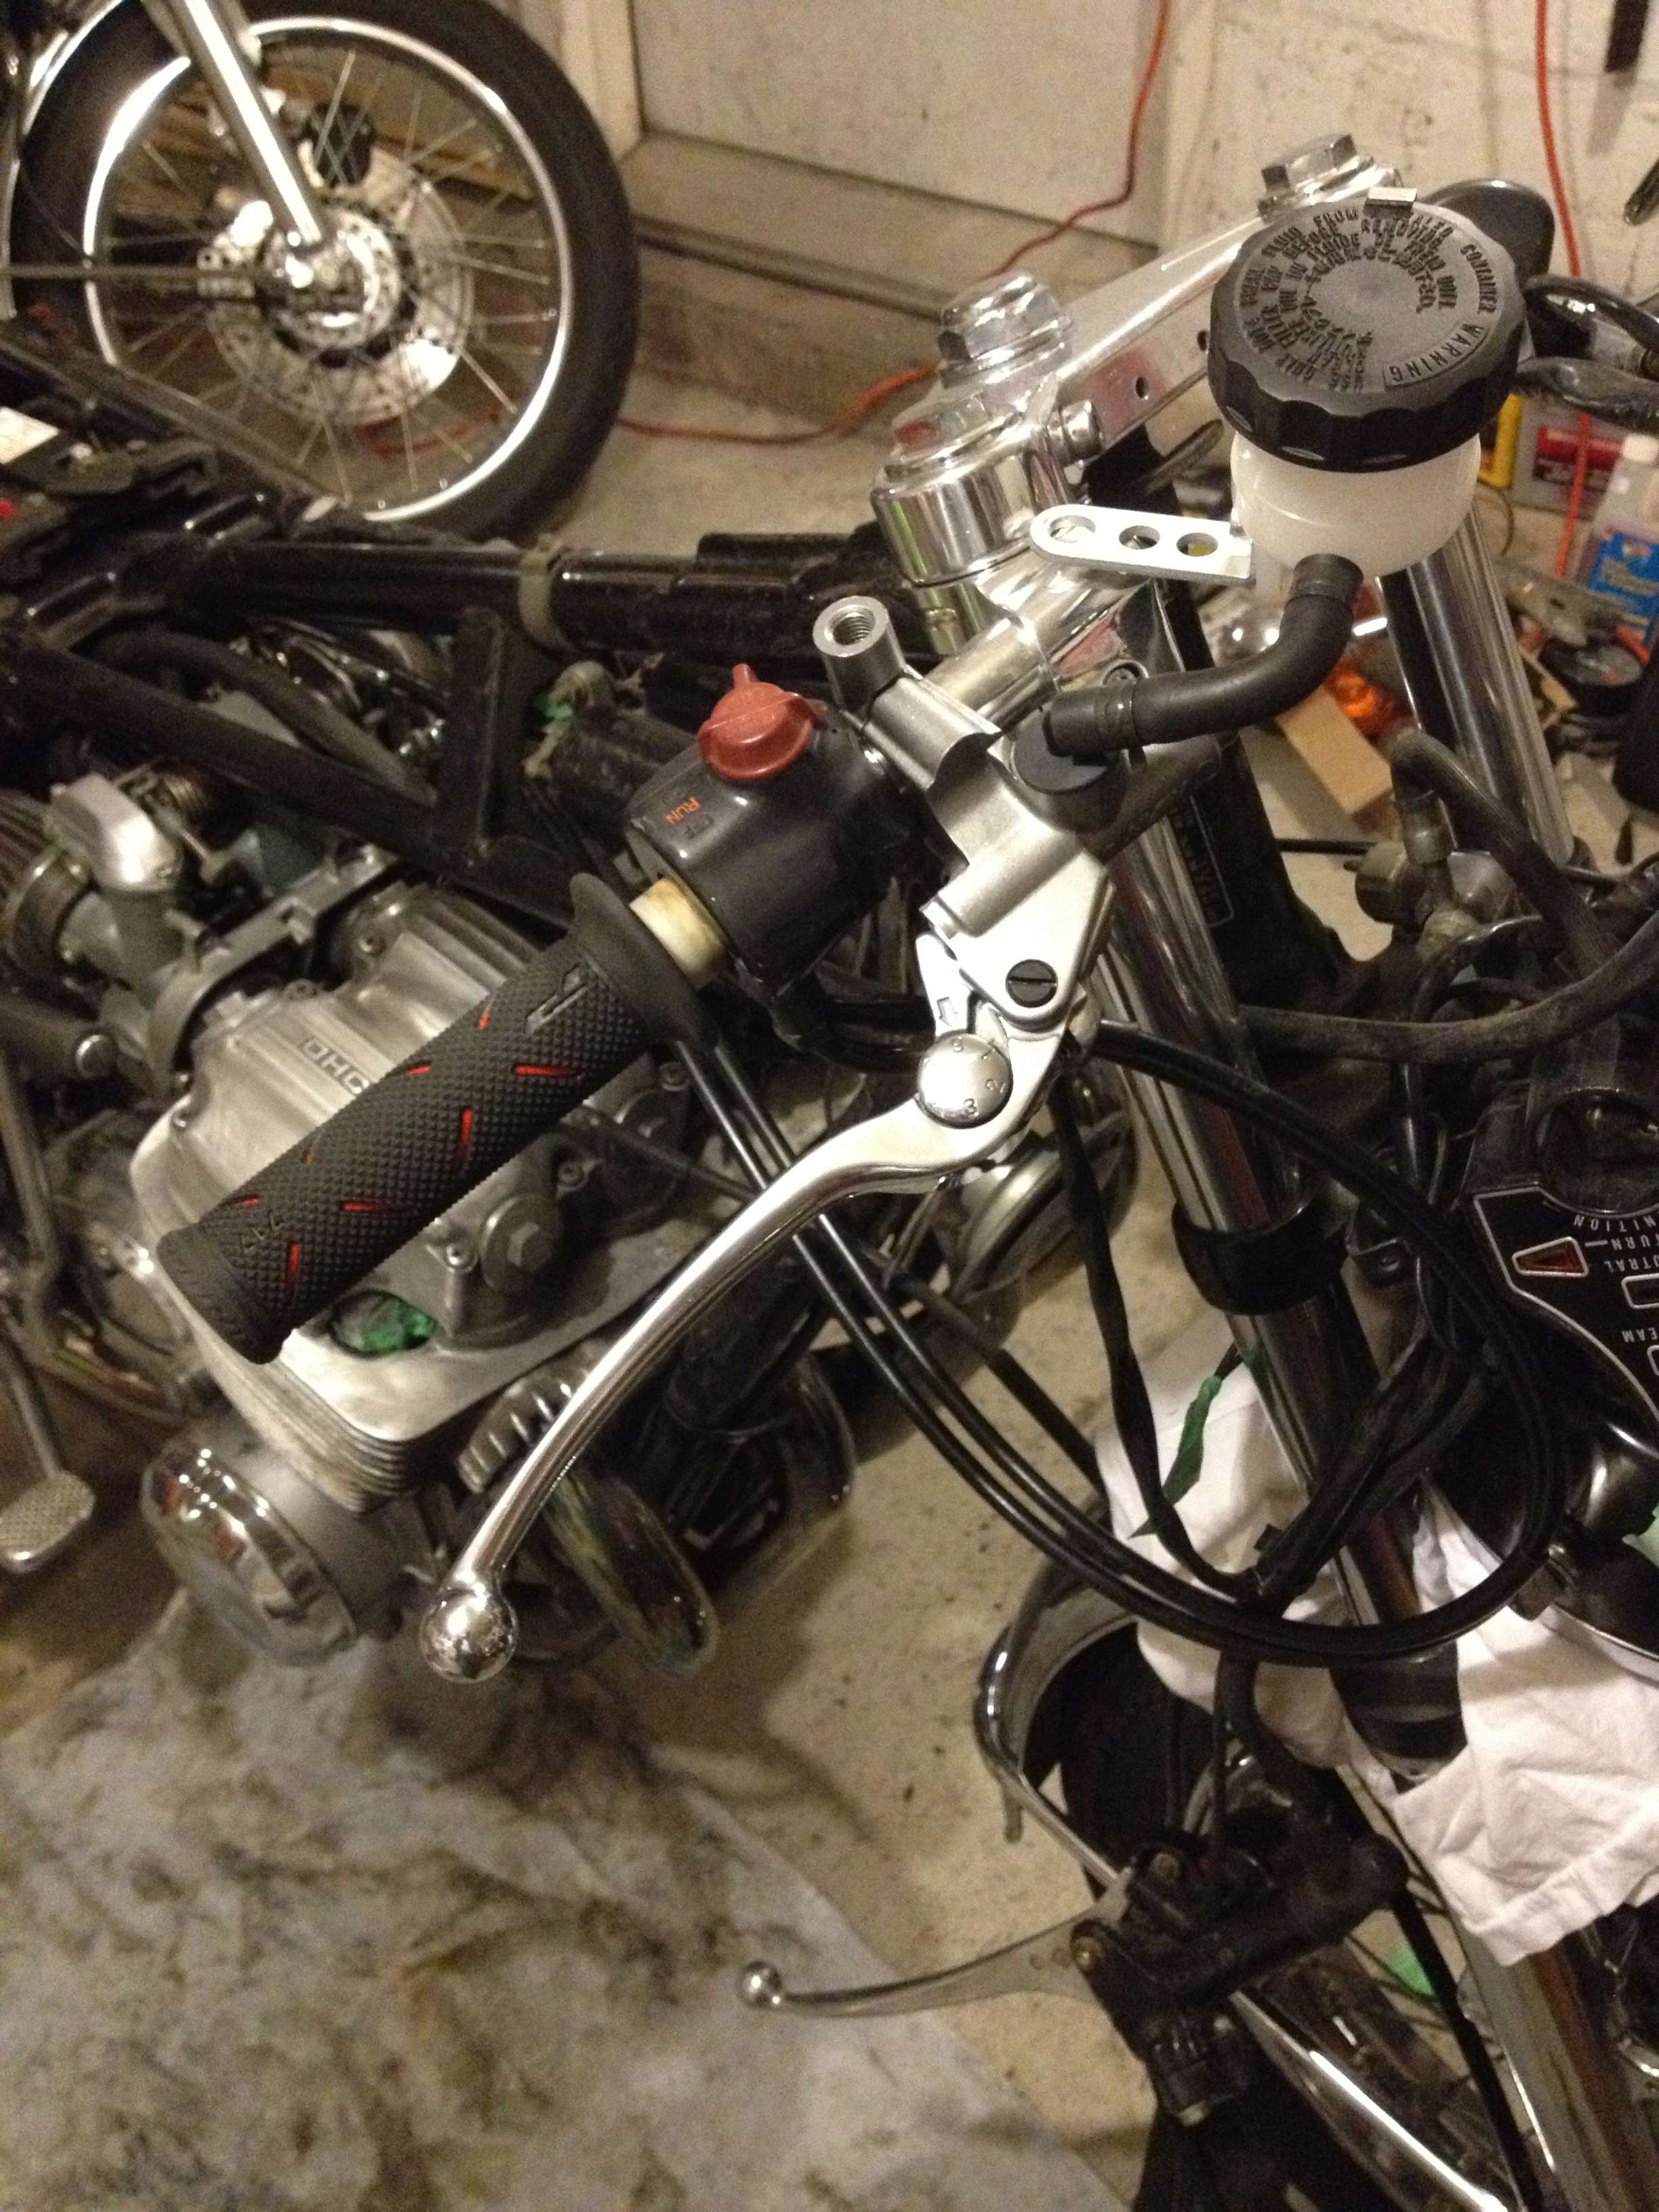
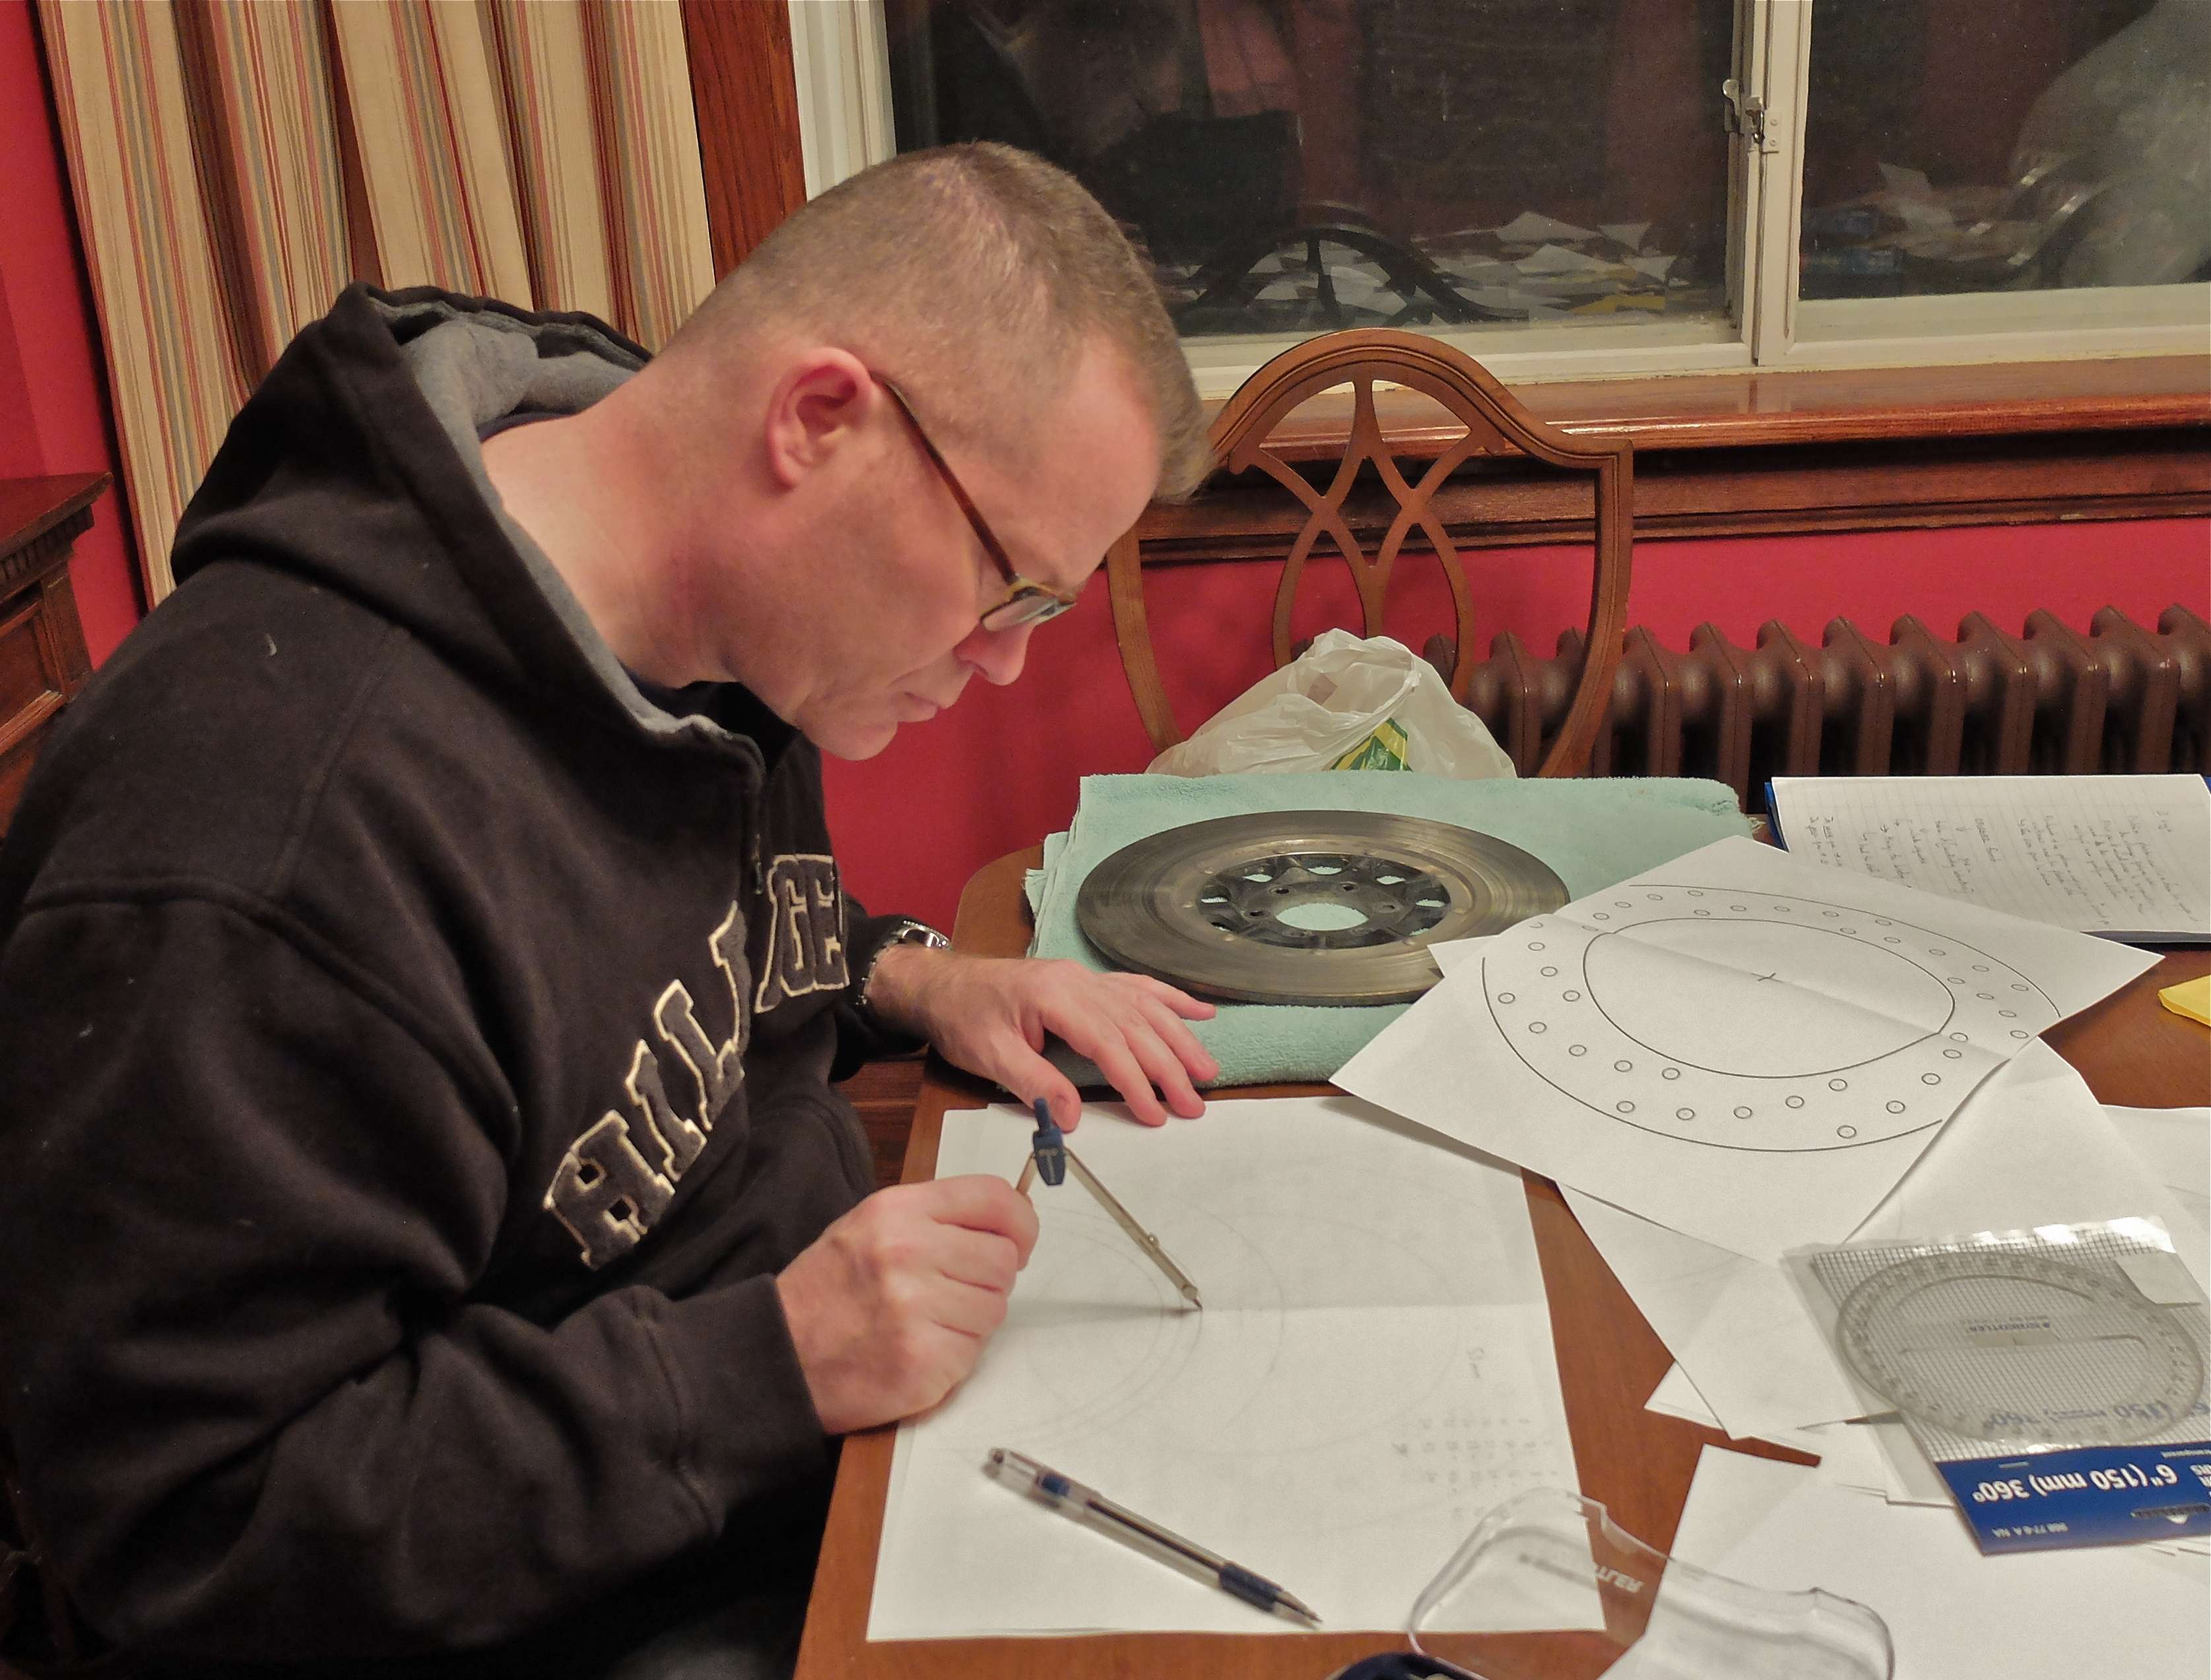
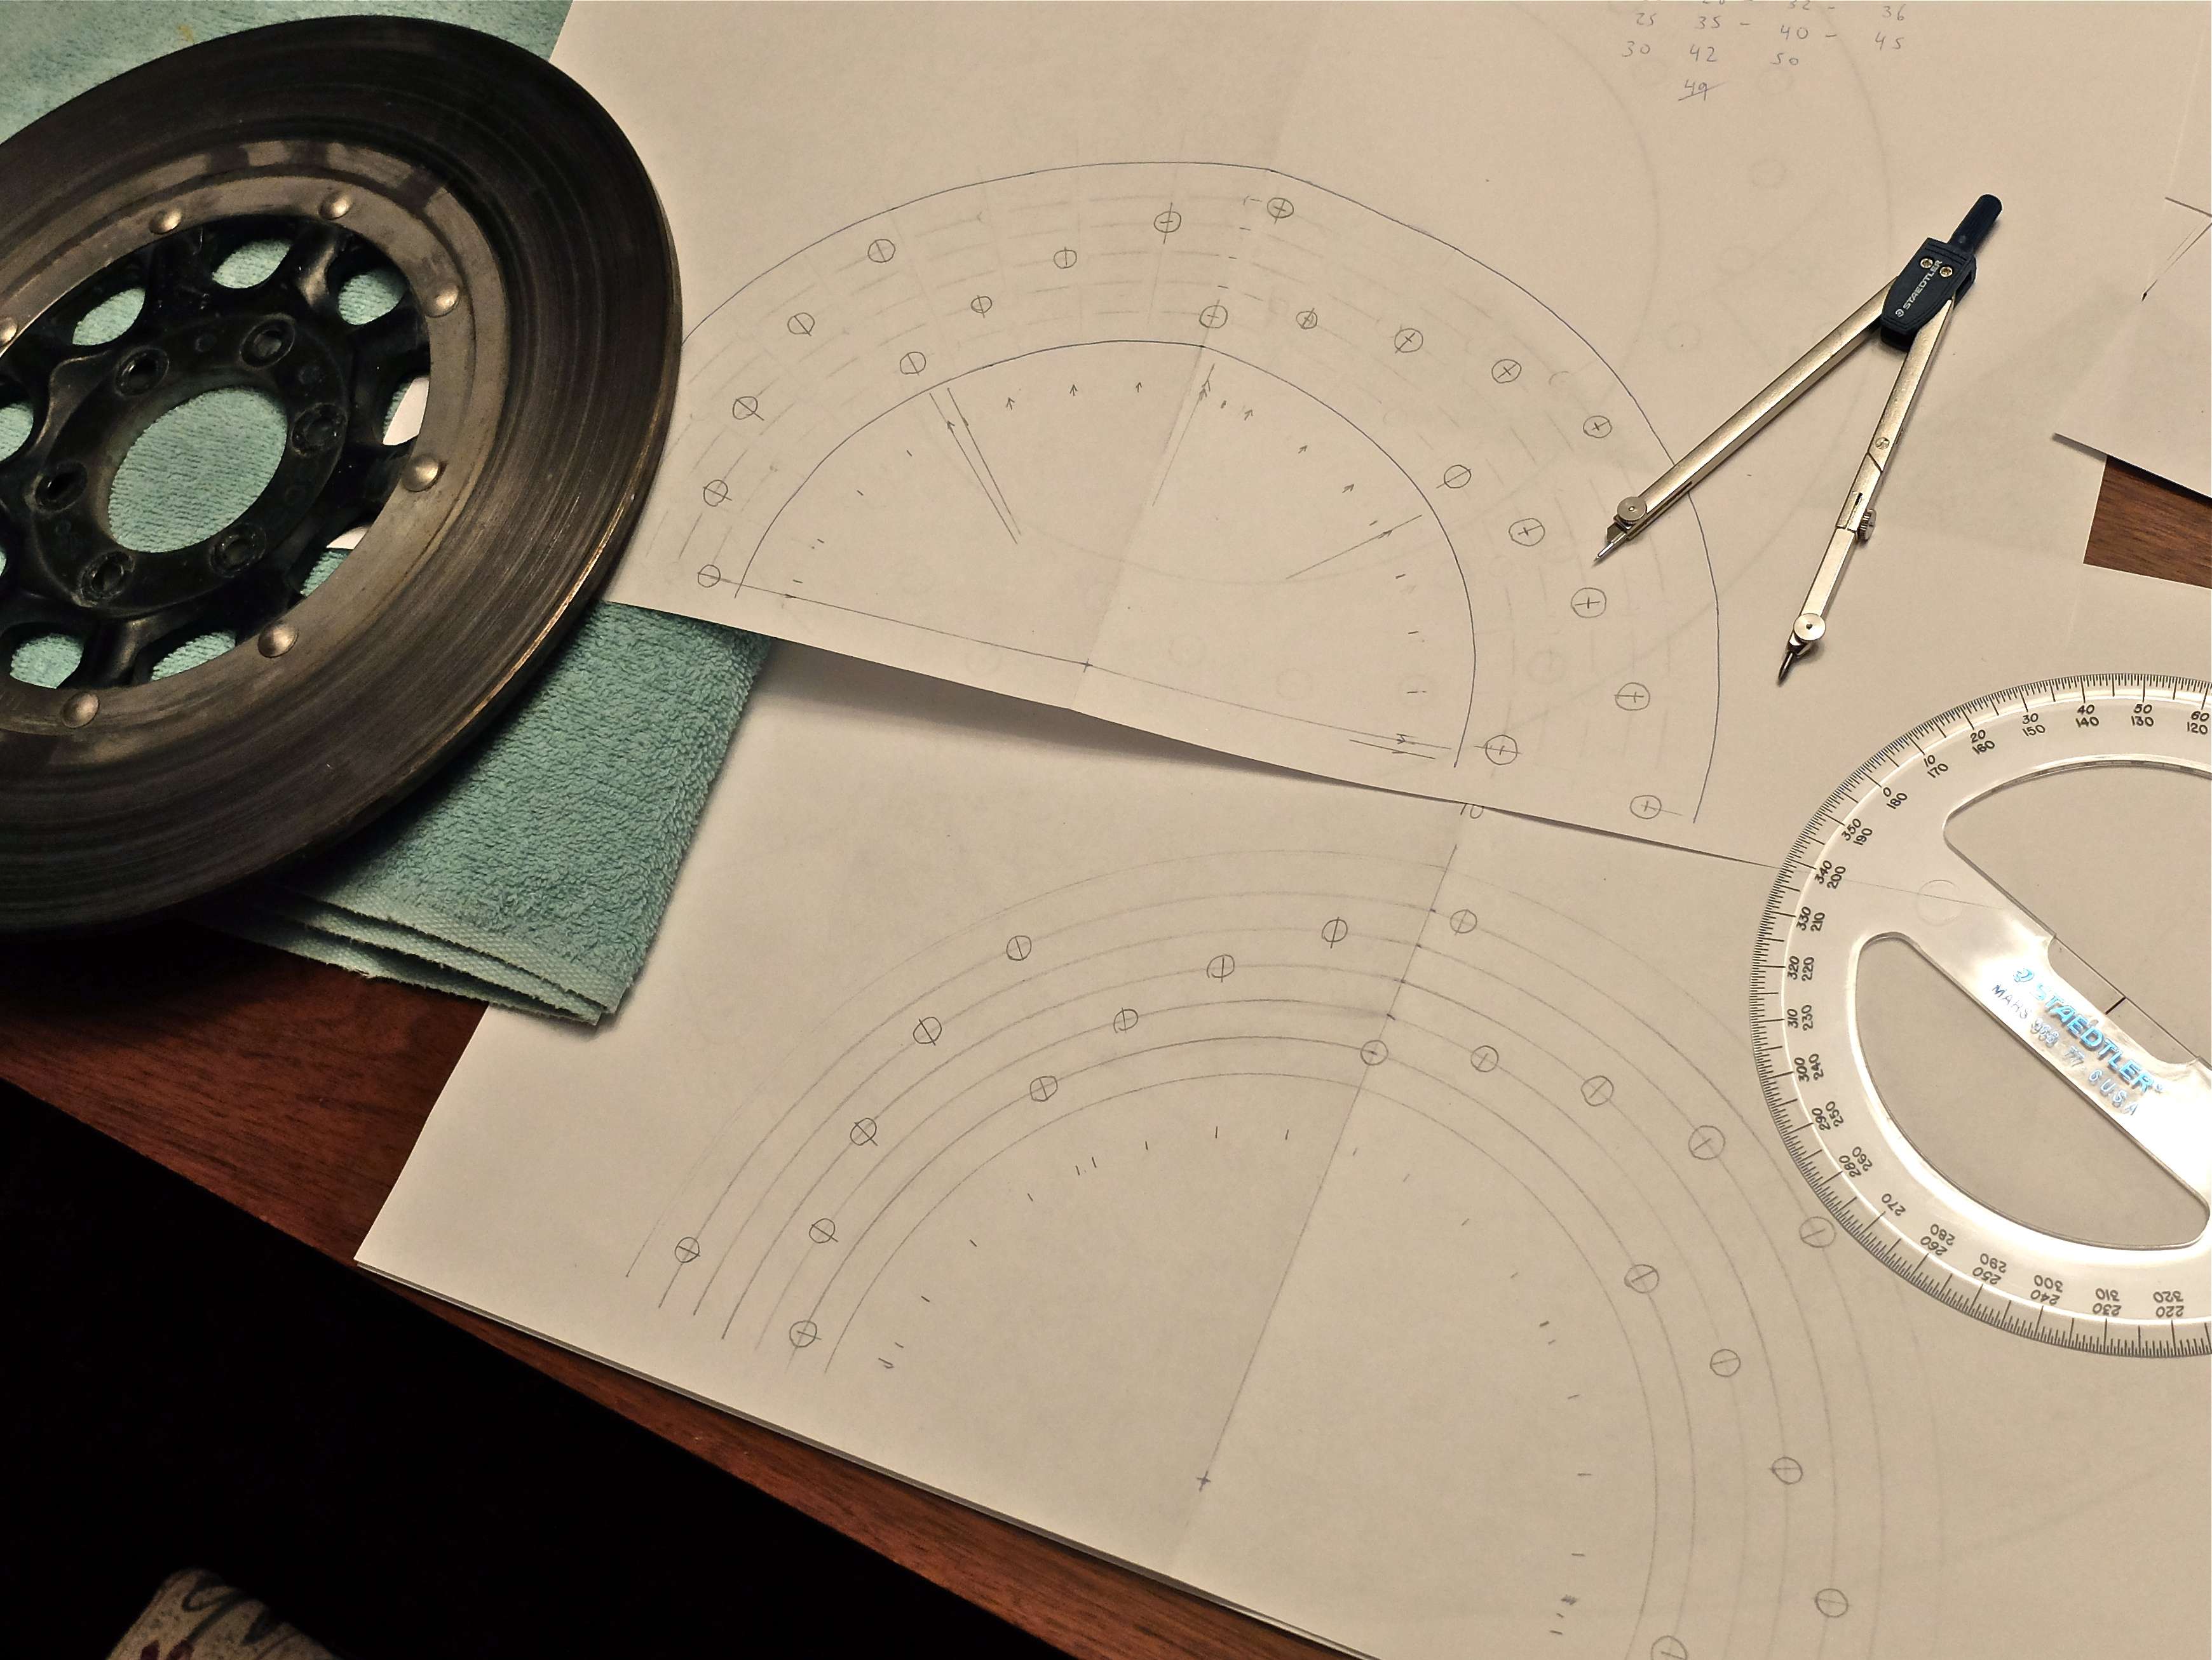
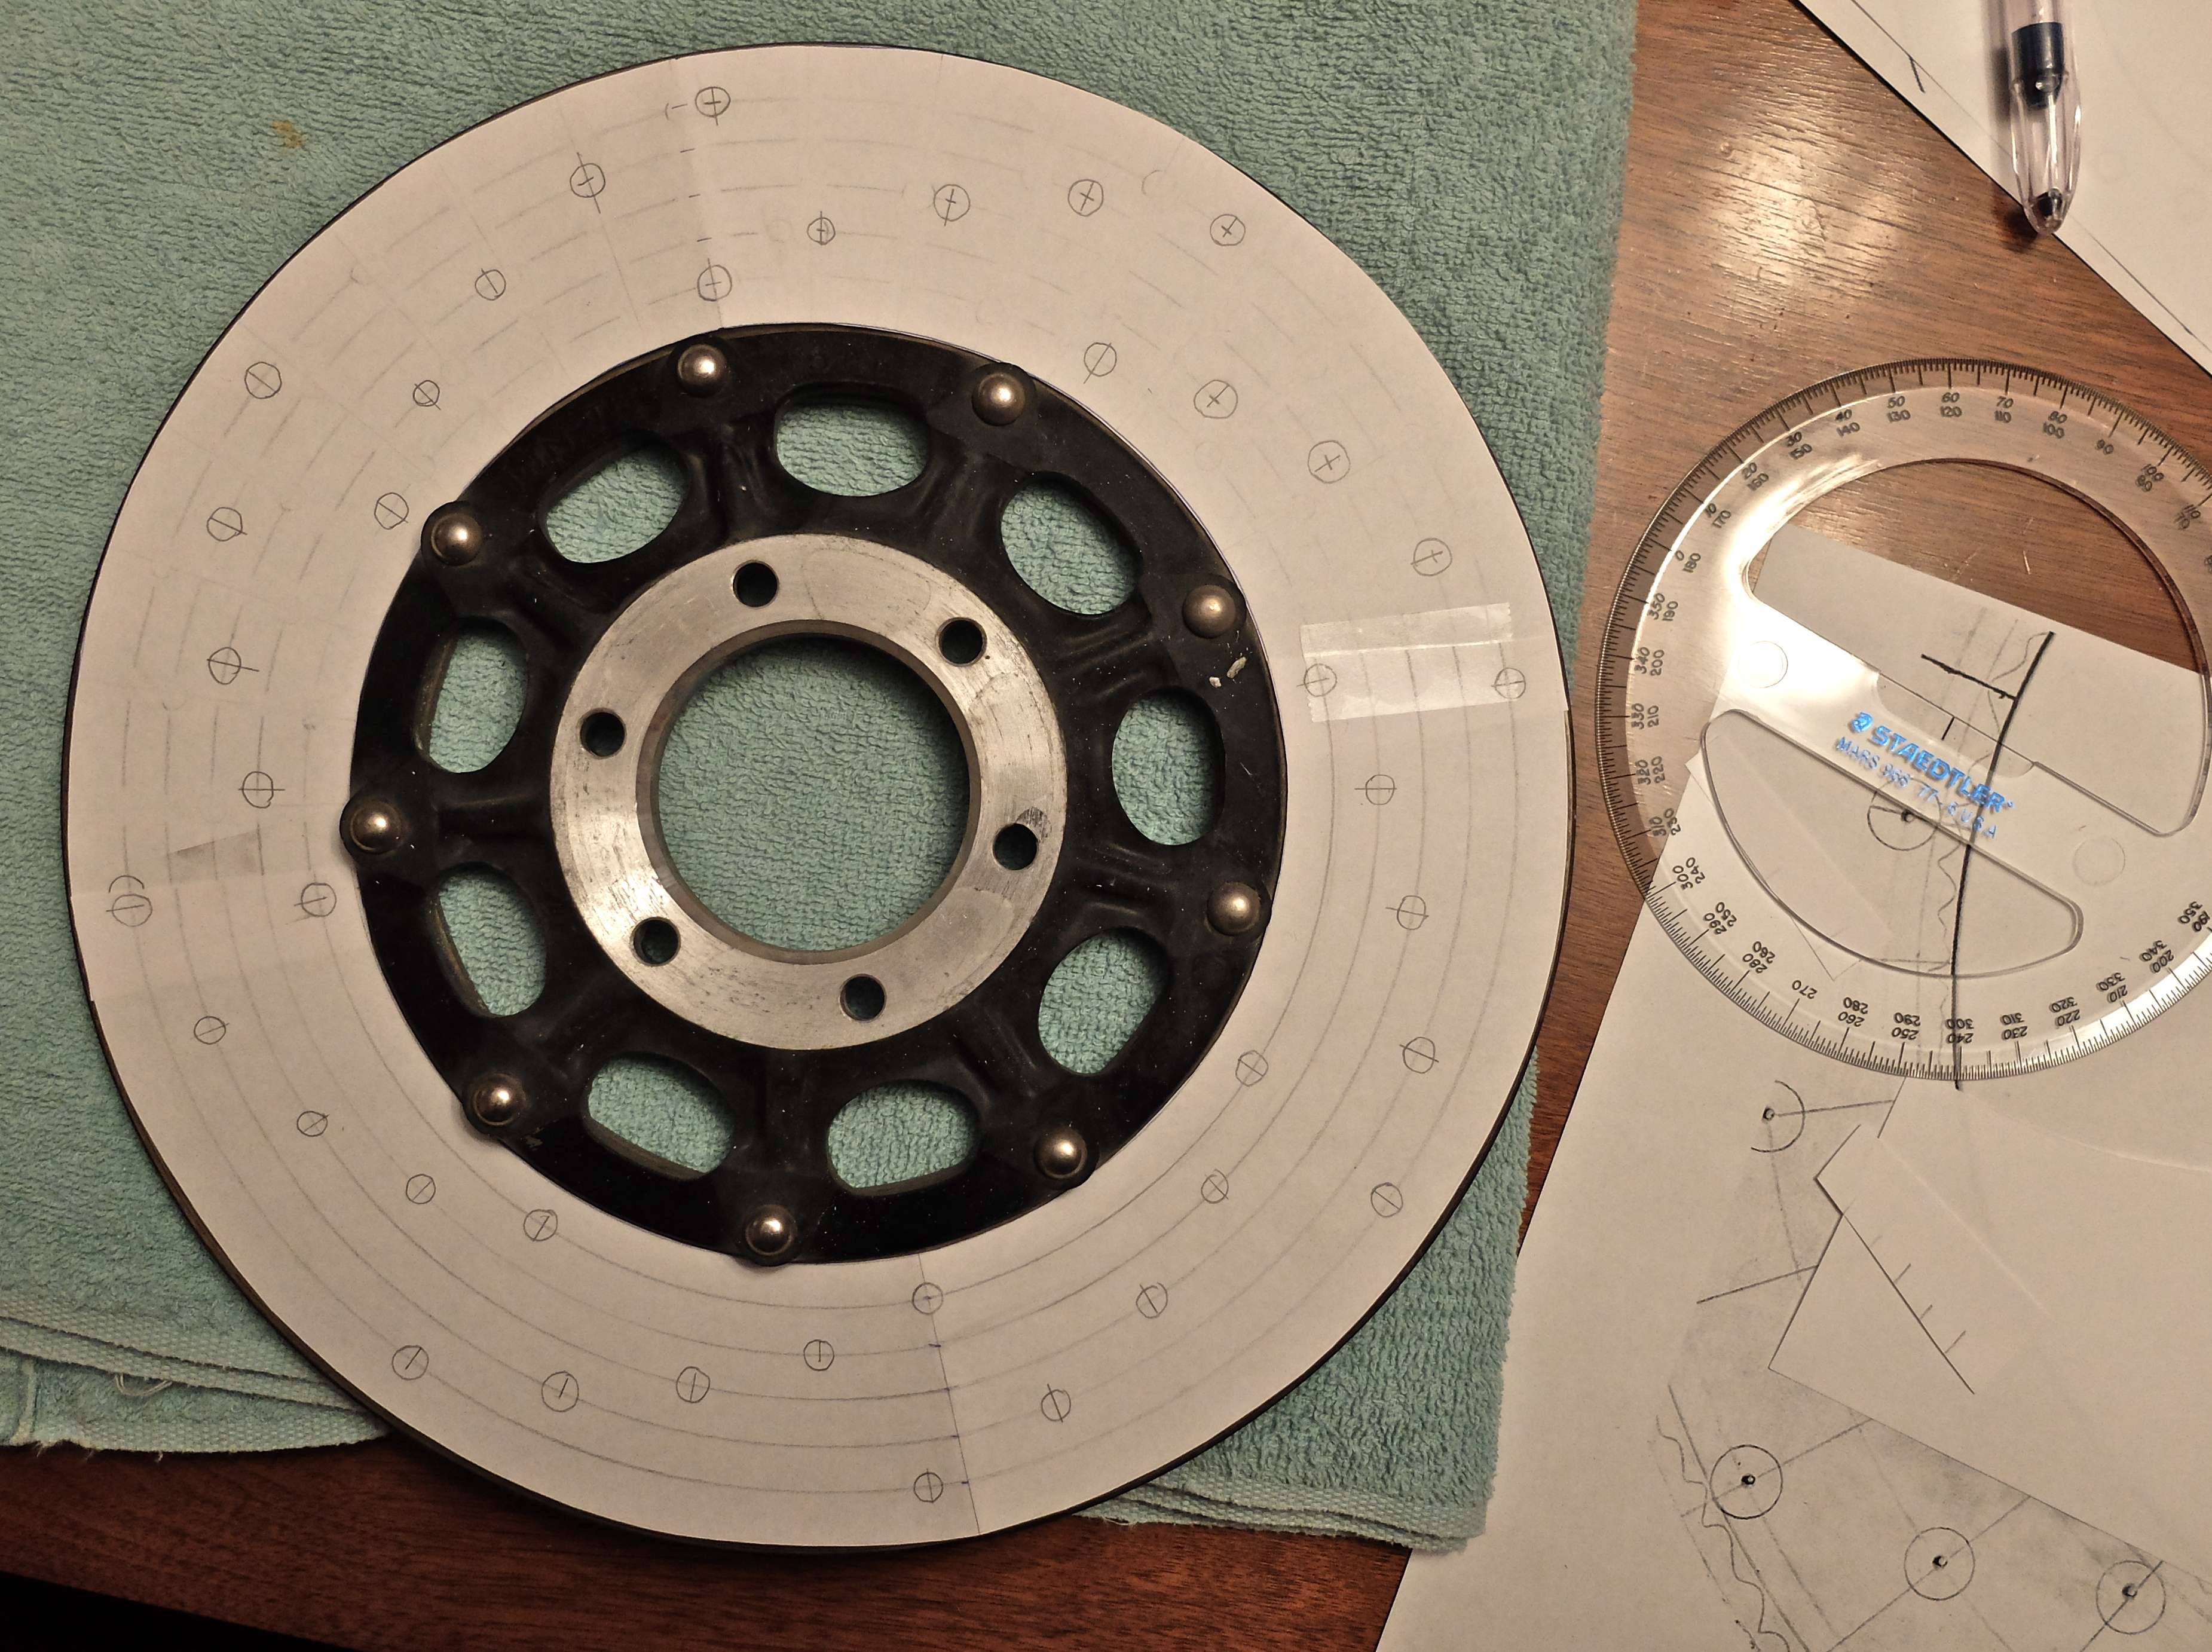
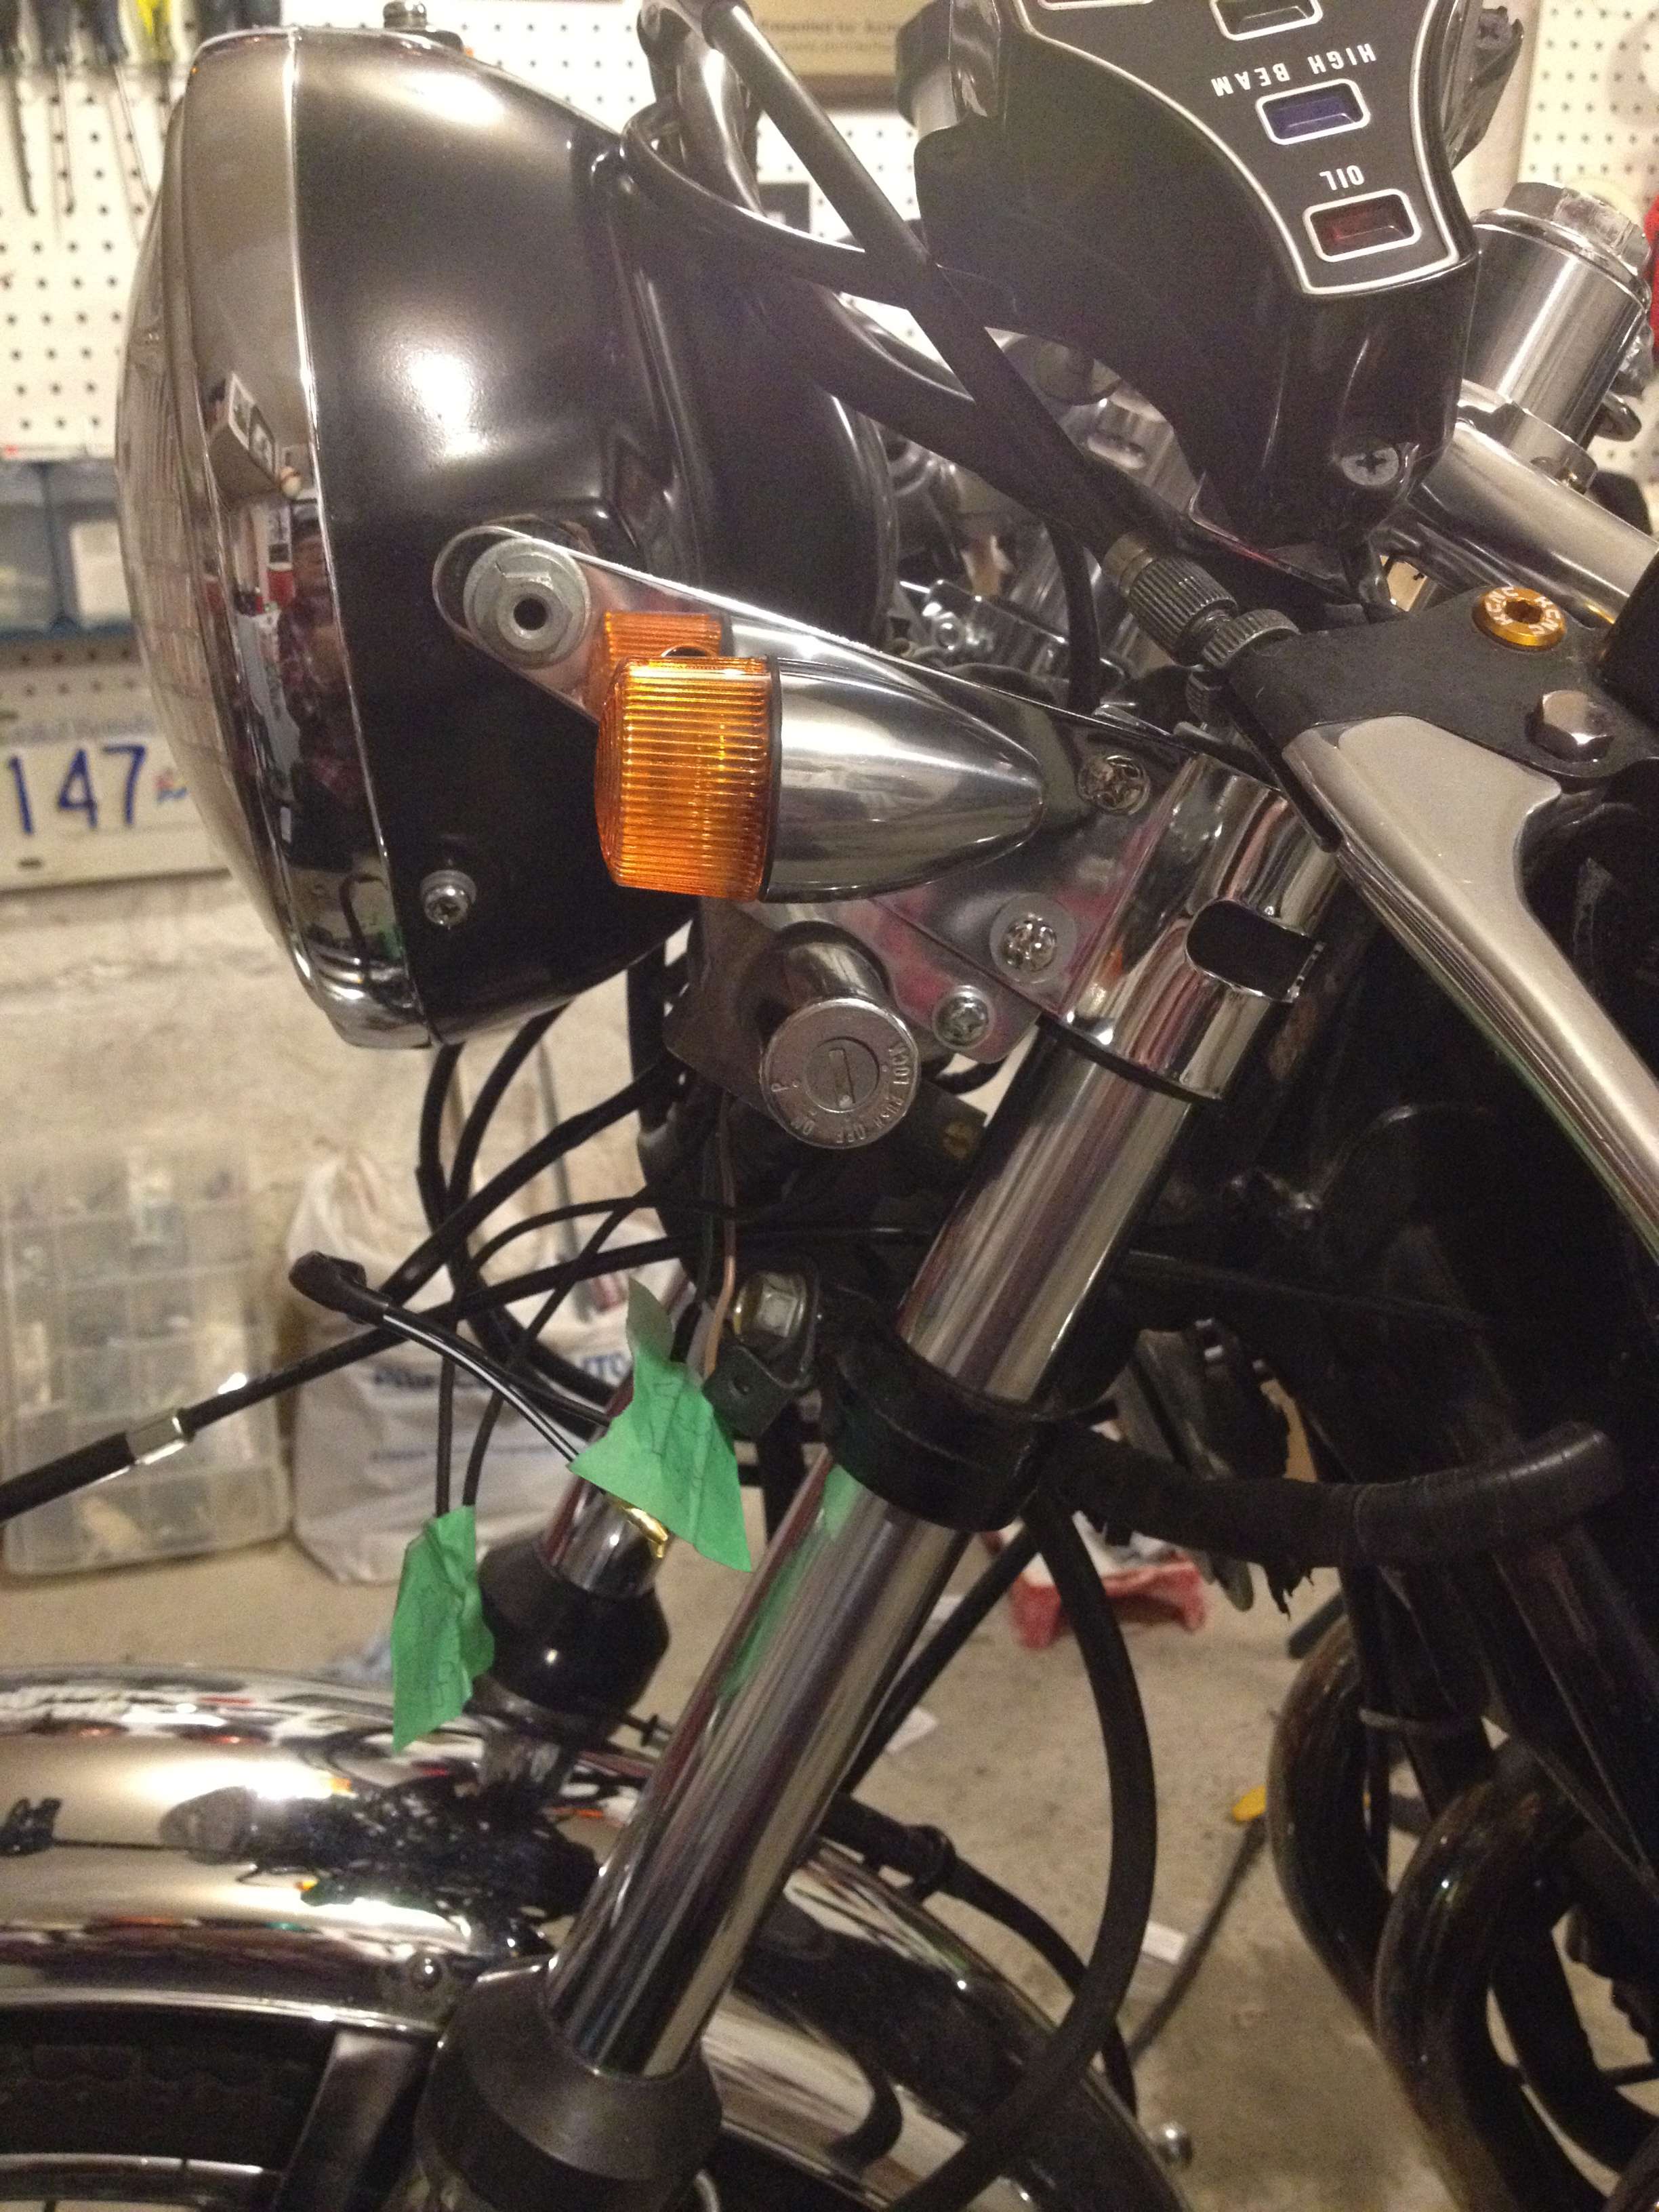
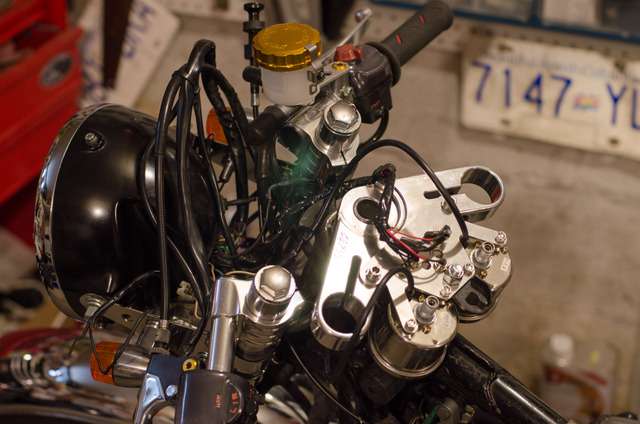
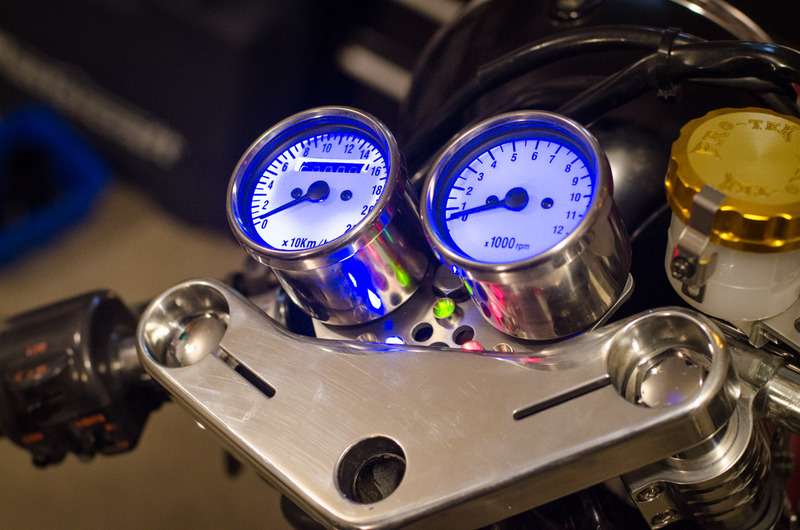
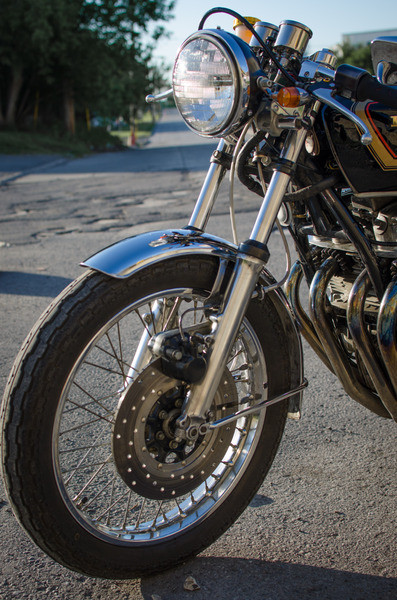
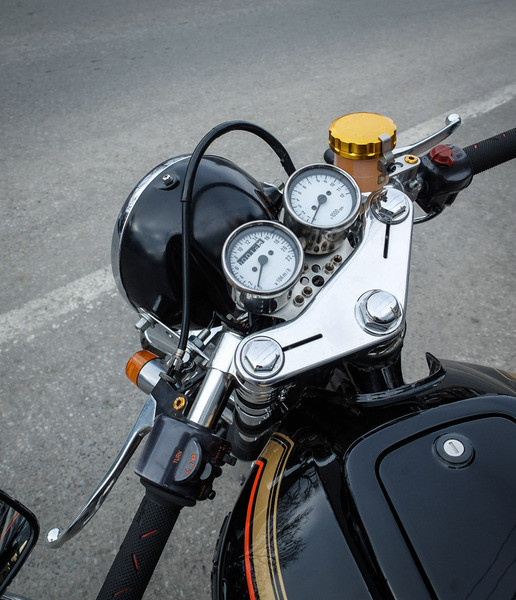
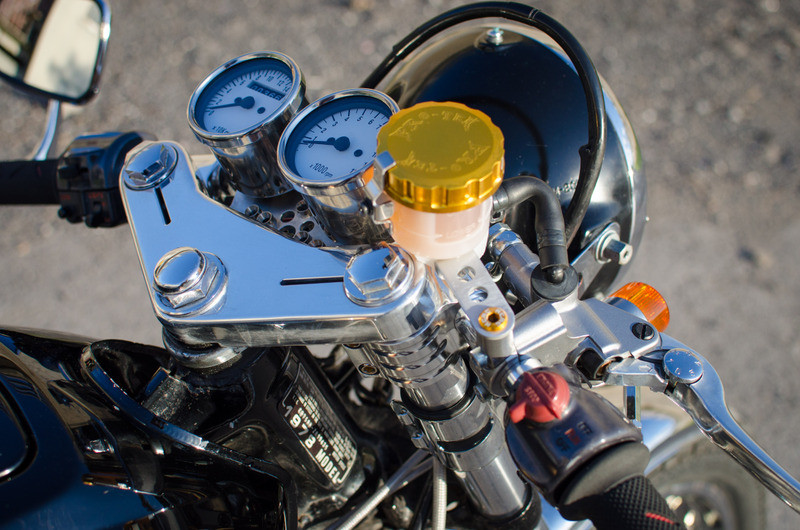
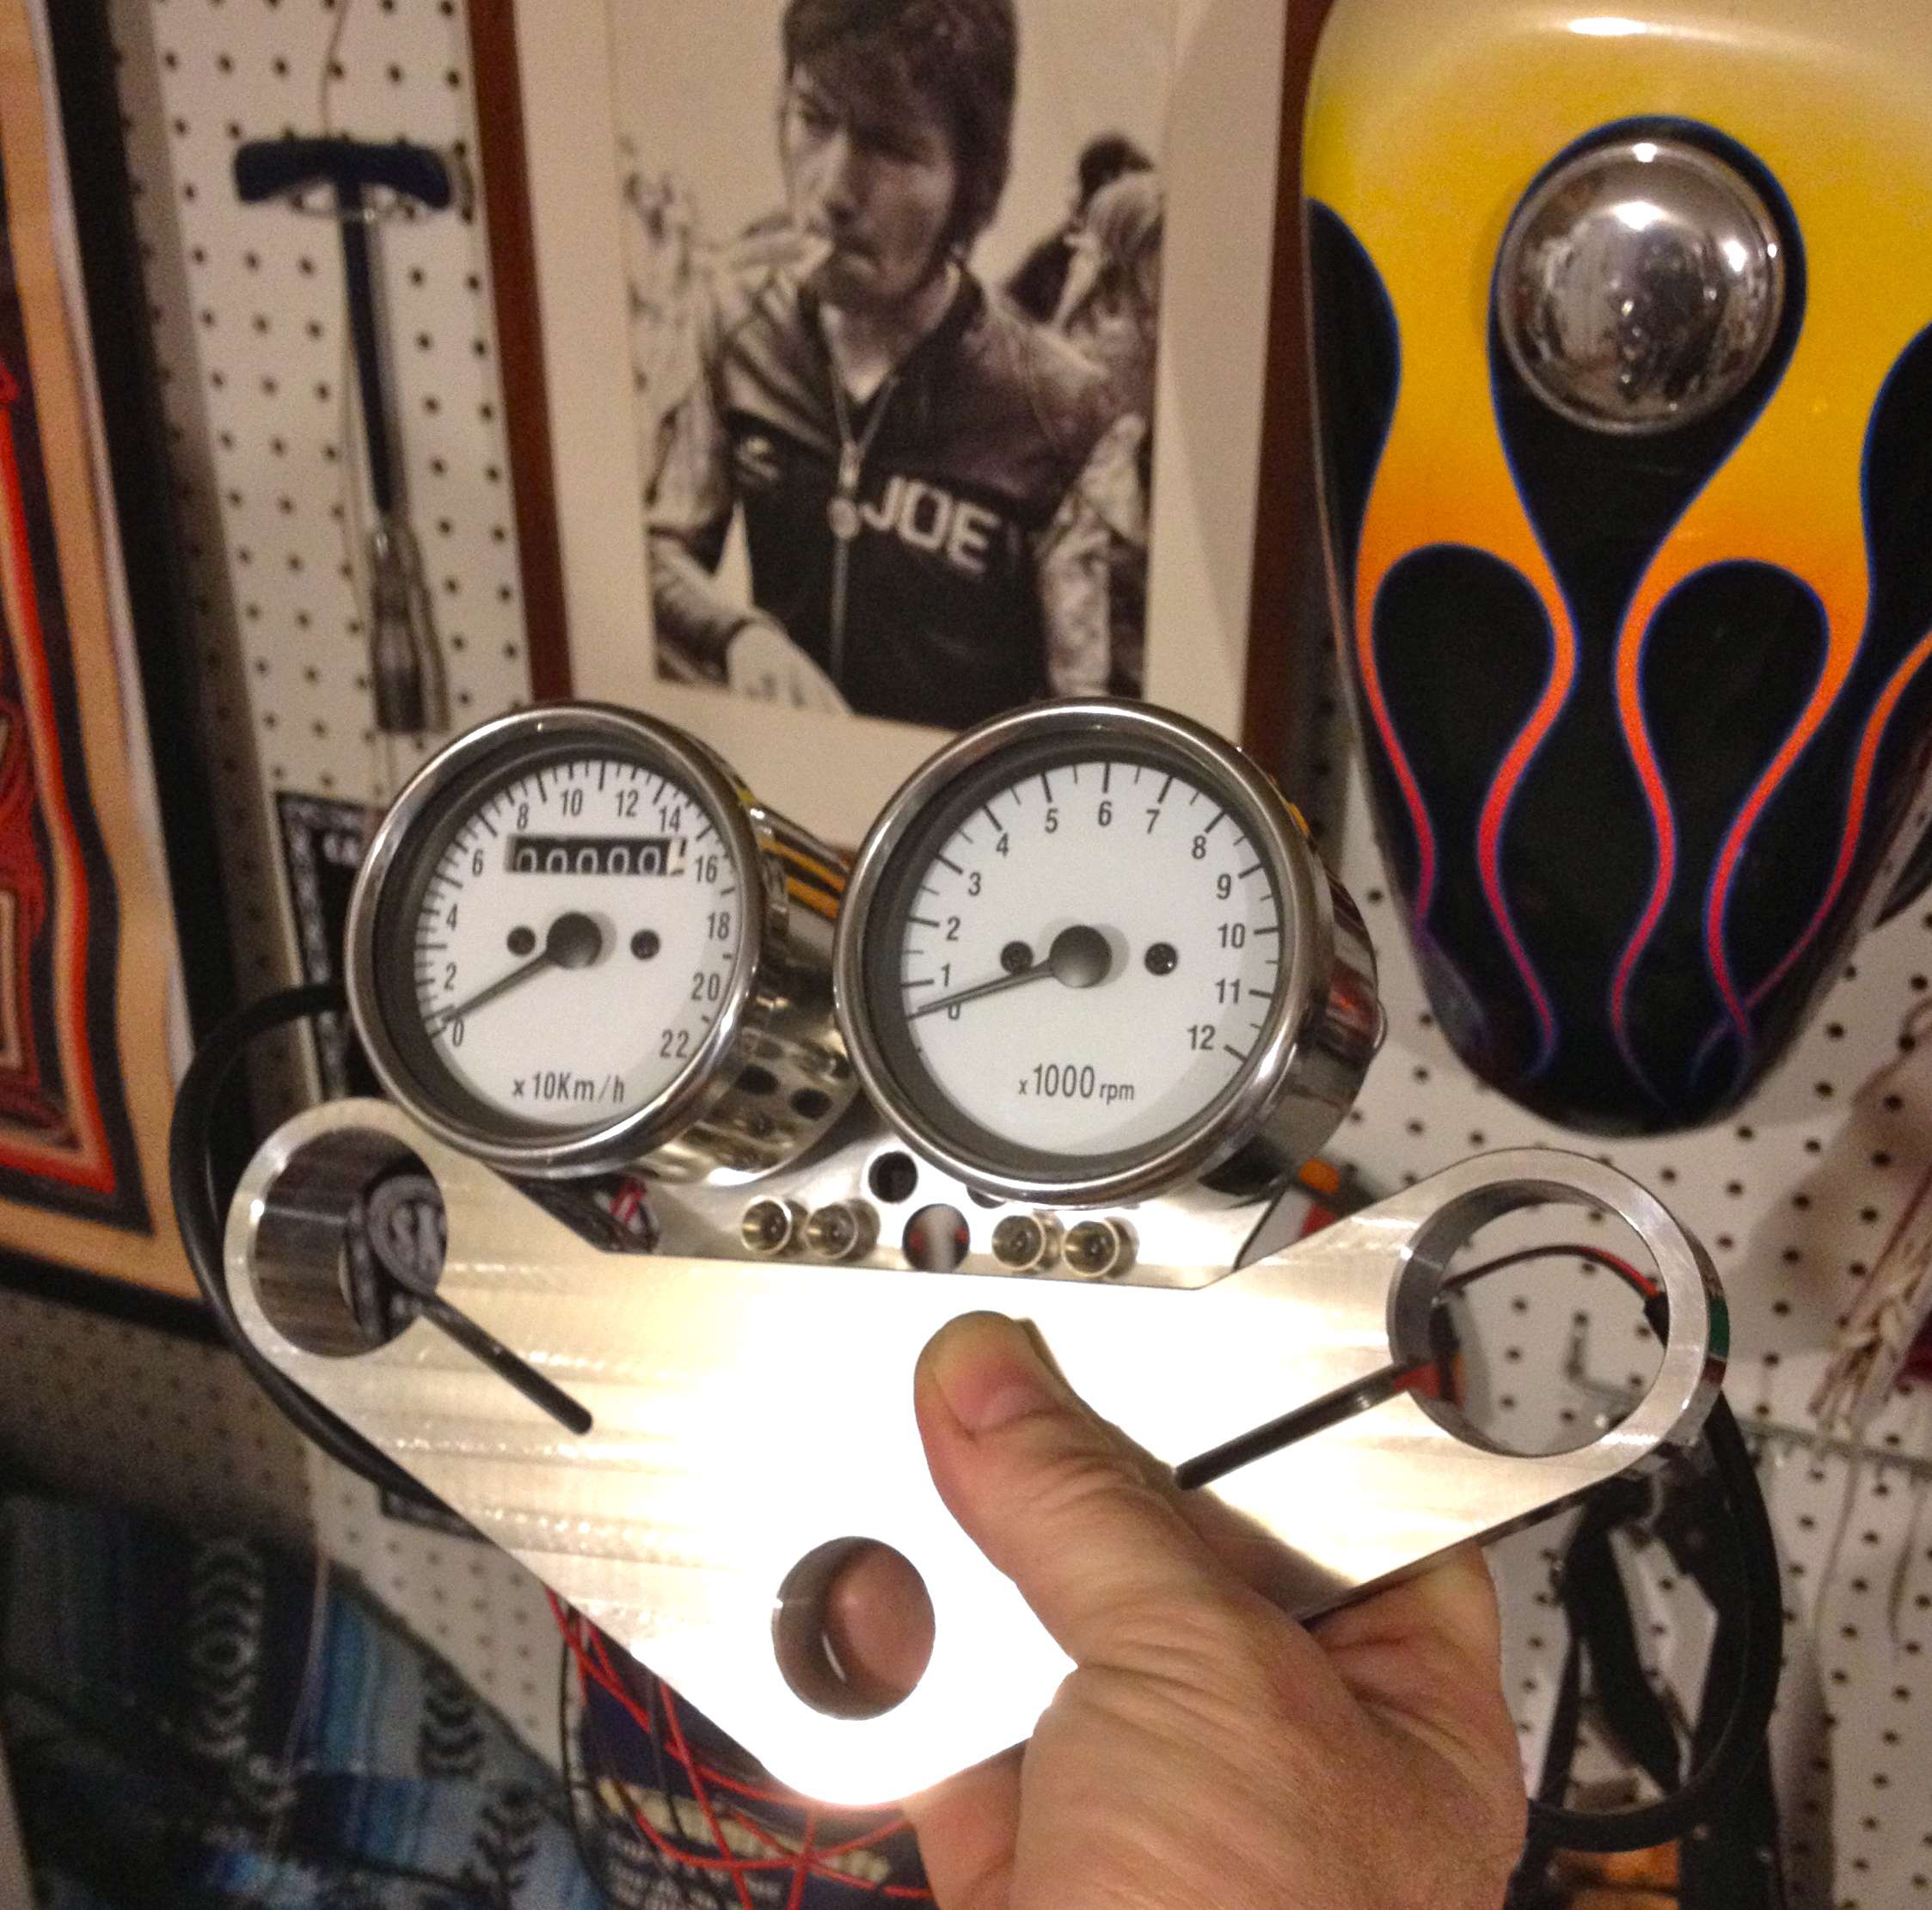
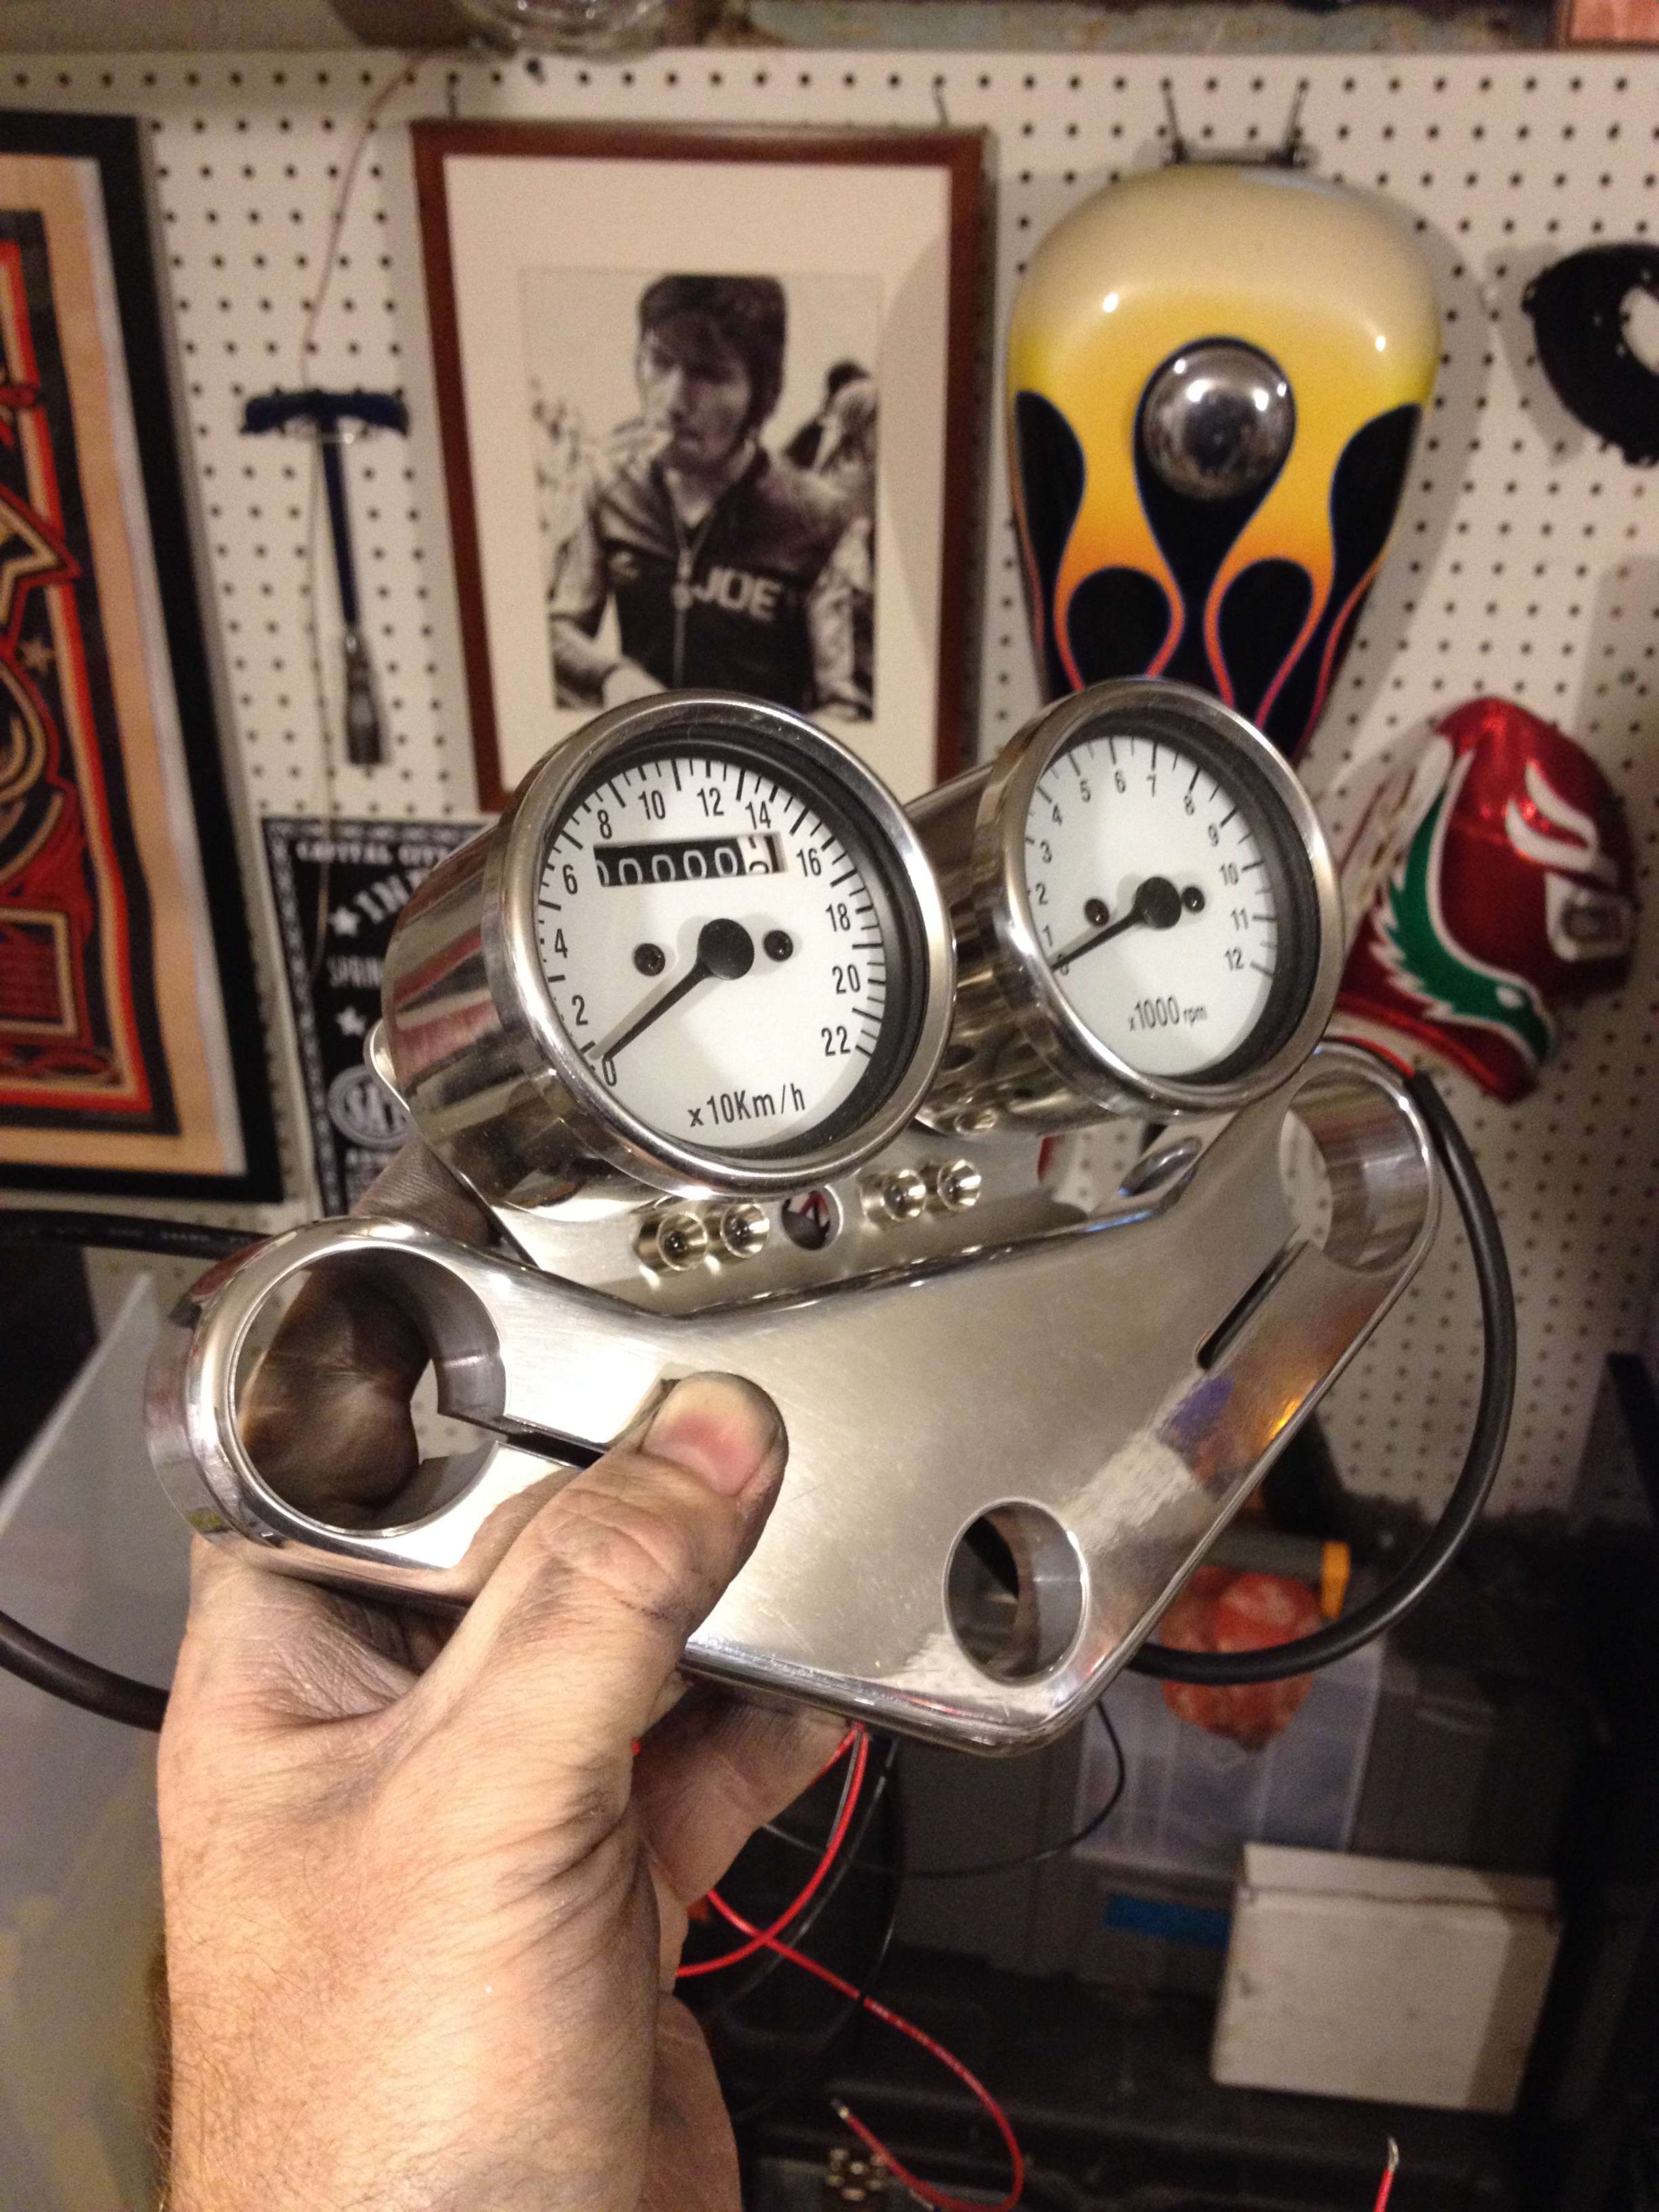
The bike was in pretty good shape. It needed a cam chain adjustment, a carb clean, and a new set of rear brake shoes, but other than that was great. I plan to do a "semi" cafe racer conversion on it. I want to retain a double seat, because my other bike is a rigid-frame 1953 Harley Panhead chopper with a single seat, so I want to retain at least one bike that I can take my wife or daughters for rides on. So no single-seat cowl or rearsets. But I do like the look and feel of lower bars, so I am going with clip-ons. With that in mind, I will be cleaning up the cockpit with a triple tree from Bullit Custom Cycles in Toronto, a set of mini gauges, and a mounting bracket with mini-LED lights. (BTW, you can see the build thread for my Panhead here: http://www.chopcult.com/forum/showthread.php?t=8406&highlight=panhead)

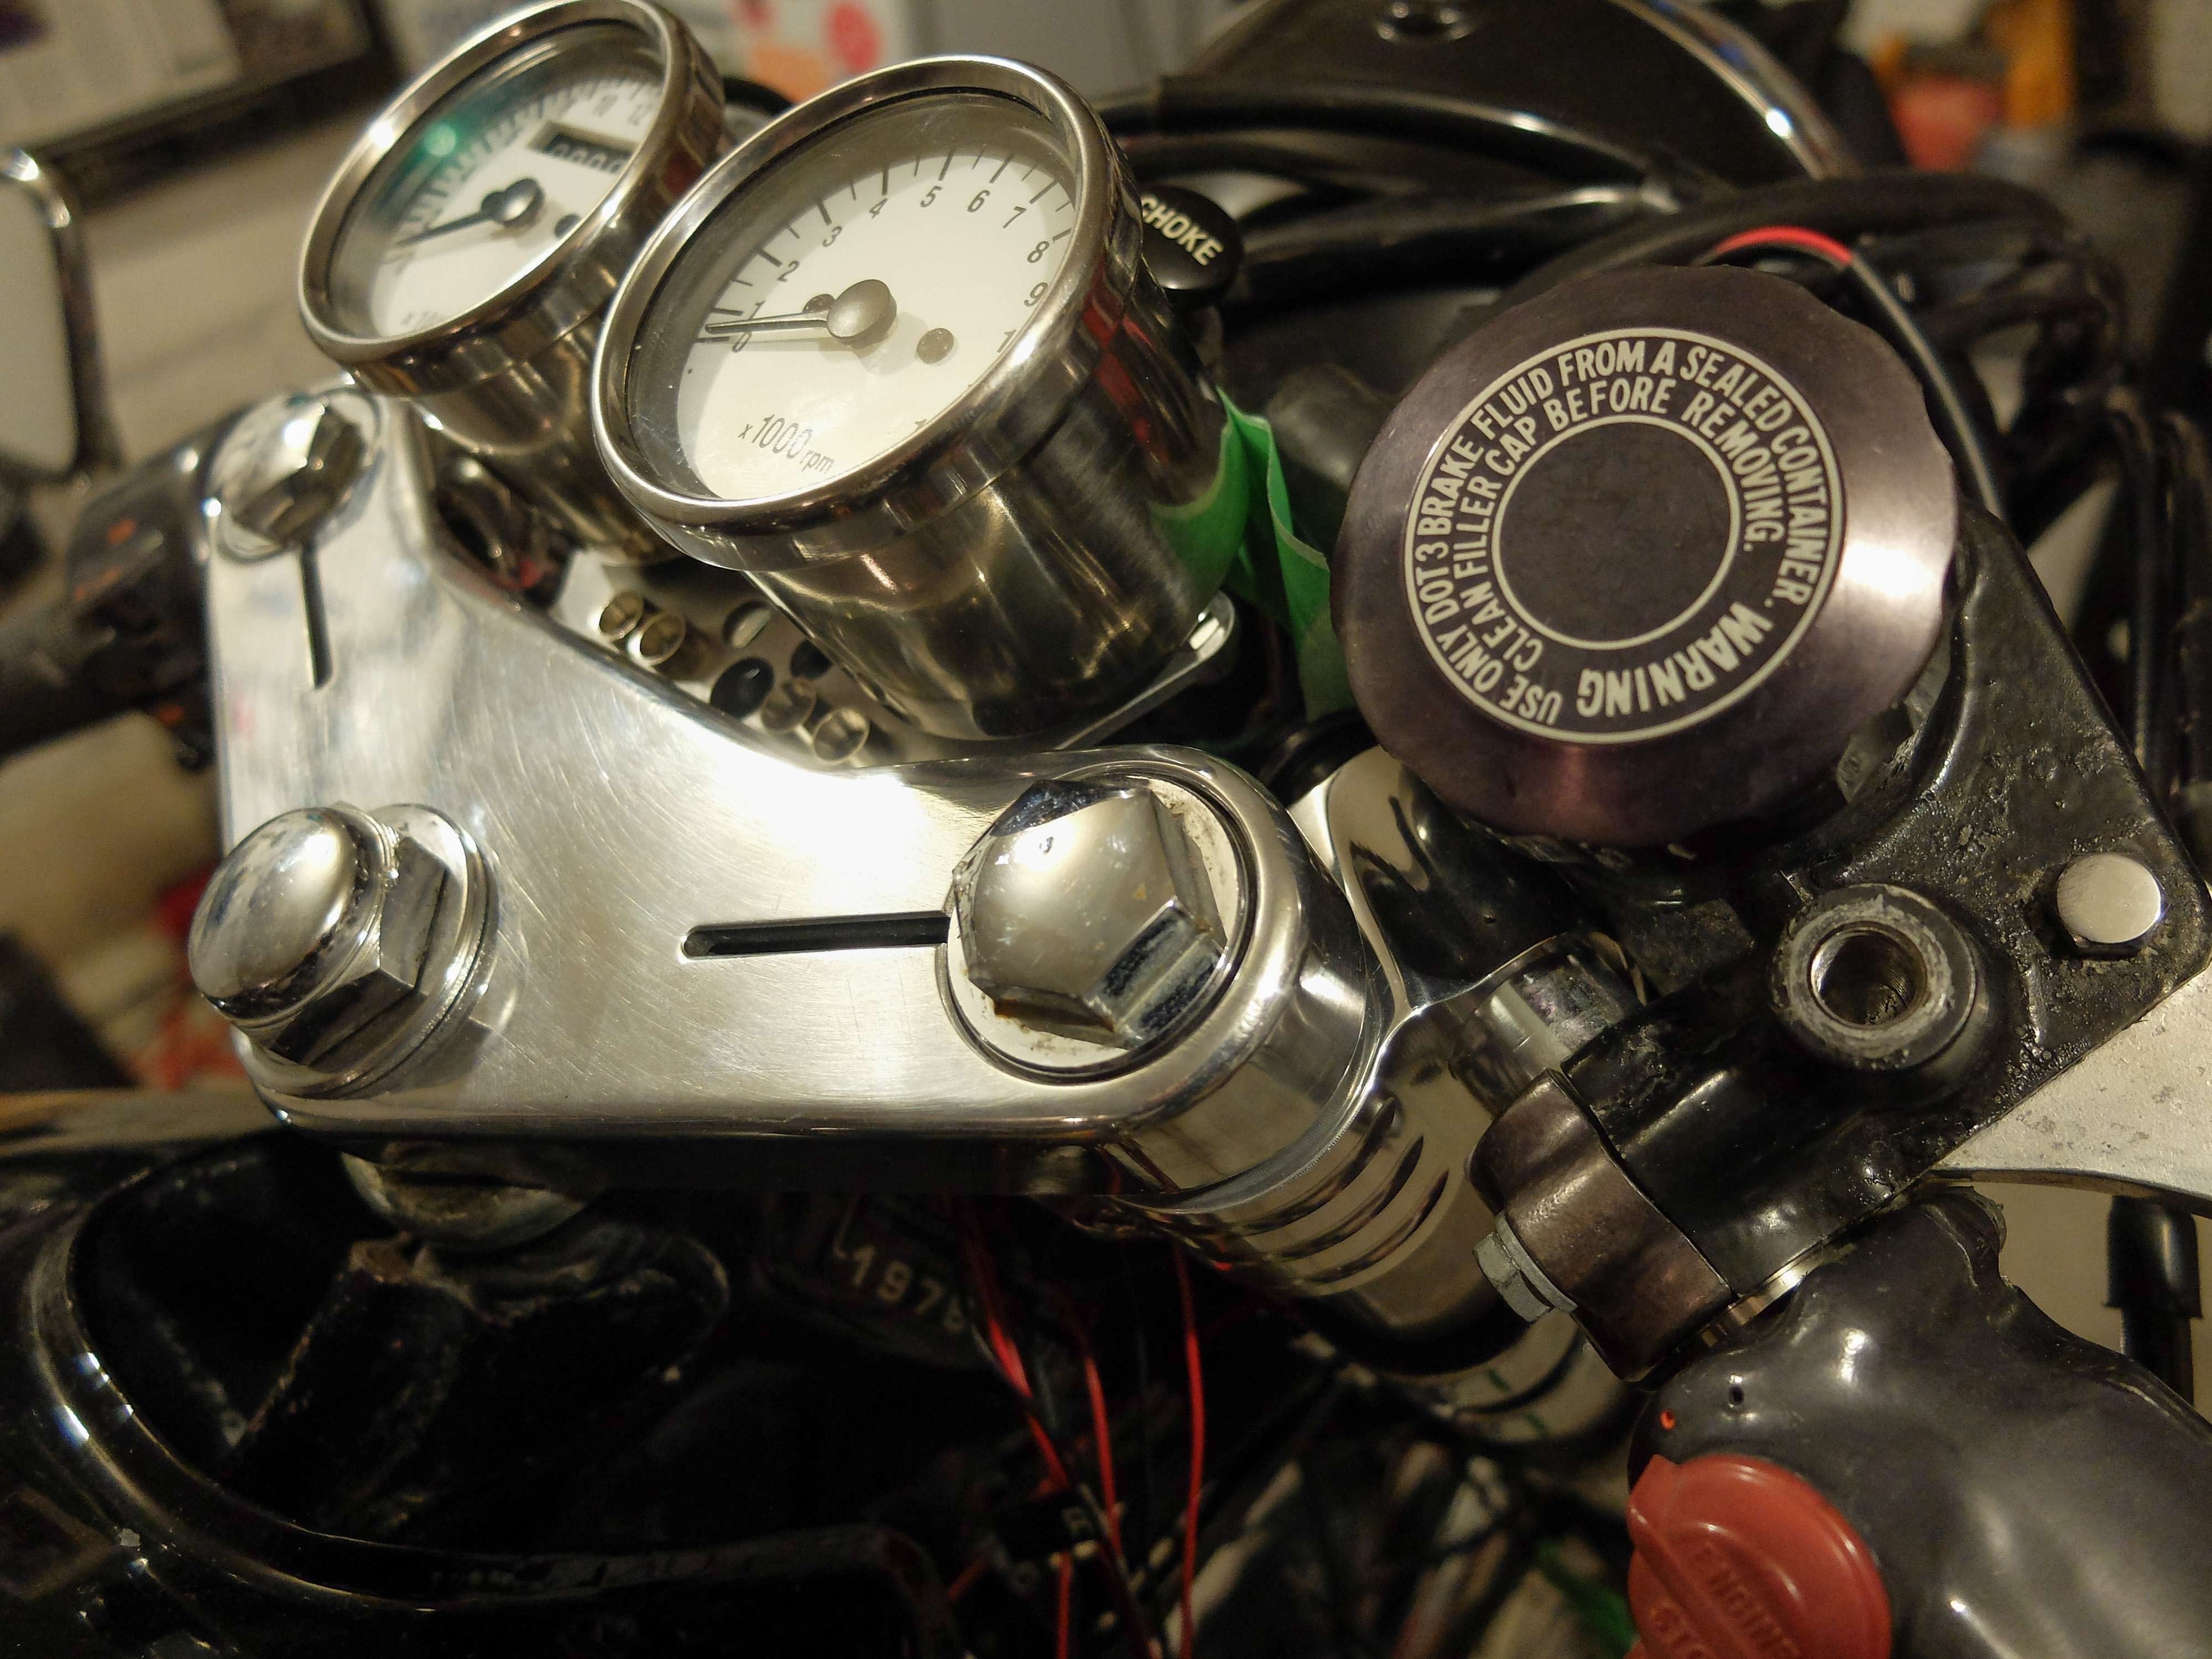
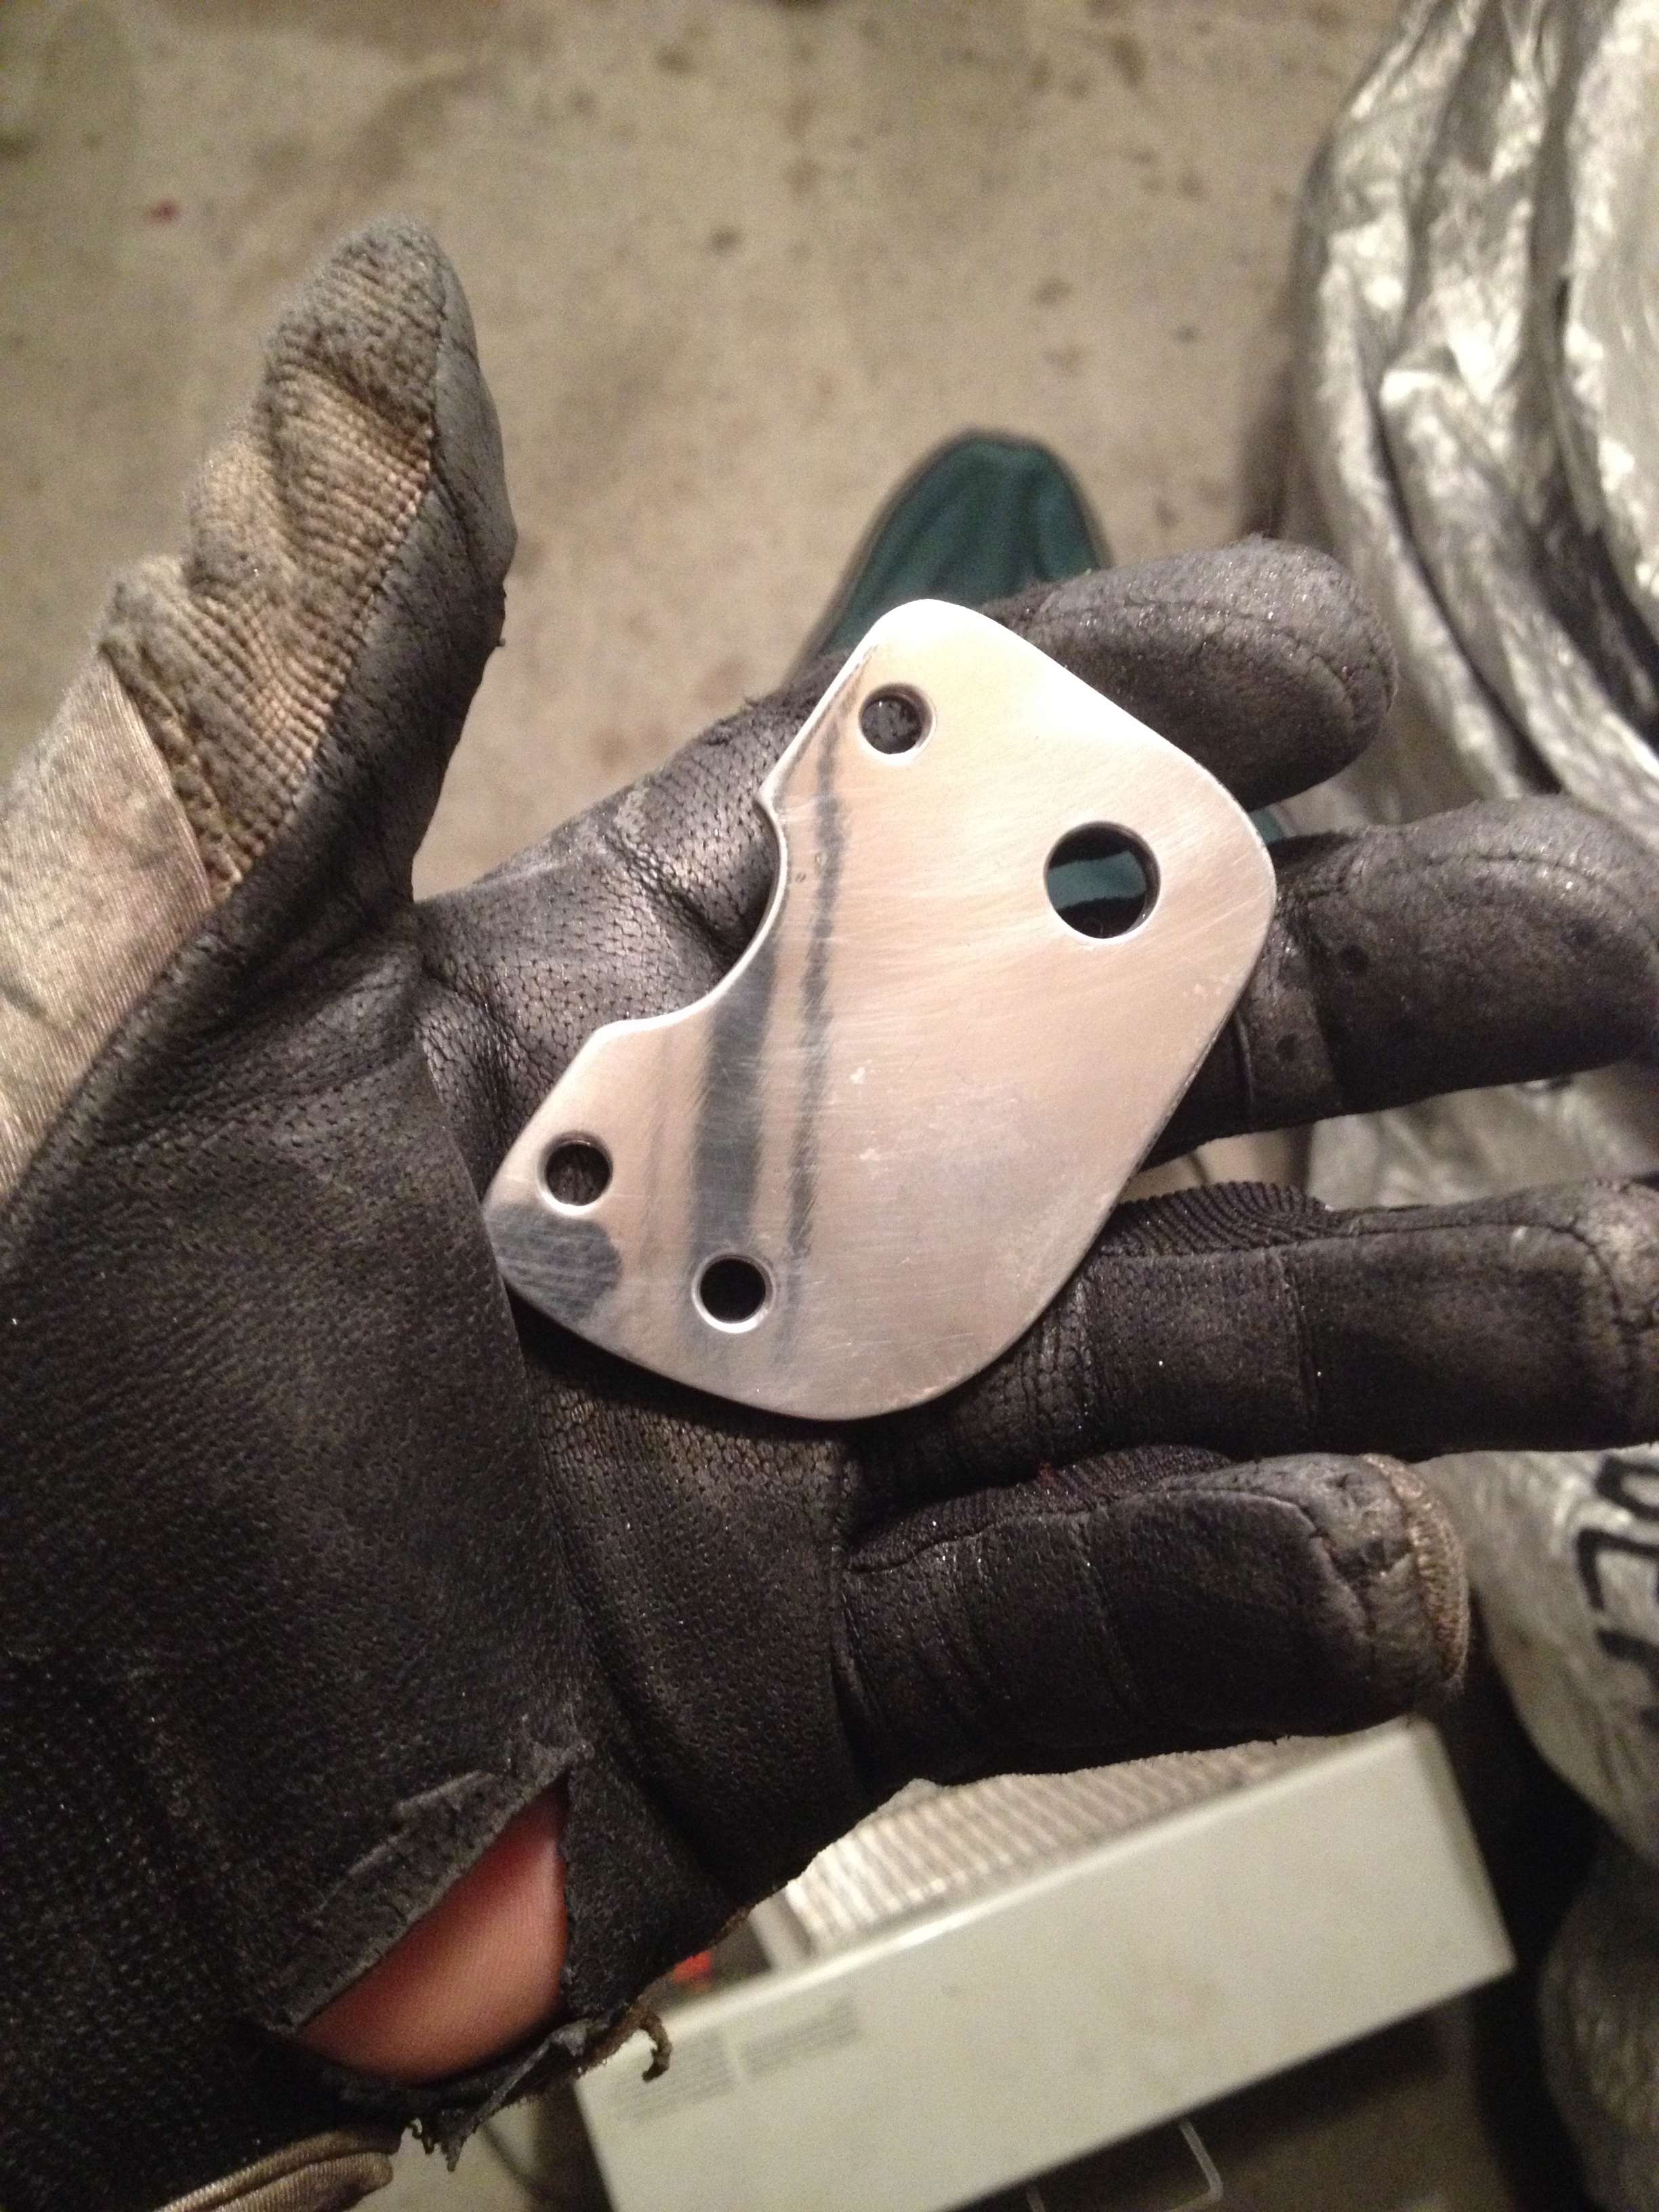
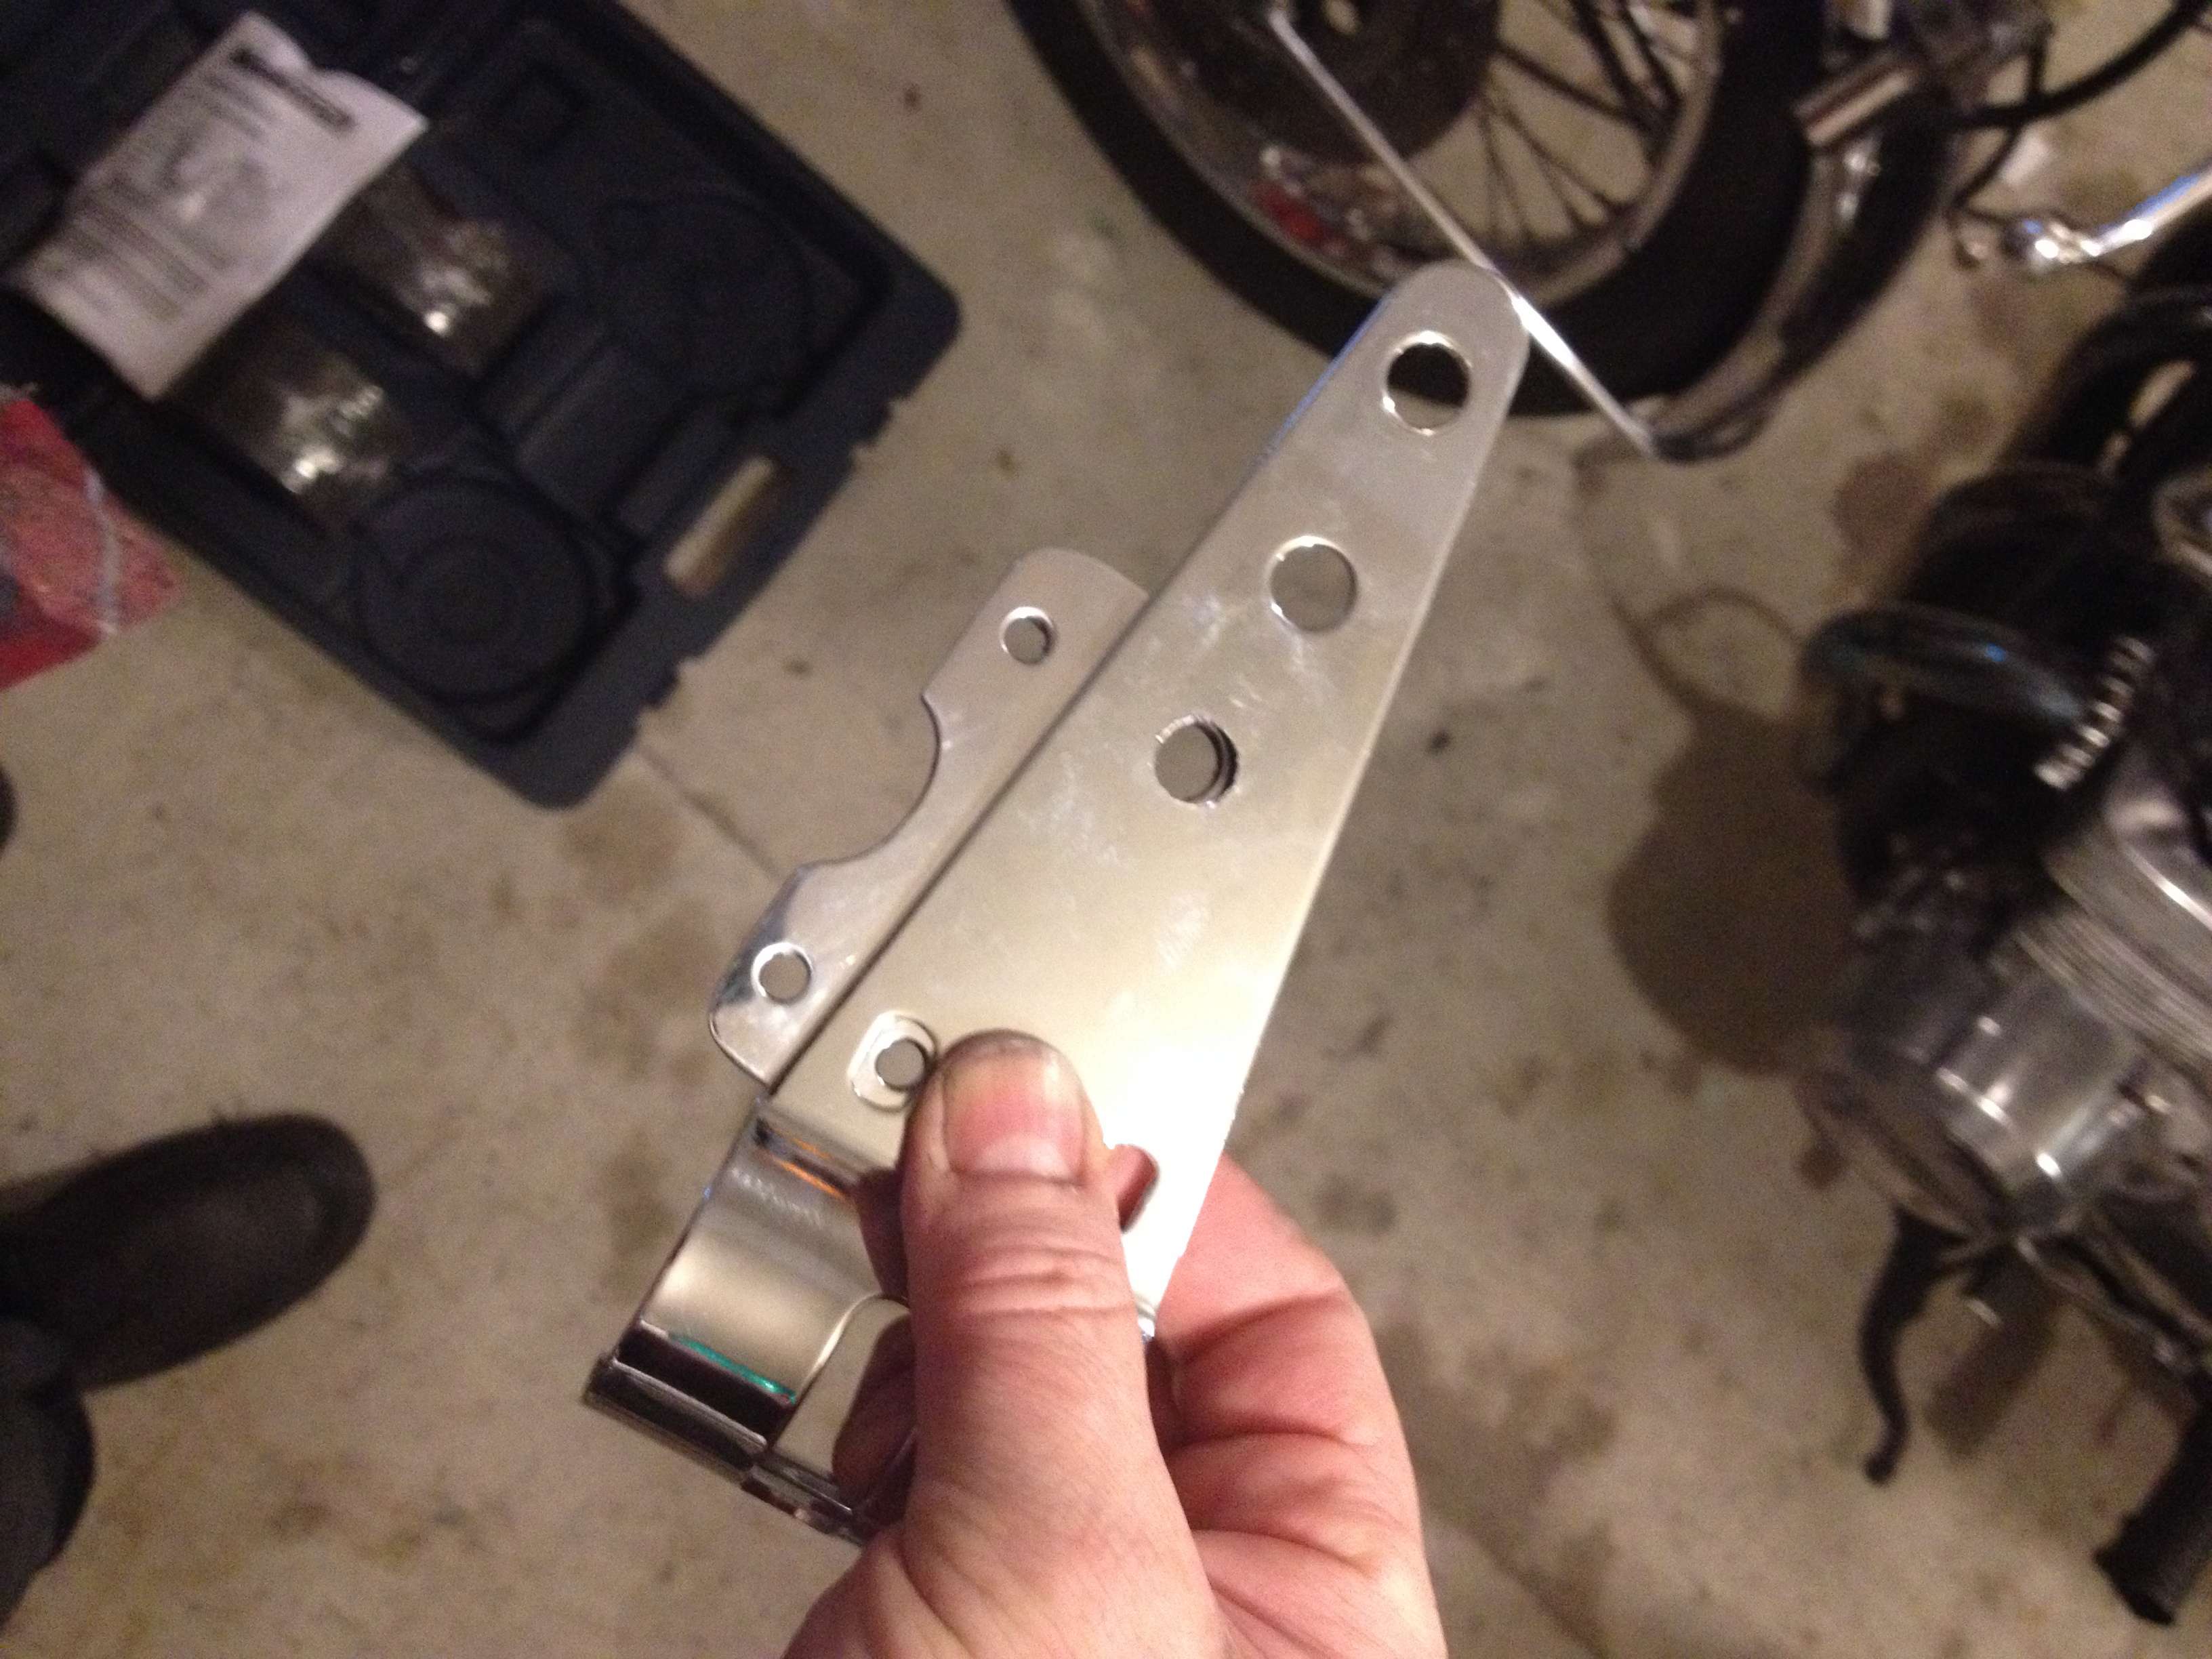
The Bullit triple tree is a beautiful piece, but still looked a little too modern and "CNC-ish" for me, so I put on on my grinder and rounded out all the edges roughly, and then sanded it progressively with 250, 400, 600, 1500 and 2000-grit sandpaper before putting it on to my buffing wheel for the final polish. Here is the before and after:
2bzu.jpg


5psr.jpg


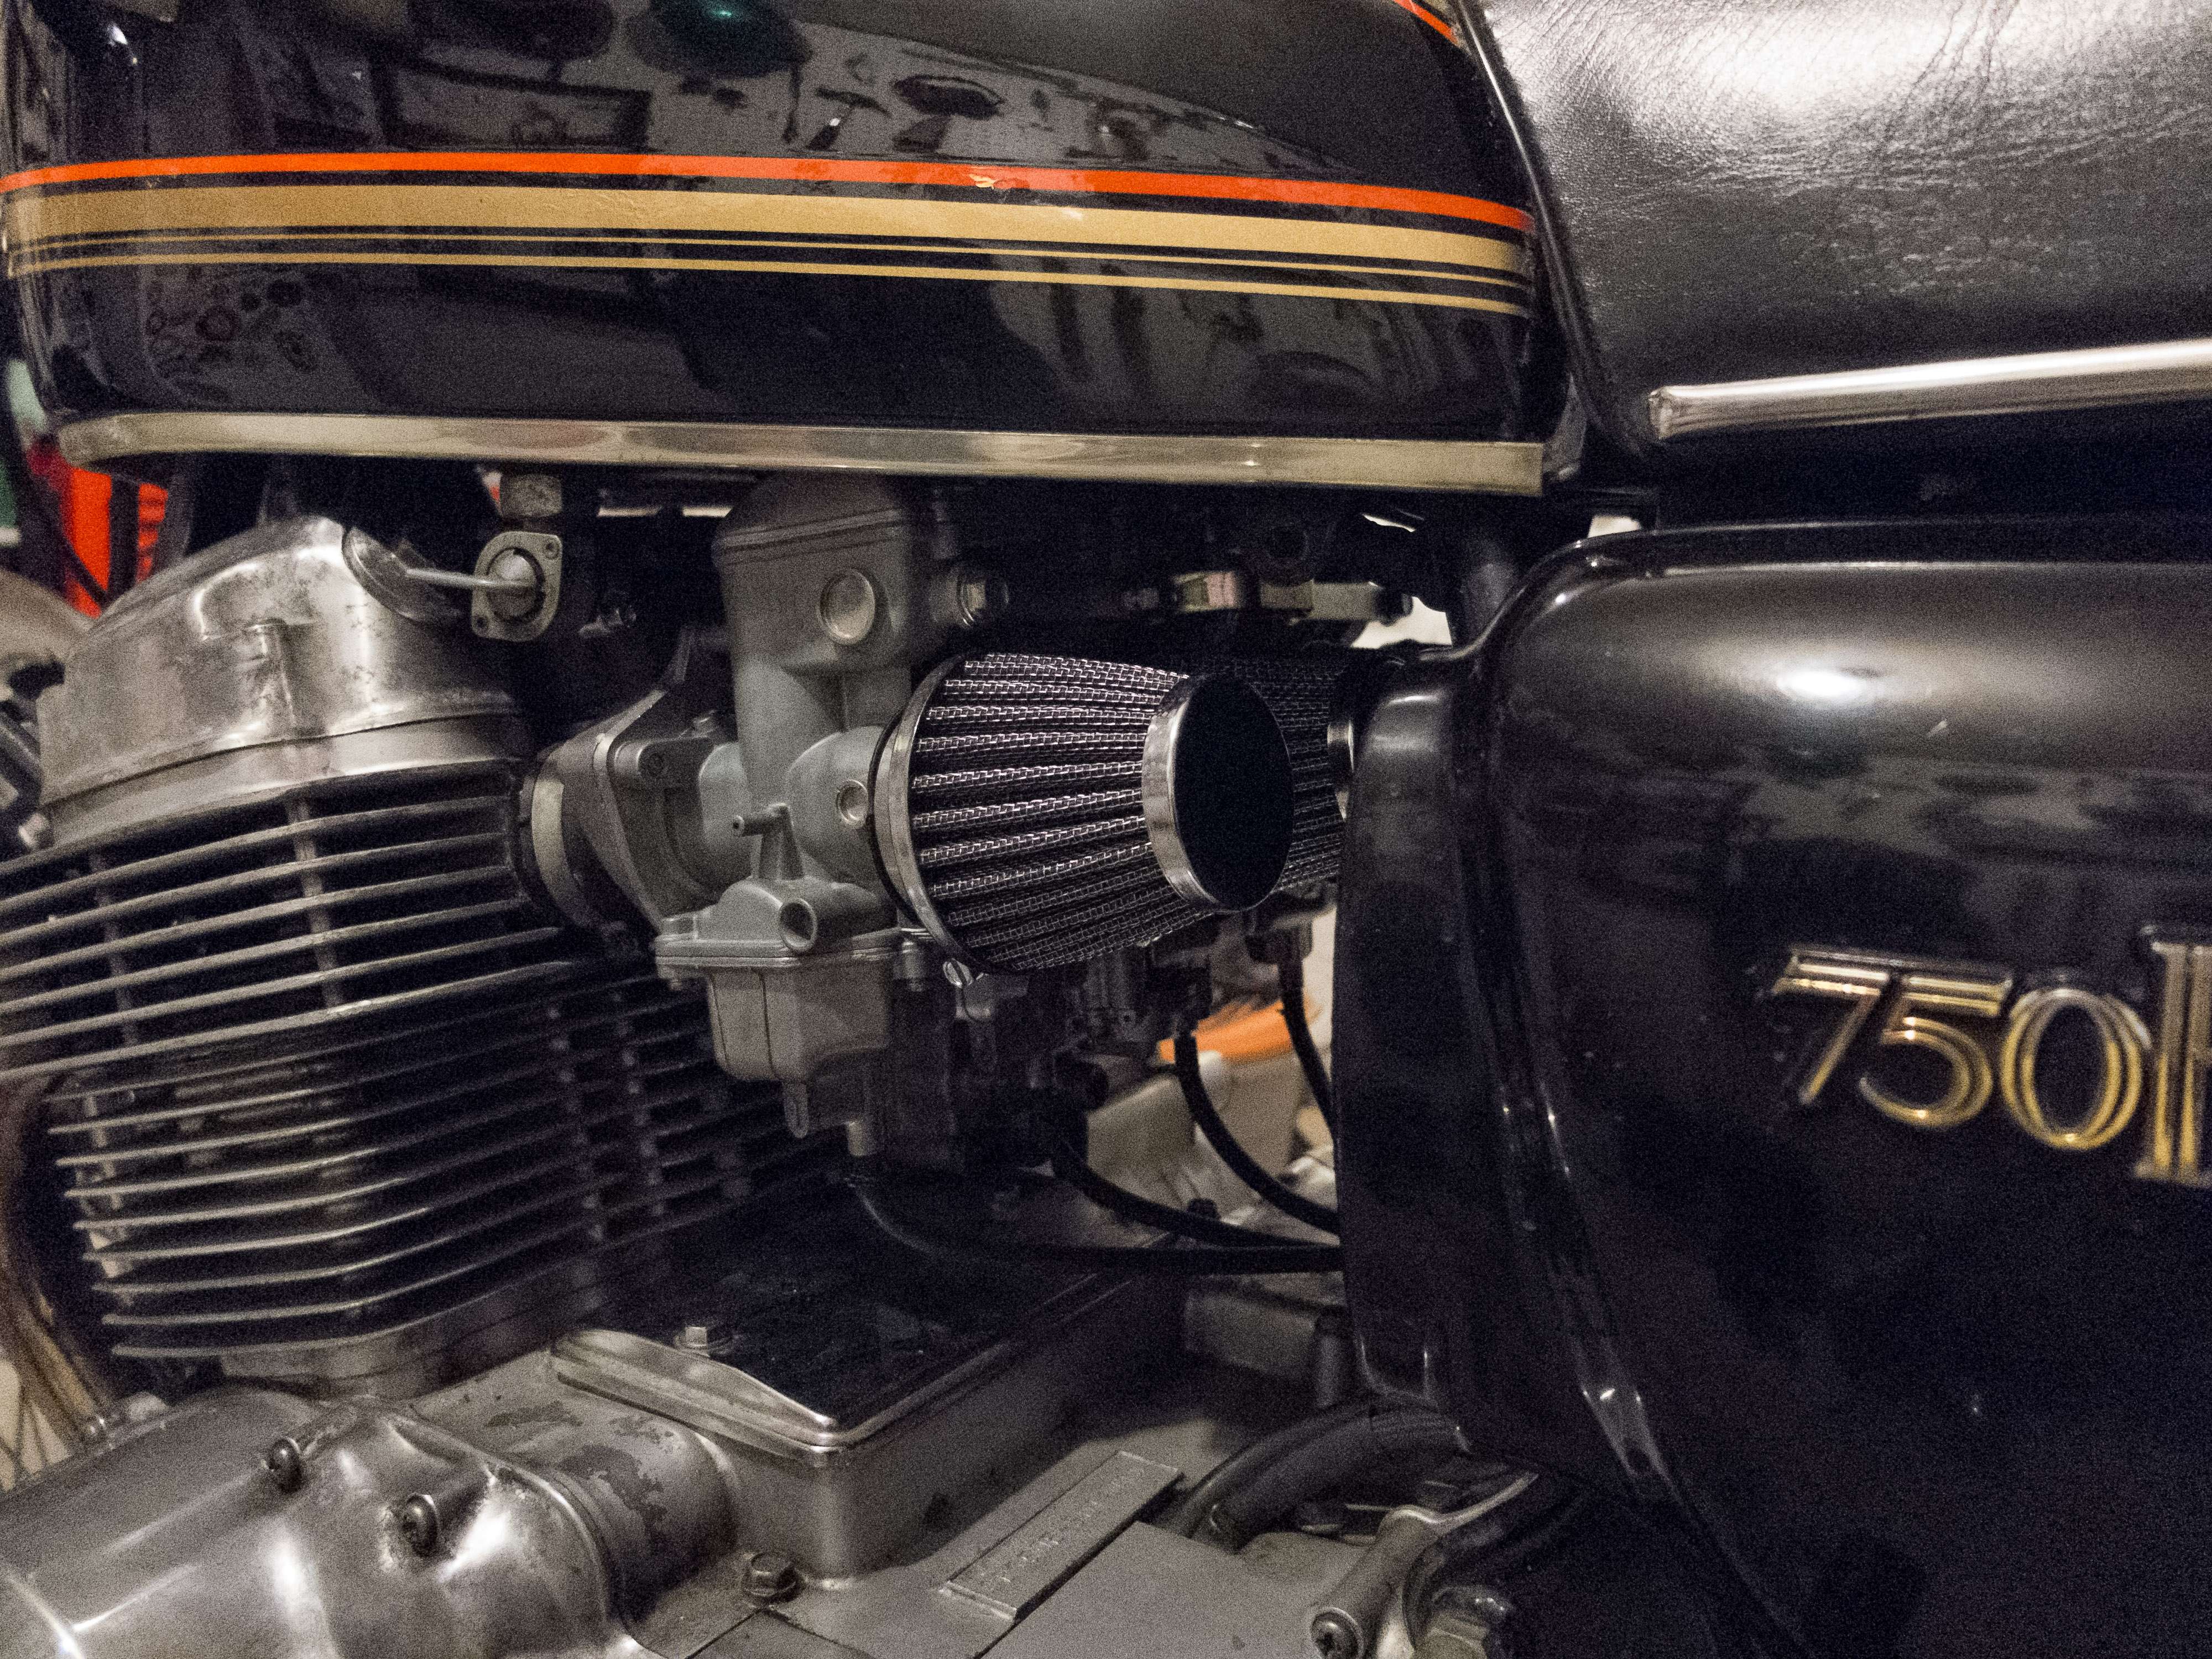
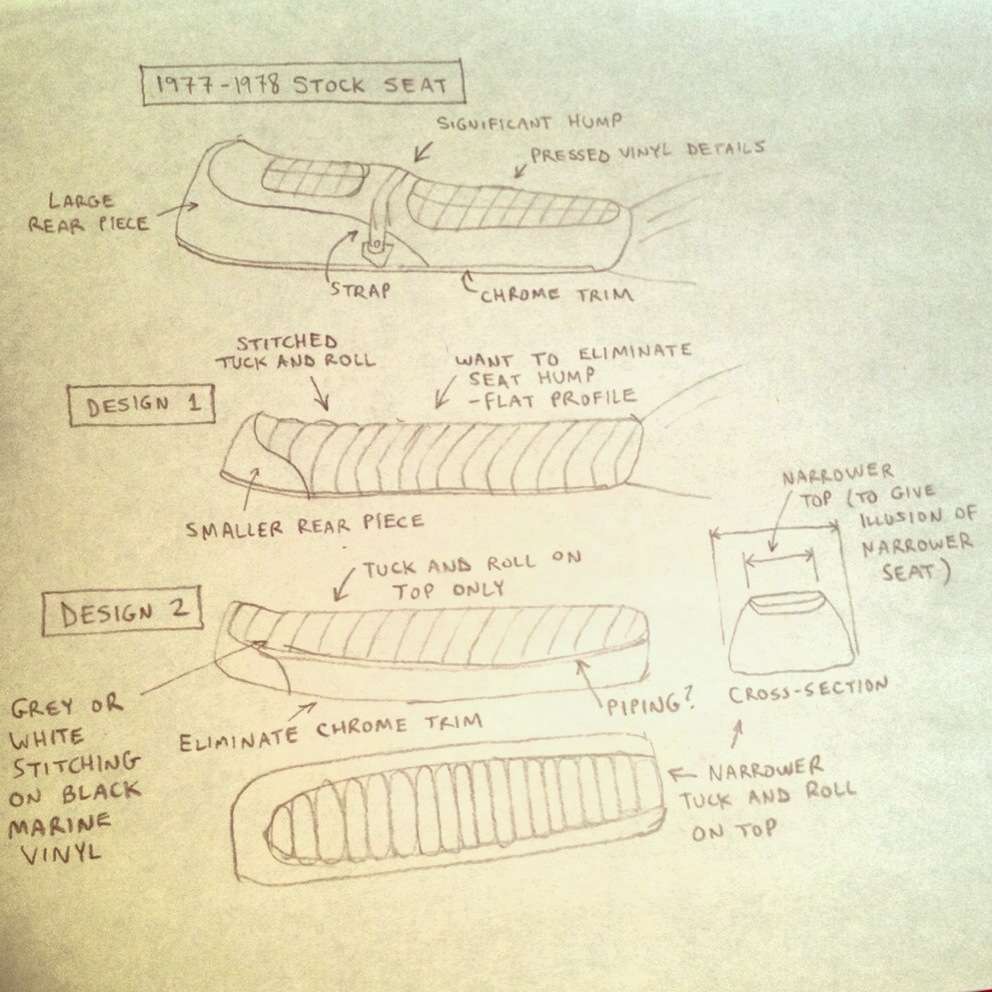
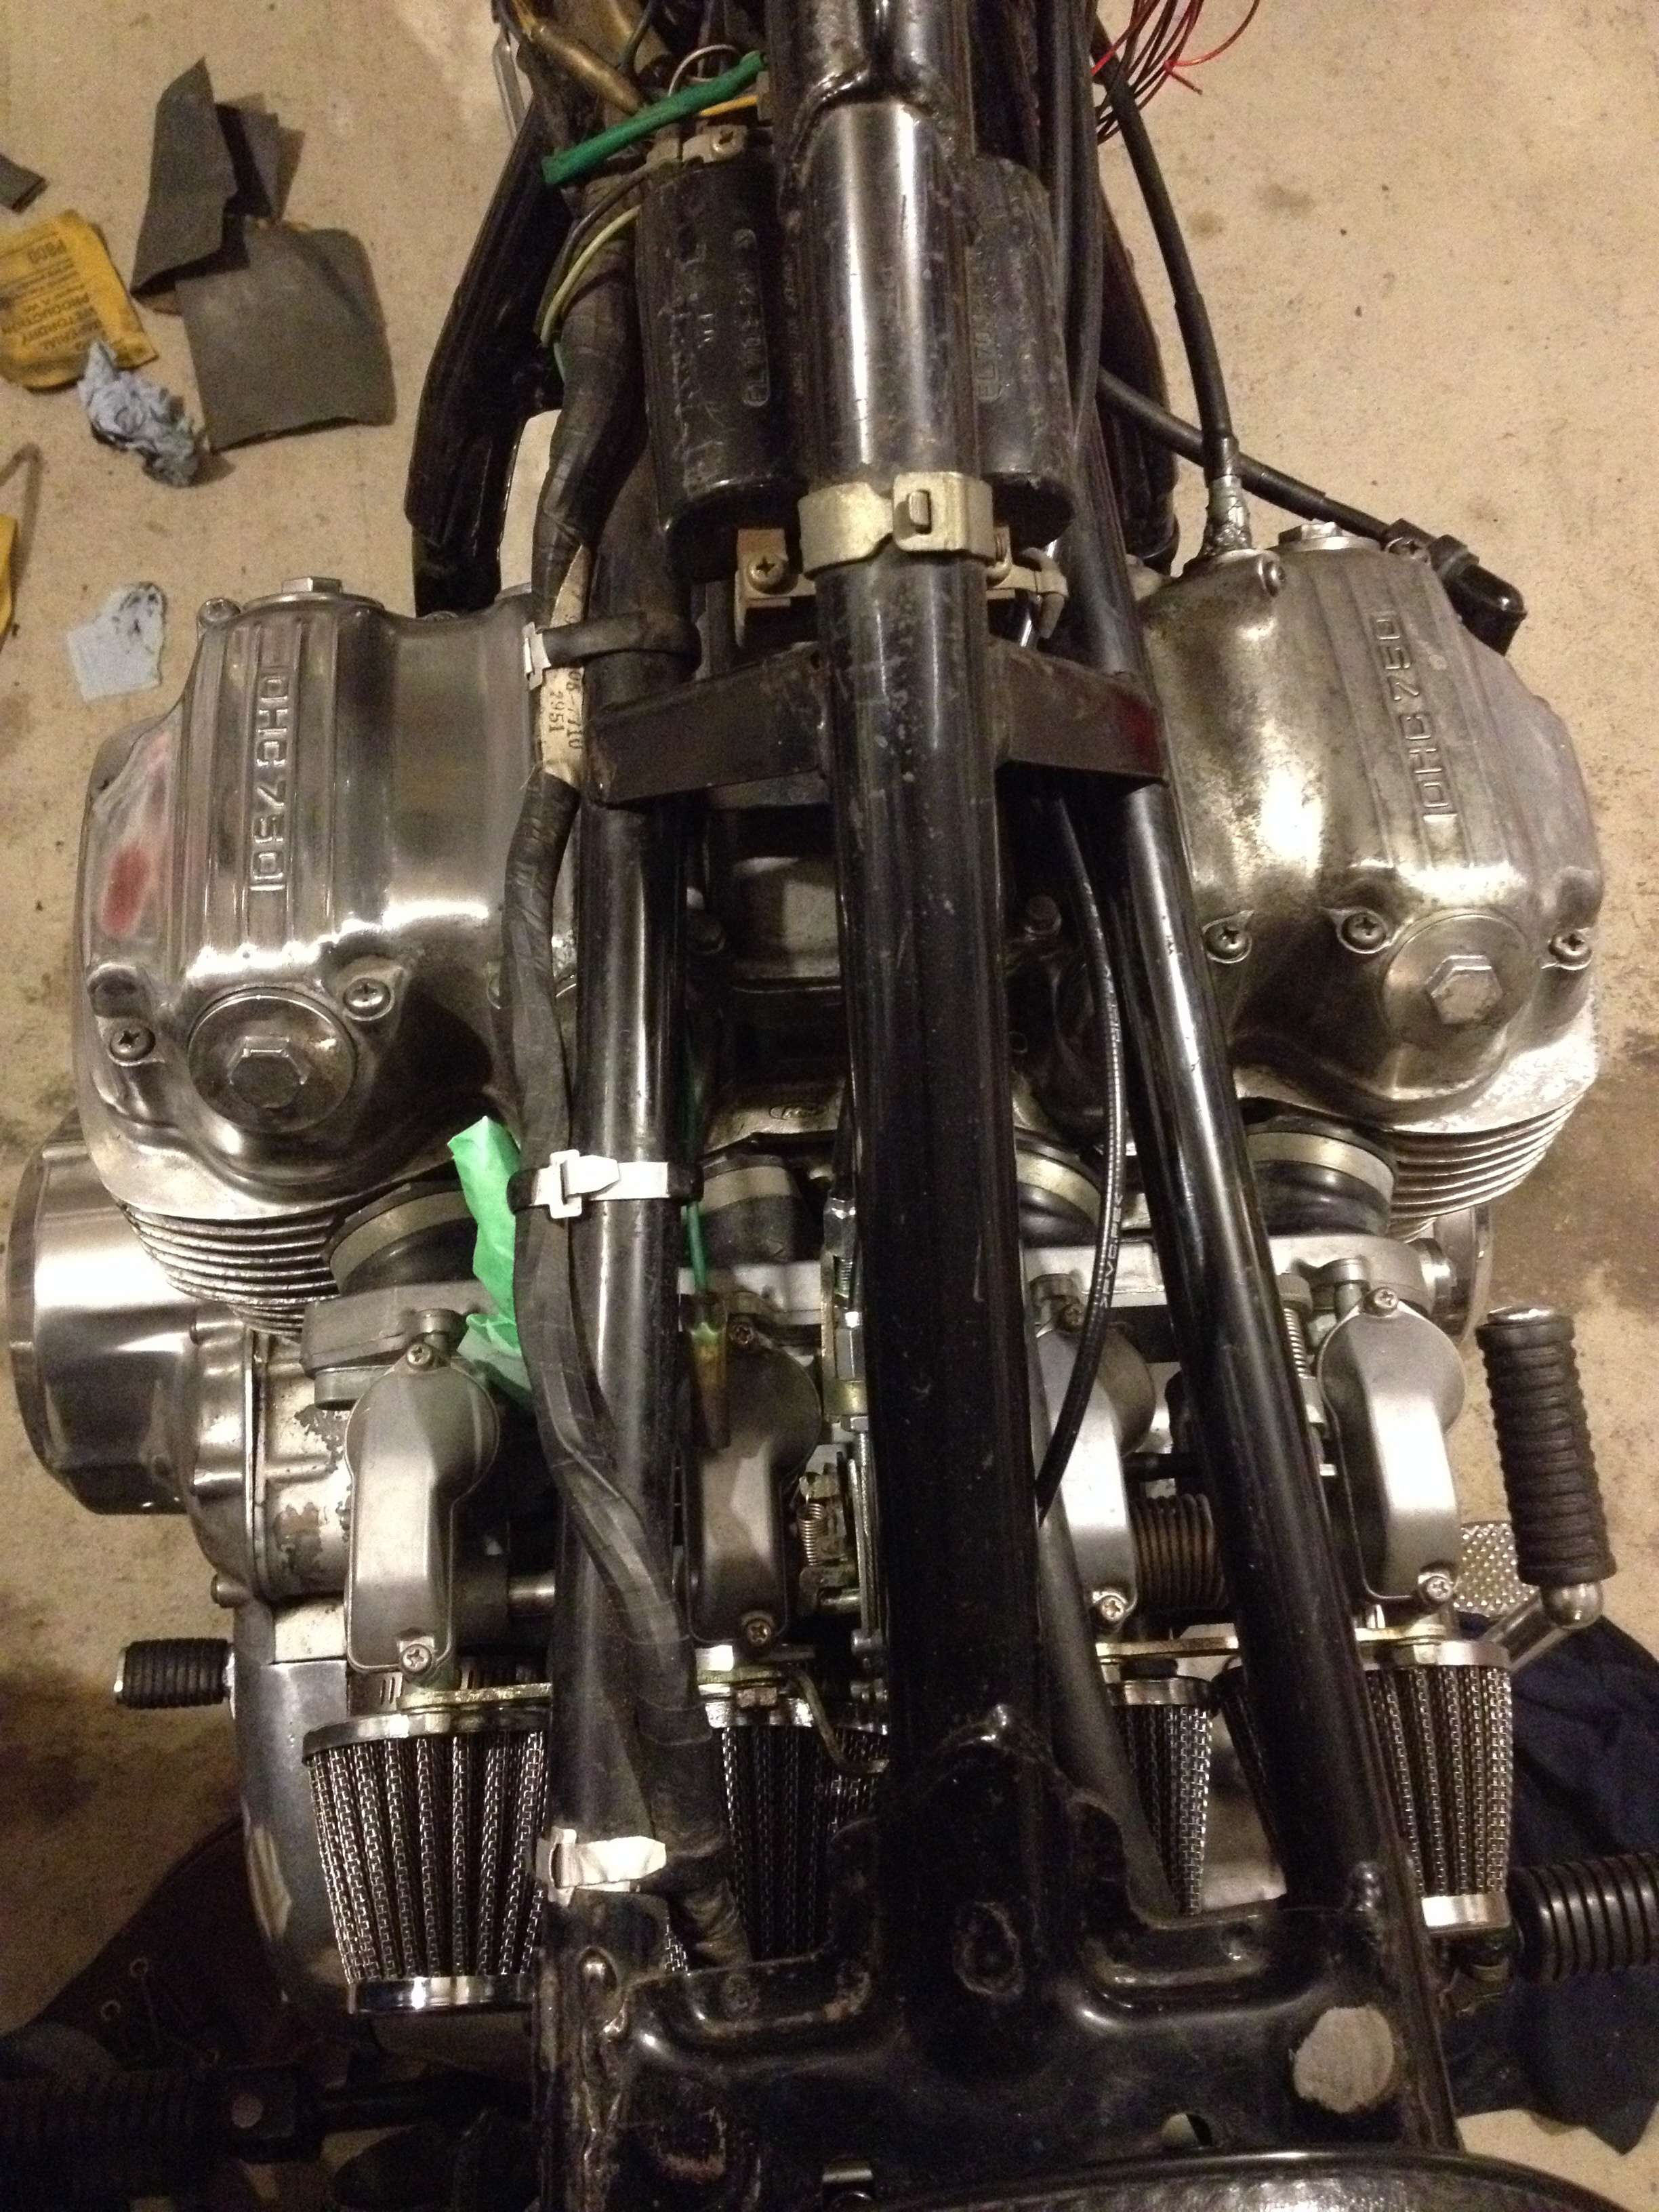
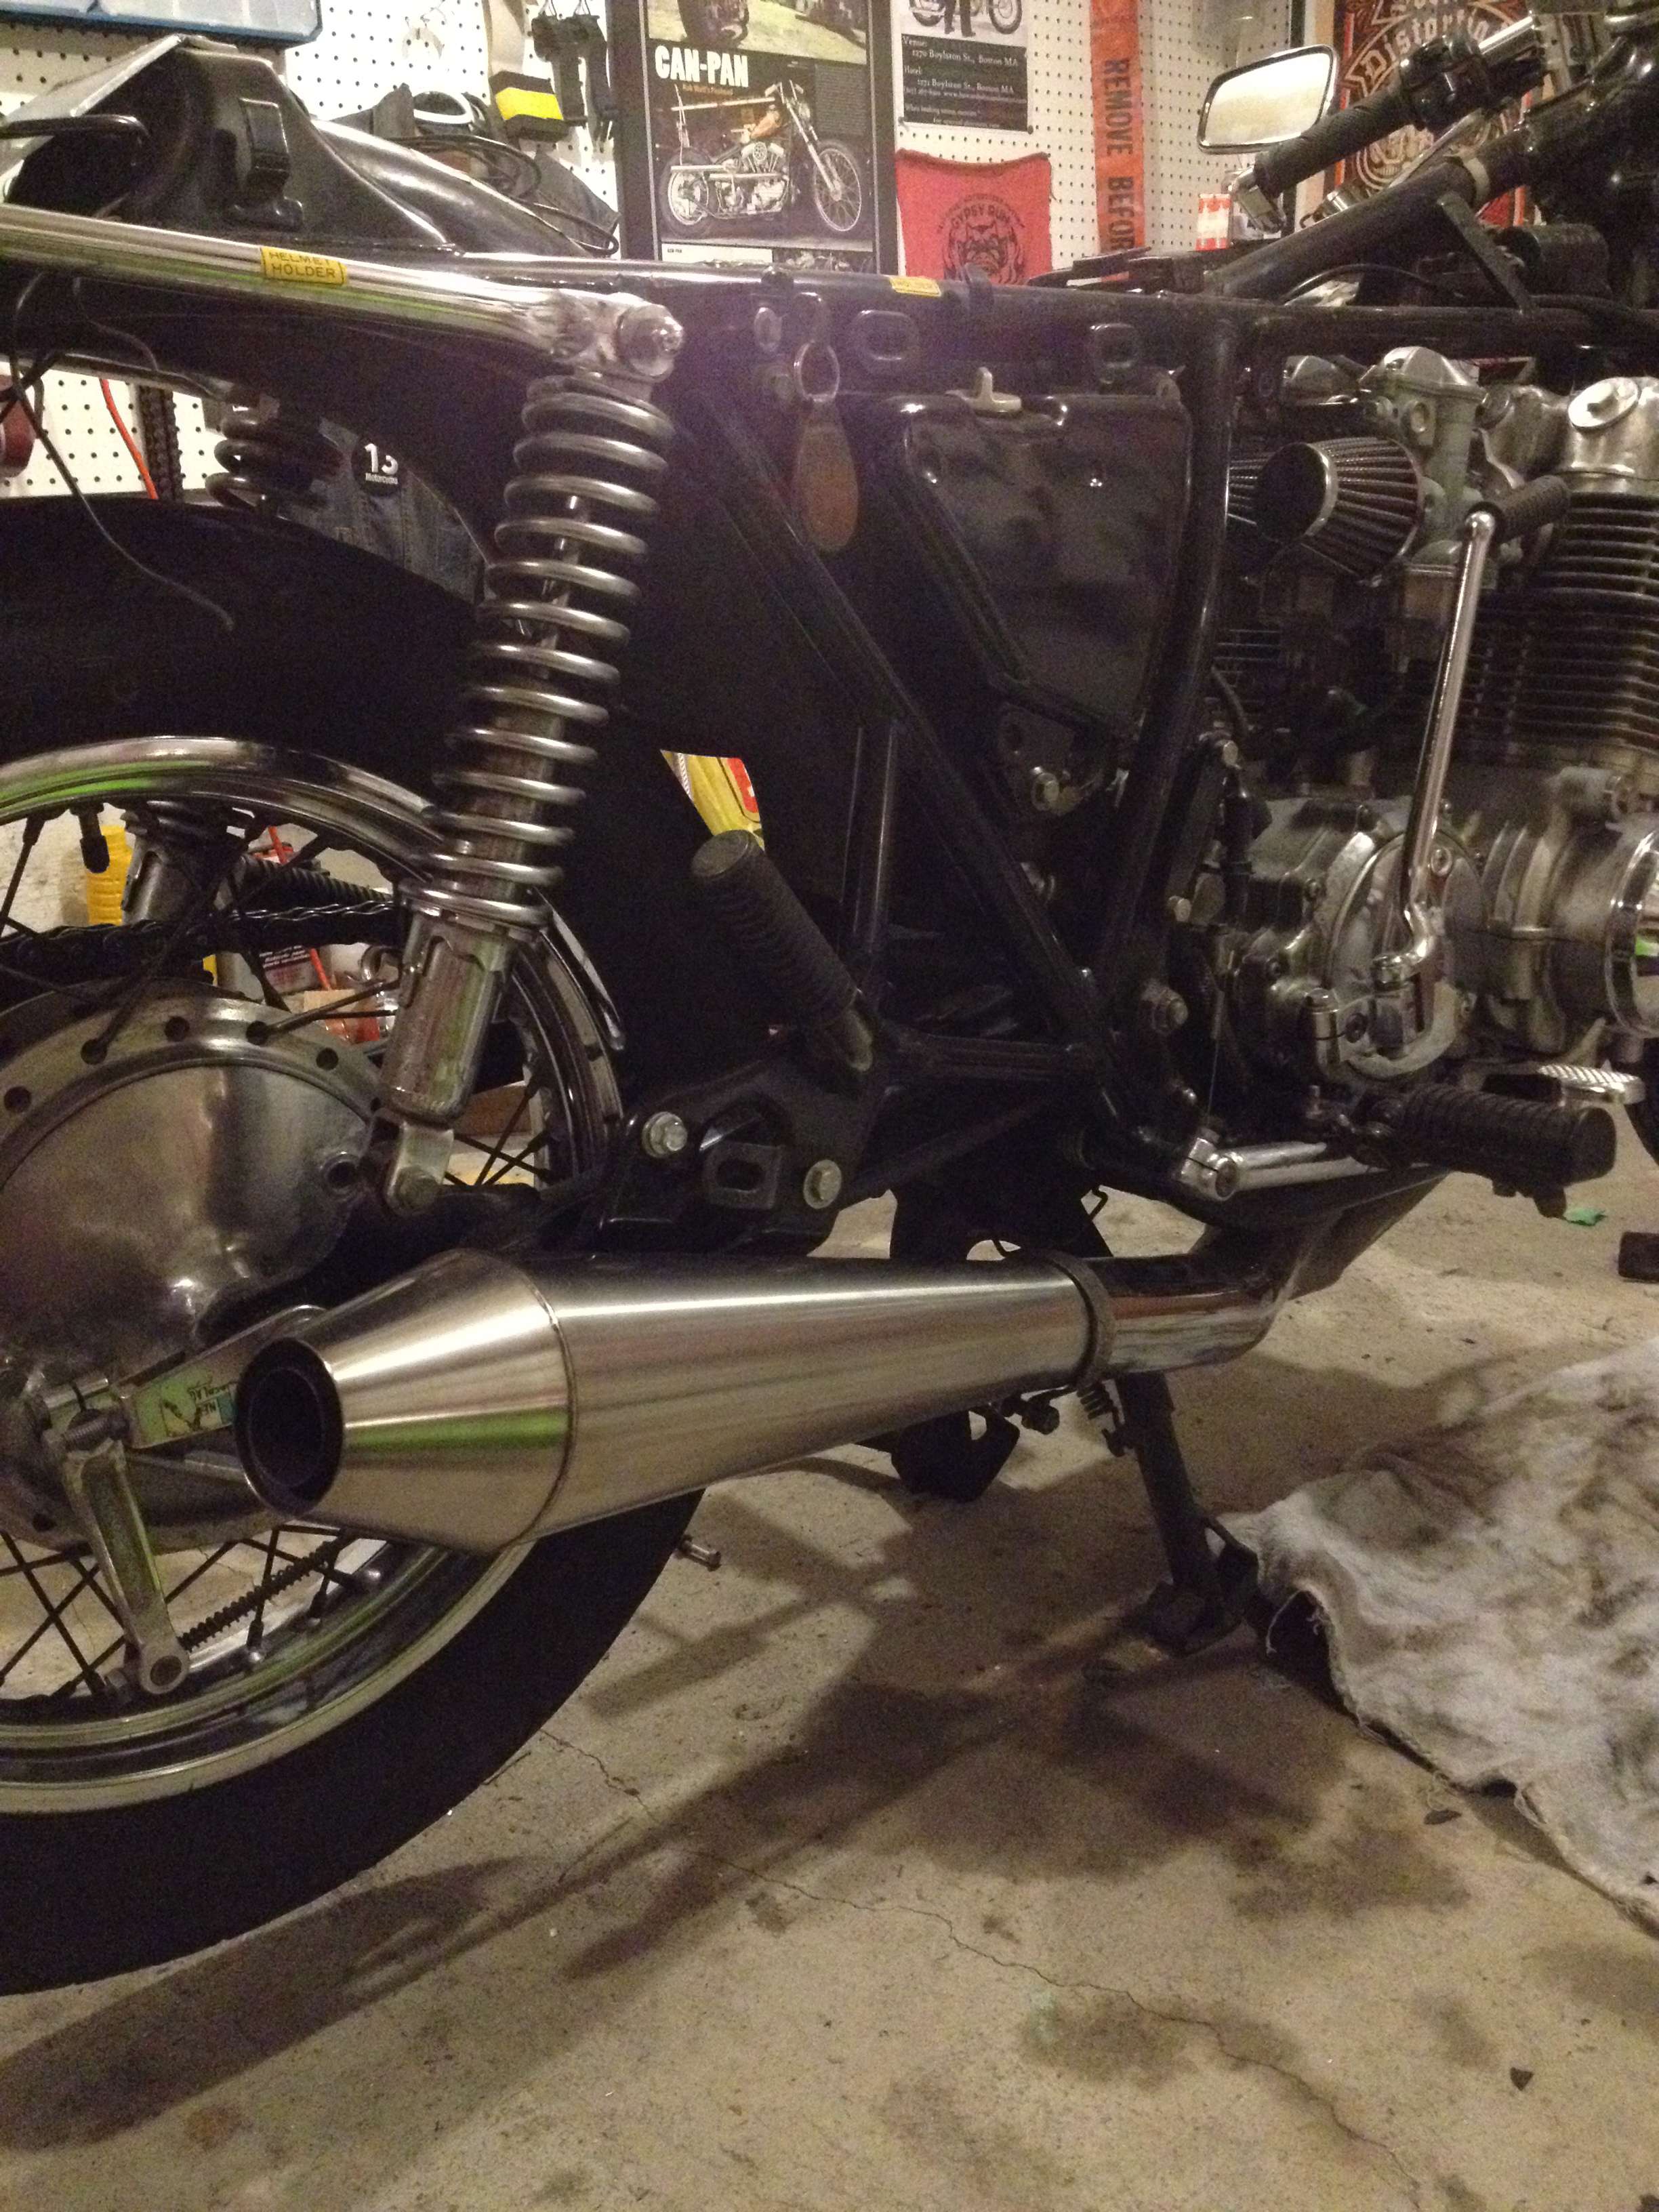
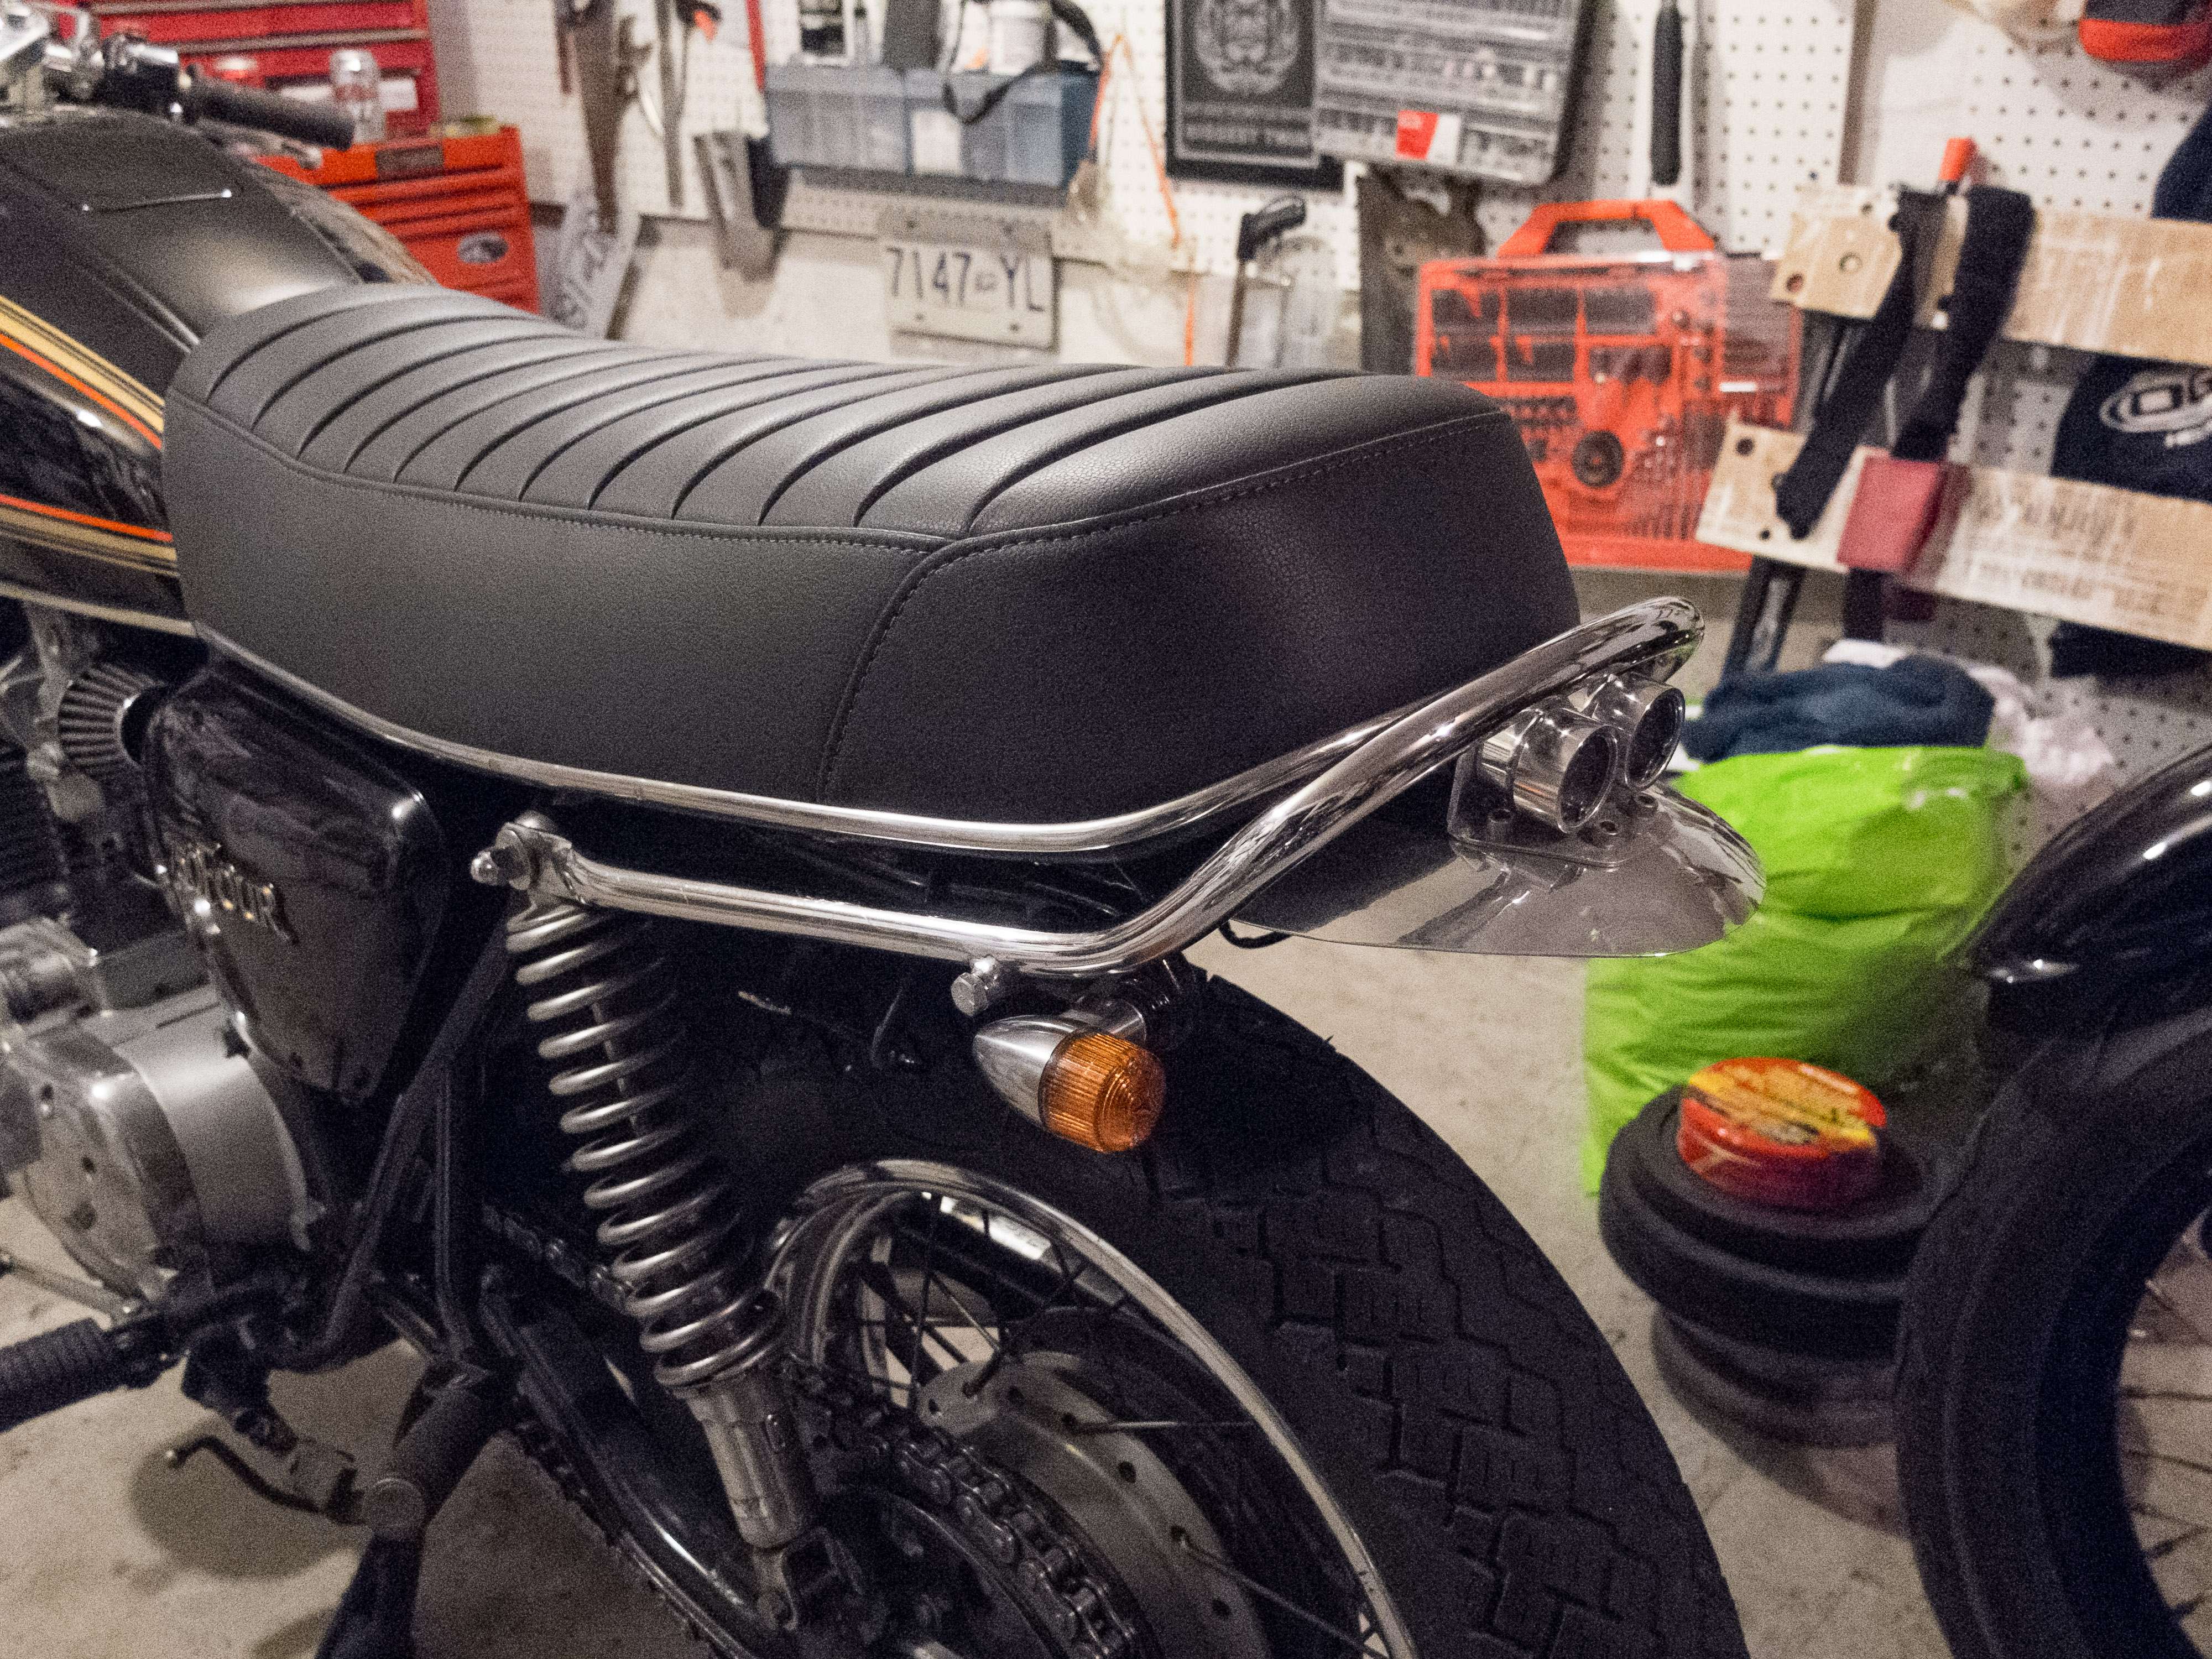
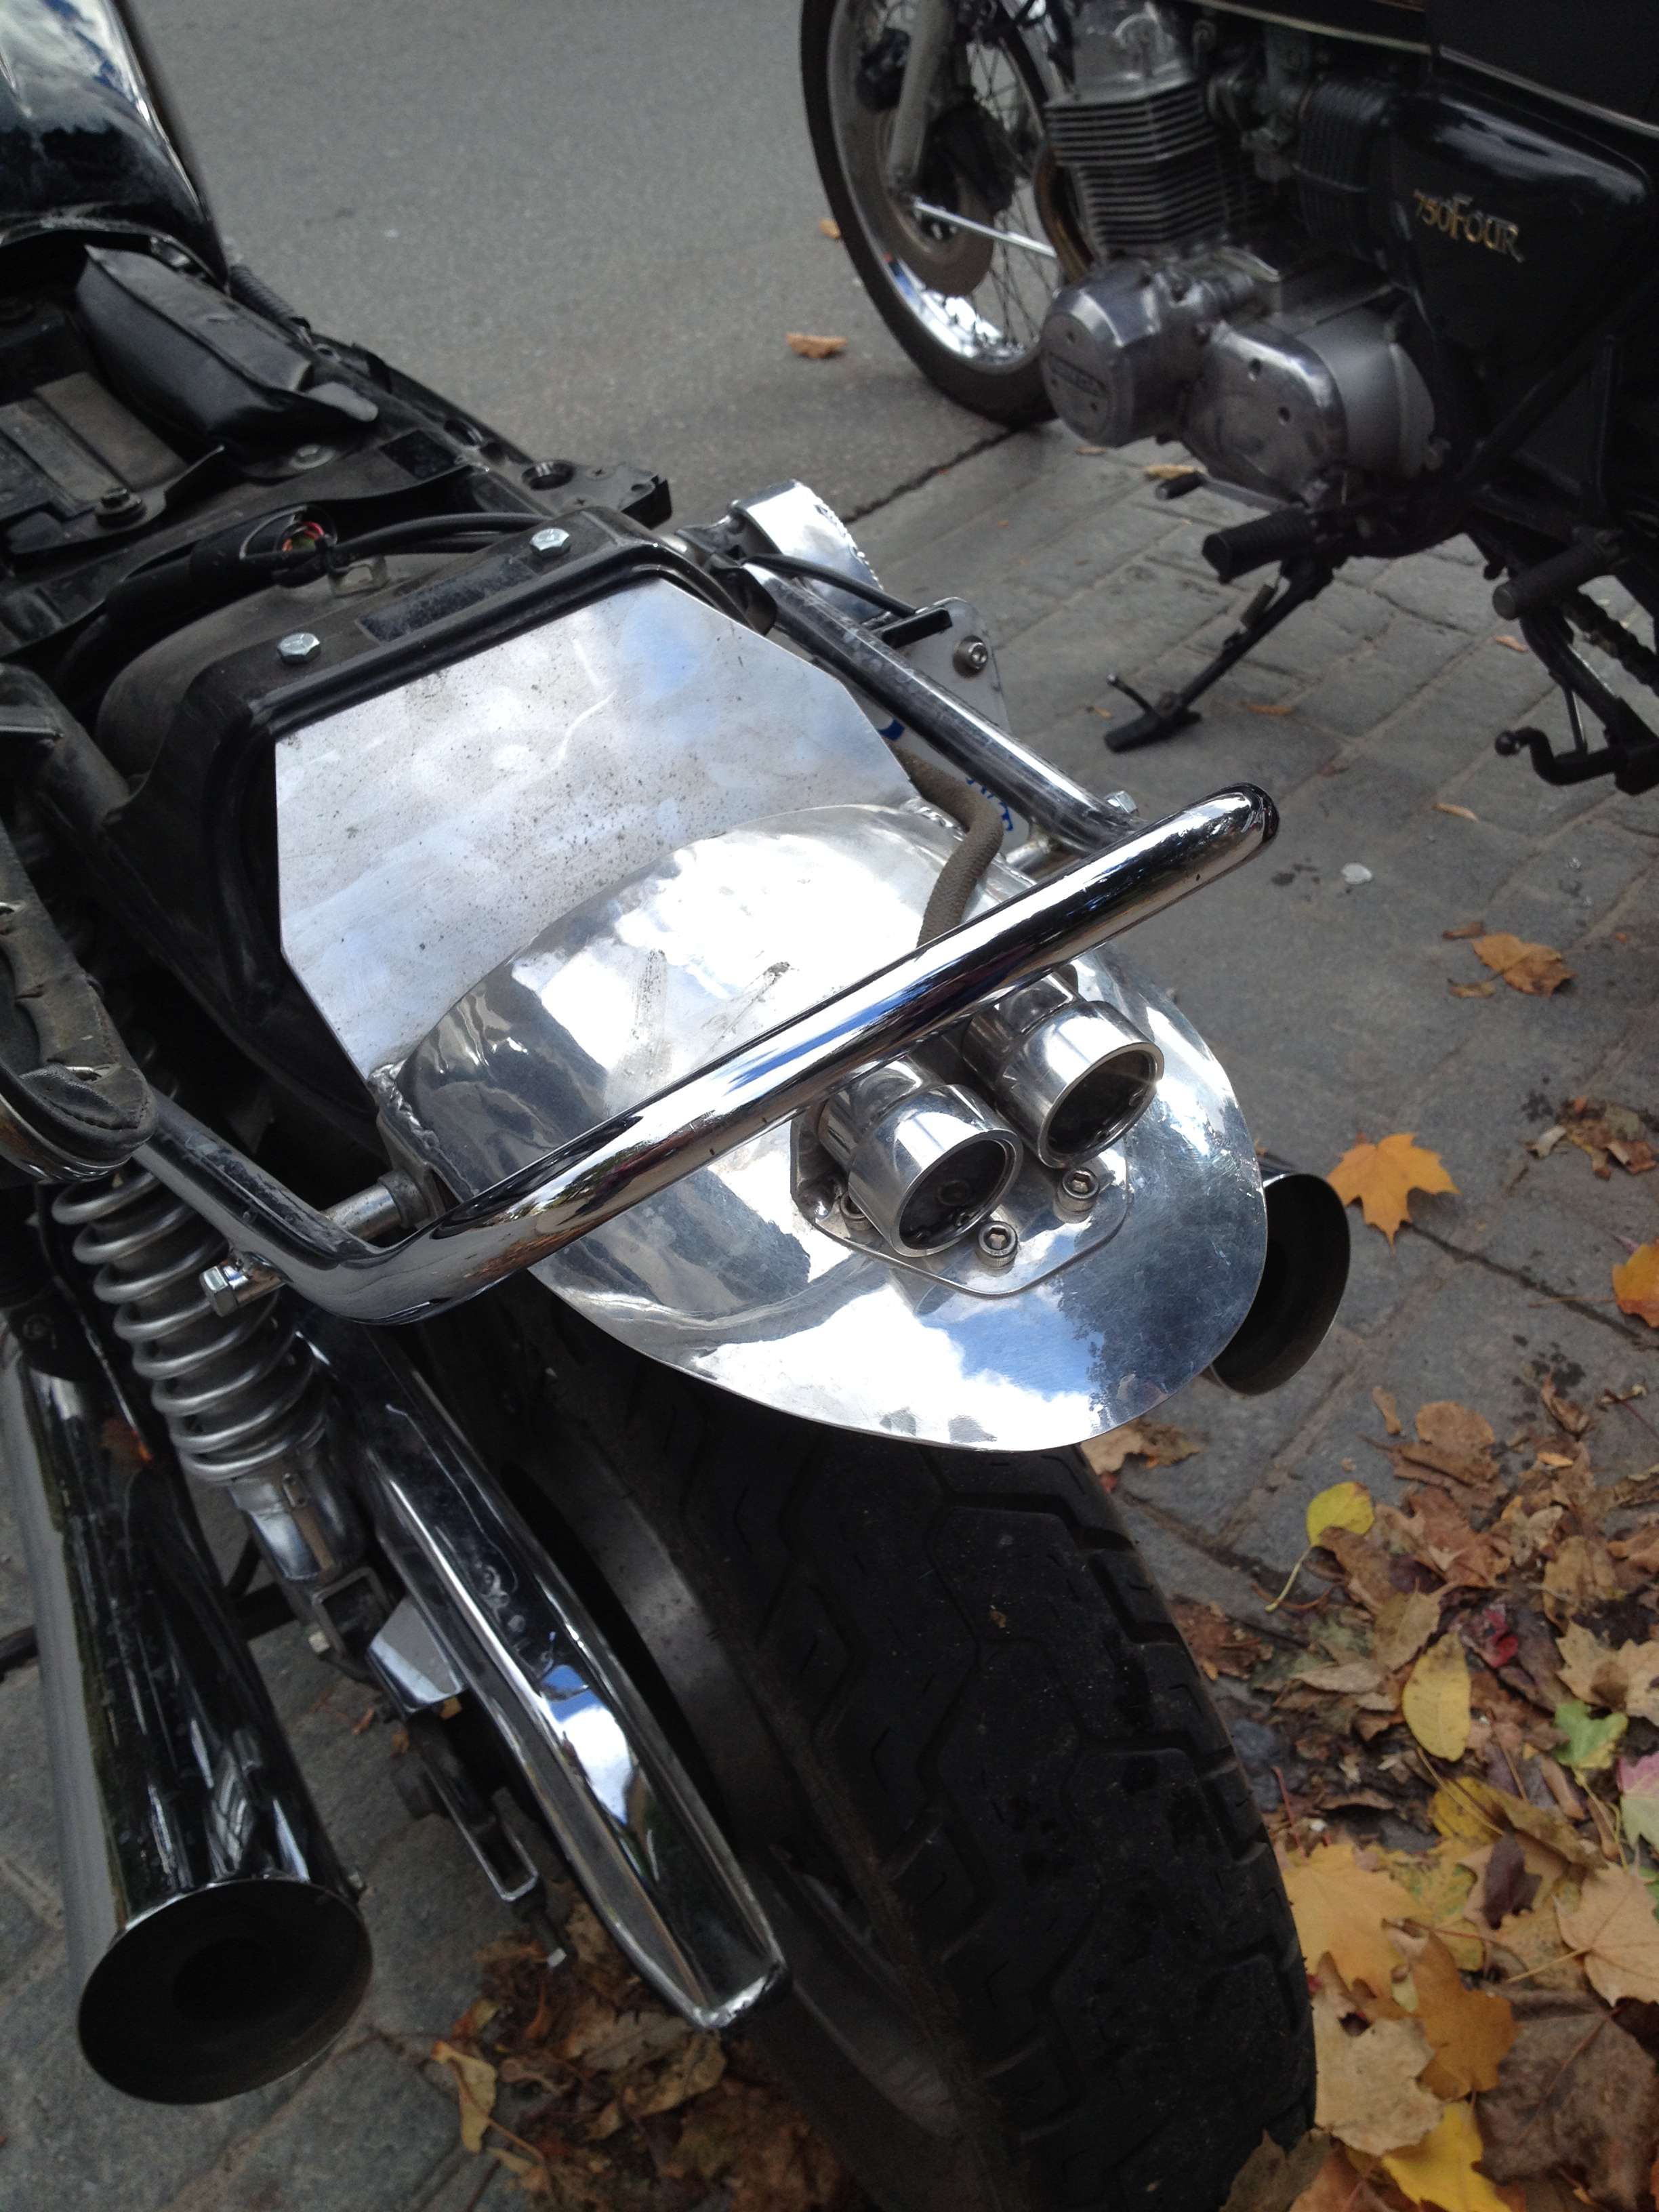
The engine is getting K&N pods, and I want to find a smaller reverse megaphone for the exhaust. I have a second seat pan and tank, and I am planning on getting a (slightly) lower, flat tuck-and-roll seat upholstered on the second pan, but which retains the stock hinge and lock (which I find quite handy). If I don't have to cut the stock frame bridge, I won't. For the tank, I am going to try to do a similar cut-out "cafe'd" tank that Vinnie did on his CB:
http://www.dotheton.com/forum/index.php?topic=13529.0

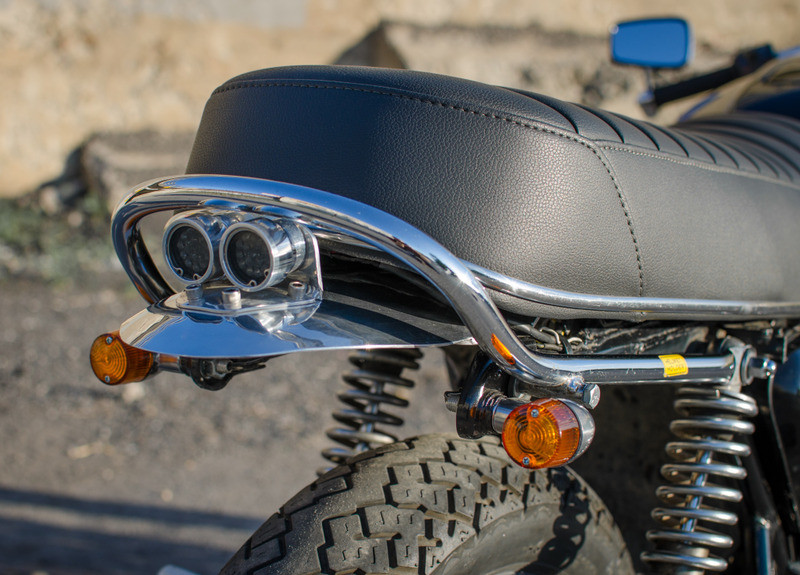
My friend Remi is probably changing his significantly, so I will likely be using the hand-hammered mini fender with some custom LED taillights that our buddy made up for that bike (here it is with the seat up to show how it is mounted):
rro2.jpg


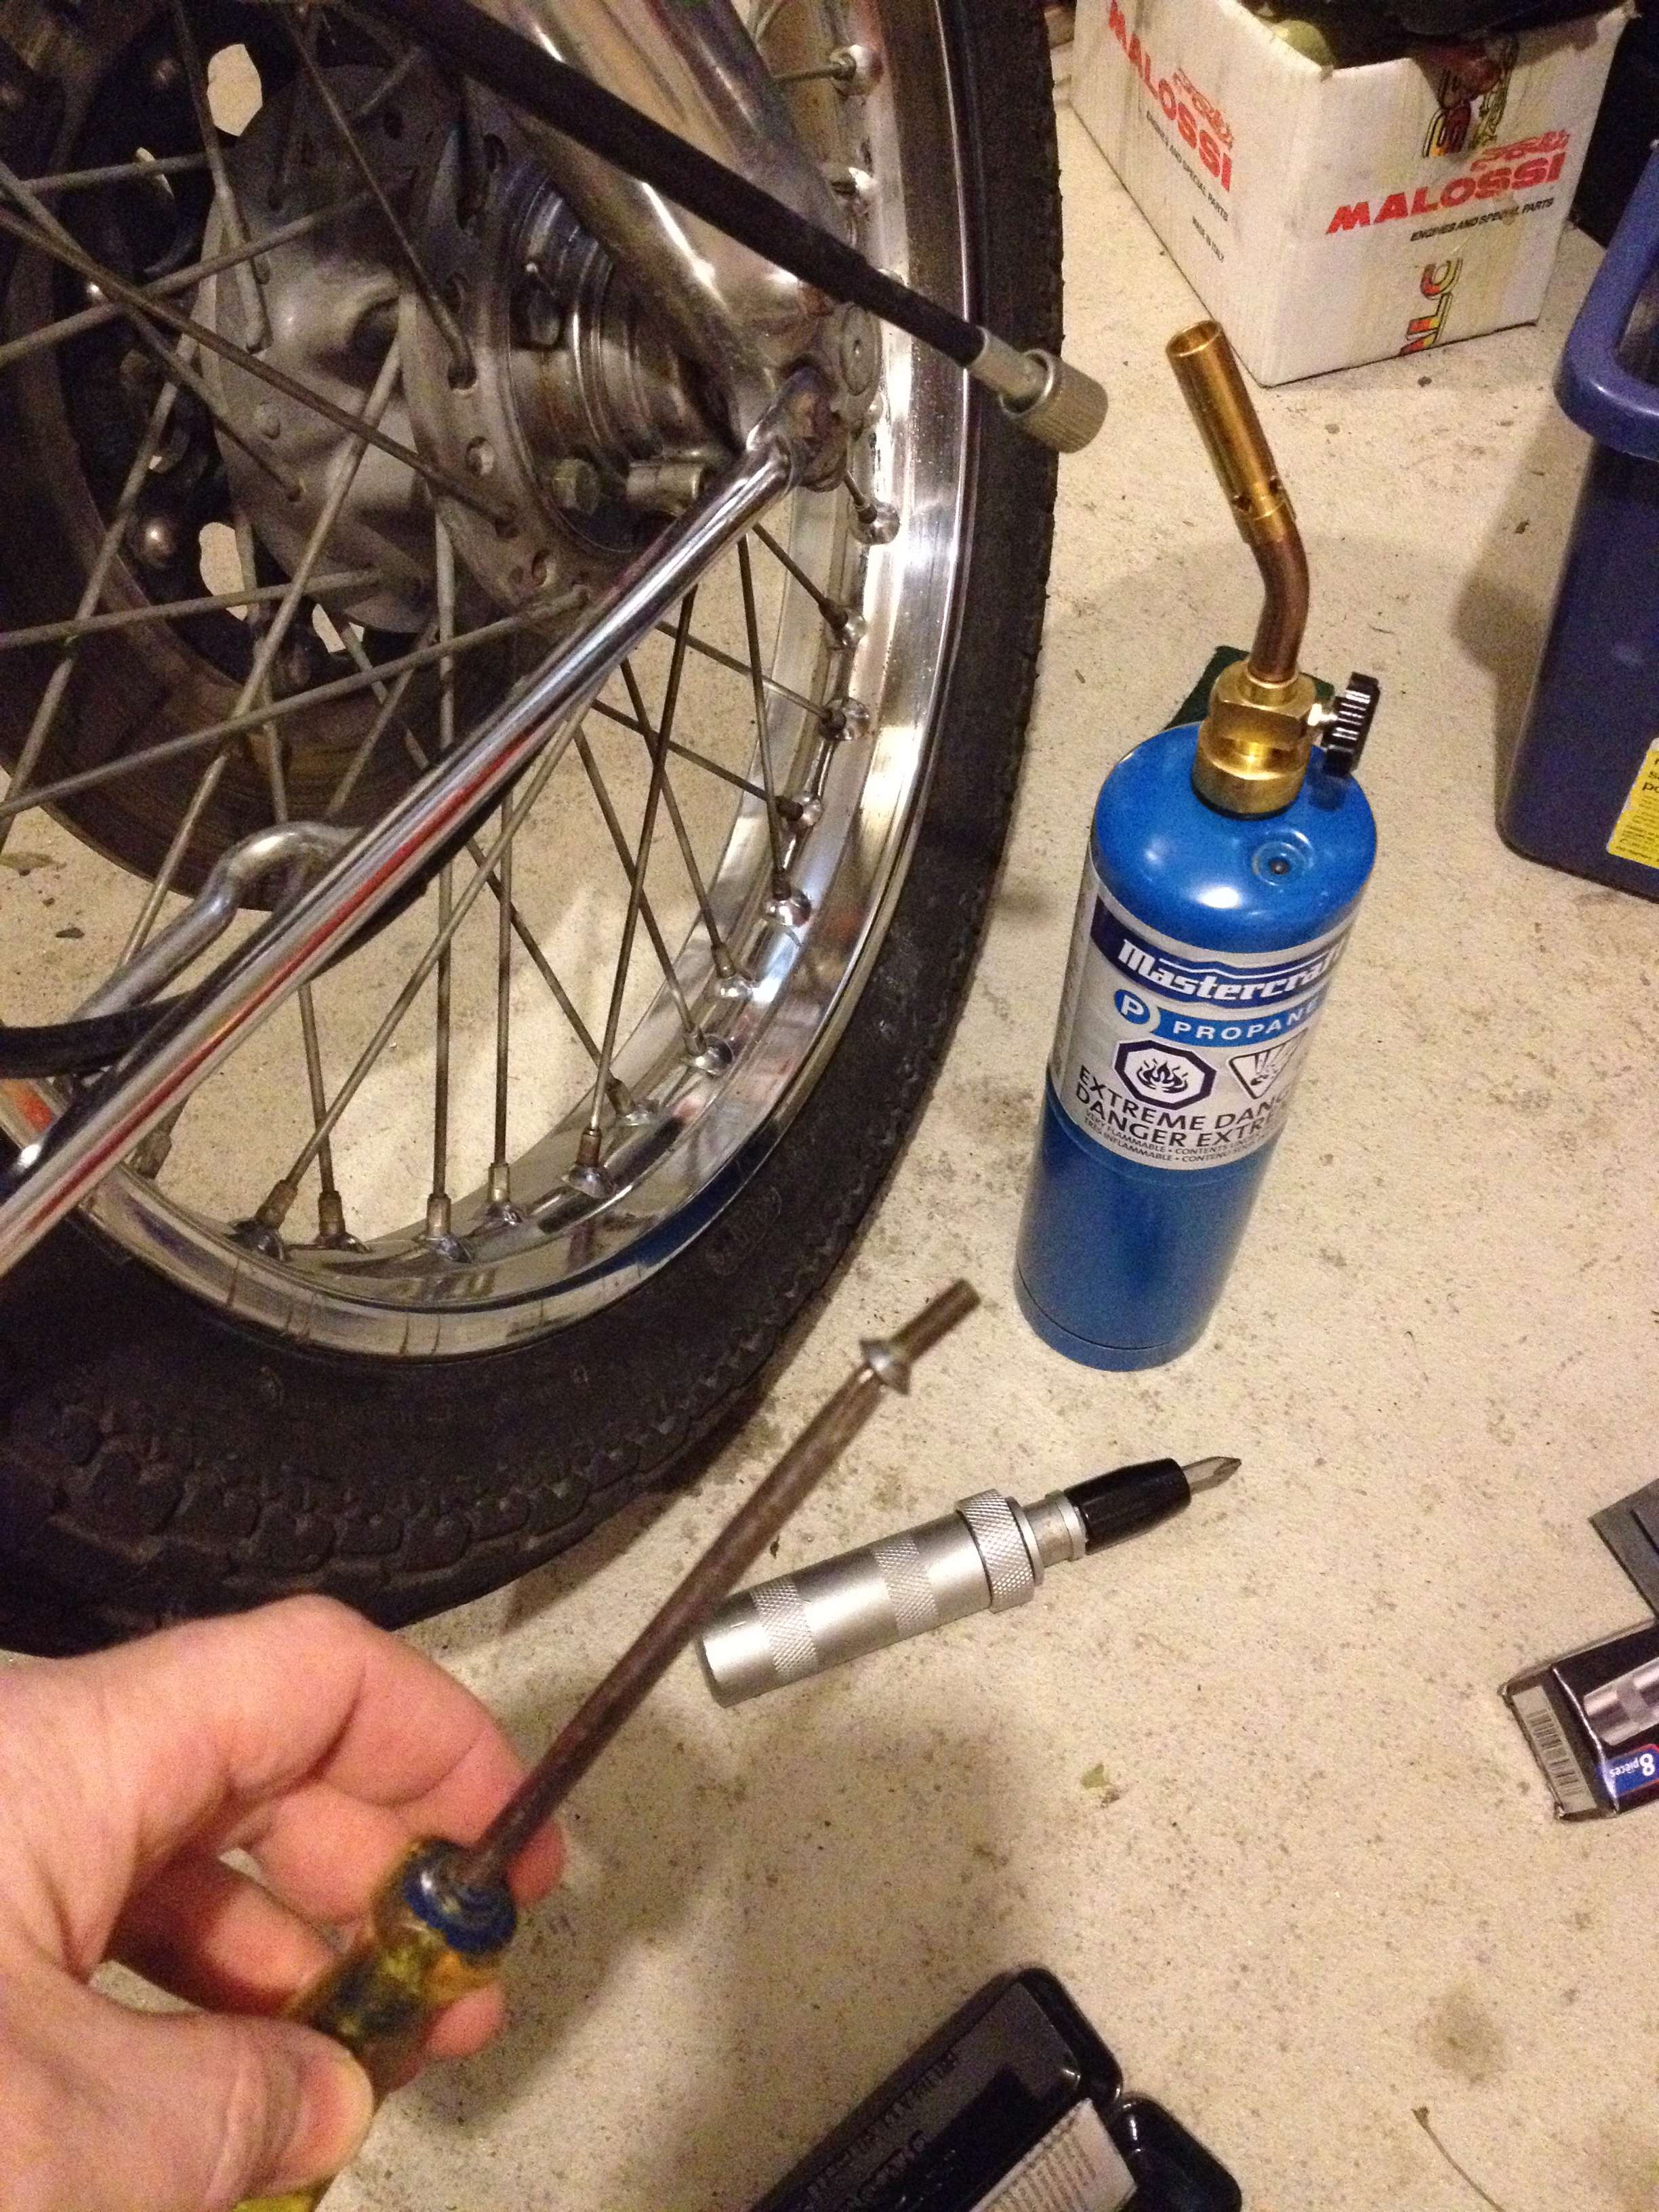
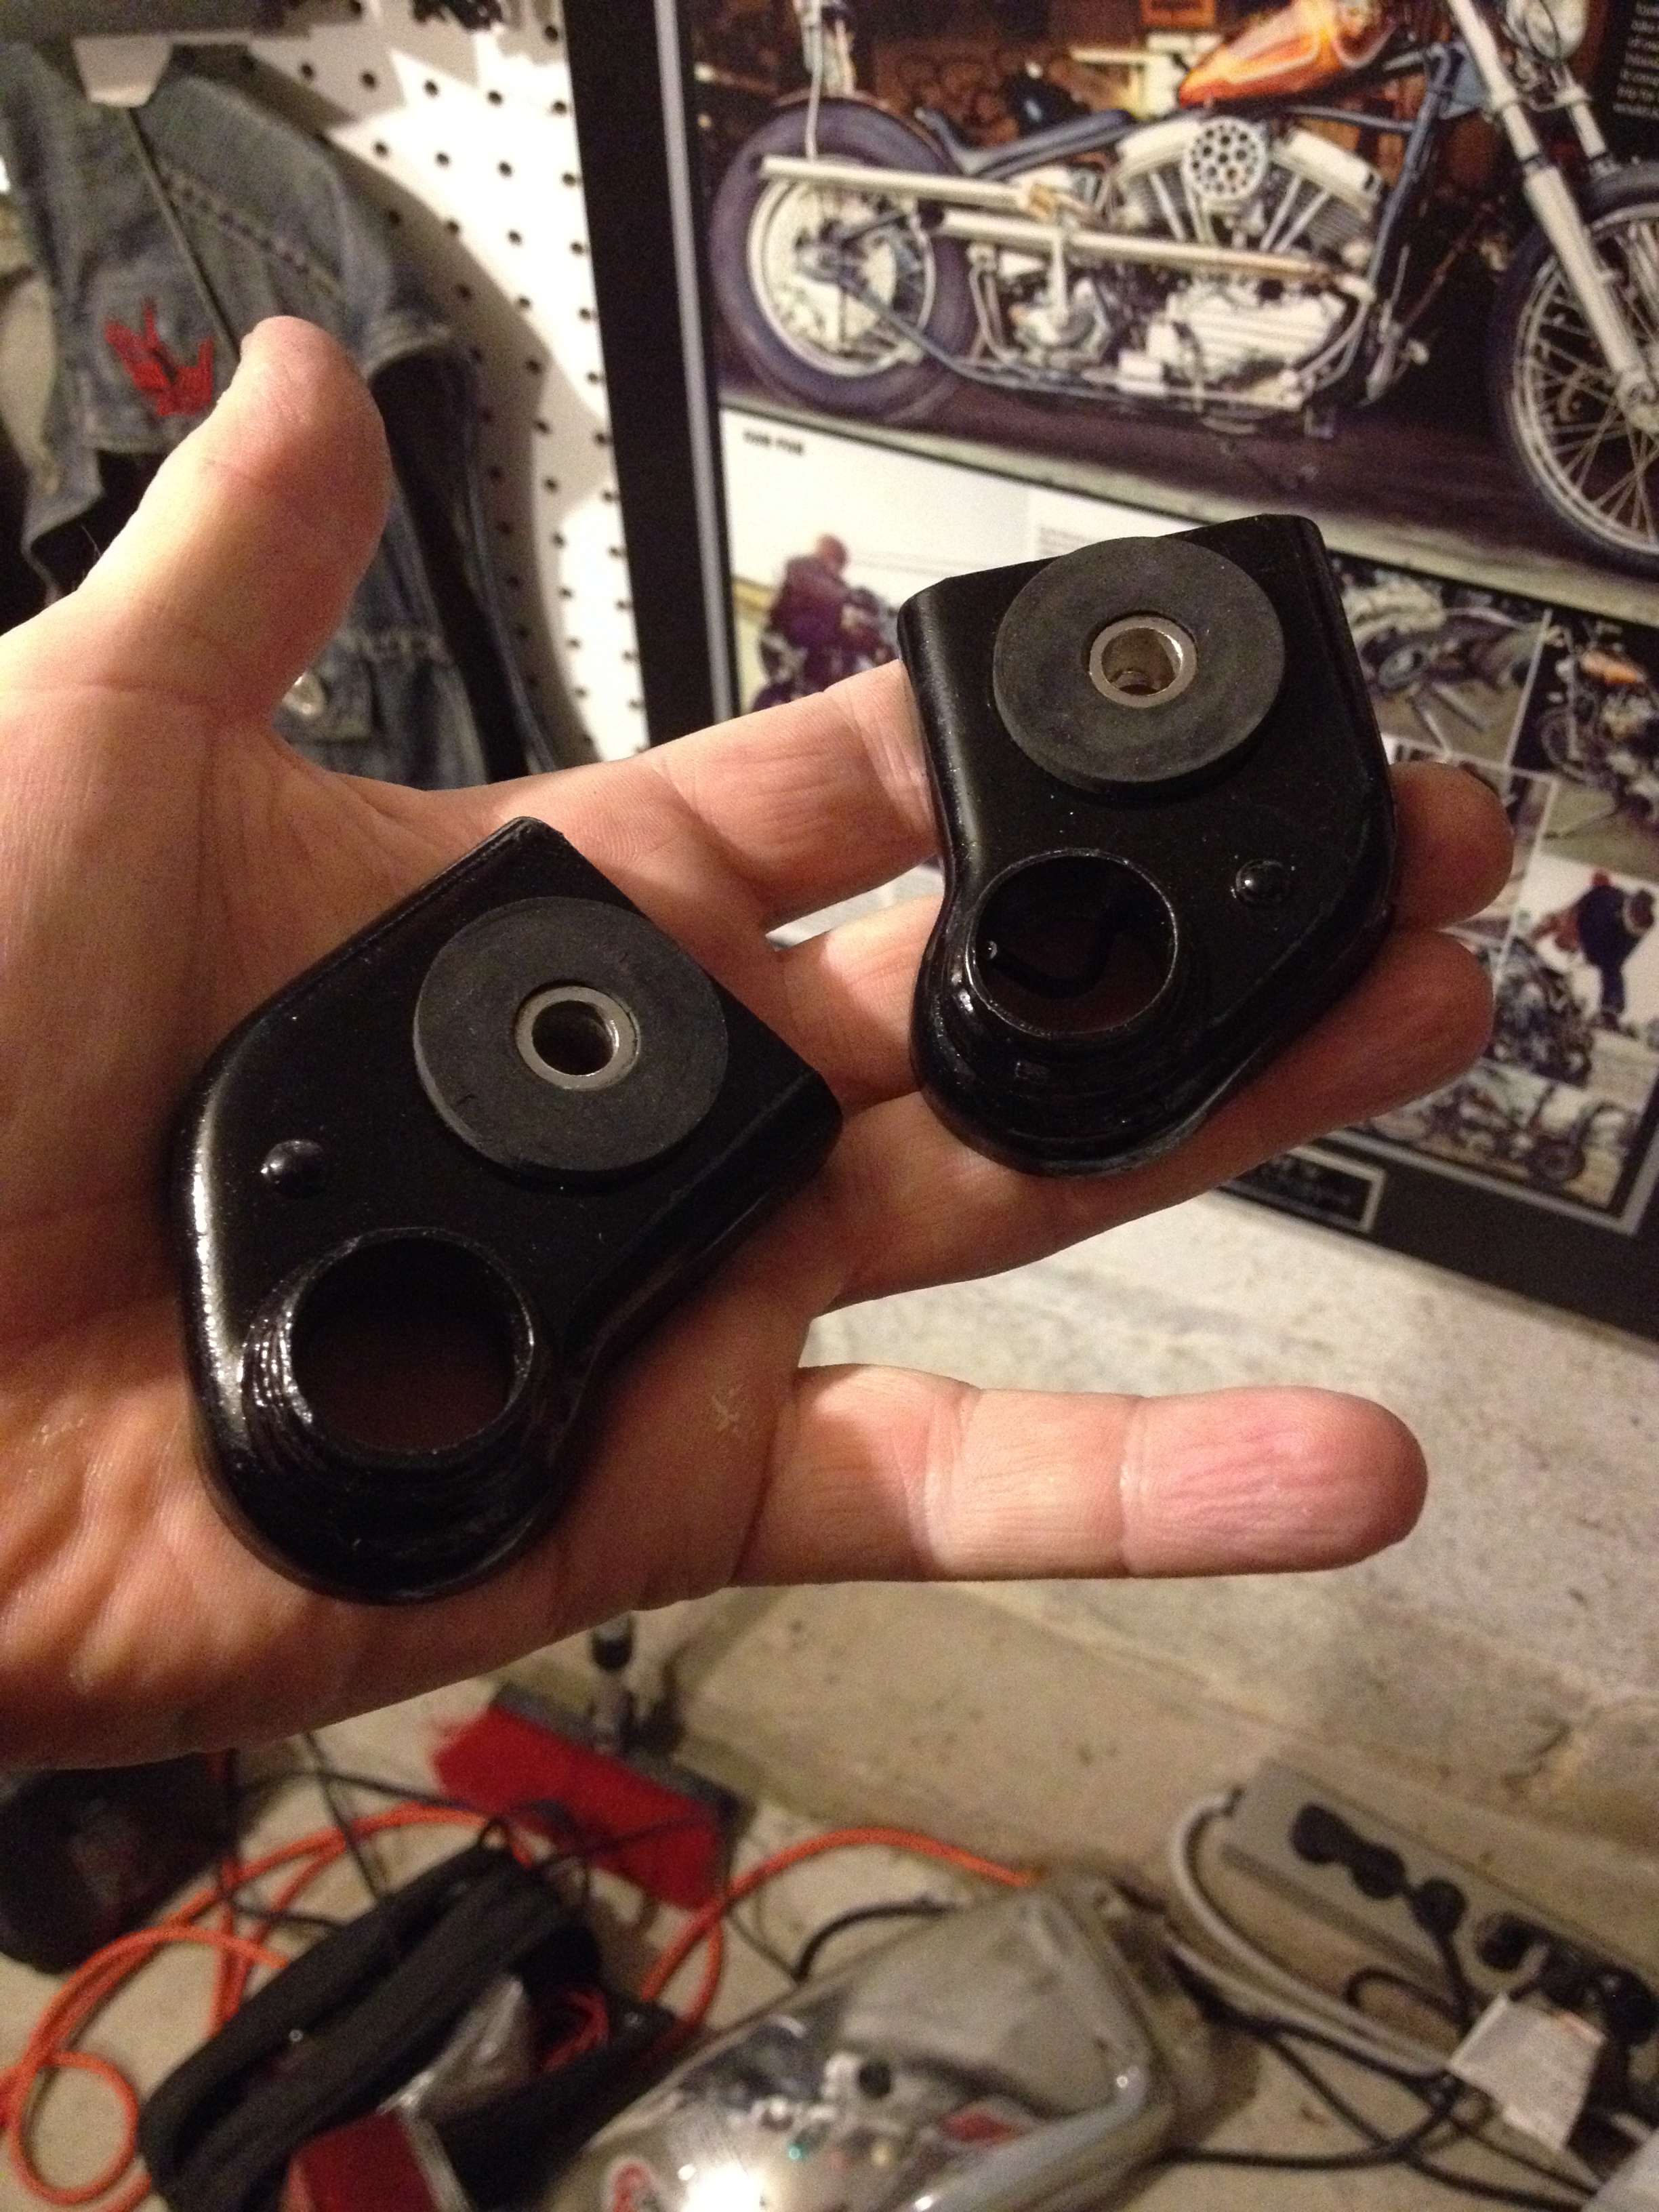
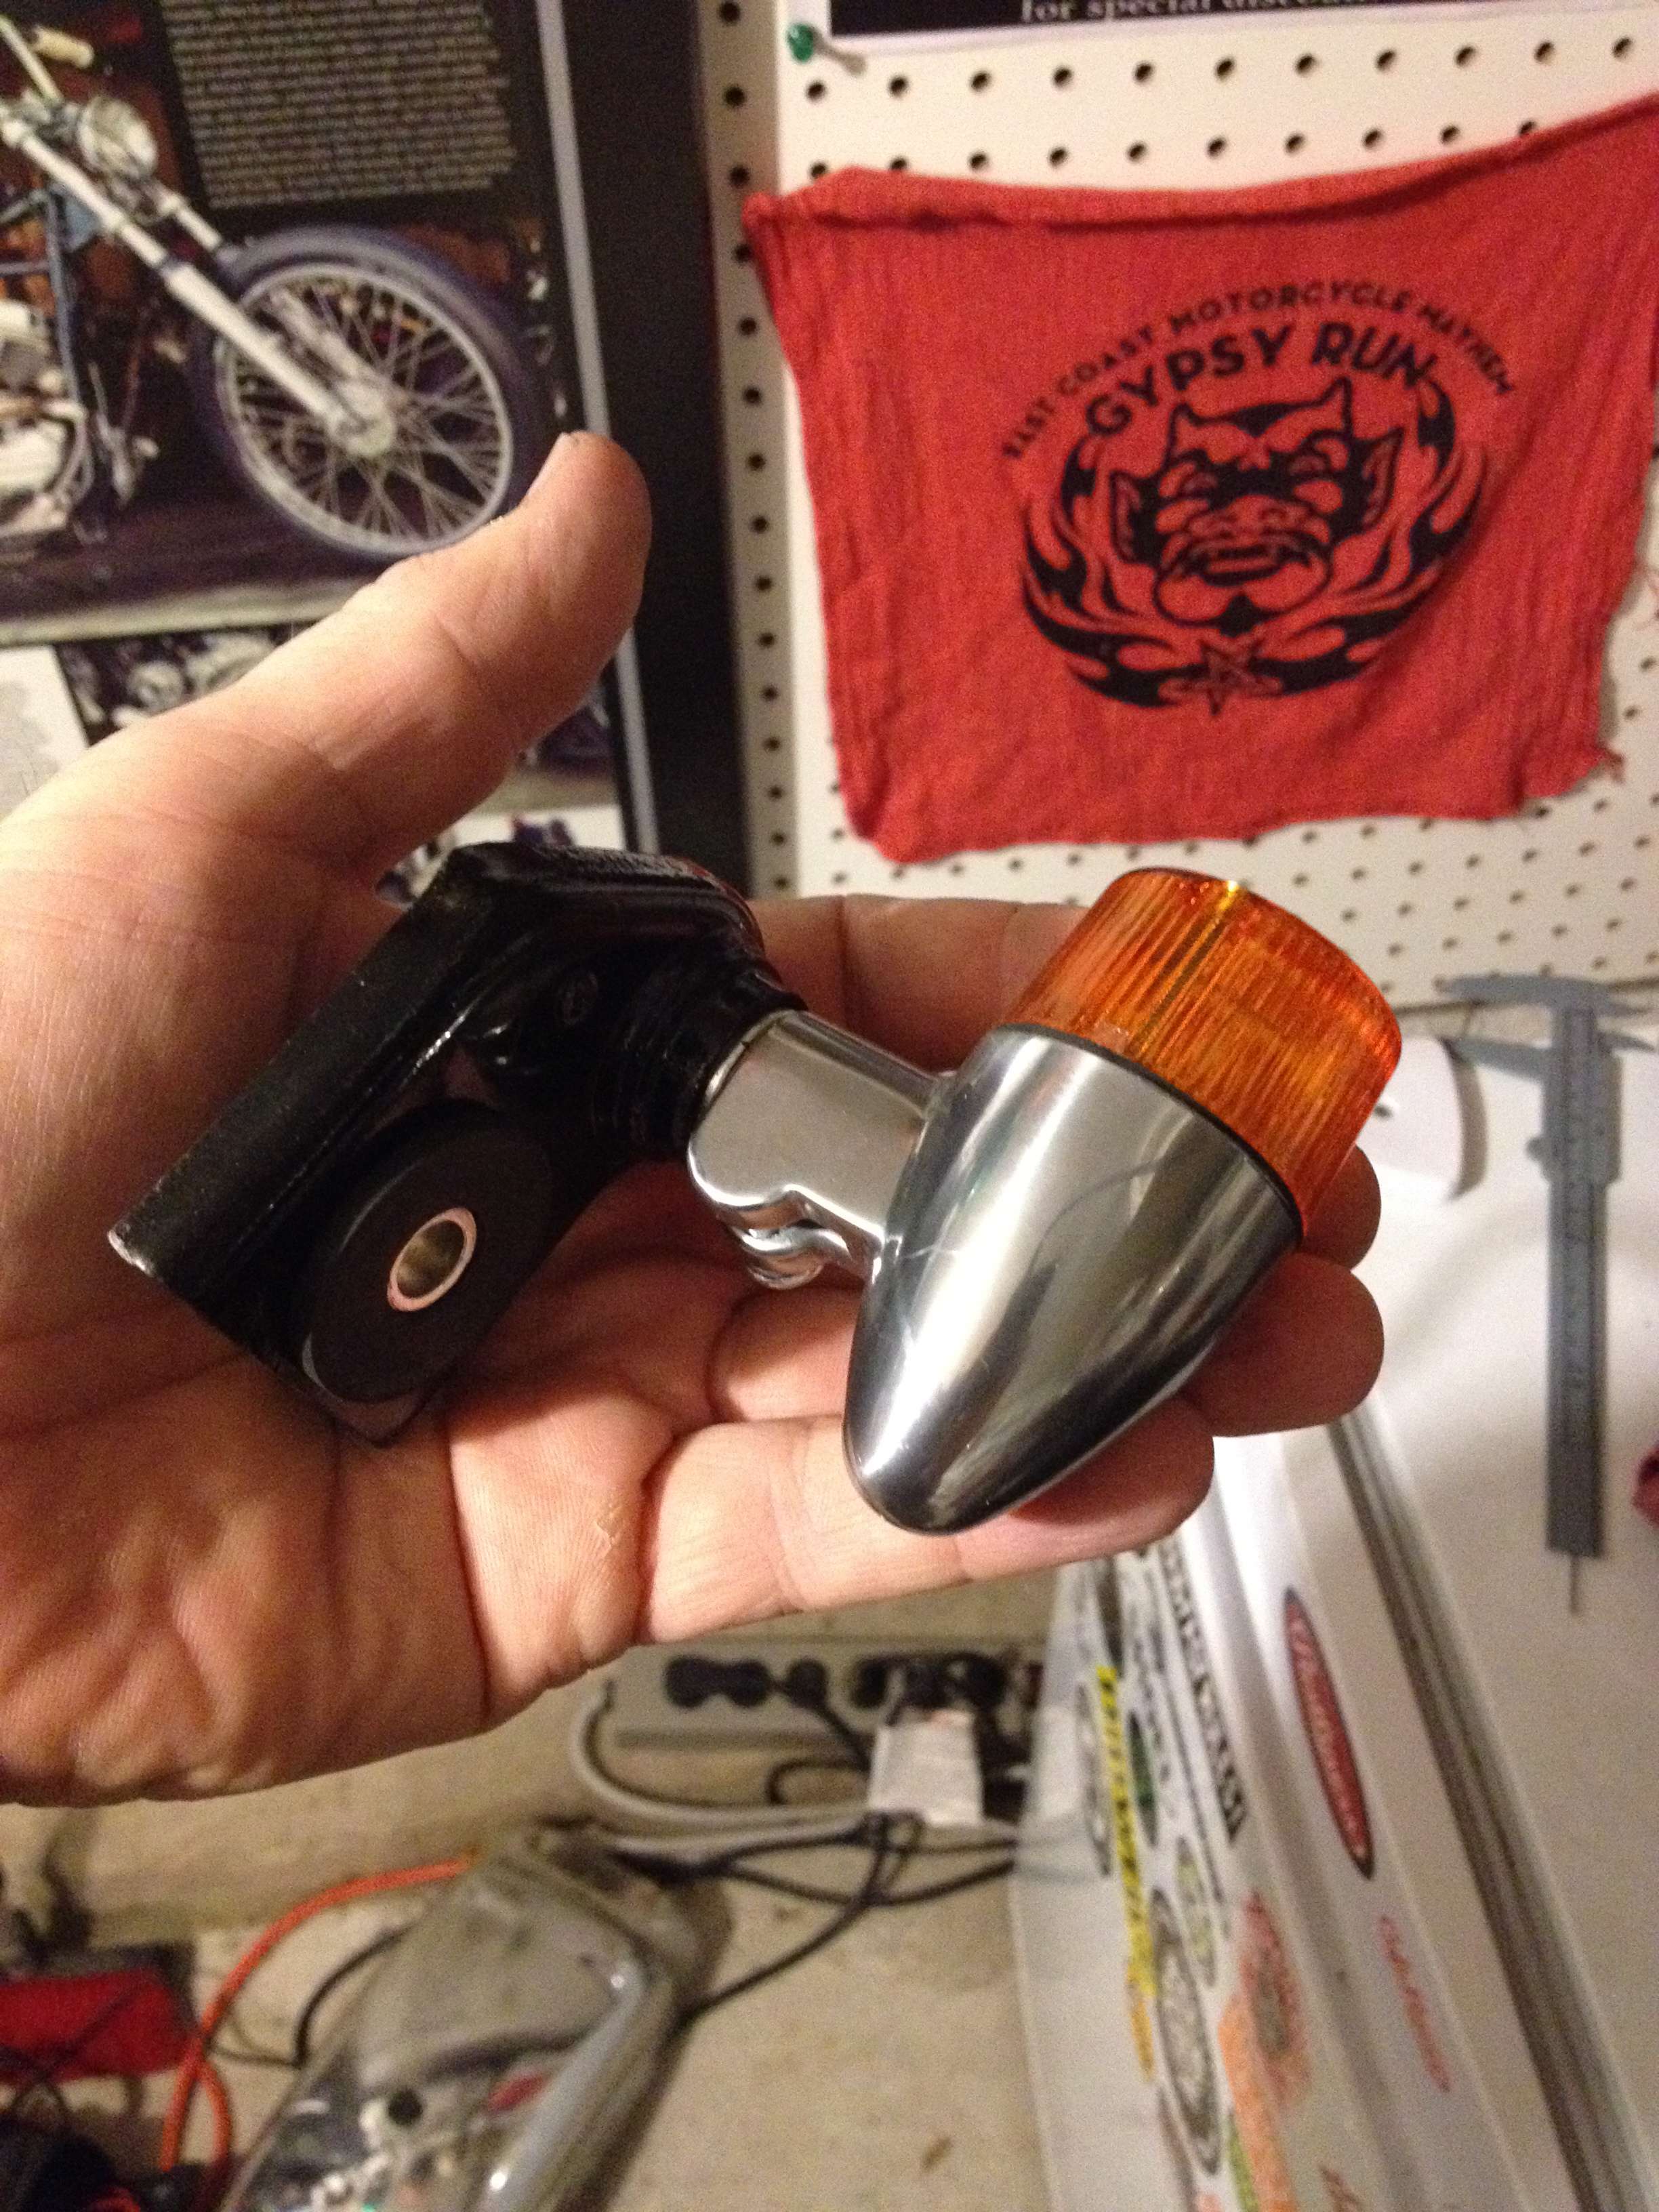
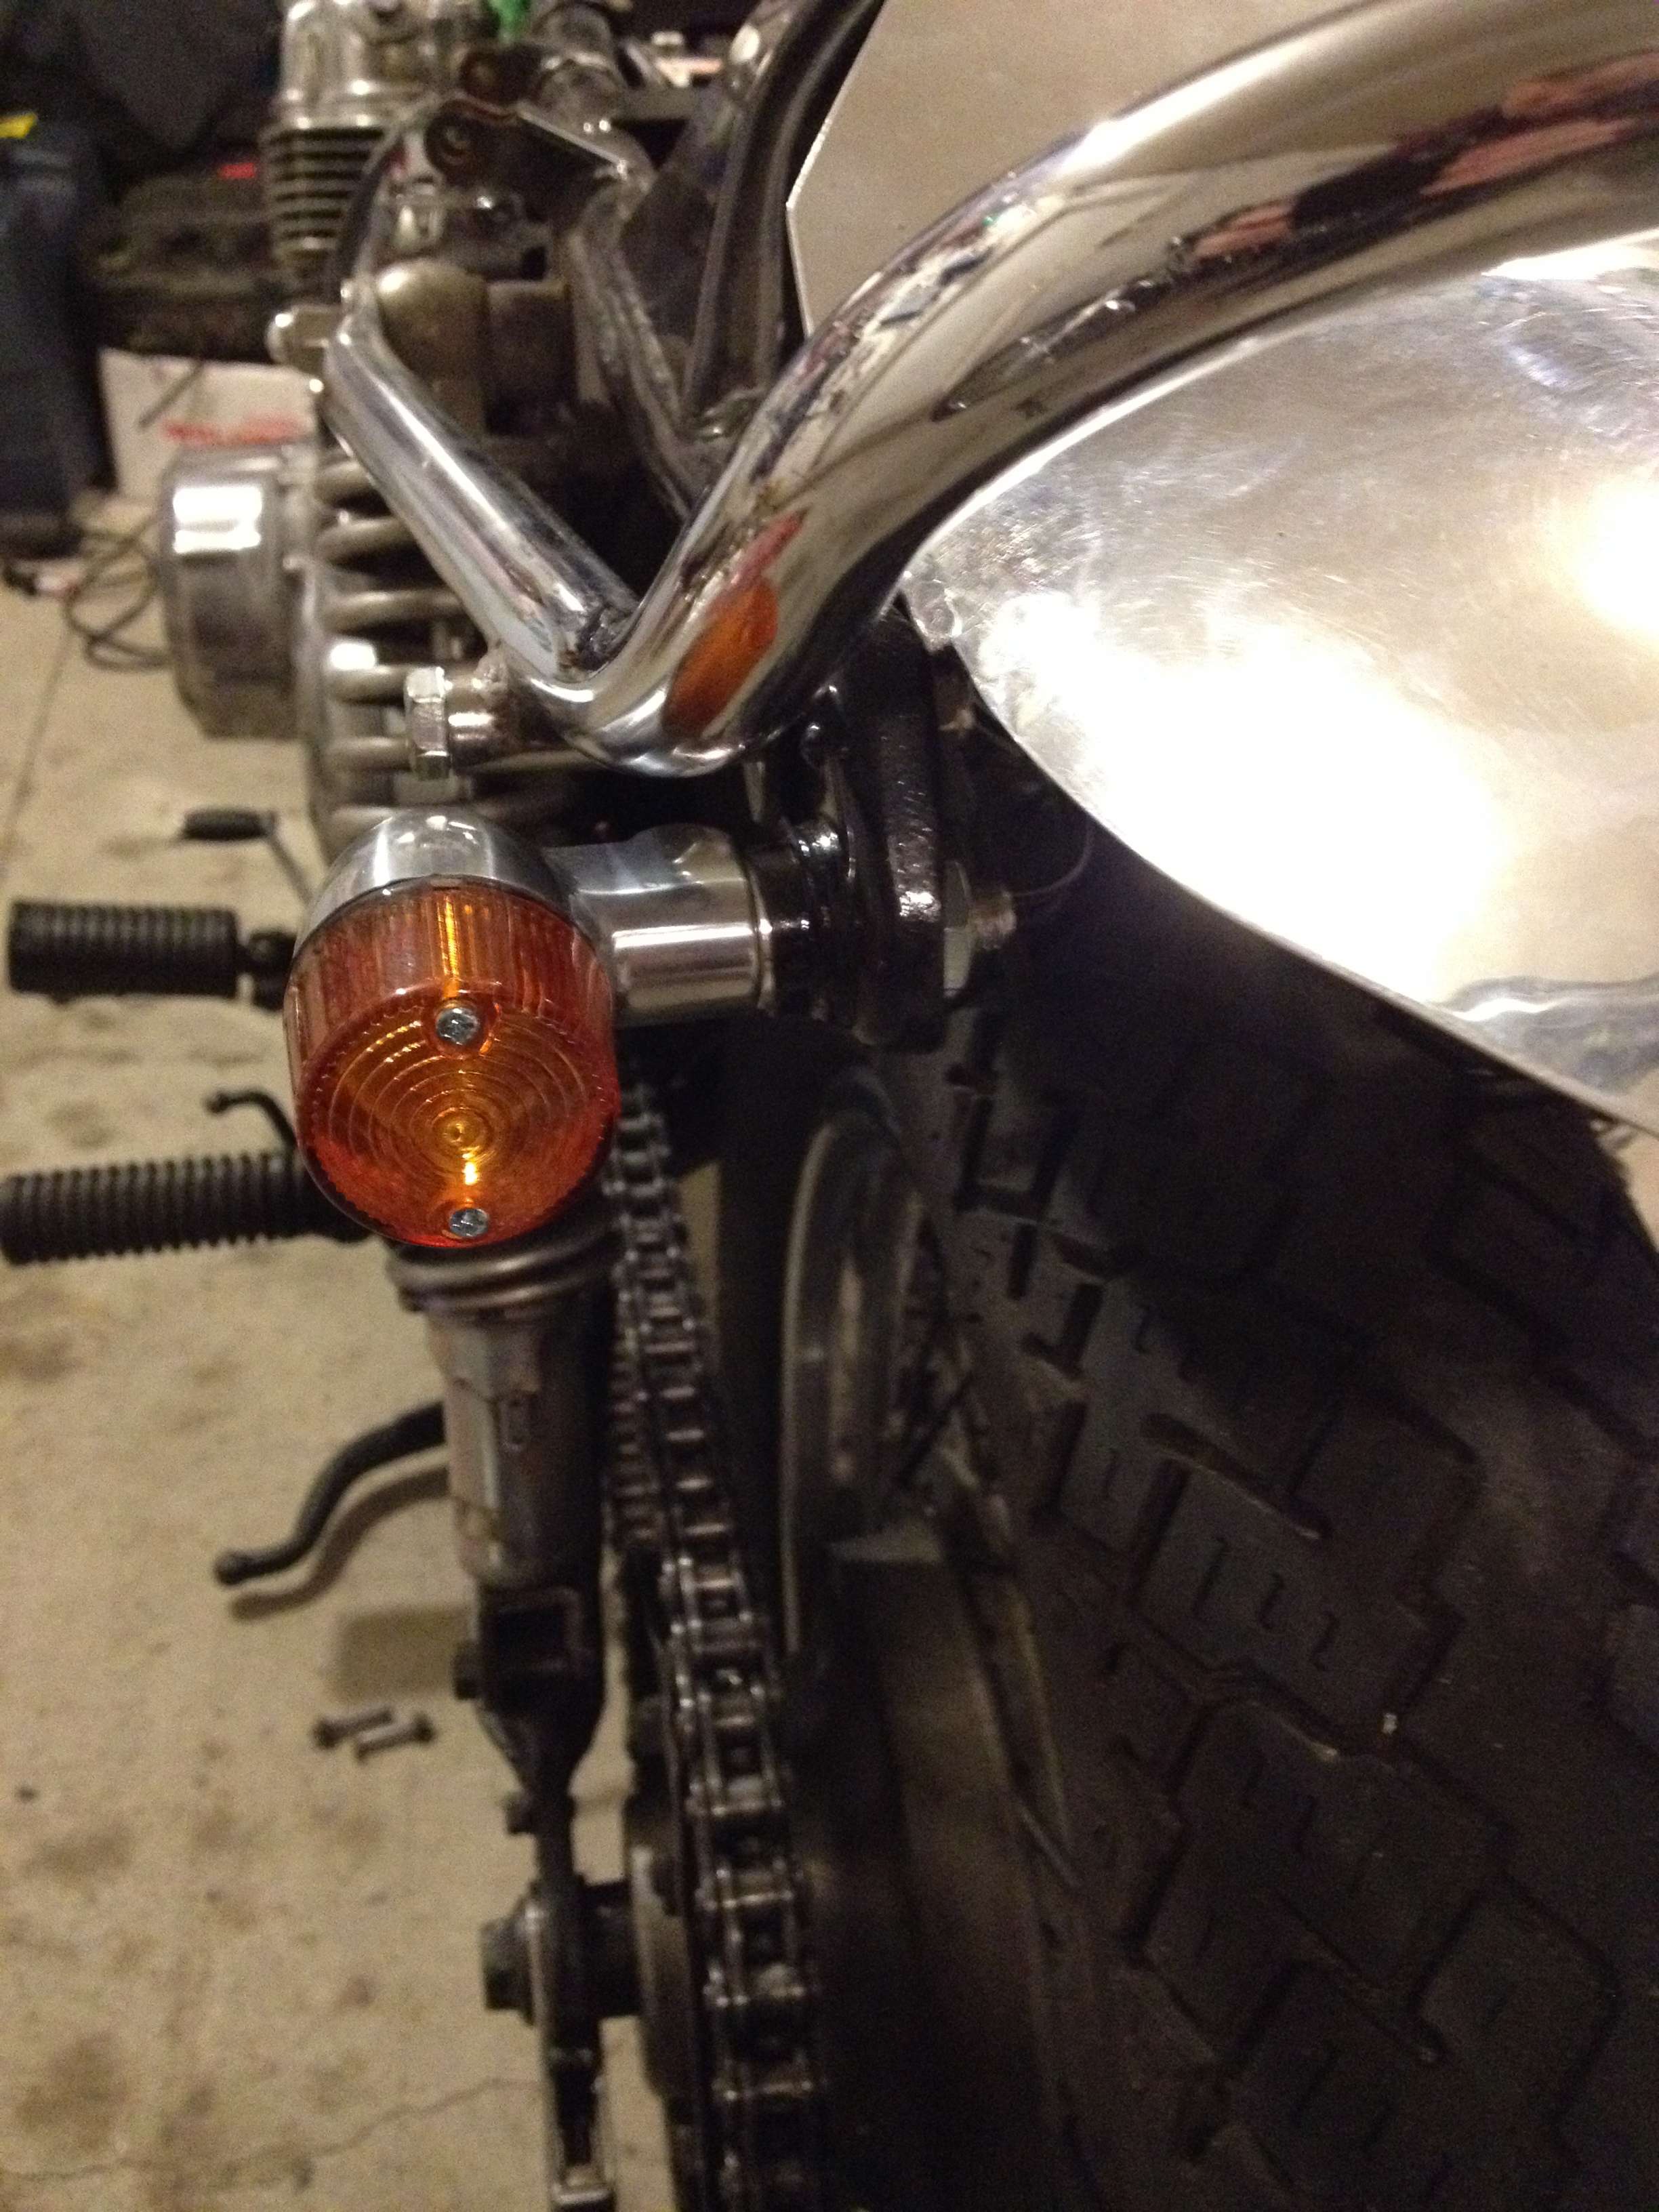
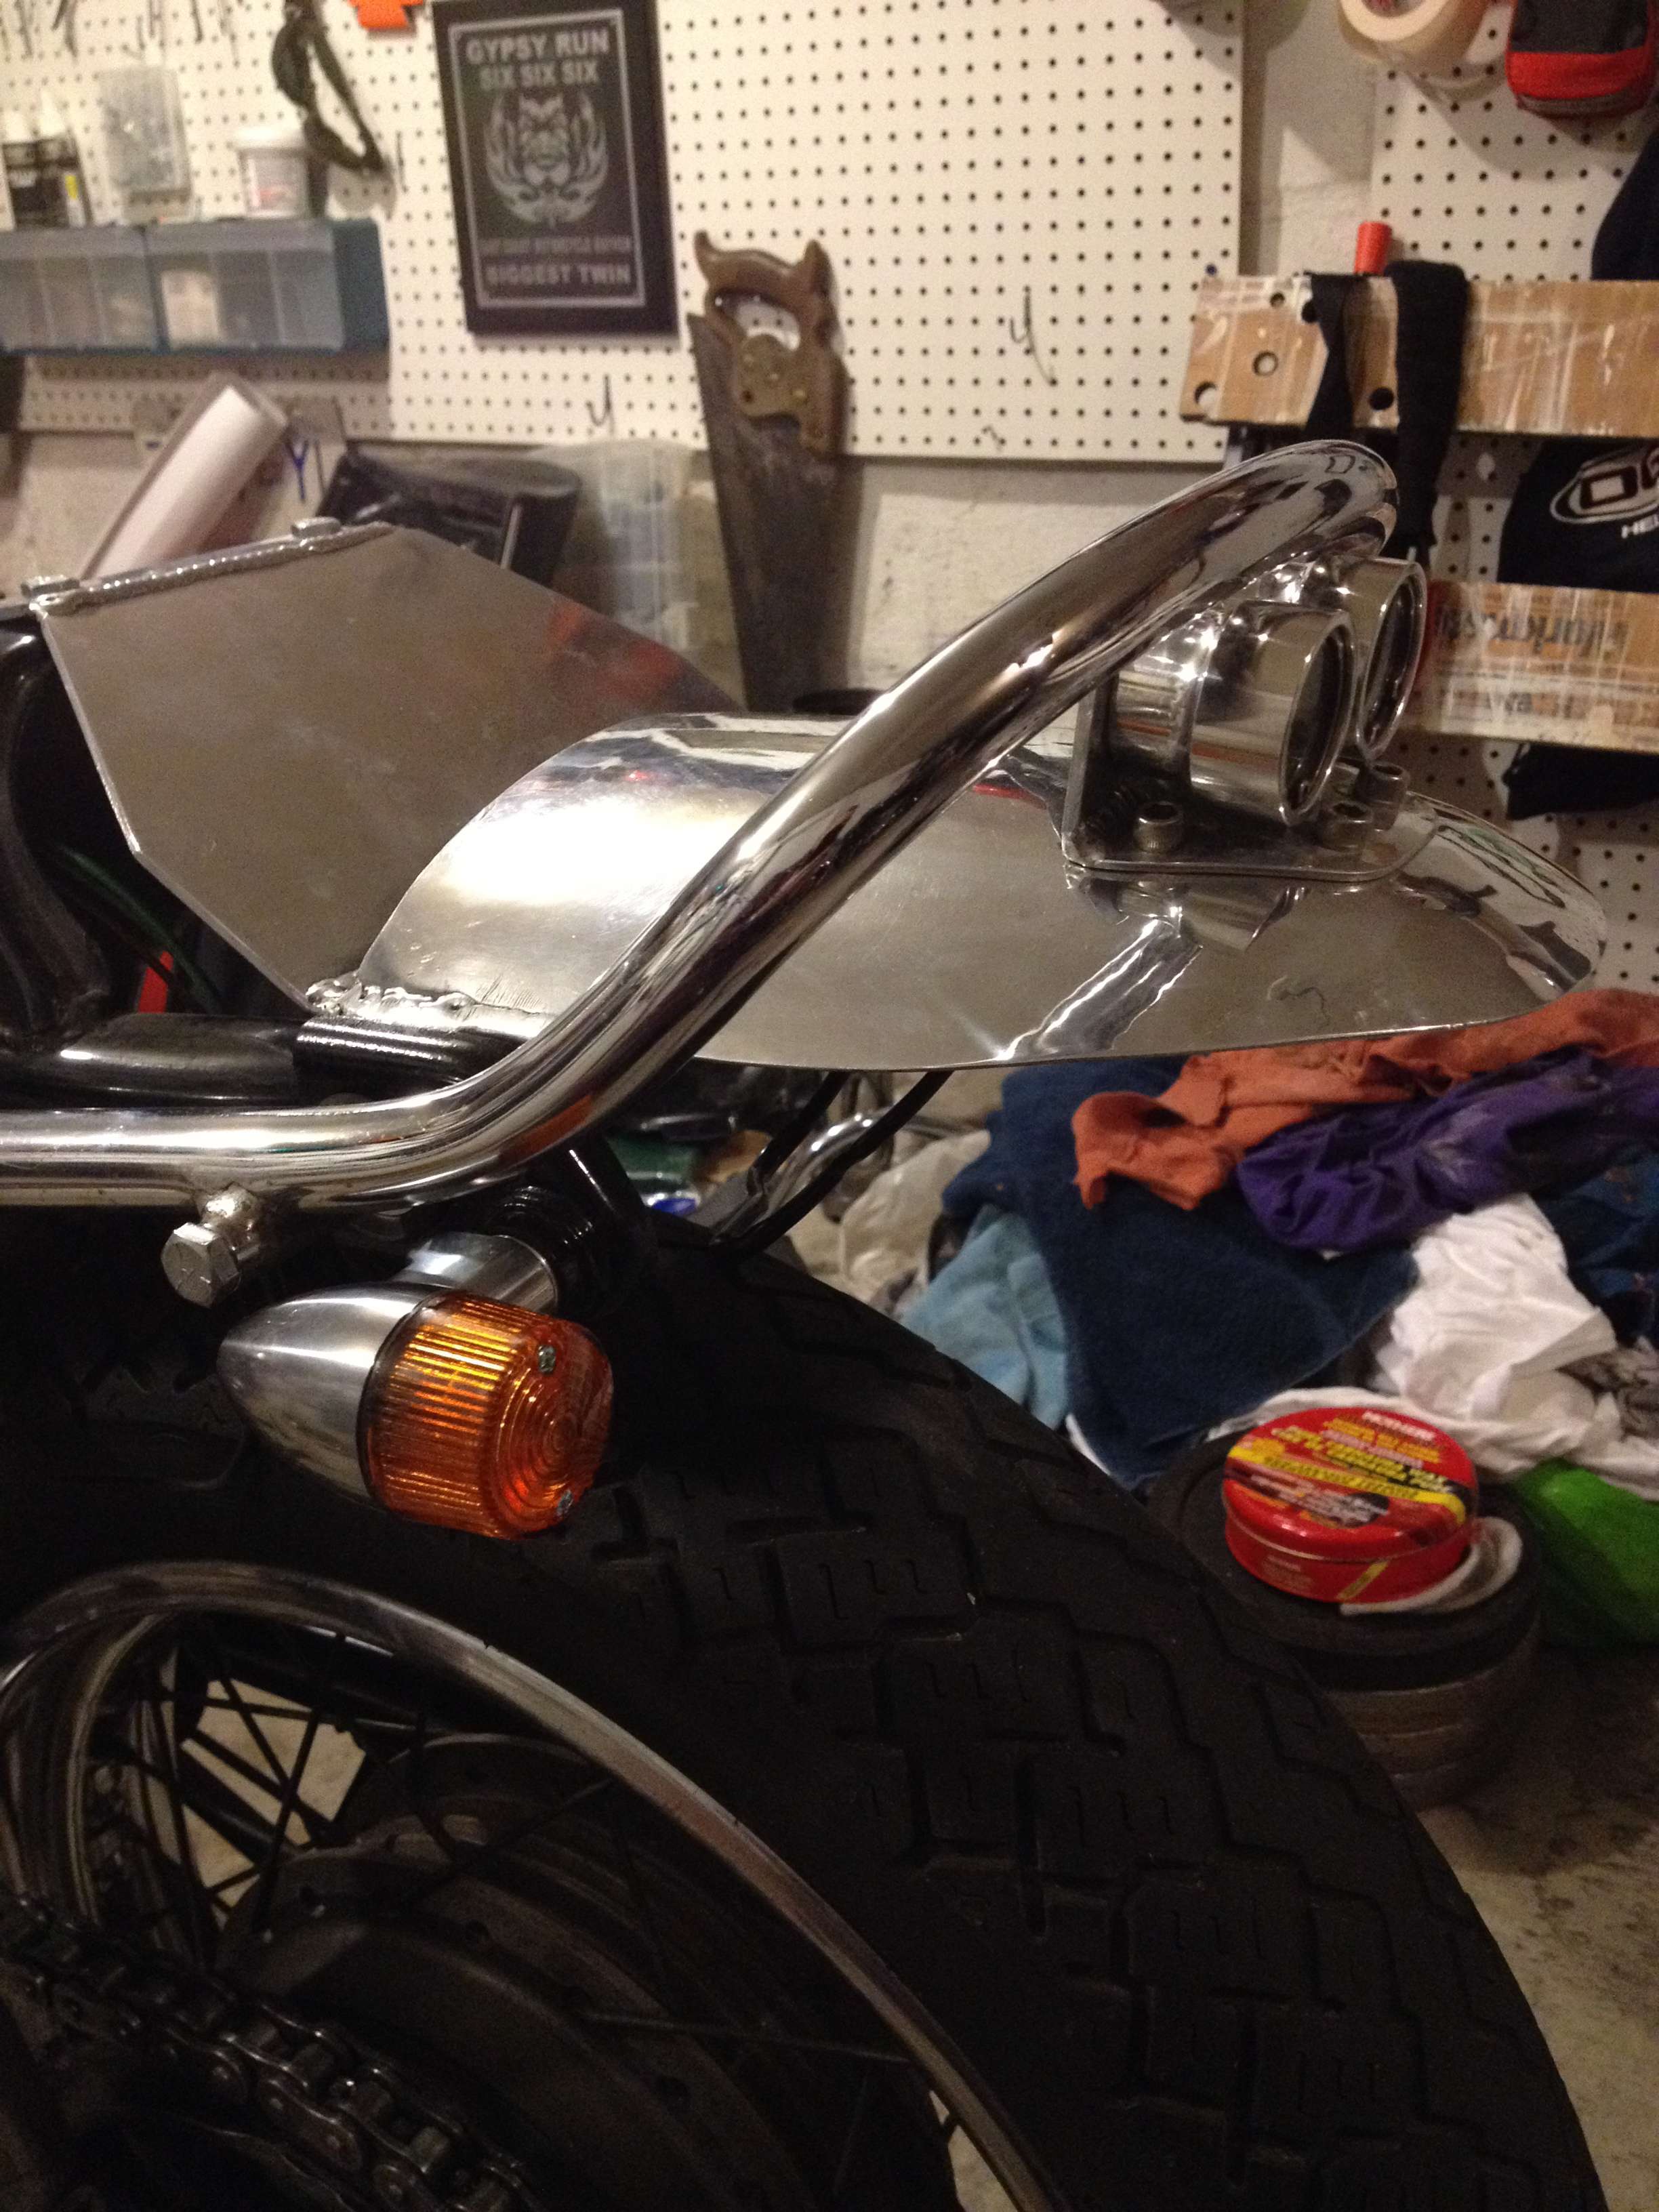
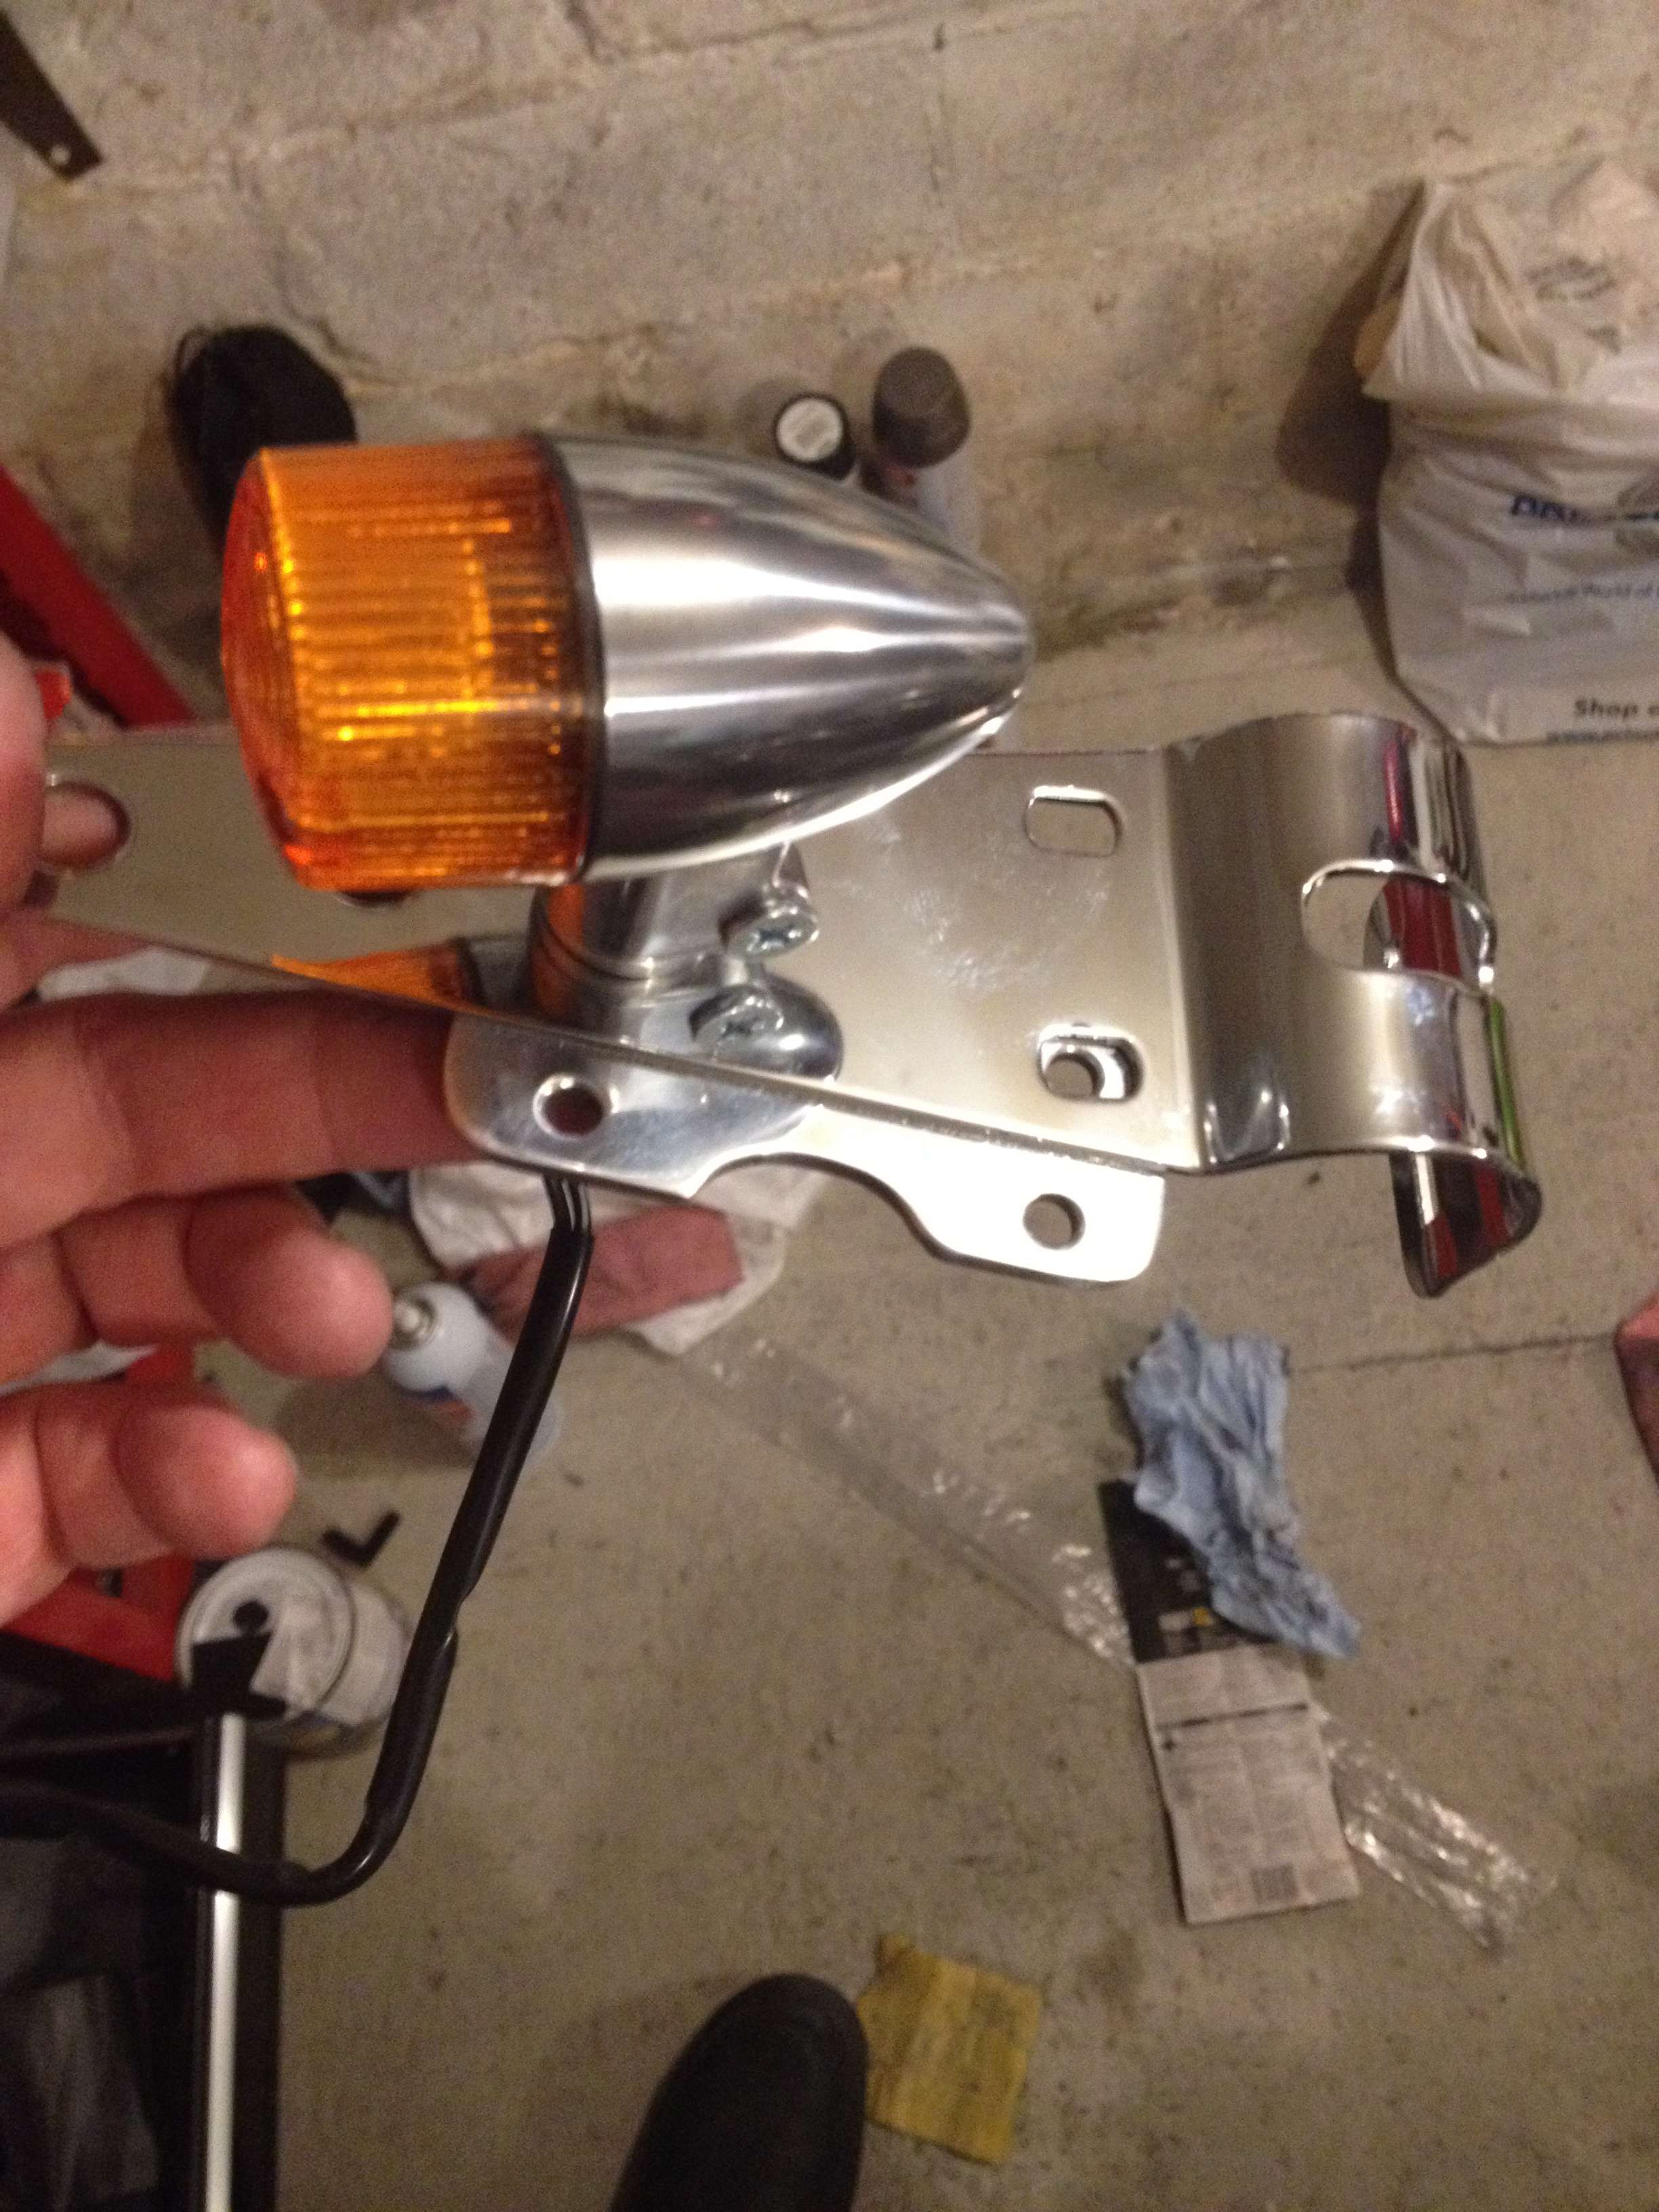
Other than that, I will be mounting some much smaller solid aluminum turn signals to replace the giant stock pumpkins (I want to keep this bike as legal as possible), and will give the whole bike a thorough clean. I will be pulling the forks, removing the pitted clearcoat and polishing the lowers, and then dissassembing the wheels to powder-coat the rims before trying my hand at relacing (I am going to order fresh stainless spokes and nipples from Buchanan's.) I welcome advice from anyone who has experience rebuilding wheels!

While I have the forks apart I will probably take the opportunity to install a set of Progressive springs as well.

So overall, nothing really exotic, but should be a nice little rider by the time I am done. We have about five solid months of snow and cold up here in Ottawa, so I have lots of time to work on it!
 
I'm in on this bud, I'm undertaking some similar work with my Dad on the same bike.
Love your work on the triple.
 
So my bike got it's mandatory provincial safety inspection done, with a few odds and ends needing work (new rear brake pads, turn signal relay etc..), but is running great. Or, was running great until i got it home and immediately began cutting things off of it.

I mocked up the front end with the new triple tree and clip-ons. the triple tree only sat halfway down on the fork tubes, so i had to drop the forks about 1/2" to get them on, but I don't think that will be enough to affect the handling at all:

qns7.jpg


I also have the pods on the bike now, which look better, but I now realize that the side panels are designed to mate with the airbox, and look a little odd without it. I may look at creating a powder-coated aluminum side panel with some speed holes and a mesh behind just to clean up the area and give it some interest:

t0m1.jpg


With the clip-ons, which have a rather bulky CNC bracket, I realized that i will not be able to use the stock brake lever and master cylinder, as it butts up against the bracket, and can't rotate down into a rideable position. So I will have to investigate some options for that - it is a 14mm brake master, correct? I have seen some clean little assemblies online (such as http://slingshot-cycles.com/products-page/master-cylinders/chrome-sport-master-cylinder-for-78-inch-bars/) that would probably be nice on here anyway

b2ut.jpg


I have been spoiled working on my '53 Panhead chopper, which has I think about four wires on the whole bike. I forgot how many cables and wires there were on a bike that actually has front brakes, turn signals, kill switch, etc... I am going to have some serious cabling issues to deal with - shortened clutch and throttle cables, and then rewiring all the new signals and indicator lights:

sstv.jpg


I wil be running full turn signals on this bike as well - I bought some nice small billet aluminum ones from Dime City. I am going to run the rear ones in the stock position, but cut the stocks down considerably to tuck them in closer to the seat. The front runs I will attach next to the headlight going through each side of the headlight brackets. We switched the rear fender / taillight assembly that my buddy made on to this bike. I think the double LED lights he fabricated look really good, and sort of reflect the look of the two chrome mini-gauges up front. But I am a little concerned that the square bracket across the bottom of the assembly might interfere with the tire when I have a passenger onboard. What do you think?

http://imageshack.com/a/img849/7395/hgw9.jpg/img]

[img]http://imageshack.com/a/img7/544/a5x6.jpg/img]

[img]http://imageshack.com/a/img834/525/3zom.jpg
 
So, I am slowly making some progress, although I expect I will make more over the upcoming Christmas break. I dropped my seat off to have it re-upholstered. I had considered buying another ratty seat just for the seatpan, but then I figured my existing seat vinyl was already split, so I might as well use it. What I am doing is getting them to create a "flat" seat rather than the two-level '77-'78 stock seat, with a tuck-and-roll top (similar to the bottom design on my admittedly amateurish sketch below:

b9b6.jpg


I had a lot of trouble getting the seized speedo retention screw out so that I could remove the front wheel - I gather from other entries on the forum that this is not an uncommon problem on CB's. In the end, I heated it up with a torch, gave it a bunch of penetrating oil, and then used a manual impact driver:

p72z.jpg


As time permits, I have also been cleaning up a lot of the aluminum - removing the clearcoat and sanding with successively finer levels of sandpaper and then polishing, either on my bench wheel, or with a dremel for parts that I am not removing (such as the valve covers). Most of it is coming up quite nice (the pics don't really do the parts justice - most are crappy iPhone pics). I will bring one of my good cameras down when time and space permits. You can the left side versus the right here (it is actually much shinier than this pic indicates, compared to the untouched right side):

e52g.jpg


Fork legs came up nice as well:

qq41.jpg
 
I cut down the stock rear signal mounts, then dremelled them out to fit the small aluminum turn signals I got from Dime City. I had to cut a bit of the tops of each mount out to fit them around the custom fender assembly, but once I painted them up and mounted them, they almost looked stock (but better - so nice to get rid of those pumpkin-sized monstrosities.) The plan for the forward ones is to drill an additional hole in each headlight mount and put them on either side of the headlight, out of the way.

msw7.jpg


dihz.jpg


vups.jpg


hqu3.jpg
 
I ran into a problem when I initially mounted my clip-ons - the stock brake level and master cyclinder assembly ran into the the bulky clip-on mounts, preventing the lever to be tilted down enough. I ordered a smaller 14mm Nissin brake master cylinder and lever:

9bml.jpg


It fit great, and looks pretty good on the bike too (I removed both the brake lever and the clutch lever (after having peeled off the 30-year-old yellowed plastic coating) and polished both on my bench wheel.

tidl.jpg


Finally, I got my exhaust in from Dime City, which was a bit of a disappointment, only because I could have sworn I ordered the 12" shorty, but I got the 18" standard reverse megaphone. I checked my order, and it says the long one, but I certainly meant to order the short one (delivery fees and duty here in Canada make it impractical to send it back to exchange it). The quality of the pipe is great, and the look is growing on me, even if it isn't the one I wanted. I still need to get a small tab welded to it for the mount.

xm5p.jpg


As an aside, I should note that between the bone-chilling cold (it was -20C / -4F here the other night) plus how crowded my tiny 1930's garage is, it is challenging working on the bike:

k565.jpg
 
From the beginning, I had wanted to drill my brake rotor, both from the practical desire to lighten the rotating mass and to clear rain, and also because the old solid disk rotors look so dated and dull. I downloaded a few templates, but for whatever reason none of them printed to the correct size, so I decided to bust out the compass and protractor and work out my own pattern for fun. It proved to be a lot trickier than I initially thought to work out a pattern that looked good, and yet still proved symmetrical all the way around a 360 degree rotor.

1d0b.jpg


I eventually worked out five concentric circles spaced at 9mm spacing, and then holes working outward at 12-degree intervals, and after the fifth (outermost) hole, I backed up the next one 3-degrees.

nnta.jpg


The finished pattern, taped to the rotor. I used a hammer punch through the paper to mark the rotor itself. You may notice that i have reversed the normal look of the pattern flowing "backwards" on many rotors - I kind of like the look of it "clawing" forward. (this is of course the right side of the rotor)

7nmg.jpg


I used my drill press at a very low speed (probably around 300rpm), and used cobalt bits and lots of oil (or in my case, because I am cheap, I used the old palmolive trick). I drilled pilot holes using a 5/32" bit, and then the main holes at 5/16"

0rs0.jpg
 
So I got my seat back from Rob and Salvador at General Upholstery here in Ottawa. First time I have used them, but won't be the last. I was really impressed. As a reminder, here are the designs I was playing with:

b9b6.jpg


And here is how the seat turned out - real tuck-and-roll, not just simulated with stitching either. Has that '70's dirt-bike look that I wanted:

1cyk.jpg


5h76.jpg


e5w4.jpg


xg9b.jpg


Of course, with that and the front brake done (plus the fact my crimpers arrived in the mail this morning), I don't have a lot of excuses left to avoid starting the electrical work, which I hate...
 
Union Jack said:
Nice work!
Does the clip-ons have enough room with the original tank?

There is enough room for normal riding, although they would pinch my thumbs if I yank it over to full lock. I am going to be mounting a steering damper as well though, which will help. If need be, I may make a steering lock on the lower triple tree as well. I will be pulling apart the whole front end again before final assembly - everything is just loosely mocked up right now.
 
So one of the things I was grappling with (like many others) was where to relocate my ignition switch. With the new gauges and gauge bracket, there was no place for the large Honda ignition switch. I figured that i would have to build a bracket for the frame under the tank, and then re-wire the whole thing. But then I was playing around, and realized if I built a small bracket I could mount it using the existing wiring on one of the new headlight mounts.

Here is the bracket I made:
1gxe.jpg


Here it is on the headlight bracket:
pajv.jpg

ta7h.jpg


And with the ignition mounted on the bracket:
fr32.jpg
 
My buddy Lee came over and gave me a hand wiring up the indicator and warning LED's, as well as the lights for the gauges. Some small tricky wiring, and I am crap at soldering, so it was great to have his help

4vwu.jpg


They look pretty nice all wired up, and it will the first vintage bike I have had in a while that actually has a neutral and oil lights...
(yes, the triple tree is not attached yet - I have to remove the gauges to put the pinch bolts in before I do final assembly)

mhzh.jpg
 
So, I am pretty terrible about keeping build threads up to date, especially as it gets into riding season. I can't even remember how many things I should have updated details on, because now the bike is essentially done. But I will try to at least bring the thread up to date.

Here are some pics of the finished bike (well, mostly finished - there are always a few details that still need attending to). As I said at the beginning, this wasn't an extreme rebuild, not was it is full-on cafe racer conversion, but it is certainly a fun bike to ride now, and my daughters appreciate the fact that I left a passenger seat on it so I can take them for rides:

p42a.jpg


In these two first pics you can see the TC Bros licence plate mount. I had to have a stepped sleeve machine up to get it to fit the lower suspension mount (they are normally designed for Harley axles, so the mounting hole was way too wide). I used a couple of licence plate bolts with built-in LED's to illuminate the plate

yb4pk.jpg


The front brake with the drilled rotor and the stainless lines:

8fnt.jpg


The triple tree, clip-ons, gauges and LED indicators: (I ordered a custom-made clutch cable, which arrived way too short, so I obviously still have the original long one on it)

nwpu.jpg
 
A couple of more pics:

A better view of the hand-hammered aluminum fender and machined LED rear lights, as well as the cut-down stalks for the small turn signals (used the same signals up forward as well - from Dime City Cycles)

ptlpv.jpg


A bad photo of the Nissin brake master cylinder and lever, which I had to go with to clear the triple tree mount - the stock master was just too bulky. I like the look of the new one though

ivj3.jpg


The seat is probably a smidgen taller than I wanted, but they did a beautiful job on the upholstery, and it is very comfortable

b74p.jpg


And here is a shot of my teenage daughter on the bike, from our ride this morning when I took her out for coffee (she looks much cooler on it than I do!)

hb27p.jpg
 
Back
Top Bottom