78 XS-750 Cafe "Triple Threat" A tribute to yamaha, new and old

Woosey

New Member
Hello DTT comunity,

I worked on this bike for a quite some time, got to enjoy it this past riding season and now and finally got around to posting it up. Let me know whatcha think.

I picked the bike up for $100 and rode it home!! but it's condition was as good as any hundred dollar bike typically is. So if i figured, if i had to rebuild the whole bike.. might as well go all out.


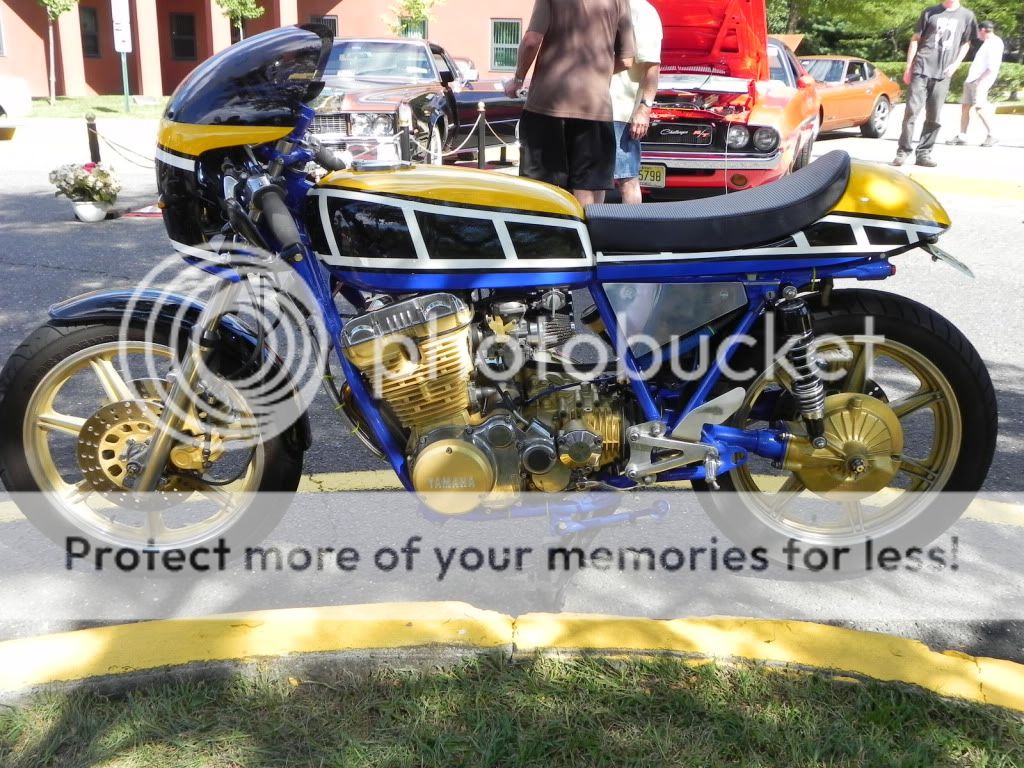
Here is the most recent picture of the bike mostly complete... taken at a local car show
DSCN0604.jpg


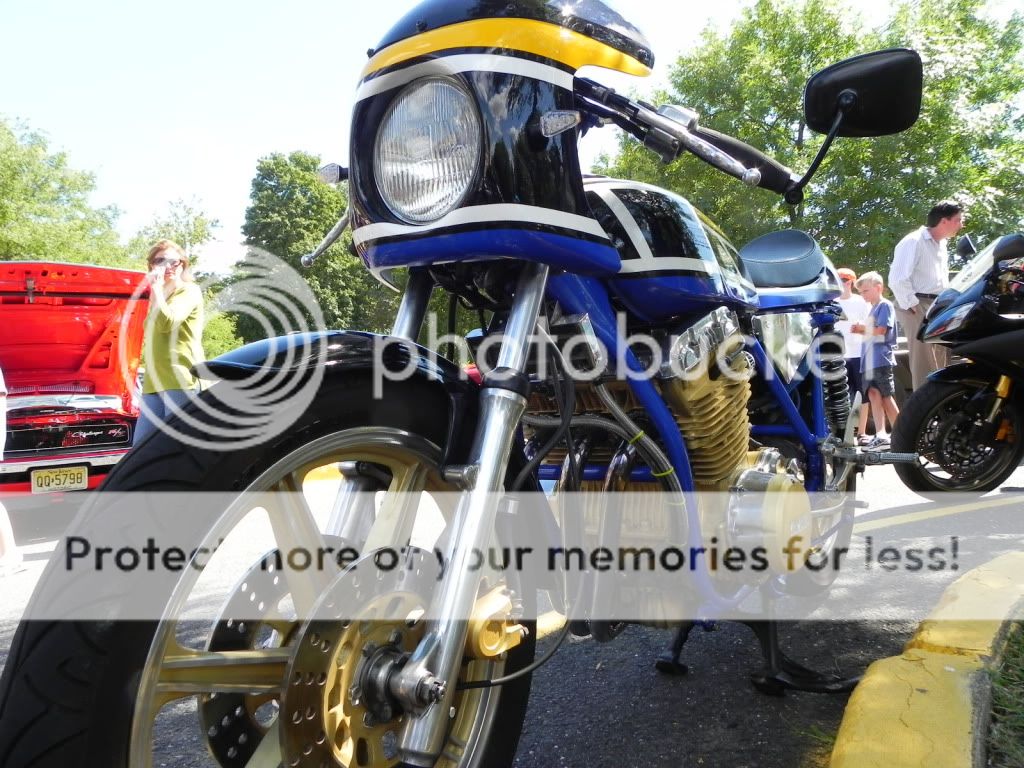
Another pic from the car show (got a bit of attention.. one guy actually knew what bike it was.. one person told their friend it was one of yamahas first production race bikes, of course i had to correct him)
DSCN0594.jpg


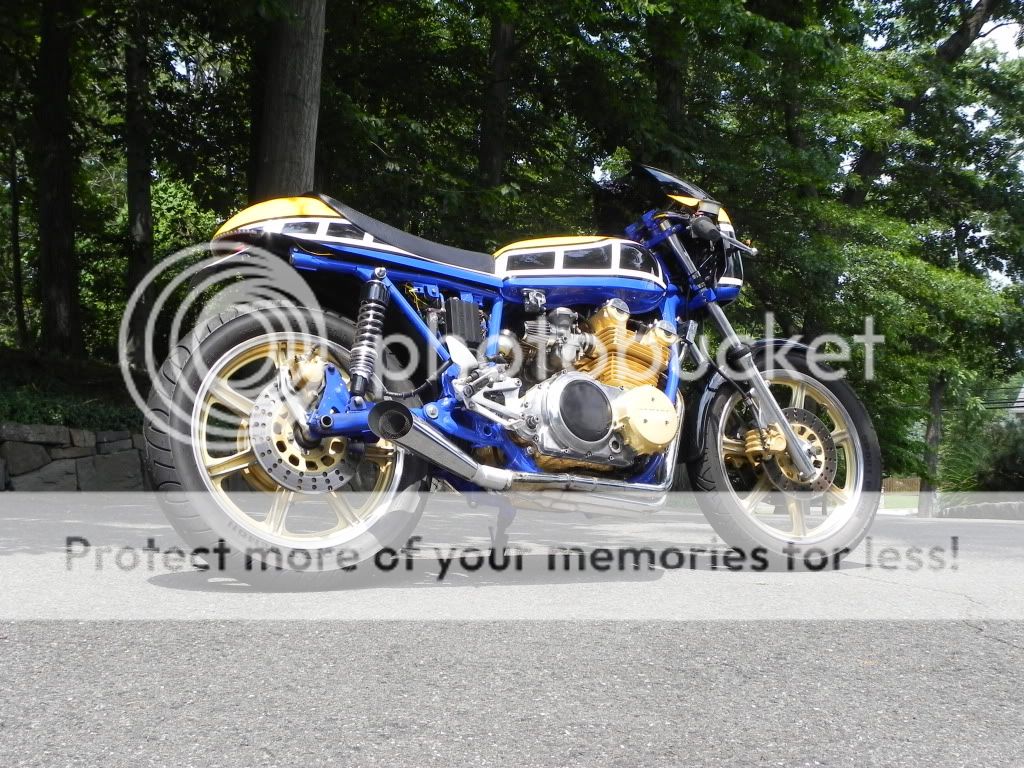
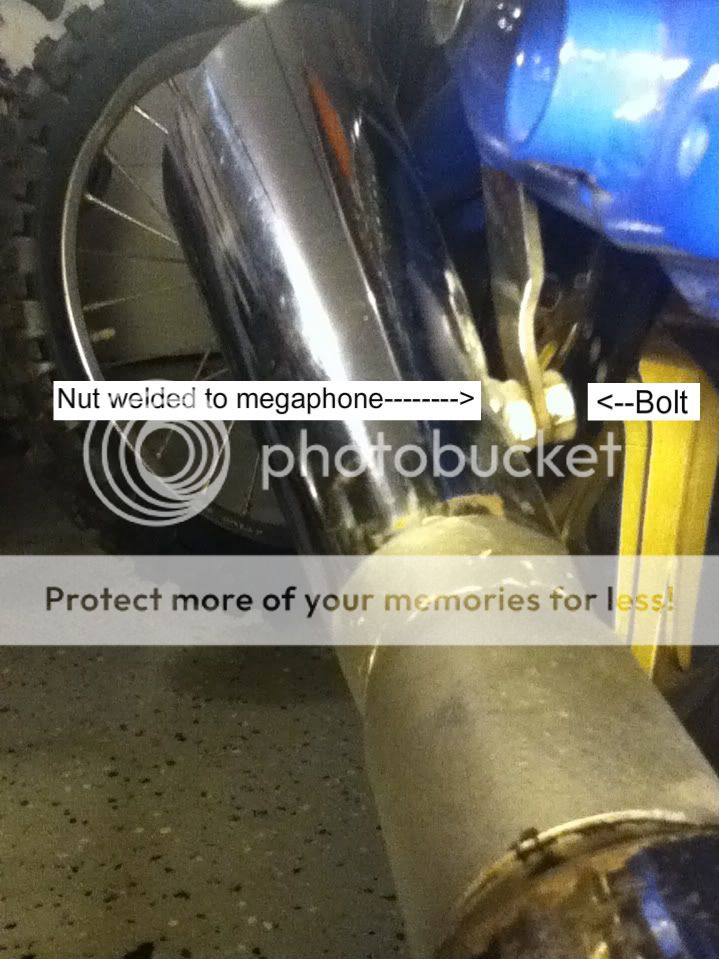
A nice shot of the pipes.. bike doesnt have its side covers yet in this one
DSCN0034.jpg


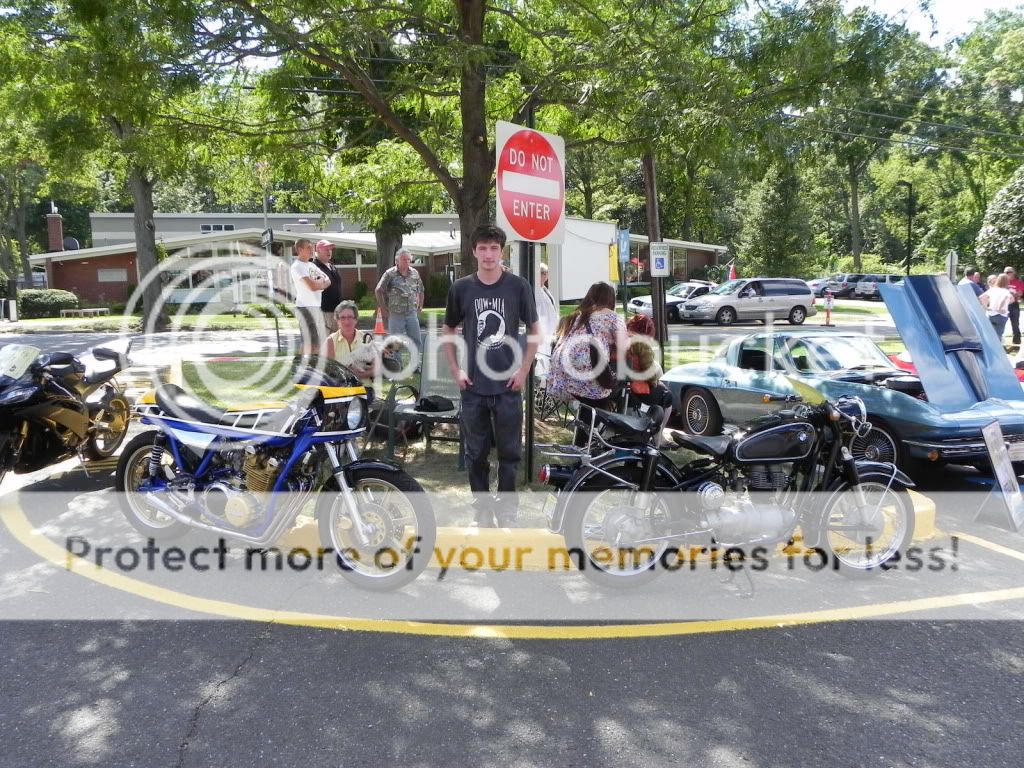
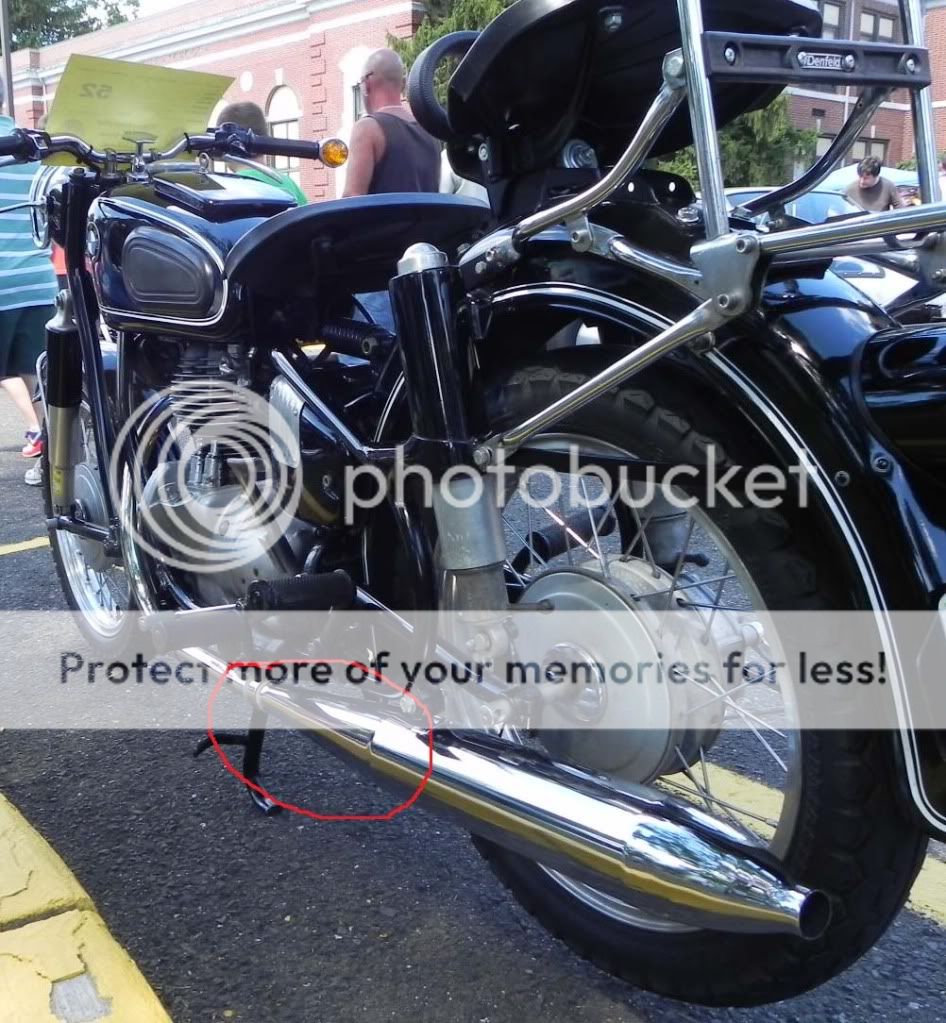
My dad entered his 64 BMW R27 (i love it.. its like a stock bobber.. best bike for cruisin)
DSCN0603.jpg


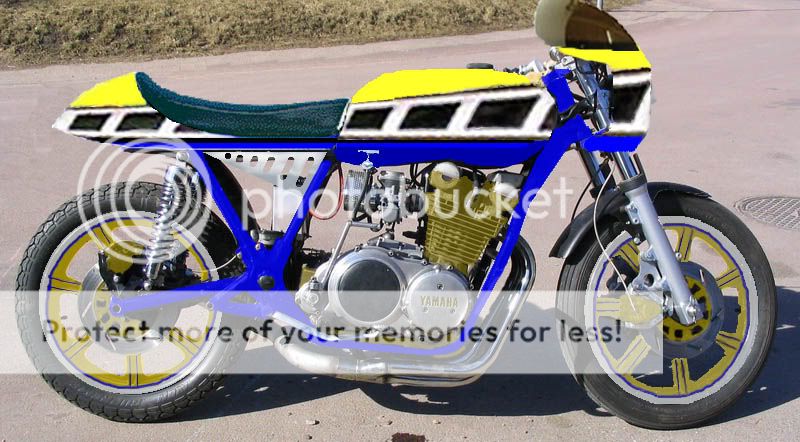
Here is my concept drawing.. got the original pic from google then photoshoped
concept.jpg
 
VERY Cool! Nicely Done...

I had the very first XS-750 on the east coast of the US back when they came out.
really liked that bike.. the first week I had it I rode it from Fort Laud FL to Atlanta up
the Blue Ridge Parkway to Maryland.. Next week rode it home...
we were sitting in front of one of the Atlanta Yamaha dealers that Monday morning to
get an oil filter and a quick change. when the owner pulled up to the store he was
pissed cuss he had not gotten his allocation yet.. Oh Well..

It was a Magic Carpet ride.. later learned how to pop double wheelies using the shaft
drive climb and any little rise in the pavement.. that would blow folks mind.....

Enjoy your neat machine!
 
Thats awesome

The bike is incredibly smooth.. made for the highway.. and it shifts quite smoothly for a shaft drive.. however i think the best thing about the triples is the howling exhaust note and broad torque
 
A nice shot of the pipes..

Can you please elaborate on these ? Probably the cleanest modification i have seen. 8)
 
Thanx.. i guess its clean because i tried to make it as simple as possible

To Start, i picked up a used set of Jardine headers i got off eBay.. i was goning to wrap them black but when i was mocking up the exhaust system i saw the chrome with the polished alimunum and decided to keep em bare.. a little scratched and dented but passable.

The megaphone "scilencer" was salvaged from my dad's rotted out bmw R27 muffler.. he got a reproduction indian made muffler that sounds and performs better then the original.. you can see the megaphone part i cut off and "slash-cut" the end in this pic (this is the indian muffler installed but has the same design)
DSCN0601megaphonehighlight.jpg

-
-
Then i welded the megaphone to a automotive exhaust elbow pipe, so i could high-temp silicone the elbow pipe to an automotive exhaust reducing coupler, and then high-temp silicone the coupler to the header collector.. i hope this next picture can make sense of that (The elbow pipe was cut enough to give me a little angle up and out.. and after welding, it was painted with high temp aluminum paint to resist rusting)
IMG_0036.jpg

-
-
The megaphone part originally has a little recess stamped into it to alow clearence for the bmw's centerstand so it seemed like a good spot to weld a nut.. the nut is for the mounting bracket to be bolted to the megaphone pipe.. before i welded the nut on, i drilled a hole right where the nut was going so a bolt through the nut will pass into the pipe
IMG_0039-1.jpg

-
-
Next i took a preforated metal screen(from a lawn mower grass catcher) and cut and rolled it into a tube the best i could and formed the inner scilencer pipe.. i used wire to attach it to the poprivits on the scilencer back plate (dont know what to call it but i think this pic will explain it... you can see a loop of wire thorugh the screen preforations and the heads of the three rivits)
IMG_0040.jpg

-
-
I made a hole in the "proforated screen tube"/"inner scilencer pipe" that lined up with the support bracket bolt and wrapped the thing in steel wool to act as the scilencer packing, then i shoved it all into the megaphone and attach the scilencer to the support bracket and as the bracket bolt went into the scilencer it went through the inner scilencer pipe to hold it in place.. (in this last pic u can see way into the pipe the bolt sticking through)
IMG_0041.jpg


Ok i know i said that it was made simple but after explaining it all, i am reconcidering my comment.. please let me know if i need to explain anything better.. i tried my best
 
I thought it was Jardine as the collector is a giveaway. The muffler was the confusing part. Nice job, thanks for the info.
 
No problem.. when i get some free time im gunna post all the mods and parts.. when i saw the jardine headers i thought "this 3 to 1 collector has got to have the best ground clearence" but i still manage to scrap it once and a while
 
How's the jetting with that pipe and the pods - did it take much to get it running clean?
 
That's an interesting paint job to say the least 8)


Technical question: What year is it? Those look like CV carbs, and emgo pod filters? How did you tune the carbs?


Also, that original metal airbox, you have that/is it for sale?? ;D
 
Im still working on getting the jetting perfect.. if i remember correctly, i went 1.5 more turns out on the pilot needle, 4 sizes up on the main jet, and raised the needle a notch.. i think i should go one size up on the pilot and another one or two on the main.. the plugs dont show lean but the bike will run rough sometimes at WOT and somethmes at 3/4 throttle
 
Its a 1978 special.. yea they are the stock CVs with the emgos.. i got a vacume gauge set to balance the carbs then tuned them by trial and error with the help of this guide ---> http://www.factorypro.com/tech/carbtun.html

i still have the original airbox.. but its a plastic not metal.. want me to take pictures of it?
 
Read this, it may be of use. One of the Aussie guys uses this for his bike.


I checked the pasts list and tried some 137.5 main jets from an XS1100, ran well yes but I still thought it could have run a bit better. What else was different? I completely overlooked the Needles and the Needle jets. I assumed they were the same and only thought the difference would be in the main/pilot/air jets.

XS750 Needles have a marking of 5HX6.
The XS1100 Needles have a marking of 5GZ6 and they are just slightly longer than the XS750 needles.

The Needle Jets are different aswell.
The XS750 have 14 small holes down the sides and markings of 270 Y-0 on the side.
The XS1100 have 16 small holes down the sides and markings are 266 X-2. The XS11 needle jets also have an extention on the end (see pics) in order to help with the venturi effect
 
A couple of questions:

1. What rear sets are you running?
2. Did you use a rear fender or just leave it open?
 
The rear sets are from a 2000 R1... i fabbed a aluminum plate to adapt the rear sets to the stock peg mounts frame so i could go back to the standard setup if i wanted to..

i am using the orignal rear fender.. most of it is a plastic fender/splash guard in front of the rear tire and i chopped the chrome rear fender into a taillight and liscense plate mount and the liscense plate itself acts as an extension of the chopped rear fender so nothing will get up under the seat
 
Thanks woosey. If you get time could to take a pic of the rear fender area?

captaincombat said:
VERY Cool! Nicely Done...


It was a Magic Carpet ride.. later learned how to pop double wheelies using the shaft
drive climb and any little rise in the pavement.. that would blow folks mind.....

Enjoy your neat machine!

What is a double wheelie? I can't find anything on it.
 
Here is a few pics.. limited space in the garage so i got what i could

You can see where the tailight and liscence plate are mounted to the chrome part of the fender that i painted black.. then that mounts to a metal arch that stiffens the frame up.. its mounted to the frame ends with those two bolts on each end.. then the plastic splash guard bolts to the metal arch
IMG_0065.jpg


IMG_0066.jpg


The seat is not straight in this picture because its not latched... i glued a LED strip the the seat, the center 9 LEDs are red and the 6 LEDs on the left and right of the center 9 are yellow.. the LED mounted to the fender flashes when the brake light is activated and can trace back and forth as a running light but i have it switched as i only use it on the highway


Here is some rear-set pics
IMG_0068.jpg


IMG_0070.jpg


Let me know if you need any more explaination
 
Those pics are great! Thanks for all your time. I still don't like the idea of no kicker. There is always a solution though.
 
No problem at all.. i agree about the no-kickstart issue.. i dont know if all the XS750/850 are the same way, but if the system doesn't have enough voltage after the starter motor draw, it wont spark :eek: .. seems pickier about voltage then any other bike im familiar with
 
Back
Top Bottom