Follow along with the video below to see how to install our site as a web app on your home screen.
Note: This feature currently requires accessing the site using the built-in Safari browser.
We noticed you are blocking ads. DO THE TON only works with community supporters. Most are active members of the site with small businesses. Please consider disabling your ad blocking tool and checking out the businesses that help keep our site up and free.
After months lurking around this site (all you guys seem to Rock by the way) i have finally decided to take the plunge into the "deep end". I have never rebuilt a motorcycle before but grew up riding a honda 400ex ATV. It never really required any heavy maintenance but it did teach me a lot.. So when i finally decided to started looking for a bike, i was gun ho about building a hard tail chopper with some gnarly ape bars, but after much reading on this site and others the i have decided to "attempt" a combination of Brat chopper/ Cafa. (When i get around to doing a photoshop rendering ill post what im thinking).
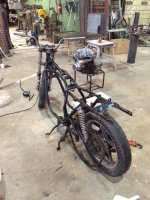
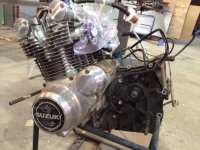
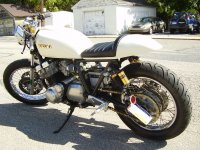
So i finally came across this this Gem that i got for $350. A 1979 GS750E. She does not run (with a LOT of effort the 4th cylinder will finally fire) but i feel with a little elbow grease she will be fierce. The carburetors have a good leak going when gas is on and after removing all 4 spark plugs, all cylinders seam to appear to have good compression when turning over. Im hoping its just in need of a good carb cleaning/seals on bottom bowls and new spark plugs.
My goal is not to spend more then $300 on this rebuild as im still in grad school and broke. Fortunate for me though once i can get her started and running, my major gives me access to a full Metal and Wood shops where i will then do my custom pipe's and seat modifications. (I dislike how the 4 exhaust pipes just drop straight down and bunch up to one)
Now i'm currently in Carb Hell. As expected there in need of a solid cleaning. Bowl seal on first carb taken off is deteriorating and was ripped. I only imagine what they look like when i get to the one that was heavily leaking. Slides don't look bad but the bowls are gunked up and the small jet appears to have some clogged but all part look good. I just hope the next 3 carbs have good parts in them as well.
Now on to cleaning. I have read a lot about this 6/1 ratio Water/Lemon boil and im doing a test run on the bowl by its self (i cant afford to screw up the main carb). everyone seams to rave about it with exception of a few..
My idea (once work up courage to do the whole carb) to combat the filming is once boil is done and there cool enough to handle, Im going to immediately scrub them down with soapy water, rinse, blow off with Air Mattress Pump then bake in the oven on 250 for 30 mins or so to evaporate any moisture in crevasses... I hope Im not making a fool of my self but I do not have an Air compressor and i don't want to leave moisture in Carb.
I posted this to the help section to but figured i would add it here as well:
When i got the 79 GS750 the right shock was slightly bent, looked like he could of had a minor drop/snagged something. But over all appeared to be in excellent condition for 35year old bike and local bike shop said it was not uncommon for these old forks to bend easily.
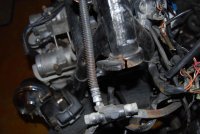
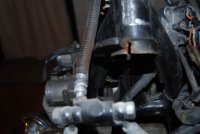
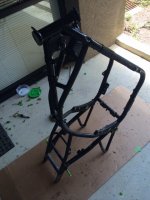
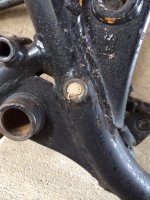
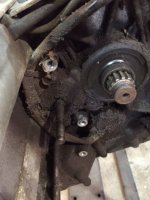
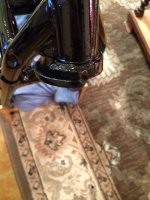
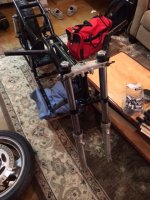
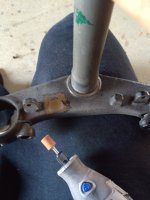
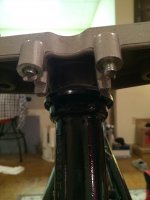
Found a donor front end off a 90's knight Hawk and when ripping off my front end to do the swap i came across this crack which was previously concealed by wires and tubes.
Has anyone ever fixed or know how/where to get this fixed?? The bike was bought with the intention of being a Rat Tat. something to puts around town/get me back and forth to work. No long cross country/Interstate treks.
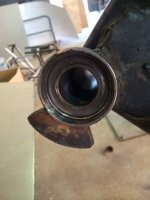
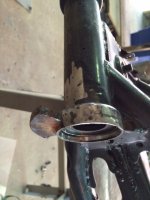
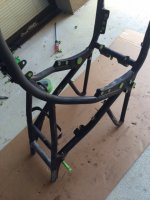
The bottom bearing as it stands now has about a 1/16-1/8th inch play.
*I know majority of people after reading posts from other sites are going to say scrap it, your SOL, but 1: They suck and this site rocks (people actually help each other to find answers here) and 2: as majority of you probably know, old bikes like this one are titled off the frame (and the number just so happens has to be on the steering tube). Finding an old replacement frame that comes with a title and is not an arm and leg is extremely few and far between (unless i have been looking in the wrong spots).
** ANY help would be much appreciated. Thanks. (If more pics are needed/angle please let me know)
the frame is probably straight, looks like what happened is the front wheel was slammed to the right and the steering stop is what tore the bottom, any other impact would have caused damage to the rear of the cup. I'd be willing to bet you could have a replacement cup machined and welded on to the neck without any adverse issues from the rest of the frame. however, that won't be cheap.
*I know majority of people after reading posts from other sites are going to say scrap it, your SOL, but 1: They suck and this site rocks (people actually help each other to find answers here)
I started a build thread on another forum for my GS and had that exact response. Once I finish I will post the end result just to show the nay sayers who was right.
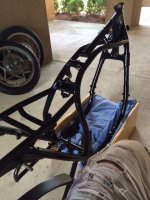
Good to see you have a very neat base to start from. Pity about the neck, but that is not the end of the world. I agree with Roc City on this, get it fixed.
It won't be cheap to get it done right but compare that to a new frame with title. Make sure it is fixed right as the last thing you want is steering slop at 140mph.
Good luck mate, I am interested to see what you come up with.
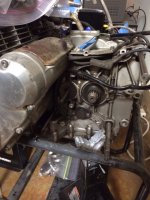
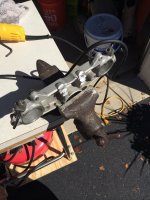
Little update. So after calling local shops non stop, I finally got in contact with a gentleman that builds custom bikes out of his home, which was right down the road. He said he could help fix the crack on the bearing cup but I would need to bring him my bare frame, original race and bearings. Due to both of our availability I had to do the "newbie" move and rip the whole bike apart before getting it up and running.. But it was well worth it, he was able to work/fold the crack back into place using the old bottom bearing as guide.
Good start so far man, I am slowly building a '77 gs750 myself, can't wait to see what you do.
By the way, cheapest air compressor you can get for blowing carbs and such out is a can of compressed air from OfficeMax or the like, will work better then a mattress pump.
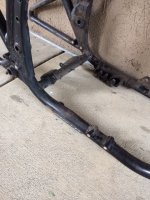
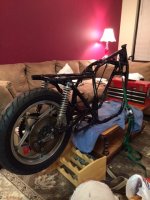
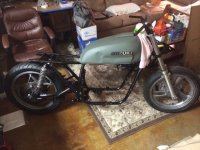
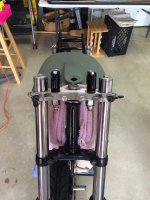
I painted the frame with KBS 3step paint kit. It was about $60 online (Compared to the $250+ for powder coating at the only shop offering within 2hrs driving) and it came out awesome. I sanded/wire brushed (not to bare metal just smooth and remove lose crap). I missed some spots and if you over apply it bubbles but over all I have no plans on showing the bike so for protection and looks it worked great. Just follow the instructions if you go down this route... Ill try posting some better pics in the light when I get a chance.
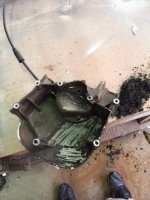
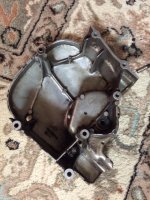
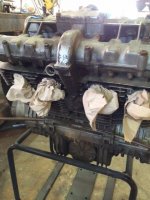
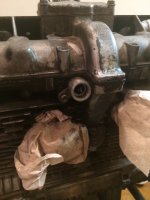
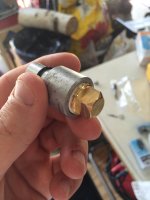
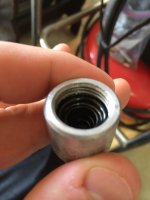
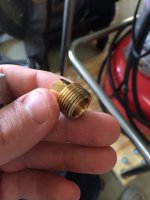
Has anyone closed off the RPM Thatch on the engine block? If so how did anyone go about capping it? Im not racing and have been driving manuals all my life so I seldomly read them and would prefer to just remove it and reduce clutter.
Take the tach cable to an auto parts store, and look for an oil pan drain plug with the same threads. You can drill a blind hole into the "body" of the threads for the tach gear to spin freely inside, and oil won't leak out.
Just FYI: sometimes the drain plug is really close to the engine, so it can be tough to tighten it down.
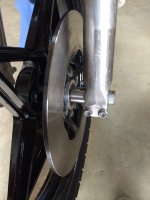
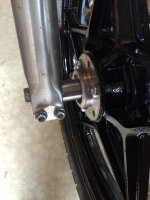
New dilemma.. Donor front end I got (basically free so no complaints, plus I like the look of thicker tubes) was from a 98 Honda NightHawk. Triple Tree fit perfectly, minus grinding down a stop nub that got in the way. The forks though are not dual brake.. Plus caliper location is different...
Does anyone one know other forks (i.e. Yamaha, honda, etc.) that are either 35mm (to fit original triple tree) or 42mm (new donor triple tree, which is preferred) that have dual calipers? specs for finding tube diameter, caliper location/dimensions etc. I feel are non existent.
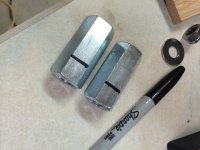
Plan at the moment. purchase a 1996 – 2003 Suzuki Bandit GSF600S Left side front brake rotor which is 4mm, same as donor rotor. pray the diameter for center axle hole fits my original GS750 wheel. reline and drill new bolt holes (new rotor is 5 hole and GS750 wheel is 6). Remove right side rotor and have 5mm cap plate milled.. plus any spaces needed.
This site uses cookies to help personalise content, tailor your experience and to keep you logged in if you register.
By continuing to use this site, you are consenting to our use of cookies.

![GS750[1]low.jpg](/data/attachments/29/29204-f45f6396d71b0befa12f9cdb7d626694.jpg)
![GS750[2]low.jpg](/data/attachments/29/29205-673f0c1da2e7f9a0479d569f497e45aa.jpg)
![GS750[3]low.jpg](/data/attachments/29/29214-30ef951e111a68e3fd20b50af9c2137c.jpg)