'81 Honda CX500 in the works

GoBears0305

Been Around the Block
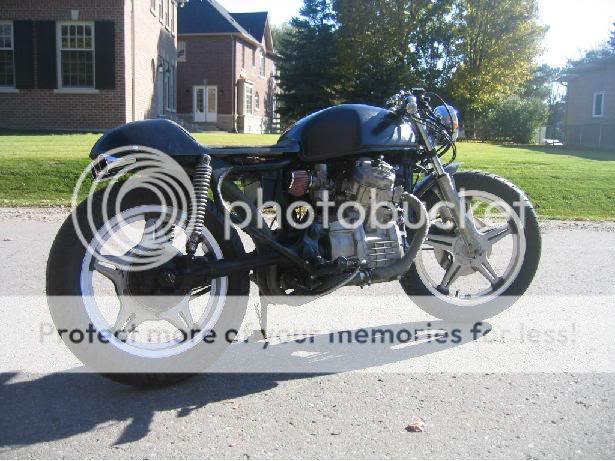
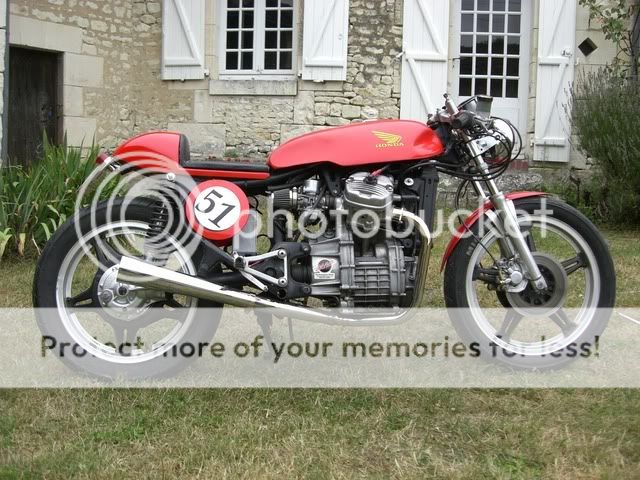
I decided to forego (for now) the CB350 project I had going and start on an '81 CX500 I picked up as a birthday gift to myself. I put together a collage (that serves as my computer desktop) of a few pictures showing 1) how I got the bike, 2) how it sits as of right now, and 3-4) my inspirations.
<img src="http://farm4.static.flickr.com/3418/3389586911_bfa797670d_o.jpg">

From the pictures, you can see that I've:
1) Removed the cruiser fairings, luggage, highway bars, and other brackets
2) Airbox (anyone who has had a CX knows that this is a pain in the ass to remove...until you realize the 3 bolts at the bottom of the box)
3) Centerstand (I was never good at propping a bike on the centerstand anyways)
4) Stock exhaust (well I put the headers and H-Box back on so I could start the bike up again)

A few things in the mail as we speak (hopefully arrives in time for the weekend):
1) Tarrozi 33mm clip-ons
2) MAC 2-1 Exhaust (replaces the 2-2 stock setup that included a very heavy H-Pipe/Housing)
3) Sealed Battery 12V 14Ah 190CCA (to mount under the seat cowl as long as I don't have clearance issues with the tire). I wish I could go small on the battery, but apparently that electric start needs a good kick)
4) K&N 54mm Pod Filters - Oval shape (replaces the EMGO's currently on there, then will re-route the crankcase breather tubes into the new pods)
5) Rear Shocks/Springs
6) 90/120 carb jet config.

The best part is it runs great! And the records from the previous owner show that it's had a steady stream of maintenance work done (e.g. fork seals, fluids, engine gaskets, water pump, etc.).
 
Swapped out the old rear shocks (I guess meant for that "cruiser" look) with a more vintage looking set. Not bad looking, although I thought I was purchasing a set with black shocks and chrome spring. But I think it looks good nonetheless.
<img src="http://farm4.static.flickr.com/3607/3396915092_13bedb63ee.jpg">
<img src="http://farm4.static.flickr.com/3566/3396104555_d821f960c9.jpg">
Will I have problems with clearance if I mount my battery here? I took the battery strap from the old airbox and thought about mounting here.
<img src="http://farm4.static.flickr.com/3546/3396104707_4182fb1f30.jpg">
<img src="http://farm4.static.flickr.com/3461/3396161545_b68c4bf681.jpg">
<img src="http://farm4.static.flickr.com/3568/3396915770_68bbc794d0.jpg">
Also removed the stock footpegs and plan on installing a solid billet set where you see the bolt or maybe in the hole below that (which would be a bit more comfortable)
<img src="http://farm4.static.flickr.com/3608/3396104995_488b1e308c.jpg">
Repositioning all the electrical components. Don't mind all the blue painters tape.
<img src="http://farm4.static.flickr.com/3471/3396105285_3ee30f6ef7.jpg">
 
You might hit the batt in that position and I hope your gona get a spill proof batt as well. That one will leak bad. You got the right idea with the electrics where they are.

ChopperforumJPG1JPG2.jpg
 
lil beast said:
You might hit the batt in that position and I hope your gona get a spill proof batt as well. That one will leak bad. You got the right idea with the electrics where they are.

Agreed on both parts. A sealed battery is actually on the way (hopefully gets here tomorrow); I just used this one for mock-up (and it now safely sitting upright again). I would really like to pick up a battery that has enough output to crank the electric start but would give me another 2 inches or so of clearance in that same spot...anyone have a recommendation?

Here it is cleaned up at the end of the day:
Looks a lot lighter! The rectifier and starter solenoid are really just held up by zip-ties (until I can fabricate something more permanent); but right now it holds up great.
<img src="http://farm4.static.flickr.com/3637/3396644095_523e892ca0.jpg">
<img src="http://farm4.static.flickr.com/3663/3396779815_cc59f9eecf.jpg">
<img src="http://farm4.static.flickr.com/3586/3397454118_546efcaa4c.jpg">
 
Here is where the battery is on mine and how it looks from the side. I still think the batt is in a dangerous spot on your bike unless your new batt is much slimmer.

ChopperforumJPG1JPG2JPG3JPG4JPG5.jpg
 
Was under the weather today but thought it would be good for me to enjoy the fresh air. So I did a few things:
-Dropped the front a couple inches (maybe too much), but I'll adjust it back up once I get the clip-ons on (was expecting them today...bummer)
-Mounted new sealed battery where the seat cowl will be (but taking lil beast's advice and am seriously debating mounting it elsewhere)
-Installed K&N Pods (the oval shape, not the circular)
<img src="http://farm4.static.flickr.com/3576/3403430472_9cc2ee8c5f.jpg">
You'll see I'm working with only about 3 1/4 inches of travel
<img src="http://farm4.static.flickr.com/3650/3403430574_20588265b3.jpg">
-Used the passenger footpegs for my brake/shift footpegs
<img src="http://farm4.static.flickr.com/3601/3403430666_57935bdd12.jpg">
<img src="http://farm4.static.flickr.com/3573/3402620729_9dbeed0400.jpg">

Also decided to use the headlight from my CB350 project (since I'm not taking the headlight from the cruiser fairing), and lose the radiator shroud (I'd rather just clean up the radiator real nice and scrap/sell the excess). And I'm trying to figure a way to attach the Tach in the center using the stock mount.
<img src="http://farm4.static.flickr.com/3569/3403430280_309792d663.jpg">
<img src="http://farm4.static.flickr.com/3473/3403430740_e7d073eb34.jpg">
 
Re: '81 Honda CX500 in the works - Seat Pan Design

Unfortunately, CX's have a dip in the seat area. So hopefully this design works out with 1) giving me a rigid, flat seating surface; 2) matching the contours of the dip; 3) giving a bit more room under the seat for electricals. Since my welding skills are non-existent, everything will just be bolted and clamped to the frame.

It's supposed to be 2 separate pans (one positioned on top of the frame rail, one on the bottom of the frame rail). Also, I wanted it to mount on top of the rear cross brace (which is the square you see).

Wish I had a 3D design software, but hopefully you can visualize what I'm attempting and hopefully provide some pointers.
 
Re: '81 Honda CX500 in the works - Seat Pan Design

GoBears0305 said:
Unfortunately, CX's have a dip in the seat area. So hopefully this design works out with 1) giving me a rigid, flat seating surface; 2) matching the contours of the dip; 3) giving a bit more room under the seat for electricals. Since my welding skills are non-existent, everything will just be bolted and clamped to the frame.

It's supposed to be 2 separate pans (one positioned on top of the frame rail, one on the bottom of the frame rail). Also, I wanted it to mount on top of the rear cross brace (which is the square you see).

Wish I had a 3D design software, but hopefully you can visualize what I'm attempting and hopefully provide some pointers.

Bear

I've got the 3d software, send me the dimensions and I'll rock you up some sheet metal files you can take to a shop with a laser cutter. I'm gone for the weekend but if next week works for you i could probably have it done.

Everything you see here was modeled in Solidworks and sent off to either a metal shop, plastics fabricator, or wood shop.
http://www.coroflot.com/public/individual_file.asp?from_url=true&individual_id=137314&portfolio_id=1045717&

Jay
 
Re: '81 Honda CX500 in the works - Seat Pan Design

jay_kent said:
Bear

I've got the 3d software, send me the dimensions and I'll rock you up some sheet metal files you can take to a shop with a laser cutter. I'm gone for the weekend but if next week works for you i could probably have it done.

Everything you see here was modeled in Solidworks and sent off to either a metal shop, plastics fabricator, or wood shop.
http://www.coroflot.com/public/individual_file.asp?from_url=true&individual_id=137314&portfolio_id=1045717&

Jay

That is much appreciated (that's what I love about this forum...tons of resources and everyone always willing to lend a hand). I'm planning on mocking it up with poster board/construction paper/etc. so that I'd be able to transfer the dimensions onto sheet metal. I'm also gone for the weekend, so we'll play it by ear.
 
CaTacl1sm said:
I'm very familiar with this picture (having scrolled through your build here and on choppercharles.com MANY times for inspiration). I wish I could say I had even an ounce of welding abilities (and equipment for that matter); Gonna work with a "bolt-on" method first and when I pick up thos welding skills (and borrow a welder from my neighbor) I'm gonna make it permanent. Thanks again for the inspiration!
 
Sweet a few more CX guys. I feel kind of left out now because I sold my CX500 and haven't been on Choppercharles.com for a few weeks. If you need help go on Choppercharles.com and find Blindstitch or Larry, I think LRCXD, they are most helpful.
 
Nice job! The CX is a bike I planned on converting one day. I want to make it look just like this one I found about a year ago on-line...
I would love to do one of these cool bikes, but I would have to figure out how to make a Hinkley style tank like this sit more horizontally.
hondaCX.jpg

HondaCXclipon.jpg
 
Decided to keep the stock exhaust setup for now (until I go to a MAC 2-1 setup with a SuperTrapp Megaphone muffler). But the H-Box looked like a Rust-Box, so it took a dip in vat of muriatic acid (3 parts water : 1 part acid...and the rule is water first then acid or it could explode). Then follow up with a rinse of water and baking soda to neutralize the acid. Inside looks good too! You'll also notice the kick stand was cleaned up too (and a bunch of other bits and pieces not pictured)
<img src="http://farm4.static.flickr.com/3372/3451743113_a6e27a33bf.jpg">

as compared to:
<img src="http://farm4.static.flickr.com/3608/3396104995_488b1e308c.jpg">

Next is spraying it (and the header pipes) with black VHT FlameProof (and wrapping at some point down the line).
 
I wouldn't keep the H-Box...but I wouldn't have gone mac, either. These bikes are simple to build for because they have all the clearance in the world.

blackmaggot2.JPG


So many things can be done on the cheap with this bike that there's no need for heavy thinking...

My suggestions are:

Get heavier forks. I went with GL1000 forks and triples.

Keep the battery in the stock-ish location. Under the tail, it'll move too much, and where you've shown it the tire WILL strike it.

Get a new GL500 stator, (not new for the rest) rear cover, pulsar pick-up and cover, and wiring harness complete with transistors and install them while you have the bike already partially apart. If you do it, you won't know any difference...but if you don't you'll thank me for having made the suggestion in a couple months (if that long).

Get some beefier brakes. The rear drum actually worked great but would fade. The front is scary.
 
Just a couple things done today.

After fixing a cracked headlight shell with Plastic Weld (Devcon), I smoothed it out to prep for paint. I'm actually recycling the headlight unit from my CB350.
<img src="http://farm4.static.flickr.com/3657/3474404777_745a849a29.jpg">

Mounted my battery but still need to clean it up.
<img src="http://farm4.static.flickr.com/3297/3475200118_8476d5294b.jpg">

I started on what will prove to be the long task of polishing the tank. But how the heck do I get into all the nooks and crannies? Also, once I find the other handlebar mount from my CB350 (you'll see I only have one on the right), I'm going to cut a short piece of handlebar as a "accessory mount" (e.g. video cam, GPS, etc.). Don't mind the clip-ons...I'm waiting for shims to get me from 35mm to 33mm. Also, is there any way to extend the bars? I guess I could flip the clip-ons the other way, but then the tightening bolts hit the tank and I don't get full turn.
<img src="http://farm4.static.flickr.com/3630/3475200036_5e42e57b39.jpg">
 
Back
Top Bottom