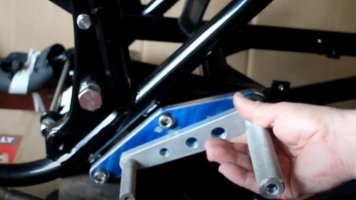
Finally got the engine mounts and rear caliper mount done, once linished, took them to be hard anodised. Along with an old Astralite wheel, which needs to be given its original gold finish... but that's for another different project.
We noticed you are blocking ads. DO THE TON only works with community supporters. Most are active members of the site with small businesses. Please consider disabling your ad blocking tool and checking out the businesses that help keep our site up and free.
You are using an out of date browser. It may not display this or other websites correctly.
You should upgrade or use an alternative browser.
You should upgrade or use an alternative browser.
A Tale of Two Zeds
- Thread starter Bevelheadmhr
- Start date

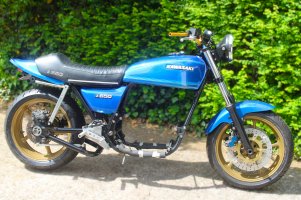
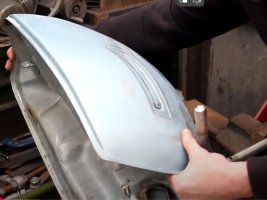
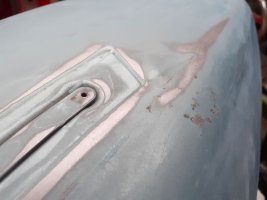
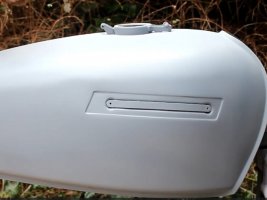
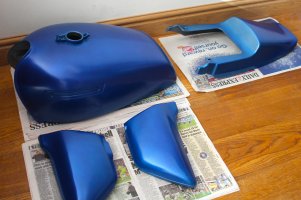
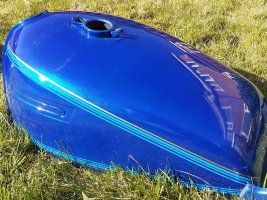
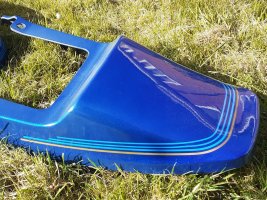
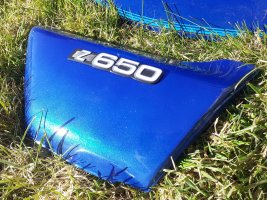
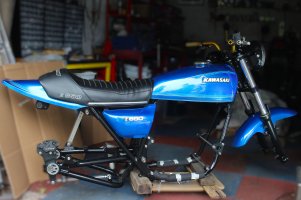
The tank had a dent that was tricky to remove. Using a steel rod, held in a vice which was passed through the filler cap, then carefully hammering the tank against the rod removed most of the dent. A little filler did the rest. Paint is rattle can 1K candy apple blue, when its gassed off in a few weeks, will use 2K clear top coat and add decals/pinstripes between the coats of 2K.
Attachments

Looks great. I always get impatient waiting for clear to harden.
Sent from my iPhone using DO THE TON
Sent from my iPhone using DO THE TON

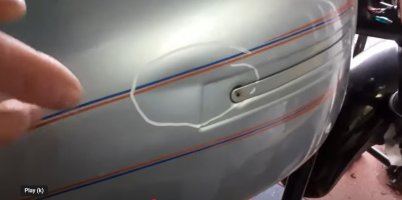
Fitted the paintwork to the bike for the first time, looks ok, but all is not good. The 2K clear coat on the tank is still 'soft' after a month. Clearly there was a problem with the hardener in the last special rattle can I used. I'm told the clear coat will eventually harden even without any hardener, but no idea how long that may take.
In the meantime the wheels have gone of to have tyres fitted, getting the bike rolling on its wheels will be a milestone.. its sitting on a small trolley at the moment, its not too stable.
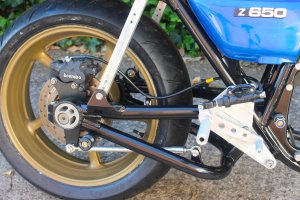
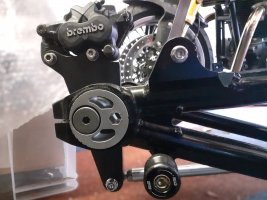
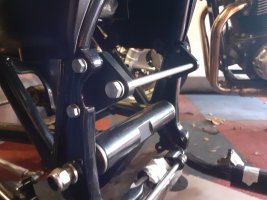
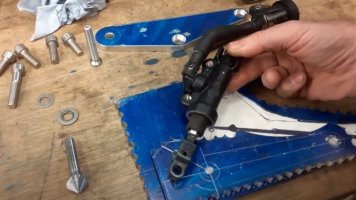
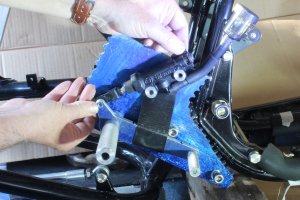
With a new, different brake lever made, the brake side rearset was test fitted to the bike, before its bracket was drilled and shaped to mount the master cylinder.
In the meantime the wheels have gone of to have tyres fitted, getting the bike rolling on its wheels will be a milestone.. its sitting on a small trolley at the moment, its not too stable.
With a new, different brake lever made, the brake side rearset was test fitted to the bike, before its bracket was drilled and shaped to mount the master cylinder.
Attachments
Fame at last! lolWatched your you tube channel today.
Maritime
Over 10,000 Posts
link it up!Fame at last! lol
Have fun.. https://www.youtube.com/@Merch131ho
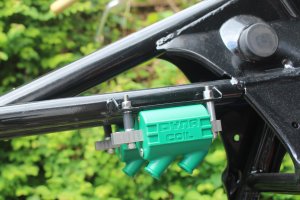
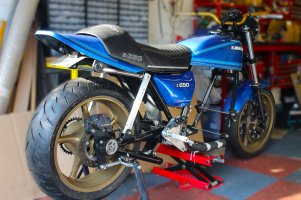
The front discs turned out to be from an 05 R6, not a04, they are 10mm bigger, which meant the calipers didn't fit. Bought an aftermarket set of the correct size, and also swapped the gold spots for Blue spots, as I preferred the look.. The rear brake torque arm looked a bit thick, so was slimmed down a couple of 22 on the lathe. While the custom rear brake line from HEL arrived and was fitted. The dyna coils were fitted, which required spacers. The rear spacers were covered in heat shrink to insulate them from the nearby low tension wire/screw.